One-Pan Lemon Garlic Chicken & Rice (Sunday Roast Flavor, Weeknight Cleanup)
I tried to make a weeknight chicken and rice dinner that tastes like a slow Sunday roast, without destroying my tiny kitchen.
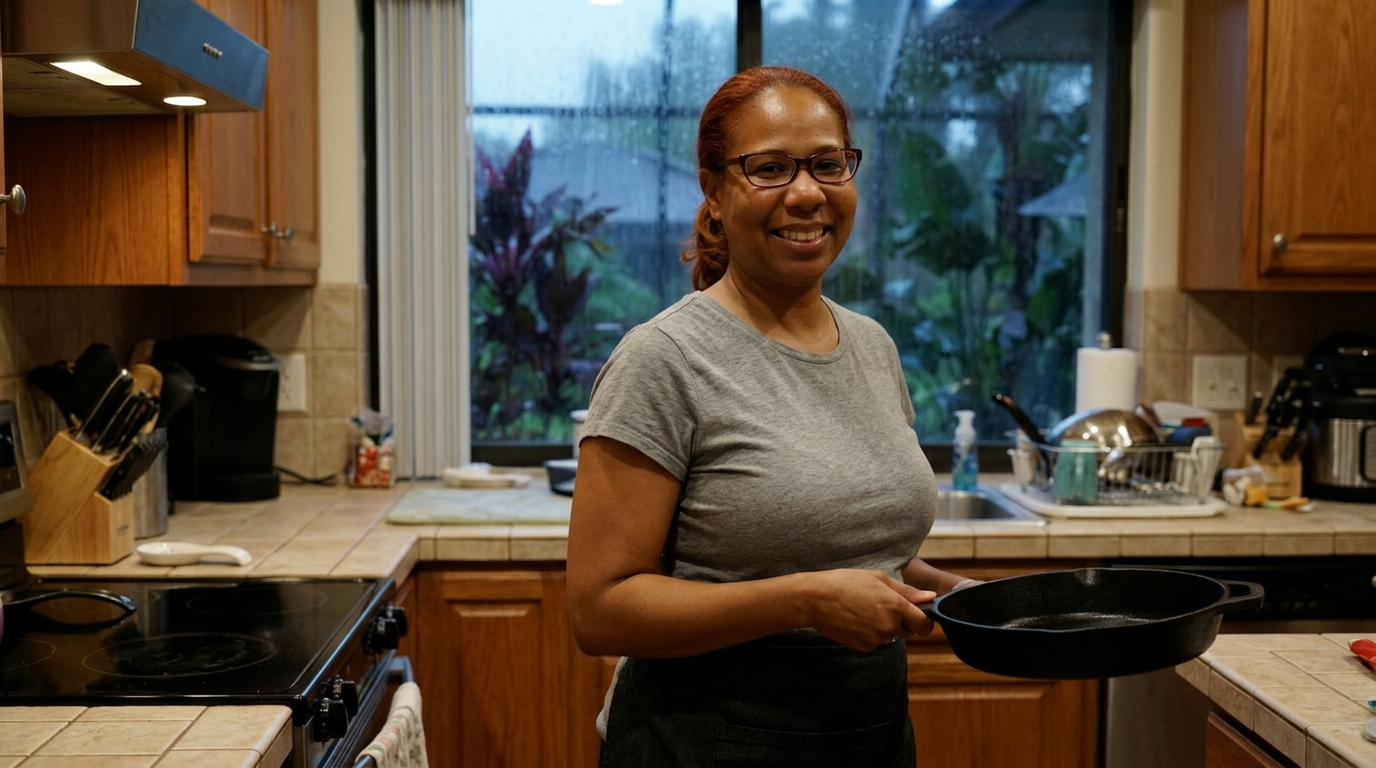
It is Tuesday at 6:15 PM, it’s pouring rain outside my window in Orlando, and I want nothing more than a rich, slow-roasted Sunday dinner. But I only have one pan, forty-five minutes, and zero desire to do a mountain of dishes.
Medium shot of Tara leaning against her kitchen counter, holding up a single heavy cast-iron skillet, looking directly at the camera with a playful, tired smile as rain taps on the window behind her.
You know that specific craving for a slow-roasted chicken dinner? The kind where the meat literally falls off the bone, the house smells like rosemary and caramelized garlic, and the juices have soaked into everything? Usually, that requires a roasting pan, a cutting board, three different prep bowls, and about three hours of your life. On a rainy Tuesday night after a long day of editing and errands, that is a flat-out impossibility. I was staring into my fridge, looking at a pack of bone-in, skin-on chicken thighs, and I made a pact with myself: I was going to get that exact weekend-level comfort flavor, but I was only allowed to use one pan.
The plan was simple but risky. I wanted to sear these chicken thighs until the skin was shattering-crisp, render out all that beautiful chicken fat, and then use that exact same fat to toast jasmine rice right in the pan. From there, I’d braise everything together with a massive amount of garlic, fresh lemon juice, chicken stock, and a handful of rosemary from my damp backyard garden. The risk with one-pan chicken and rice is always the texture. If you don't balance your liquid perfectly, you end up with either dry, chalky chicken and burnt rice, or perfectly cooked chicken sitting in a soggy, bloated rice soup. I had exactly one shot to get this ratio right on camera.
I cleared off my counter, grabbed my trusty 12-inch cast-iron skillet—which is basically an extension of my right arm at this point—and pulled out my ingredients. We are talking five bone-in, skin-on chicken thighs, one entire head of garlic, two plump lemons, fresh rosemary, chicken stock, and a cup and a half of long-grain jasmine rice. No fancy tools, no pre-chopped grocery shortcuts. Just real, honest ingredients and one heavy pan that was about to do some serious heavy lifting. I took a deep breath, tied my hair back, and turned the burner to medium-high.
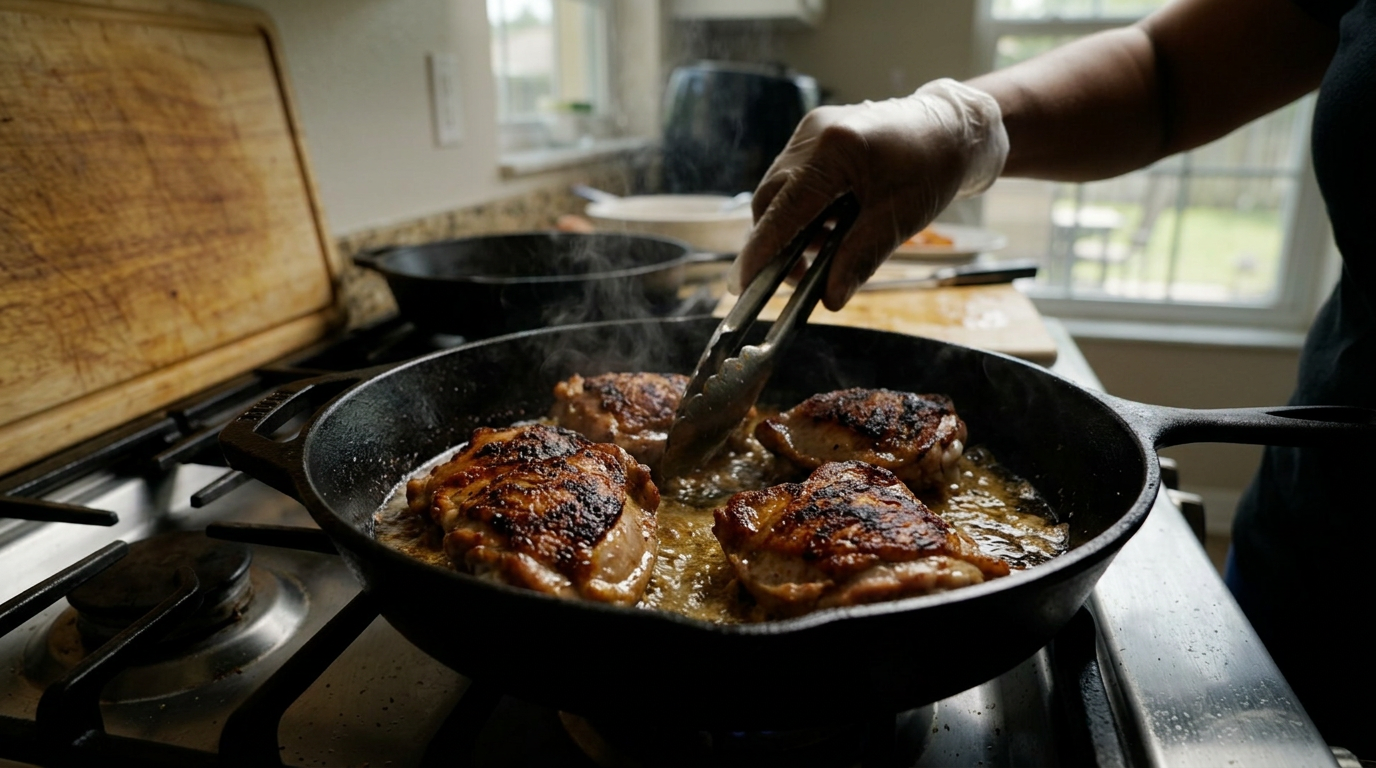
I started by patting the chicken thighs completely dry with paper towels. If there is one rule of kitchen science you must never break, it is this: moisture is the absolute enemy of a good sear. I seasoned them generously with kosher salt, black pepper, and a touch of paprika for color. As soon as that cast iron started whispering with a tiny wisps of smoke, I laid the thighs skin-side down. The sizzle was immediate and incredibly loud. I didn't touch them for eight full minutes. That is the hardest part of cooking—just leaving things alone. You have to trust the heat to do its job.
As the chicken skin rendered, the kitchen filled with that deep, savory aroma of frying chicken fat. I sneaked a peek with my tongs at the seven-minute mark. Beautifully golden, but not quite shattered-crisp yet. I gave them two more minutes, then flipped them. The skin was this gorgeous, mahogany-brown crust. I let them sear on the flesh side for just four minutes to lock in the juices, then pulled them out onto a single plate, leaving a lake of liquid gold—rendered chicken fat—shimmering at the bottom of the skillet.
Now came the flavor foundation. I turned the heat down to medium because chicken fat burns quickly. I tossed in a whole head of garlic cloves that I had smashed with the flat of my knife, along with two sprigs of fresh rosemary. The second that herbs and garlic hit that hot fat, the scent exploded. It smelled like a high-end Italian bistro in my humid little kitchen. I stirred them around for about sixty seconds until the garlic turned pale golden, making sure not to let it go a shade darker, or it would turn bitter.
Next up was the rice. I poured a cup and a half of unwashed jasmine rice directly into that aromatic fat. Toasting the rice is a non-negotiable step here. Every single grain needs to be coated in that garlic-infused chicken fat. It seals the starch and guarantees the rice grains stay separate and fluffy instead of clumping together into mush. I stirred it constantly for two minutes until the grains looked translucent and smelled incredibly nutty, like popcorn.
Then came the deglazing moment. I poured in a third of a cup of fresh lemon juice and scraped up all those delicious, caramelized brown bits stuck to the bottom of the pan—that is pure flavor gold right there. Once the lemon juice mostly evaporated, I poured in two and a half cups of low-sodium chicken stock. I brought it to a rapid simmer, tasted the broth—it needed a big pinch of salt and a crack of black pepper—and then nestled the chicken thighs back into the rice, skin-side UP.
Here is the crucial trick: you want the bottom of the chicken thighs submerged in the simmering stock so they braise and stay incredibly juicy, but you must keep that crispy skin above the liquid level. If you submerge the skin, all that hard work of searing it goes right down the drain. I popped a tight-fitting lid on the skillet, turned the heat down to low, and set a timer for twenty minutes.
While it simmered, I did a quick food-safety wipe of the counters and washed the single cutting board I used. It felt amazing knowing that when dinner was done, I wouldn't have a sink overflowing with pots. Around the fifteen-minute mark, the steam escaping the lid started smelling less like raw stock and more like rich, savory rice pilaf. I could hear the gentle hiss of the liquid getting fully absorbed.
When the timer finally beeped, I lifted the lid. A massive cloud of lemon-and-garlic-perfumed steam hit my face. The rice had absorbed every drop of liquid, swelling into plump, separate grains. The chicken thighs looked incredibly tender, their skin still holding onto that deep golden crust. I used my instant-read thermometer to check the thickest part of the thigh—it registered at 178 degrees Fahrenheit. Perfect. For chicken thighs, going slightly past the standard 165 degrees actually makes them much more tender and melt-in-your-mouth.
B-roll sequence showing close-ups of the chicken searing, the garlic cloves sizzling in golden fat, the rice being stirred and toasted, the pouring of chicken stock, and the steam rising as the lid is lifted.
To finish it off, I shaved some fresh lemon zest right over the top and threw on a handful of chopped flat-leaf parsley for a pop of bright green. I scooped a generous portion of the rice onto a plate and nestled a chicken thigh right on top. The rice was incredibly rich, infused with all that chicken fat and garlic, but brightened up beautifully by the lemon juice. As I pressed my fork into the chicken, it practically fell apart, yet the skin still made a distinct, satisfying crackle.
I took my first bite right there at the kitchen counter, still standing up. It was absolute heaven. It had all the deep, comforting, slow-cooked depth of a Sunday roast, but the brightness of the lemon kept it feeling light enough for a weeknight. The best part? The bottom of the rice had formed this slightly crispy, caramelized crust against the cast iron—what the Spanish call socarrat. It was an accidental masterpiece.
If I were to do this again, I might throw in some artichoke hearts or baby spinach at the very end to sneak some more greens in, but honestly, this minimalist version is hard to beat. My kitchen was clean, my house smelled incredible, and I had a restaurant-quality meal on the table in under forty-five minutes with only one pan to wash. That is what I call a weeknight win.
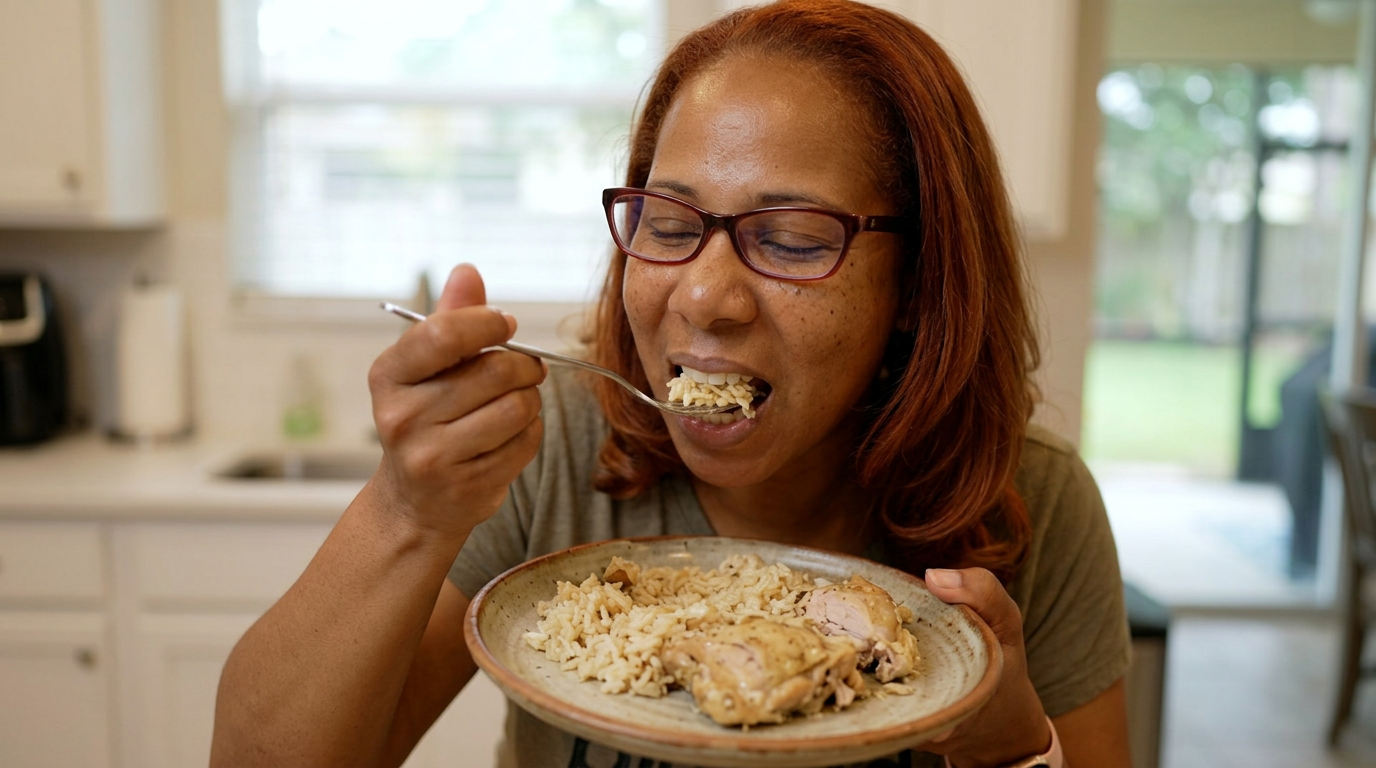
Close-up of Tara taking a bite of the dish, closing her eyes in satisfaction, then panning down to a beautifully styled plate of the chicken and rice under warm kitchen lighting.
Shot List
| Type | Description | Audio | Duration |
|---|---|---|---|
| Medium | Tara in her kitchen, holding up a cast-iron skillet, smiling. | It is Tuesday at 6:15 PM, it’s pouring rain outside my window in Orlando, and I want nothing more than a rich, slow-roasted Sunday dinner. | 6s |
| Close-up | Raindrops hitting the kitchen window pane with a blurred green backyard background. | But I only have one pan, forty-five minutes, and zero desire to do a mountain of dishes. | 5s |
| Detail | Tara's hands seasoning bone-in, skin-on chicken thighs with salt and pepper on a wooden board. | I was staring into my fridge, looking at a pack of bone-in, skin-on chicken thighs, and I made a pact with myself. | 7s |
| B-roll | Chicken thighs being placed skin-side down in a hot, dry cast-iron skillet, sizzling instantly. | The plan was simple but risky. I wanted to sear these chicken thighs until the skin was shattering-crisp. | 8s |
| Close-up | Rendering chicken fat bubbling around the edges of the golden-brown chicken skin. | As the chicken skin rendered, the kitchen filled with that deep, savory aroma of frying chicken fat. | 6s |
| Overhead | Tongs flipping the chicken thighs to reveal a deep, mahogany-brown seared crust. | I gave them two more minutes, then flipped them. The skin was this gorgeous, mahogany-brown crust. | 6s |
| Detail | Smashed garlic cloves and fresh rosemary sprigs being tossed into the shimmering chicken fat. | I tossed in a whole head of garlic cloves that I had smashed with the flat of my knife, along with two sprigs of fresh rosemary. | 7s |
| B-roll | Jasmine rice being stirred into the skillet, coating the white grains in golden fat. | Next up was the rice. I poured a cup and a half of unwashed jasmine rice directly into that aromatic fat. | 8s |
| Close-up | Pouring chicken stock into the skillet, creating a sudden burst of steam and bubbling. | Once the lemon juice mostly evaporated, I poured in two and a half cups of low-sodium chicken stock. | 6s |
| Detail | Placing the seared chicken thighs carefully back into the simmering rice and stock mixture. | I brought it to a rapid simmer... and then nestled the chicken thighs back into the rice, skin-side UP. | 8s |
| Detail | An instant-read thermometer being inserted into the thickest chicken thigh, reading 178F. | I used my instant-read thermometer to check the thickest part of the thigh—it registered at 178 degrees Fahrenheit. | 5s |
| Timelapse | The lid being lifted in slow motion, releasing a heavy cloud of fragrant steam. | When the timer finally beeped, I lifted the lid. A massive cloud of lemon-and-garlic-perfumed steam hit my face. | 7s |
| Close-up | A fork scraping the crispy skin of the chicken thigh, making a distinct crunch sound, then pulling tender meat away. | As I pressed my fork into the chicken, it practically fell apart, yet the skin still made a distinct, satisfying crackle. | 8s |
| Medium | Tara taking a bite, nodding in pure delight, leaning against her clean kitchen counter. | My kitchen was clean, my house smelled incredible, and I had a restaurant-quality meal on the table in under forty-five minutes. | 7s |
- Capture the macro sound of the fork scratching against the crispy chicken skin to emphasize the texture.
- Show a quick cut of the clean sink at the end to prove the 'one-pan' promise was actually kept.
- Get a tight shot of the lemon being zested over the hot pan, catching the tiny flecks of yellow falling onto the chicken.
- Record the bubbling sound of the chicken stock when it first hits the hot cast-iron skillet.
- 0:00 — Cozy, acoustic guitar intro with a slow, warm tempo matching the rainy day mood.
- 1:15 — Upbeat, light acoustic pop transition as Tara begins prepping the ingredients and seasoning the chicken.
- 2:45 — Slightly energetic, rhythmic percussion starts as the chicken hits the hot skillet, building excitement.
- 4:30 — Warm, jazzy lo-fi beats set in while the rice is being toasted and the stock is simmering.
- 7:15 — Soft, swelling strings under the acoustic guitar as the lid is lifted and the steam rises.
- 8:45 — Bright, uplifting, and cheerful acoustic folk melody as Tara plates up and takes her first bite.
- Use a warm color grade to counteract the cool, rainy light from the window, emphasizing the cozy sanctuary of the kitchen.
- Keep jump cuts to a minimum during the prep scenes to maintain a relaxed, conversational, and authentic rhythm.
- Overlay a subtle, clean text graphic showing the exact ingredient measurements as Tara adds them to the pan.
- Boost the natural kitchen audio (sizzling, scraping, steam) slightly above the background music to make the experience highly sensory.
| Call | Provider | Model | Input Tokens | Output Tokens | Compute / Credits |
|---|---|---|---|---|---|
| Script | abacus.ai | gemini-3.5-flash | 1,087 | 3,889 | — |
| Image 1 — The Rainy Evening Setup | abacus.ai | nano_banana2 | — | — | 6,754.15 |
| Image 2 — The Golden Sear | abacus.ai | nano_banana2 | — | — | 6,754.075 |
| Image 3 — The First Bite | abacus.ai | nano_banana2 | — | — | 6,753.95 |
I Rescued a Cold Publix Rotisserie Chicken (And Made It Taste Like 6 Hours of Work)
I took a dry, leftover grocery store shortcut and used a few pantry tricks to transform it into a rich, comforting family dinner that tasted like it simmered all afternoon.
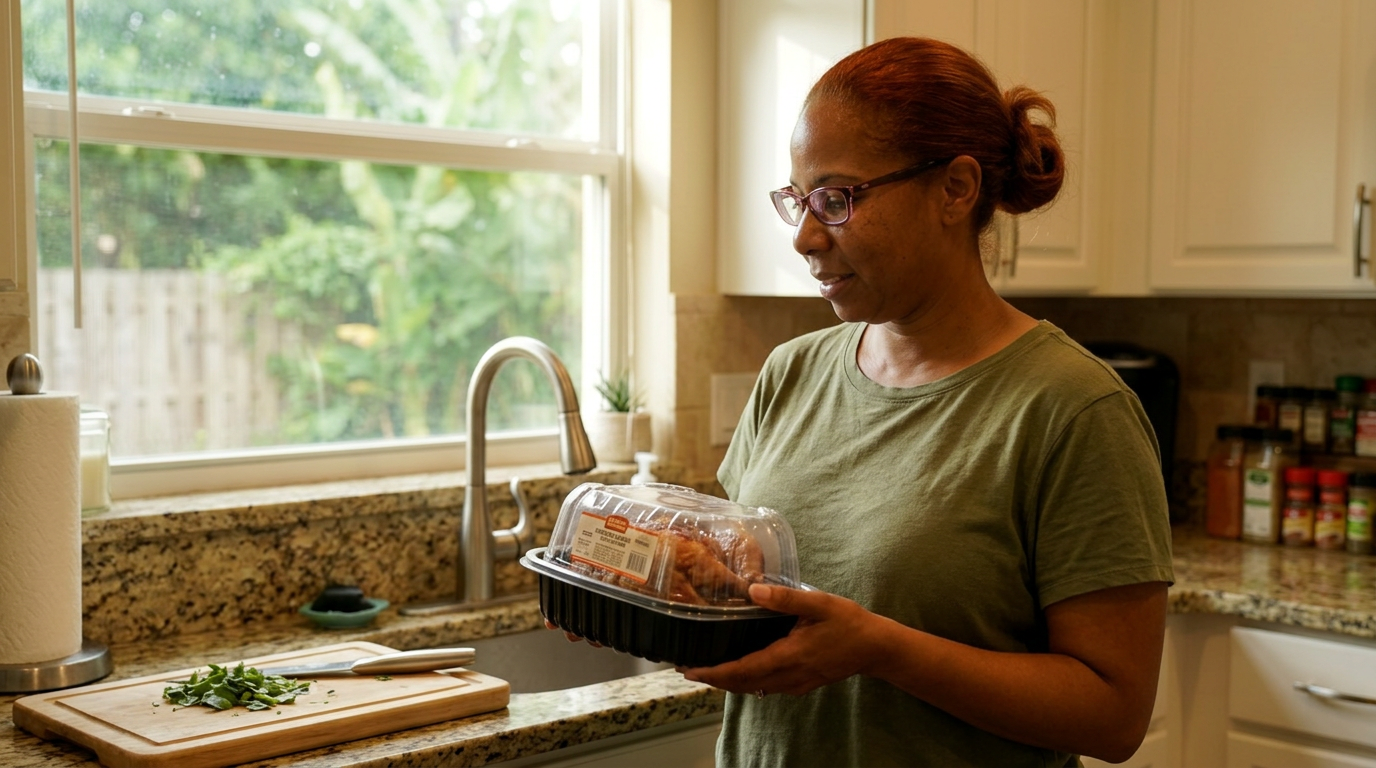
We’ve all been there: staring at a cold, half-eaten grocery store rotisserie chicken in the fridge, wondering how to make it taste like a real meal again. Today, we are rescuing this five-dollar shortcut and turning it into a rich, velvety chicken and sage pot pie with a scratch-ish puff pastry crust.
Close-up of Tara's hand opening a plastic Publix rotisserie dome, revealing a partially carved, cold chicken under the harsh light of an open refrigerator.
It was a Tuesday afternoon in Orlando, the kind where the humidity clings to the screen porch and the sky is threatening a five o'clock downpour. I had exactly forty-five minutes before the family started wandering into the kitchen asking the dreaded question: 'What's for dinner?' I opened the fridge and there it was. A sad, cold, half-carved Publix rotisserie chicken looking back at me. We had eaten the breasts the night before, leaving behind the drumsticks, thighs, and a carcass that still had plenty of good meat clinging to the bone.
Now, I love a grocery store shortcut as much as anyone, but leftovers can feel incredibly uninspiring when they are just reheated in the microwave. The skin gets rubbery, the white meat dries out, and it just tastes like... yesterday's rush. My goal today wasn't just to warm this chicken up; I wanted to completely reinvent it. I wanted to use the bones to create a quick, deeply savory pan-gravy, shred the dark meat for maximum juiciness, and top the whole thing with a flaky, golden puff pastry crust that makes it feel like a Sunday project instead of a Tuesday rescue mission.
The plan was simple but required some strategic timing. First, I needed to pick every scrap of meat off that frame while it was still cold—it’s actually much easier to shred clean when the fat is solidified. Then, instead of tossing the bones, I was going to quick-simmer them in a boxed chicken stock with some fresh herbs from the backyard to boost the flavor. Finally, I'd build a classic roux, throw in some frozen peas and carrots I found hiding in the freezer, and bake the whole thing in my trusty cast-iron skillet. The stakes? Turning a dry three-pound leftover into a bubbling, comforting masterpiece before the rain started.
I started by rolling up my sleeves and tackling the chicken carcass on a large plastic cutting board, making sure to keep the cooked poultry away from any raw prep areas. Stripping a cold chicken is a tactile, messy job, but it’s incredibly satisfying. I managed to harvest about three cups of beautiful, shredded dark meat and small bits of breast meat. I kept a close eye out for any small bones or gristle—there is nothing worse than biting into a cozy pot pie and finding a stray rib bone. I set the shredded meat aside in a bowl and piled the bare bones directly into a small saucepan.
To give this quick dinner a deep, slow-cooked flavor flavor, I poured four cups of standard low-sodium chicken broth over the bones, threw in a bruised clove of garlic, and tossed in a handful of fresh sage and thyme from my patio pots. I brought that to a boil and let it simmer on the back burner. Within five minutes, the kitchen smelled incredible. The steam rising from the pot carried that rich, roasted chicken aroma, completely masking the fact that this stock came from a box. This is my favorite kitchen hack: always extract that extra gelatin and roasted flavor from the leftover bones.
While the stock simmered, I set my cast-iron skillet over medium heat and melted three tablespoons of unsalted butter. The smell of melting butter always draws people into the kitchen. I added one finely diced yellow onion and two stalks of chopped celery. I watched them closely, stirring with a wooden spoon until they softened and turned translucent, about six minutes. I didn't want any hard brown edges here; we were going for a sweet, gentle base. I added a pinch of kosher salt and some cracked black pepper, letting the seasoning cook right into the aromatics.
Next came the crucial step: the roux. I sprinkled three tablespoons of all-purpose flour directly over the softened vegetables. Using my wooden spoon, I stirred constantly, coating every bit of onion and celery in the flour-butter mixture. I let this cook for a full two minutes to get rid of that raw flour taste. The mixture turned a pale, sandy gold, and it smelled slightly nutty. This is where patience pays off; rushing this step means your sauce will taste like wet dough later.
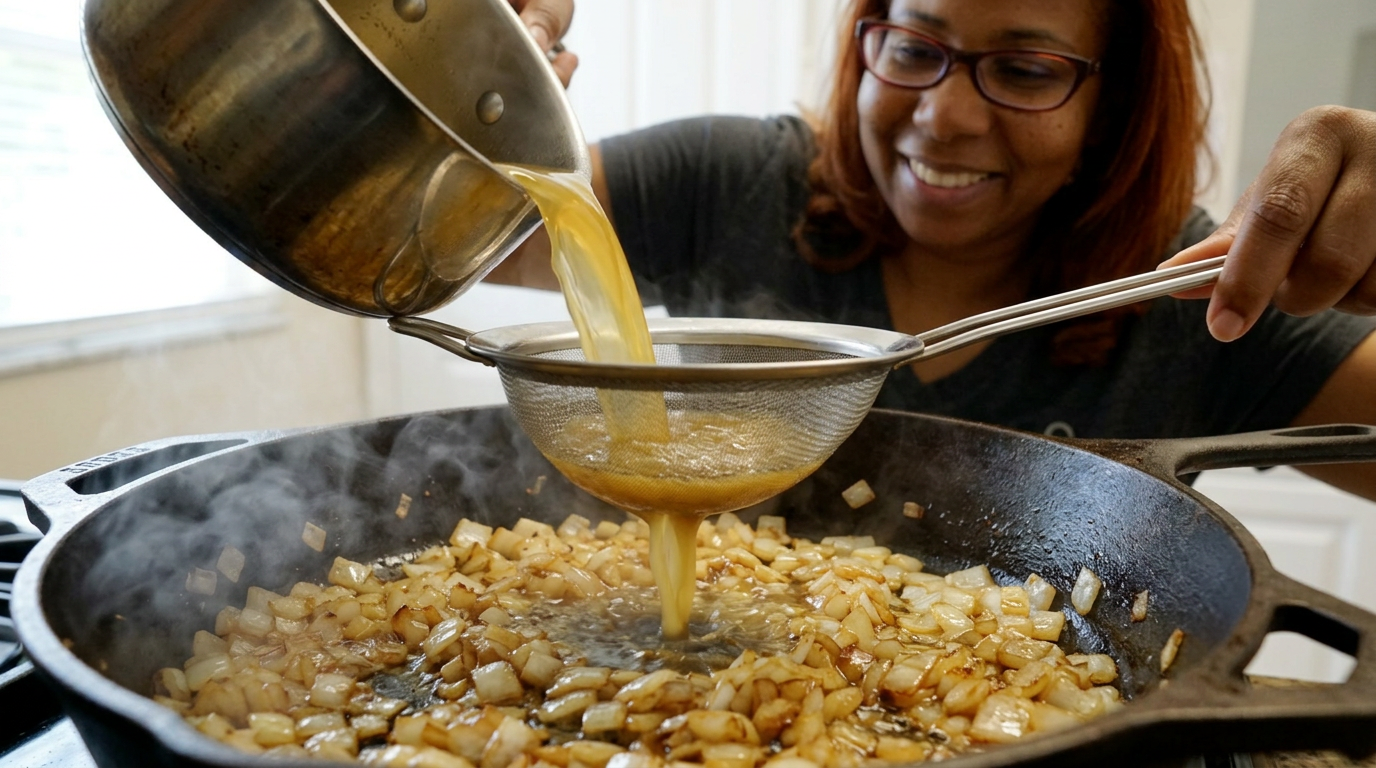
Now for the magic transformation. I ladled the hot, bone-infused chicken stock through a fine-mesh strainer directly into the skillet, whisking vigorously with my right hand while pouring with my left. At first, it looked like a clumpy mess, but as the hot liquid hit the flour, it bloomed. I kept whisking, pulling in the bits from the edges of the skillet. Within three minutes, the sauce thickened into a velvety, glossy gravy that coated the back of my spoon. I took a quick taste—it was rich, savory, and had a beautiful herbal note from the sage.
I turned the heat down to low and folded in the shredded rotisserie chicken along with one cup of frozen peas and carrots. No need to thaw them first; they cook perfectly in the hot gravy. The contrast of the bright green peas and orange carrots against the cream-colored sauce looked instantly appetizing. I let the mixture barely simmer for two minutes just to heat the chicken through, ensuring it stayed tender and didn't overcook.
I pulled the skillet off the heat. It was time for the shortcut that feels like a luxury: store-bought puff pastry. I unfolded a single sheet of thawed pastry onto a lightly floured counter. I didn't even use a rolling pin; I just gently stretched it with my hands to fit the diameter of my ten-inch skillet. Using a sharp paring knife, I cut three small slits in the center to let the steam escape. I carefully draped the cold pastry over the hot chicken mixture, tucking the overhanging corners inside the rim of the skillet to create a rustic, crumpled border.
To get that deep, photo-worthy golden-brown finish, I beat one egg with a splash of water and brushed it generously over the entire pastry surface. I sprinkled a few flaky sea salt crystals and some cracked black pepper on top for texture. I slid the heavy skillet onto the middle rack of my oven, which I had preheated to 400 degrees Fahrenheit. Now, all I could do was wait twenty-five minutes while the puff pastry did its thing.
B-roll sequence of onions sizzling, flour being whisked into butter, straining hot stock into the skillet, folding in bright green peas, and brushing the puffed pastry crust with egg wash.
At exactly twenty-four minutes, the oven timer buzzed, but I didn't even need it. The smell of buttery, baked pastry and roasted chicken gravy had filled the entire house, drifting all the way to the front door. I pulled the skillet out using a thick oven mitt, and it was absolutely stunning. The puff pastry had risen into a towering, flaky, deep-golden crust, with thick ribbons of rich, savory gravy bubbling up through the vents in the center. It looked like something you would order at a high-end tavern, completely unrecognizable from the cold carcass I started with.
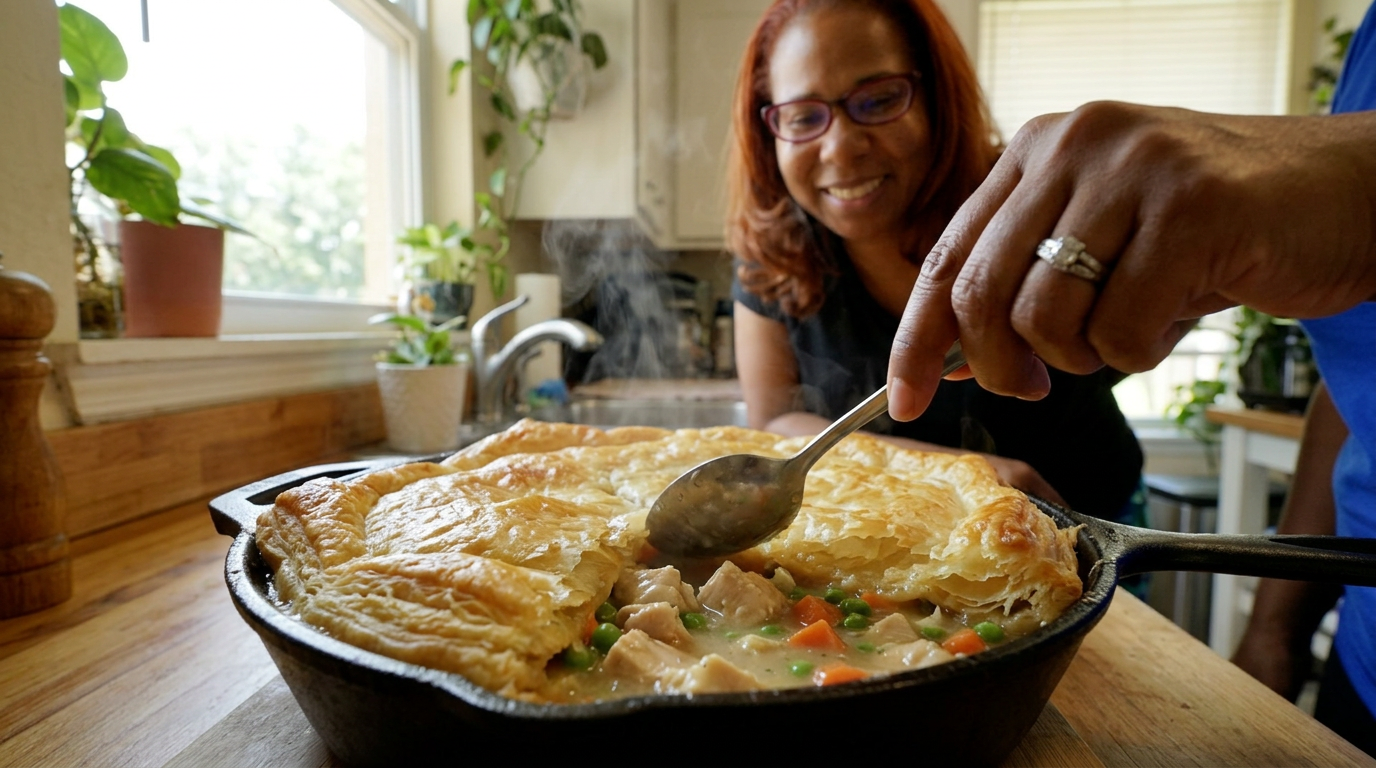
I let it rest for five minutes on the stove—a crucial step to let the gravy set up so it doesn't run everywhere when you scoop it. When I finally broke through the crust with a large serving spoon, the sound of the shattering pastry was incredibly satisfying. I scooped a generous portion into a shallow ceramic bowl. The chicken was incredibly moist, having soaked up all that fresh herb gravy, and the peas held their bright color and pop. My family polished off the entire skillet, scraping the bottom for every last bit of caramelized gravy.
This recipe proved that a little kitchen strategy can turn even the most uninspired leftovers into a highlight of the week. Next time, I think I'll add a splash of dry white wine to the onions before adding the flour to give the gravy an extra layer of brightness. But for a quick, rainy Tuesday rescue mission? This was an absolute win. Don't throw away that leftovers container—there is always a great dinner hiding inside it.
Close-up of a spoon breaking through the ultra-flaky, golden puff pastry crust, releasing a cloud of steam and revealing the rich, bubbling chicken filling beneath.
Shot List
| Type | Description | Audio | Duration |
|---|---|---|---|
| Close-up | Opening the plastic dome of a cold, half-eaten Publix rotisserie chicken inside the fridge. | [SFX: Refrigerator door opening, plastic lid peeling open with a squeak] | 4s |
| Medium | Tara standing at the kitchen island, talking directly to the camera with the chicken in front of her. | Tara: 'Today, we are rescuing this five-dollar shortcut and making it taste like six hours of love.' | 8s |
| Detail | Tara's hands shredding the cold chicken meat off the bones, separating meat into a bowl. | [SFX: Soft tearing noises, meat dropping gently into a ceramic bowl] | 6s |
| Overhead | Placing the bare bones into a saucepan and pouring boxed chicken broth over them. | [SFX: Liquid splashing gently, bones clinking against the bottom of the pot] | 5s |
| Close-up | Fresh sage leaves and sprigs of thyme being tossed into the simmering chicken stock. | [SFX: Gentle bubbling and simmering sounds intensify] | 4s |
| B-roll | Butter melting and foaming in a hot cast-iron skillet, followed by chopped onions and celery sliding in. | [SFX: Loud, satisfying sizzle as vegetables hit the hot butter] | 7s |
| Detail | Stirring the flour into the softened vegetables to form a smooth, sandy-colored roux. | [SFX: Wooden spoon scraping the bottom of the cast-iron skillet] | 6s |
| Close-up | Straining the hot, dark chicken stock directly into the skillet while whisking vigorously. | [SFX: Whisk scraping metal rapidly, gravy bubbling and thickening loudly] | 8s |
| Overhead | Folding the shredded chicken and bright frozen peas and carrots into the thick gravy. | Tara: 'Look at that color contrast. It instantly looks alive again.' | 5s |
| Detail | Draping the sheet of puff pastry over the skillet and crimping the edges with fingers. | [SFX: Soft patting, pastry dough stretching slightly] | 5s |
| Close-up | Brushing the puff pastry with egg wash, showing the shiny wet glaze under the kitchen lights. | [SFX: Soft pastry brush bristles sweeping across the dough] | 4s |
| Timelapse | The puff pastry rising, turning deep golden brown, and bubbling at the vents inside the oven. | [Music swells with a warm, acoustic kitchen vibe] | 10s |
| Medium | Tara pulling the hot, bubbling skillet out of the oven using a striped fabric oven mitt. | Tara: 'Oh my goodness, look at this. It smells incredible in here.' | 6s |
| Detail | A spoon cracking through the puffed, flaky crust with a loud, crunchy sound. | [SFX: Decisive, loud crack of crispy pastry sheets shattering] | 5s |
| Close-up | Plating a big scoop of the pot pie in a bowl, steam rising beautifully into the air. | Tara: 'Perfectly juicy, rich, and made entirely from leftovers.' | 6s |
- Capture the condensation on the plastic Publix rotisserie container before opening it to emphasize the 'cold leftover' starting point.
- Get an extreme close-up of the fresh sage and thyme leaves being chopped, focusing on the release of aromatic oils on the cutting board.
- Show the steam venting from the oven door when it first opens, capturing the rustic, home-baked atmosphere.
- Record the audio of the spoon breaking the pastry crust as close to the microphone as possible for a highly satisfying sound design moment.
- 0:00 — Light, acoustic guitar with a slightly playful, curious rhythm to match the leftover dilemma.
- 1:45 — Warm, steady instrumental groove as Tara begins prep work and stock simmering.
- 3:30 — Slightly jazzy, upbeat tempo as the onions sizzle and the roux starts to build structure.
- 5:15 — Smooth, swelling strings and acoustic guitar as the gravy thickens and the filling comes together.
- 7:00 — Calm, ambient kitchen warmth music during the baking timelapse sequence.
- 8:30 — Rich, triumphant acoustic folk music as the finished pot pie is pulled from the oven and plated.
- Keep the pacing brisk during the shredding process, using quick cuts to show the transition from whole carcass to clean bones.
- Use a warm, golden color grade to emphasize the cozy, comforting nature of the pot pie and counteract the cool lighting of the initial fridge scene.
- Add a subtle text overlay with the cost breakdown of the ingredients to highlight the 'budget rescue' angle of the video.
- Enhance the cooking sounds (sizzling, whisking, pastry cracking) in the audio mix to make the sensory experience more immersive for viewers.
| Call | Provider | Model | Input Tokens | Output Tokens | Compute / Credits |
|---|---|---|---|---|---|
| Script | abacus.ai | gemini-3.5-flash | 1,085 | 3,837 | — |
| Image 1 — The Leftover Dilemma | abacus.ai | nano_banana2 | — | — | 6,753.425 |
| Image 2 — The Rich Gravy Bloom | abacus.ai | nano_banana2 | — | — | 6,753.35 |
| Image 3 — The Golden Shatter | abacus.ai | nano_banana2 | — | — | 6,753.45 |
My 15-Minute Sweet & Spicy Citrus Shrimp Tacos | Orlando Summer Survival Dinner
I used bright, fresh-squeezed Florida citrus, quick-seared shrimp, and a humid Orlando afternoon to make a heavy day feel so much lighter.
It is eighty-five percent humidity out there today, and the absolute last thing I want to do is turn on my heavy oven. Let's make something fast, incredibly bright, and spiked with the freshest Florida citrus I could find in my fridge.
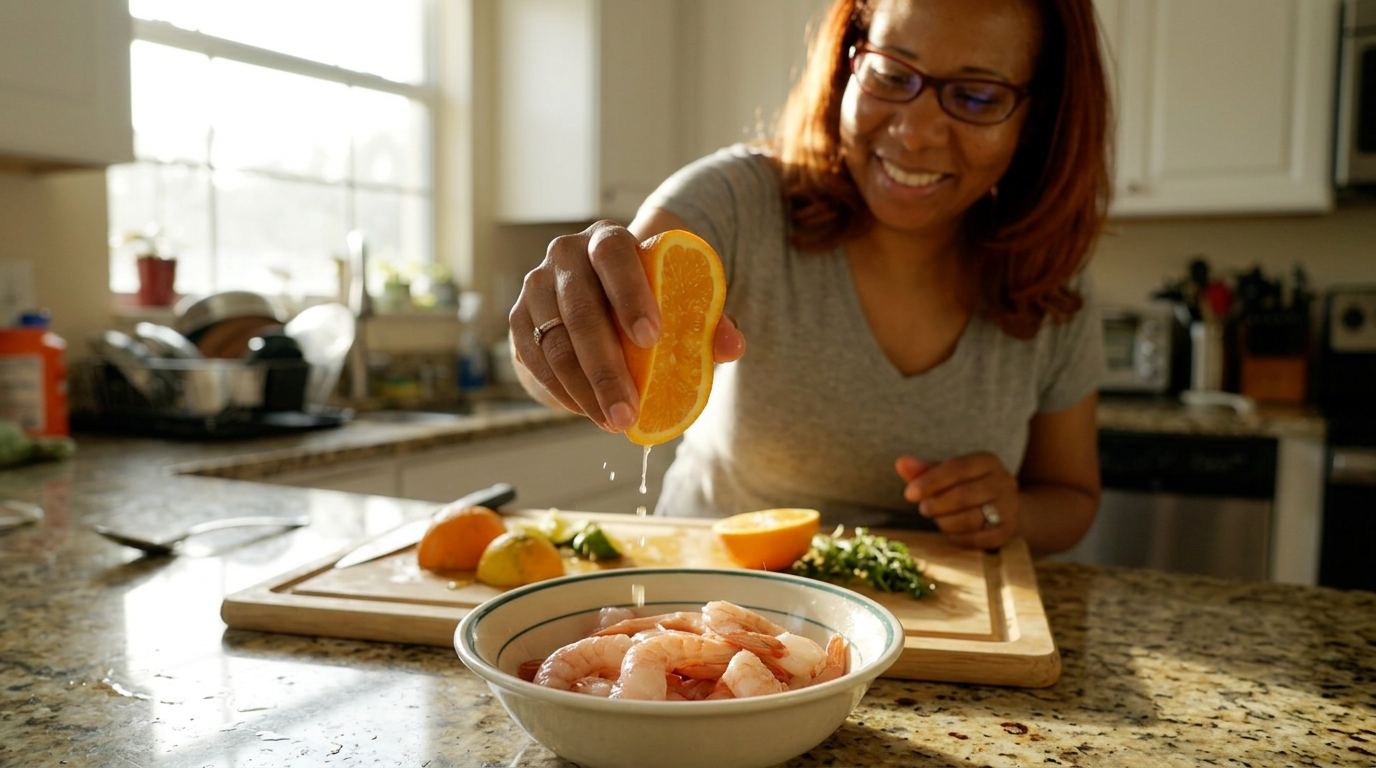
Close-up of Tara squeezing a juicy, bright orange directly over a bowl of raw, plump pink shrimp. The juice splashes and glistens under warm kitchen lighting, immediately followed by a quick, handheld pan to Tara smiling, wiping her brow, and gesturing to a messy, colorful countertop.
It was one of those classic mid-July Orlando afternoons where the air feels so thick you could practically slice it with a butter knife. I had spent the entire morning running errands around Winter Park, dodging those sudden, torrential subtropical downpours that pop up out of nowhere, and by the time I finally dragged myself back through my front door, I was completely drained. My stomach was rumbling, but the mere thought of standing over a hot, steaming stove for an hour or preheating my oven to four hundred degrees made me want to lay flat on the cool tile floor of my kitchen.
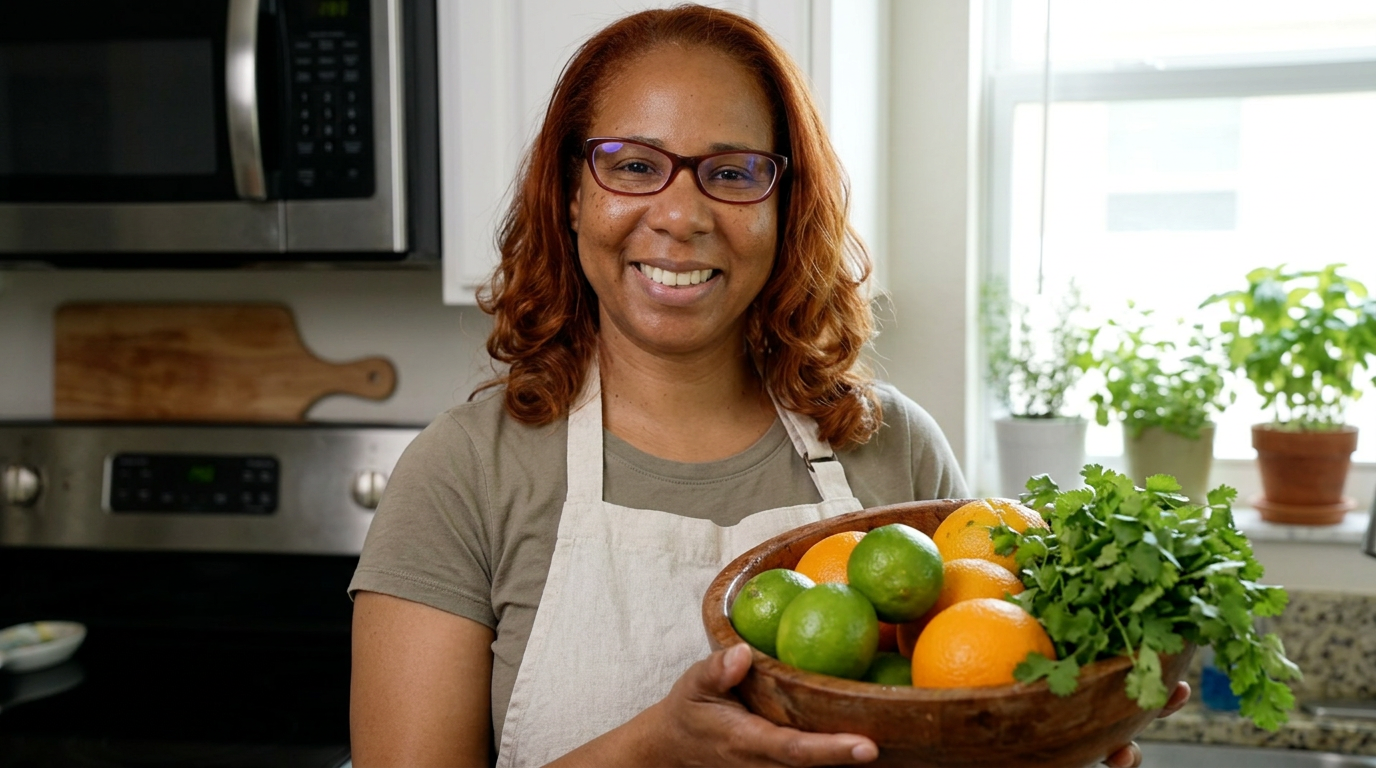
I stood there with the fridge door wide open, letting the cold air wash over my face while I scouted for inspiration. Tucked away in the back of the crisper drawer, I found two beautiful, slightly bumpy Valencia oranges and a wonderfully tart-looking lime that had survived my last Publix run. In the freezer, I had a bag of wild-caught Florida pink shrimp that would thaw out in under ten minutes if I ran them under some cool tap water. Right then and there, the game plan solidified: we were making ultra-quick, sweet-and-spicy citrus shrimp tacos with a crunchy, zesty cabbage slaw to bring some life back into this heavy afternoon.
The stakes for this meal were simple but incredibly high for my sanity. I needed dinner on the table in fifteen minutes flat, using only one single skillet so I wouldn't have a mountain of hot dishes to wash afterward. I wanted that perfect, elusive balance of smoky heat from chipotle powder and the vibrant, sweet punch of fresh-squeezed orange juice. If I timed this right, the shrimp would cook in a flash, staying plump and juicy, while the citrus marinade would caramelize beautifully in the hot cast iron pan. It was time to get to work before the next thunderstorm rolled in.
I started by tossing my frozen shrimp into a colander in the sink, running thin streams of cool water over them. While they thawed, I grabbed my cutting board to tackle the citrus. Cutting into those Valencia oranges instantly filled my entire kitchen with this incredibly bright, uplifting aroma that completely cut through the humid afternoon slump. I squeezed the juice of one whole orange and half of the lime directly into a wide mixing bowl, watching the pale yellow seeds drop in, which I quickly fished out with a spoon. To build my marinade, I whisked in a tablespoon of olive oil, a hefty teaspoon of garlic powder, a pinch of cumin, and a generous shake of chipotle powder for that smoky, back-of-the-throat heat.
Once the shrimp were fully thawed, I patted them dry with paper towels. This is a crucial step that a lot of people skip—if your shrimp are wet when they hit the pan, they are going to steam instead of sear, and you'll miss out on those gorgeous, flavorful charred edges. I dropped the dry shrimp directly into the citrus bath, tossing them gently with my hands until they were thoroughly coated in that beautiful, orange-tinted glaze. Because citrus juice is highly acidic, it will actually start to 'cook' or cure the delicate shrimp meat if left too long, so I set a timer for exactly seven minutes. That was my window to build the slaw.
For the slaw, I wanted a massive texture contrast to the tender shrimp. I finely shredded a quarter-head of red cabbage, which gave me this stunning, vibrant purple color that looked gorgeous on the wooden cutting board. I tossed the cabbage into a medium bowl and added a handful of chopped fresh cilantro from my backyard herb garden, along with a pinch of kosher salt. To tie it all together, I made a quick, creamy dressing using a couple of tablespoons of sour cream, a squeeze of the remaining lime juice, and a tiny splash of honey to balance the tartness. I massaged the dressing into the cabbage with my fingers until it softened just slightly but still retained its satisfying, noisy crunch.
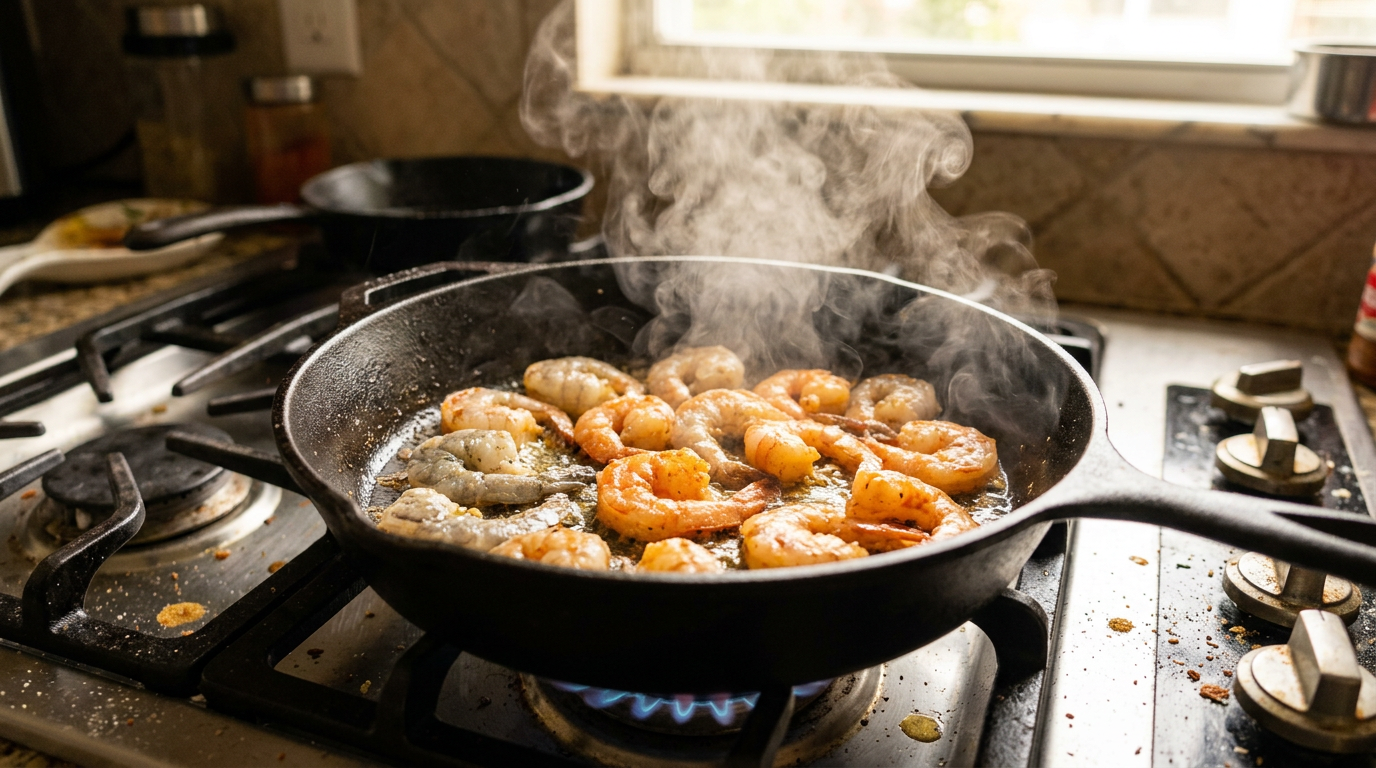
Now came the moment of truth: the sear. I pulled out my seasoned cast iron skillet and placed it over medium-high heat, letting it get hot enough that a drop of water flicked onto the surface danced and evaporated instantly. I swirled in a tablespoon of high-smoke-point avocado oil, and then, using tongs, I laid the marinated shrimp into the pan one by one. The immediate, loud sizzle was music to my ears, and the smell of sweet orange juice caramelizing against the hot iron and smoky chipotle was absolutely intoxicating.
Here is where things can go wrong fast. Shrimp are notorious overachievers; they cook in the blink of an eye. If you leave them in the pan too long, they turn rubbery, tough, and shrink down to sad little bouncy balls. I watched them like a hawk. After exactly two minutes, I saw the edges turning a beautiful, opaque pinkish-orange. I flipped them over, revealing a stunning, dark-golden crust where the natural sugars in the Valencia orange juice had caramelized against the iron.
As the second side cooked for just one more minute, I poured the leftover marinade from the bowl directly into the pan. It bubbled up furiously, reducing into a thick, glossy, sweet-and-savory glaze that clung to every single shrimp. I pulled the skillet off the heat immediately to prevent overcooking and let the residual warmth of the pan finish the job. The shrimp looked absolutely incredible—plump, glossy, and coated in a dark, rich glaze.
Before assembling, I needed to prep my tortillas. I set a dry stainless steel pan over medium heat and warmed up a few white corn tortillas until they were soft, pliable, and developed those beautiful, charred little freckles on both sides. Keeping them warm in a clean kitchen towel, I was finally ready to build my plates. I could hear the rumbling of thunder outside, signaling the daily afternoon storm was finally arriving, but inside my kitchen, everything felt incredibly fresh, bright, and ready to go.
Documentary-style, fast-paced kitchen B-roll. Focus on the raw textures: the crunch of the cabbage under a sharp knife, the sizzle of the skillet, steam rising, and the glossy reduction of the orange juice glaze glazing the pink shrimp.
I assembled the tacos by laying down a warm corn tortilla, piling on a generous mountain of that crunchy, bright purple cabbage slaw, laying four plump, glazed citrus shrimp right on top, and finishing it off with a few slices of fresh avocado and a scatter of green cotija cheese. Taking that first bite was pure heaven. The shrimp exploded with juicy, sweet orange flavor, followed immediately by the smoky kick of the chipotle, all cut perfectly by the cool, tangy crunch of the lime-spiked slaw. It was exactly what my body was craving—light, vibrant, and incredibly satisfying without leaving me feeling heavy or sluggish in the Florida heat.
Looking back, the only thing I might change next time is adding a little bit of fresh mango diced up into the slaw for an extra tropical punch, but honestly, this simple version was absolute perfection. It proved to me once again that you don't need to spend hours in a hot kitchen or use a ton of ingredients to make something deeply flavorful and comforting. It's all about using bright, fresh elements to work with the weather, not against it.
Thank you so much for hanging out with me in my kitchen today. If you're roasting in your own summer heat right now, I highly recommend giving this quick citrus shrimp recipe a try. Don't forget to like this video, subscribe to Cooking With Tara for more real-life home cooking, and let me know in the comments how you survive those hot summer nights. Until next time, stay cool, eat well, and I'll see you in the next recipe!
Slow, beautiful tracking shot of three fully assembled tacos on a rustic ceramic plate, backlit by soft afternoon light from a window. Tara takes a big, happy bite, smiles genuinely at the camera with her mouth slightly full, and shrugs happily as the rain starts to patter against the windowpane behind her.
Shot List
| Type | Description | Audio | Duration |
|---|---|---|---|
| Close-up | A juicy Valencia orange being sliced in half on a wooden cutting board, juice spraying slightly. | Ambient kitchen sounds, birds chirping outside, Tara: 'Today, we are beating the Florida heat with the brightest citrus we can find.' | 5s |
| Medium | Tara standing at her kitchen counter, speaking directly to the camera, holding up the orange halves and smiling. | Tara: 'It is incredibly humid in Orlando today, so we are keeping the stove time under five minutes.' | 8s |
| Overhead | Shrimp in a colander under running cold water, transitioning from frosted white to translucent pink. | Sound of rushing water. Tara: 'First step, thawing out our wild Florida pink shrimp. Fast and easy.' | 6s |
| Close-up | Squeezing orange and lime juice into a glass bowl with spices, whisking it into an orange-red marinade. | Whisk clinking against glass. Tara: 'We want sweetness from the orange, tartness from the lime, and smoky chipotle heat.' | 7s |
| Detail | Hands patting raw shrimp dry with a thick paper towel on a clean plate. | Soft rustling paper. Tara: 'Make sure they are bone dry, or they won't get that gorgeous sear we want.' | 5s |
| B-roll | A sharp knife quickly slicing through vibrant red cabbage, creating fine, purple ribbons. | Rhythmic, crisp chopping sound of the knife on wood. | 6s |
| Close-up | Hands tossing red cabbage, cilantro, lime juice, and sour cream in a bowl. | Squishing, fresh sounds of mixing. Tara: 'This lime cabbage slaw is going to provide that crucial crunch.' | 6s |
| Medium | Tara turning on the gas stove, placing a heavy cast-iron skillet on the burner. | Gas click and whoosh of flame. Tara: 'Let's get this cast iron screaming hot.' | 5s |
| Close-up | Shrimp hitting the hot skillet with tongs, immediately sizzling and producing a small cloud of fragrant steam. | Loud, satisfying sizzle. Tara: 'Listen to that. That is flavor developing instantly.' | 7s |
| Timelapse | Shrimp curling up and turning from greyish-pink to vibrant orange-white in the skillet over two minutes. | Sizzling continues, upbeat acoustic music swells slightly. | 8s |
| Detail | Pouring the leftover citrus marinade into the skillet; it bubbles and reduces into a thick, dark glaze. | Intense bubbling, sizzling sound. Tara: 'Pour that marinade in. Let it sticky-up and coat every single shrimp.' | 6s |
| Close-up | Corn tortillas being warmed on a open gas flame with metal tongs, getting slight char marks. | Soft gas flame hiss. Tara: 'Quick char on the tortillas—never skip this part!' | 5s |
| Overhead | Step-by-step assembly of a taco: tortilla, purple slaw, four glazed shrimp, avocado slices, and cotija cheese. | Light acoustic guitar music. Tara: 'Slaw goes down first... then our sticky, spicy shrimp...' | 10s |
| Medium | Tara holding up a beautifully loaded taco, taking a large, messy bite, and closing her eyes in delight. | Tara: 'Oh my goodness. The crunch, the sweet glaze... it is absolutely perfect.' | 8s |
| Wide | Tara waving goodbye in her kitchen as the camera slowly pulls back, showing her cozy living space and window wet with rain. | Tara: 'Stay cool, subscribe for more, and I'll see you next time!' Music fades out. | 8s |
- Capture close-ups of the condensation dripping down a cold glass of sweet tea on the counter to emphasize the Florida humidity.
- Get high-frame-rate slow-motion footage of the lime juice squeezing over the purple cabbage to highlight the color contrast.
- Record the sound of the sudden heavy rain outside the window to use as ambient background audio during the recipe setup.
- Take a quick shot of the messy counter at the end—used lime halves, cilantro stems, and spice jars—to keep the vlog feeling authentic and unproduced.
- 0:00 — Warm, acoustic guitar intro—light, breezy, and inviting, setting a relaxed Southern/coastal mood.
- 1:15 — Upbeat, light percussion joins the guitar as Tara begins chopping the cabbage and preparing ingredients.
- 3:45 — Music drops to a minimal, steady bassline and soft shaker to keep the focus on the sizzling sound of the shrimp hitting the pan.
- 5:30 — A playful, sunny ukulele melody fades in as the caramelized orange glaze begins to bubble and reduce.
- 7:15 — Smooth, jazzy transition music plays during the assembly of the tacos, building anticipation.
- 8:45 — Warm, acoustic guitar returns for the tasting and wrap-up, fading out slowly with the final screen.
- Keep the pacing relaxed but efficient; match the editing cuts to the rhythmic sounds of chopping and sizzling.
- Use warm, color-grading tones to emphasize the sunny Florida atmosphere, making the oranges and greens pop vibrantly.
- Add clean, minimalist text overlays on screen for ingredient measurements (e.g., '1 tsp chipotle powder') instead of interruptive title cards.
- Incorporate natural Foley sound design—boost the volume of the crunching cabbage, the sizzling pan, and the rain outside to create an immersive sensory experience.
| Call | Provider | Model | Input Tokens | Output Tokens | Compute / Credits |
|---|---|---|---|---|---|
| Script | abacus.ai | gemini-3.5-flash | 1,085 | 4,078 | — |
| Image 1 — The Fresh Squeeze | abacus.ai | nano_banana2 | — | — | 6,753.95 |
| Image 2 — Meet Tara | abacus.ai | nano_banana2 | — | — | 6,754.15 |
| Image 3 — The Sizzling Cast Iron | abacus.ai | nano_banana2 | — | — | 6,753.9 |
Why I Stopped Rushing My Sunday Smothered Pork Chops | Cooking With Tara
I spent years rushing my gravy until a rainy Sunday afternoon in Orlando taught me that the best things in life need time to brown.
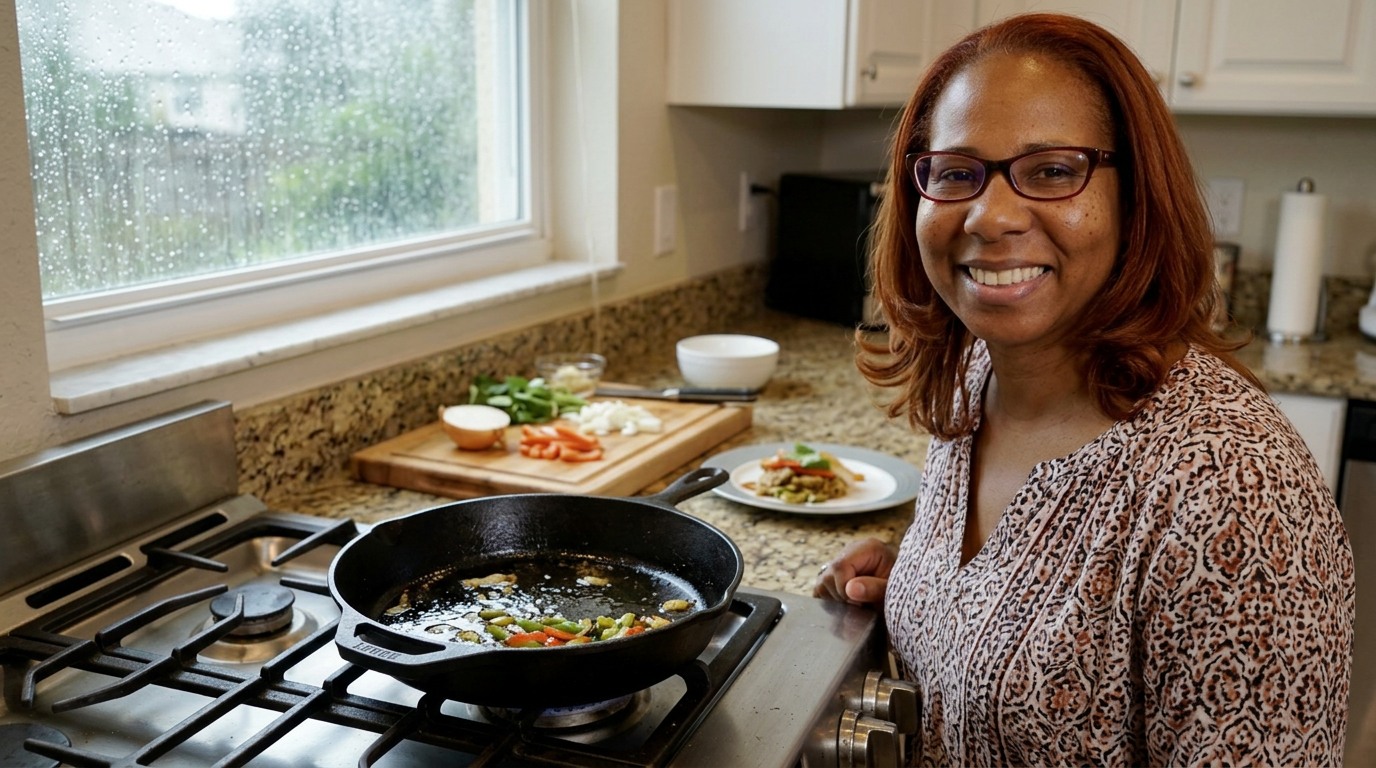
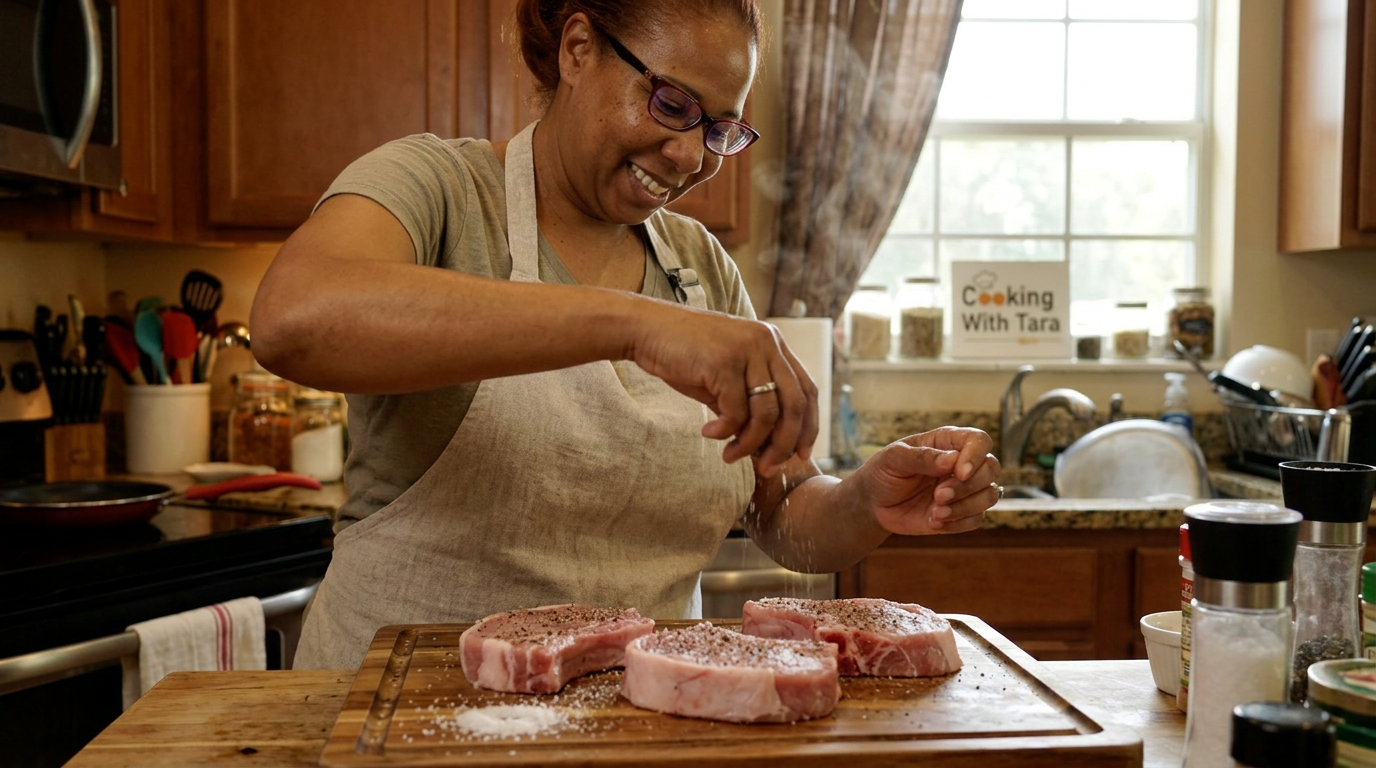
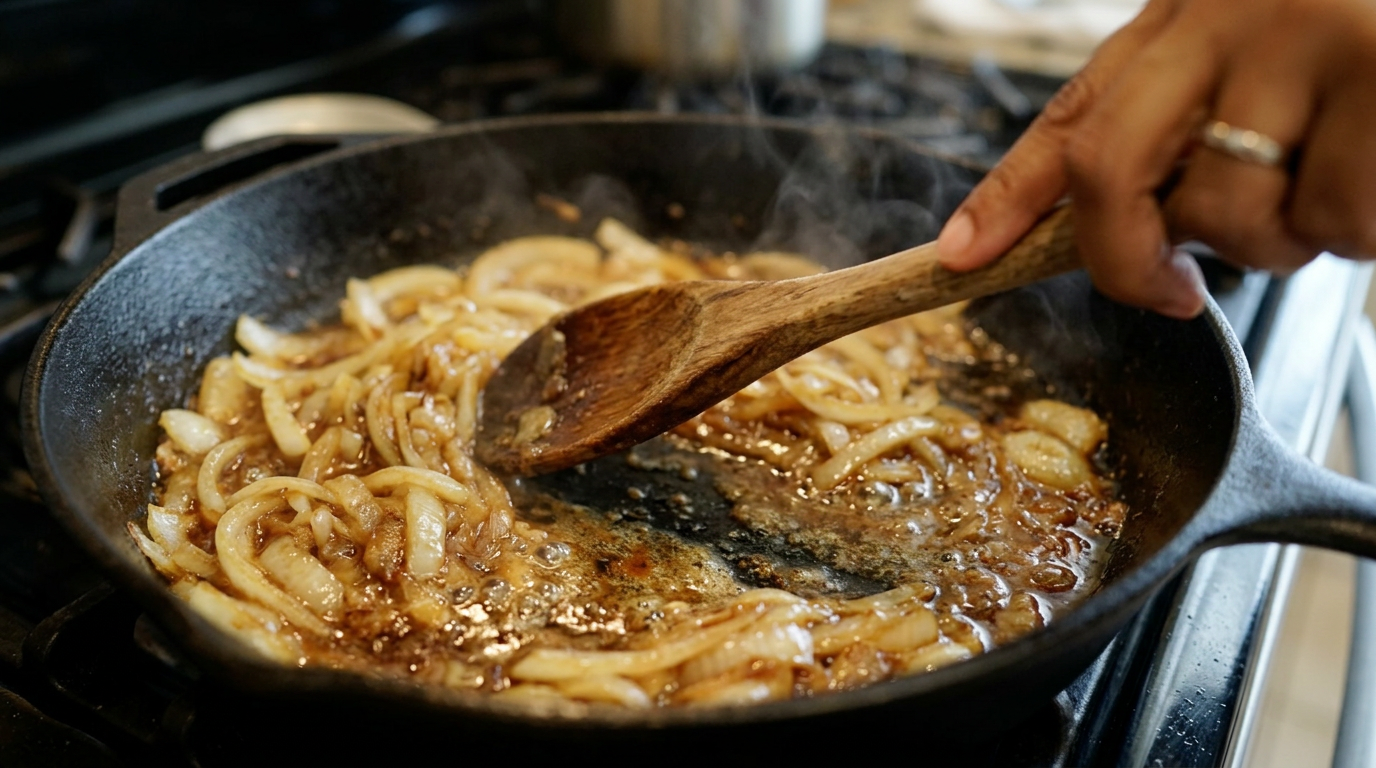
They say you can't rush a good gravy, but for years, I tried. Today, we're making Sunday smothered pork chops the slow, right way—and trust me, the pan drippings do not lie.
Extreme close-up of a wooden spoon scraping caramelized brown bits from the bottom of a hot cast-iron skillet, steam rising into the lens.
It was one of those classic Sunday afternoons in Orlando where the sky turns the color of a wet slate shingle, and you just know a heavy downpour is coming to trap you inside for the next three hours. My backyard herbs were practically drowning, and honestly, so was my motivation to do anything productive. That was the moment I realized my soul needed comfort food. Not a quick weeknight stir-fry, but something that takes over the kitchen with the smell of toasted flour, onions, and seared meat. I wanted smothered pork chops.
My relationship with smothered pork chops has always been a little dramatic. Growing up, this was the ultimate Sunday dinner, but when I first started cooking them myself in my twenties, I was always too inpatient. I’d rush the sear, burn the flour during the roux phase, and wind up with a pale, watery gravy that tasted more like disappointments and raw starch than love. Today, with the rain tapping against my kitchen window, I promised myself I wouldn't rush a single step.
The plan was simple but required absolute discipline: four bone-in rib cut pork chops, about an inch thick, sourced from my local Publix. I went with bone-in because the bone keeps the meat incredibly juicy and adds so much depth to the gravy. We were going to season them aggressively, sear them to get a gorgeous crust, and then build a deep, mahogany-colored onion gravy right in those pork drippings. The stakes? If I rushed the onions, they’d be crunchy; if I rushed the flour, the gravy would taste chalky. It was a test of patience.
I started by patting the chops completely dry with paper towels. If there's moisture on the surface, they steam instead of sear, and we want a crust that looks like mahogany. I seasoned them generously with kosher salt, freshly cracked black pepper, garlic powder, onion powder, and just a pinch of cayenne pepper for a little warmth. I let them sit on the cutting board for about fifteen minutes to take the chill off. Putting cold meat into a hot pan is a one-way ticket to tough, dry pork.
I heated up my 12-inch seasoned cast-iron skillet over medium-high heat and swirled in a tablespoon of vegetable oil and a tablespoon of unsalted butter. The butter adds flavor, while the oil raises the smoke point so the butter doesn't burn. As soon as that foam subsided, I laid the chops in. The sizzle was immediate and loud, filling the kitchen with that beautiful, savory aroma of browning meat. I let them sear for exactly four minutes on the first side without touching them. No peeking, no wiggling.
When I flipped them, my heart did a little happy dance. They had this gorgeous, golden-brown crust, speckled with caramelized spices. I let them go for another three minutes on the second side. Now, here's a food safety note: we aren't cooking them all the way through yet. I checked them with my digital thermometer, and they were sitting around 130 degrees Fahrenheit. Perfect. They were going to finish cooking later in the gravy, so I pulled them out and set them on a plate to rest, catching all those precious juices.
This is where the real work began. The bottom of my skillet was covered in dark brown crusty bits—what French chefs call fond, but what I call flavor gold. I turned the heat down to medium and threw in one massive yellow onion, thinly sliced, along with three cloves of minced garlic. Immediately, the moisture from the onions started loosening those browned bits. I used a wooden spoon to scrape them up, marrying them into the softening onions.
I sprinkled two tablespoons of all-purpose flour directly over the onions. This is the make-or-break moment. You have to cook this flour down. If you pour your liquid in too fast, you get raw flour gravy. I stirred it constantly for about four minutes, watching the flour turn from pale white to a beautiful, nutty blond, and finally to a deep peanut butter color. My kitchen smelled like a bakery that had suddenly started roasting garlic.
Next came the liquid. I slowly whisked in two cups of low-sodium beef broth and half a cup of heavy cream, pouring in a steady stream while whisking like my life depended on it to prevent lumps. I also threw in a sprig of fresh thyme from my soggy backyard garden and a splash of Worcestershire sauce for that savory, umami punch. It looked a little thin at first, but as it reached a simmer, the starch in the flour activated, and the gravy began to thicken into a glossy, velvet blanket.
I tasted the gravy and adjusted the seasoning with a little more salt and black pepper. Then, I nestled the pork chops back into the skillet, along with any juices that had pooled on the resting plate. I spooned that rich, brown onion gravy right over the top of the chops, turned the heat down to low, popped a lid on, and let them simmer gently for ten minutes. This allowed the pork to finish cooking to a perfectly safe and tender 145 degrees Fahrenheit while absorbing all that oniony goodness.
A montage of hands slicing onions, flipping golden pork chops in a sizzling skillet, whisking smooth gravy, and spooning rich brown sauce over the chops.
When I lifted the lid, the gravy was bubbling gently around the edges, thick enough to coat the back of a spoon. I plated a single chop over a mountain of garlic mashed potatoes and ladled a generous amount of that smothered onion gravy over the top. The pork was so tender I could cut it with the side of my fork. It was juicy, perfectly seasoned, and that gravy—oh my goodness. It had this deep, sweet onion flavor balanced by the savory richness of the pan drippings and the subtle warmth of the cayenne.
My husband took his first bite and literally closed his eyes, murmuring something that sounded like 'don't ever stop making this.' Getting that reaction made every single patient minute of browning that flour worth it. It tasted like home, like warmth, and like a rainy Sunday afternoon well spent. Next time, I think I might throw in some sliced cremini mushrooms with the onions to add an extra layer of earthiness, but honestly, this classic version is hard to beat.
If you're looking for a sign to slow down this weekend and cook something that takes a little patience, this is it. Don't rush the gravy, let those onions sweeten, and enjoy the process. The full recipe is in the description below. Let me know in the comments how you like your smothered chops, and I'll see you in the next video!
Tara takes a bite of the pork chop with mashed potatoes, smiles warmly at the camera, and waves goodbye as the rain streams down the window in the background.
Shot List
| Type | Description | Audio | Duration |
|---|---|---|---|
| Close-up | Raindrops hitting the kitchen window pane, blurry green backyard in the background. | Rain falling softly on a tin roof. | 4s |
| Medium | Tara standing in her kitchen, holding a bag of yellow onions, smiling at the camera. | Tara: 'Today, we are tackling a Sunday classic, and we are not rushing it.' | 6s |
| Overhead | Four thick, bone-in pork chops on a wooden cutting board being patted dry with a paper towel. | Slight patting sounds. | 5s |
| Close-up | Spices (salt, pepper, garlic powder, cayenne) being sprinkled from high up onto the pork chops. | Tara voiceover explaining the spice blend. | 5s |
| Detail | Butter melting and foaming in a hot cast-iron skillet next to vegetable oil. | Sizzling and bubbling sounds of melting butter. | 4s |
| Medium | Tara carefully placing the seasoned pork chops into the hot skillet with tongs. | Loud, satisfying sear sound as meat hits the pan. | 6s |
| Close-up | Flipping the pork chops to reveal a beautiful, deep golden-brown crust. | Tara: 'Look at that gorgeous color. That is flavor right there.' | 5s |
| B-roll | Tara slicing a large yellow onion into thin half-moons on a cutting board. | Rhythmic chopping sound of a sharp knife. | 5s |
| Close-up | Onions and garlic being tossed into the pan drippings, steam rising. | Sizzling softens as onions release moisture. | 5s |
| Overhead | Flour being sprinkled over the onions and stirred, turning a rich peanut-butter brown color. | Wooden spoon scraping the bottom of the cast iron. | 6s |
| Close-up | Pouring beef broth and heavy cream into the skillet while whisking vigorously. | Whistling sound of the whisk against the pan. | 6s |
| Detail | Pork chops being nestled back into the bubbling onion gravy. | Soft bubbling and simmering sounds. | 5s |
| Close-up | Tara lifting the lid off the skillet, releasing a massive cloud of savory steam. | Sigh of satisfaction from Tara off-camera. | 4s |
| Medium | Tara plating a pork chop over mashed potatoes and spooning thick gravy over it. | Tara voiceover describing the texture of the gravy. | 7s |
| Close-up | A fork cutting effortlessly through the tender pork chop, dripping with gravy. | Soft eating sounds, rain outside. | 6s |
- Capture the ambient sound of the rain outside to contrast with the sizzling sounds inside the kitchen.
- Get an extreme close-up of the flour changing color in the pan—this is the visual cue for the audience.
- Show the resting plate with the accumulated juices being poured back into the skillet so viewers know not to waste them.
- Film a slow-motion pour of the finished gravy cascading over the mashed potatoes.
- 0:00 — Soft, acoustic guitar folk music starts, setting a cozy, rainy-day mood.
- 1:30 — Music swells slightly as the pork chops hit the sizzling pan, adding energy.
- 3:15 — Music transitions to a warm, jazzy piano track during the onion chopping and sautéing.
- 5:00 — Tempo slows down to emphasize the patience needed while cooking the roux.
- 7:30 — Upbeat, satisfying acoustic melody returns as the gravy thickens and chops simmer.
- 9:15 — Soft, comforting outro music plays during the tasting and sign-off.
- Keep the pacing relaxed and conversational; don't over-edit or cut too quickly during the gravy-making process.
- Use subtle text overlays to show key temperatures (like 145F for cooked pork) and time markers for browning.
- Enhance the low-frequency sounds of the pan sizzle and the rain to create an immersive ASMR-like experience.
- Color grade with warm, golden tones to emphasize comfort and contrast with the cool, blue rainy-day light from the window.
| Call | Provider | Model | Input Tokens | Output Tokens | Compute / Credits |
|---|---|---|---|---|---|
| Script | abacus.ai | gemini-3.5-flash | 1,081 | 3,194 | — |
| Image 1 — Kitchen Mood Setting | abacus.ai | nano_banana2 | — | — | 6,753.75 |
| Image 2 — Tara Seasoning Chops | abacus.ai | nano_banana2 | — | — | 6,753.625 |
| Image 3 — The Perfect Gravy Sear | abacus.ai | nano_banana2 | — | — | 6,753.6 |
Making My Grandma's Crispy Salmon Patties | Pantry Staple Magic
I wanted to see if a humble can of pink salmon and some stale saltines could recreate the ultra-crispy, comforting dinner my grandmother used to make on rainy Orlando afternoons.
There is a very specific, golden-brown magic that happens when pantry staples hit a hot cast-iron skillet. Today, we are turning a simple can of pink salmon into the crispiest, most comforting dinner you can make for under ten dollars.
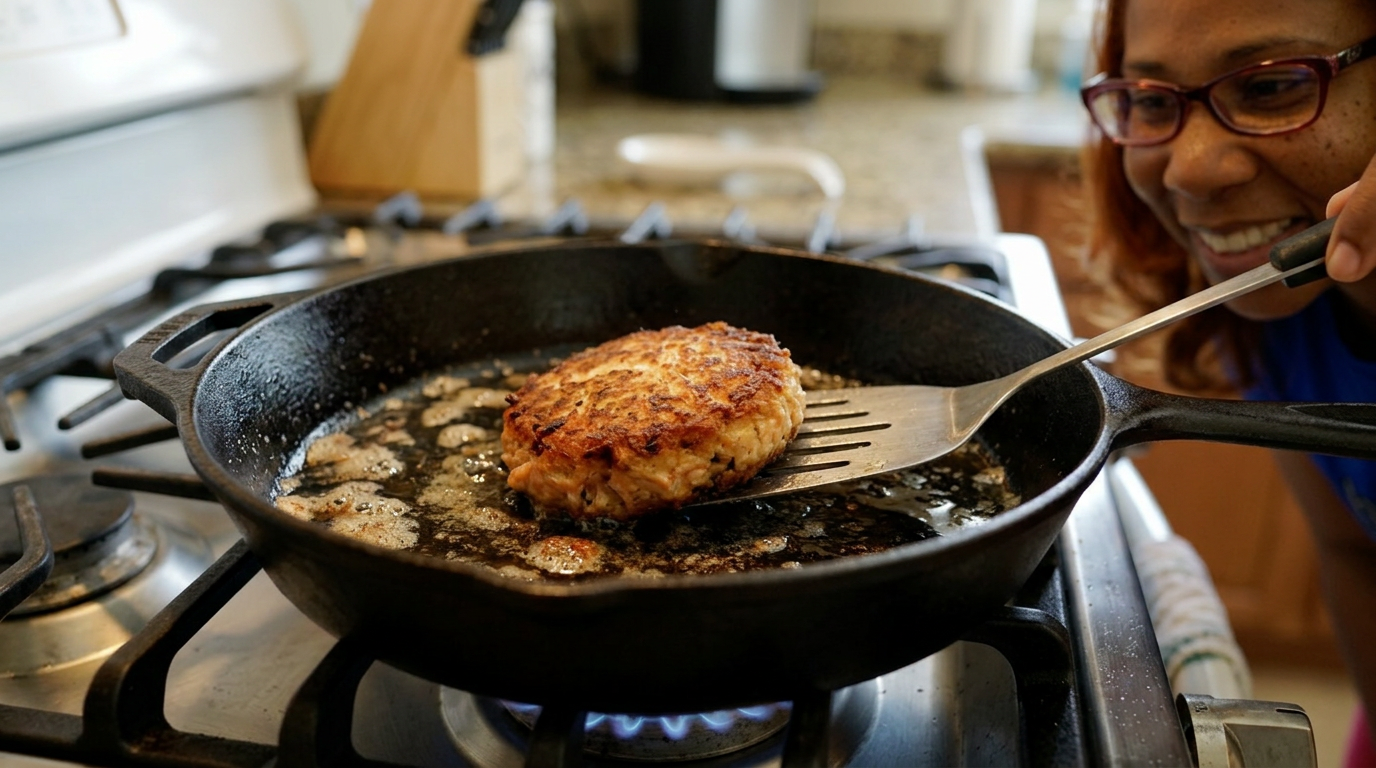
Close-up of a spatula flipping a perfectly golden, sizzling salmon patty in a seasoned cast-iron skillet, hot oil bubbling slightly around the edges.
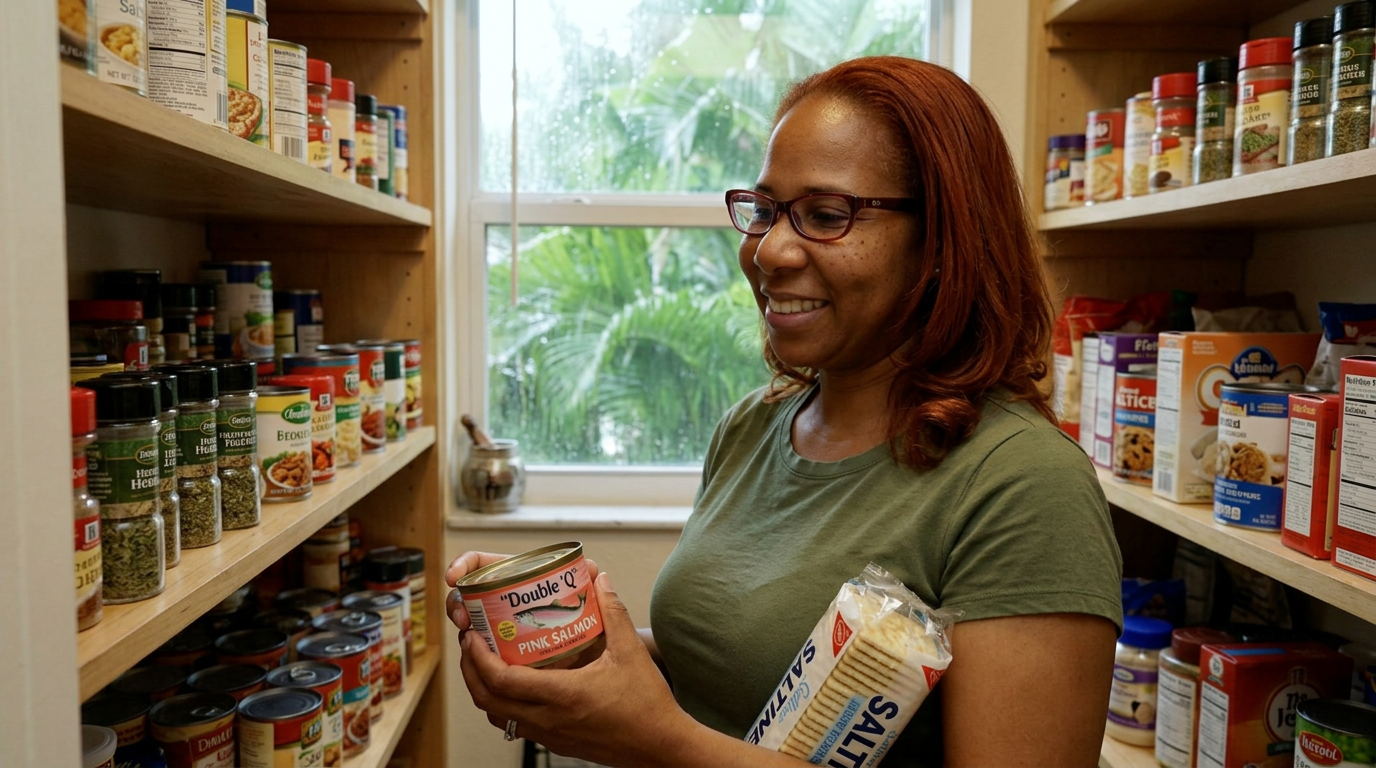
It was one of those humid, stormy Tuesday afternoons in Orlando where the sky turns a heavy slate gray by 3:00 PM and you instantly lose all motivation to drive to the grocery store. I stood in front of my pantry, staring at a lonely can of wild-caught pink salmon, a sleeve of slightly stale saltine crackers, and a couple of lemons. My grandmother, who lived in Georgia before moving down to Florida, used to make salmon croquettes—or salmon patties, depending on who you asked—every single time the pantry looked this bare. To her, it wasn't a compromise; it was a weekly highlight served with a side of white rice and hot sauce.
But here was my dilemma: canned salmon can easily turn into a mushy, bland disappointment if you don't treat it right. The stakes were low in terms of budget, but high in terms of dinner satisfaction. I wanted that shatteringly crisp exterior—the kind of crust that holds its own against a squeeze of fresh lemon and a creamy, tangy sauce. I didn't want a heavy, doughy binder masking the fish, and I certainly didn't want them falling apart the moment they hit the hot oil.
My plan was simple but required precision. I was going to use crushed saltines instead of breadcrumbs for that classic, flaky texture, finely minced celery and green bell pepper for crunch to break up the richness, and just enough egg and mayonnaise to bind it all together without making it wet. I also decided to whip up a quick, smoky remoulade sauce using what I had in the fridge door to elevate this from a quick struggle-meal to something that felt genuinely special.
Safety-wise, working with canned fish means checking for any large bones or skin. While they are completely edible and softened during the canning process, I prefer to pick through the fish quickly with my fingers to ensure a smoother texture for the final patties. With my cast iron skillet preheating on the stove and the rain starting to lash against my kitchen window, I set out to prove that budget pantry cooking can still deliver a five-star crunch.
I started by popping open the 14.75-ounce can of pink salmon. The familiar, savory scent immediately filled the kitchen—a smell that always reminds me of my grandmother's house. I drained the liquid thoroughly over the sink. Moisture is the absolute enemy of a crispy patty, so I even pressed the salmon lightly against the strainer with a fork to coax out those last stubborn drops of water.
Next came the prep work. I finely minced one rib of celery, half of a small green bell pepper, and two green onions. I wanted these pieces incredibly small—almost like a confetti—so they would cook through quickly in the pan and distribute evenly. If the vegetable chunks are too big, they create steam pockets inside the patty, which leads to structural collapse. I tossed them into a mixing bowl with the flaked salmon, keeping a close eye out for any large bone fragments.
For the binder, I took about 12 saltine crackers and crushed them right in their sleeve before dumping the crumbs into the bowl. There is something incredibly therapeutic about crushing crackers by hand. I added one large egg, a tablespoon of mayonnaise for moisture, a teaspoon of Dijon mustard for a bit of sharp background heat, a heavy splash of Worcestershire sauce, and a tablespoon of fresh lemon juice.
To season, I went in with a teaspoon of Old Bay, half a teaspoon of garlic powder, and a generous pinch of kosher salt and cracked black pepper. Now, the mixing part is crucial. You want to use a fork and gently fold everything together. If you overwork the mixture or mash it into a paste, you end up with heavy, dense pucks instead of light, flaky patties. I mixed it just until it clumped together when pressed.
I formed the mixture into four equal-sized patties, about an inch thick. At this point, they felt a little delicate, which brings me to my favorite kitchen trick: chilling. I slid the plate of patties into the fridge for about twenty minutes. This cold rest lets the cracker crumbs absorb the moisture from the egg and mayo, locking the structure in place so they don't break apart in the hot skillet.
While the patties chilled, I put together a quick remoulade. I mixed half a cup of mayonnaise with a tablespoon of coarse Creole mustard, a squeeze of lemon, a pinch of smoked paprika, a dash of hot sauce, and a finely minced dill pickle. The smoky, acidic bite of this sauce is the perfect counterpoint to the rich, fried patties.
Now for the main event: the fry. I heated a quarter-inch of neutral canola oil in my seasoned cast-iron skillet over medium-high heat. To test if the oil was ready, I dropped a single cracker crumb in. It immediately sizzled and danced on the surface—perfect. I gently lowered the chilled patties into the hot oil. The sizzle was instant, loud, and incredibly satisfying.
I let them cook undisturbed for exactly four minutes. The temptation to flip them early is always there, but you have to resist. If you move them too soon, you destroy that gorgeous crust they are trying to build. I watched the edges turn a deep, lacy golden brown. When I slid my thin metal fish spatula underneath, it glided effortlessly—a sign that the crust had fully formed.
Using a fork to help guide them, I flipped the patties over. The contrast of the deep, beautifully browned crust against the pale pink interior was gorgeous. I let them fry for another three to four minutes on the second side, ensuring the internal temperature reached a safe 145 degrees Fahrenheit, though since canned salmon is already cooked, we are mainly looking for hot-through-and-through and maximum crispiness.
Handheld B-roll of hands flaking salmon, crushing saltines, mixing gently with a fork, shaping patties, sliding them into the fridge, whisking the sauce, and the dramatic, sizzling flip in the cast iron skillet.
I transferred the hot, golden patties to a paper-towel-lined plate to drain for just a minute, sprinkling them with a tiny pinch of flaky sea salt while the oil was still wet on the surface. I plated them up over a simple bed of dressed arugula, spooning a generous dollop of that smoky remoulade right on top, finished with a fresh lemon wedge and some extra chopped green onions.
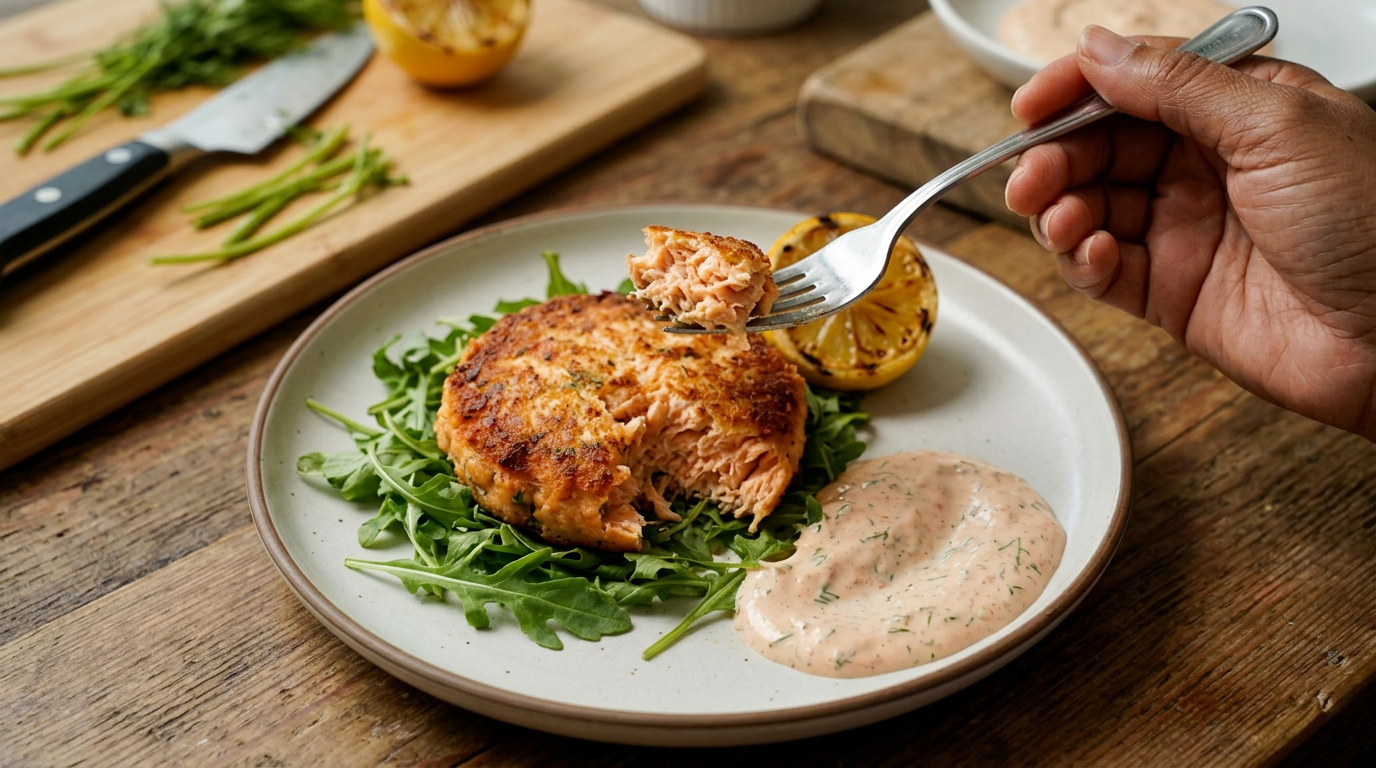
The first bite was pure nostalgia. The exterior had this incredible, shatteringly crisp crunch from the fried saltines, followed by the tender, flaky, perfectly seasoned salmon inside. The celery and bell pepper still had a tiny bit of textural bite, and the cool, tangy remoulade cut through the richness of the fry beautifully. It tasted like home, but slightly elevated.
Looking back, the only thing I might change next time is adding a pinch of cayenne directly into the salmon mixture for an extra kick of heat, or maybe serving them on toasted brioche buns as a salmon burger. But as a quick, budget-friendly comfort food dinner made entirely from what I had on hand? This proved that with the right technique, simple pantry ingredients can easily carry the whole plate.
Close-up of Tara cutting into a patty with a fork, showing the steam rising and the flaky interior, dipping it into the remoulade, and taking a bite with an authentic, happy reaction.
Shot List
| Type | Description | Audio | Duration |
|---|---|---|---|
| Close-up | Sizzling salmon patty being flipped in a hot cast-iron skillet, oil bubbling. | [Sizzling sound intensifies] Tara (VO): There is a very specific, golden-brown magic that happens when pantry staples hit a hot cast-iron skillet... | 5s |
| Wide | Tara standing in her cozy Orlando kitchen, holding a can of salmon and smiling at the camera. | Tara: Hey everyone, welcome back to the kitchen. Today, we are taking this humble can of salmon... | 15s |
| Medium | Tara opening her pantry, scanning shelves, and grabbing a sleeve of saltines. | Tara: It's one of those rainy, humid Orlando afternoons where you just do not want to go to the store. | 10s |
| B-roll | Rain pouring down outside a window with tropical green plants visible in the background. | [Soft sound of rain] Tara (VO): My grandmother used to make these every time the weather turned gray. | 8s |
| Overhead | Draining the canned salmon in a colander, pressing it with a fork. | Tara (VO): First trick to getting that perfect crust: you have to get rid of all the excess moisture. | 12s |
| Detail | Tara's hands picking through the flaked salmon in a bowl, removing a small bone. | Tara: I like to quickly run my fingers through it just to make sure there are no large bones or skin. | 10s |
| Close-up | Crushing saltine crackers inside their plastic sleeve with hands. | [Crushing sounds] Tara: There is something incredibly therapeutic about this part. | 7s |
| Overhead | Adding minced celery, bell pepper, egg, mayo, spices, and cracker crumbs to the salmon. | Tara (VO): We want celery and bell pepper chopped tiny so they don't create pockets of steam. | 15s |
| Detail | Gently folding the salmon mixture with a fork, keeping it light and textured. | Tara: Don't overmix this. If you mash it into a paste, your patties will turn out like dense lead weight. | 12s |
| Medium | Tara forming the mixture into patties and placing them on a white plate. | Tara: Now, we shape them and slide them into the fridge for twenty minutes to firm up. | 15s |
| B-roll | Mixing the remoulade sauce in a small glass bowl with a whisk. | Tara (VO): While those chill, we make a quick, smoky remoulade with mayo, creole mustard, and pickles. | 10s |
| Timelapse | Patties frying in the cast iron skillet, browning beautifully around the edges. | [Lively sizzling music swells] Tara (VO): Four minutes on the first side. Do not touch them! | 15s |
| Close-up | The dramatic flip, revealing a perfectly golden-brown, laced crispy crust. | Tara: Look at that crust! That is exactly what we are chasing. | 8s |
| Detail | Lifting hot patties onto a paper-towel-lined plate, sprinkling with flaky salt. | Tara (VO): A little flaky sea salt right as they arrive out of the oil. | 8s |
| Medium | Tara tasting a patty with a fork, nodding and smiling warmly at the camera. | Tara: Oh my goodness. That crunch is ridiculous. It honestly takes me right back to my grandma's kitchen. | 15s |
- Capture the raw sound of the cracker sleeve being crushed by hand; the crunch is highly satisfying for audio design.
- Get a slow pan of the rain hitting the window with wet tropical Florida foliage outside to establish the cozy, stormy atmosphere.
- Film a macro shot of the salmon being flaked with a fork to show the moisture level and the natural texture of the fish.
- Record a close-up of the lemon being squeezed over the hot, finished patty with individual droplets catching the light.
- 0:00 — Warm, acoustic guitar folk music starts softly, establishing a cozy, rainy-day mood.
- 1:15 — Music transitions to a slightly more upbeat, casual kitchen-prep rhythm with light percussion.
- 3:30 — Folk music fades down during the ingredient mixing and structural explanation, letting the natural kitchen sounds shine.
- 5:45 — A playful, bluesy jazz track kicks in as the quick remoulade sauce is whipped up.
- 7:10 — Music swells and becomes energetic as the patties hit the hot cast-iron skillet and start to sizzle.
- 8:45 — Music shifts to a warm, triumphant acoustic melody as the final dish is plated and tasted.
- Keep the pacing relaxed and conversational, allowing natural pauses for the sounds of sizzling, chopping, and cracker-crushing to act as ASMR breaks.
- Use clean, minimalist text overlays for ingredient measurements (e.g., '14.75 oz Pink Salmon', '12 Saltine Crackers') in a warm cream color.
- Apply a slightly warm, cinematic color grade with high contrast to make the golden-brown crust of the patties pop visually against the green herbs.
- Incorporate a subtle sound design boost on the 'crunch' sound when Tara takes her first bite of the patty to emphasize the crispiness.
| Call | Provider | Model | Input Tokens | Output Tokens | Compute / Credits |
|---|---|---|---|---|---|
| Script | abacus.ai | gemini-3.5-flash | 1,086 | 3,897 | — |
| Image 1 — The Golden Flip | abacus.ai | nano_banana2 | — | — | 6,753.95 |
| Image 2 — Pantry Inventory | abacus.ai | nano_banana2 | — | — | 6,754.125 |
| Image 3 — The Perfect Bite | abacus.ai | nano_banana2 | — | — | 6,754.1 |
I Made A Low Country Seafood Boil At Home (With The Ultimate Garlic Butter Sauce)
I wanted that messy, paper-on-the-table seafood boil experience, so I skipped the expensive restaurant and built a garlic-butter mountain in my own Orlando kitchen.
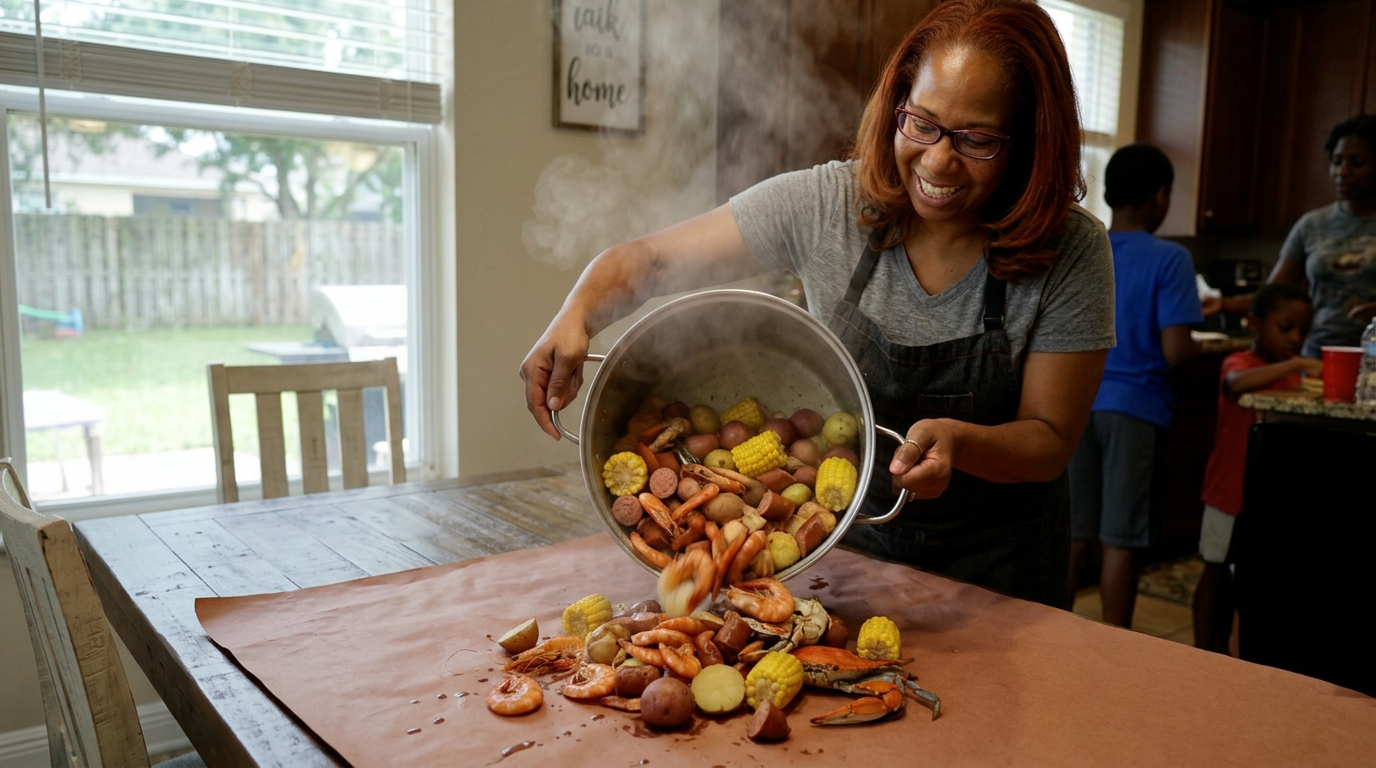
There is nothing quite like dumping a steaming pot of shrimp, crab, and sausage directly onto a newspaper-lined table. Today, we are bringing that messy, beautiful backyard tradition indoors, and it all starts with a garlic butter sauce that will change your life.
Tight, slow-motion shot of melted garlic butter being drizzled over steaming red potatoes, plump shrimp, and snow crab claws sitting on brown parchment paper.
It was one of those typical Orlando afternoons where the humidity hangs so thick you can practically wear it, and the sky was threatens its daily 4:00 PM downpour. Honestly, I didn't want to go out, but my family was craving something celebratory. My brother had just finished his grueling semester exams, and we needed a feast that felt like a party. That is when it hit me: a backyard-style low country seafood boil, but adapted for a standard home stove.
The plan was simple but ambitious. I wanted to pack a giant stockpot with sweet corn, smoky sausage, tender red potatoes, snow crab legs, and jumbo shrimp, all infused with a deeply spiced, citrusy broth. But let is be honest—the real star of any boil is the dipping sauce. I wasn't going to settle for just melted butter. I wanted to create a rich, hyper-savory cajun garlic butter sauce, loaded with whole heads of minced garlic, lemon juice, and a custom spice blend that would coat every single bite.
The stakes were surprisingly high for a casual family dinner. Seafood is expensive, and timing is everything here. If you overcook the shrimp, they turn to rubber; if you undercook the potatoes, you are tooth-testing a rock. Plus, my kitchen isn't a spacious restaurant line—it is a modest suburban space with a temperamental electric burner. I had to coordinate the cooking times perfectly in a single pot while managing the garlic butter on my second burner without letting it burn. It was time to get to work.
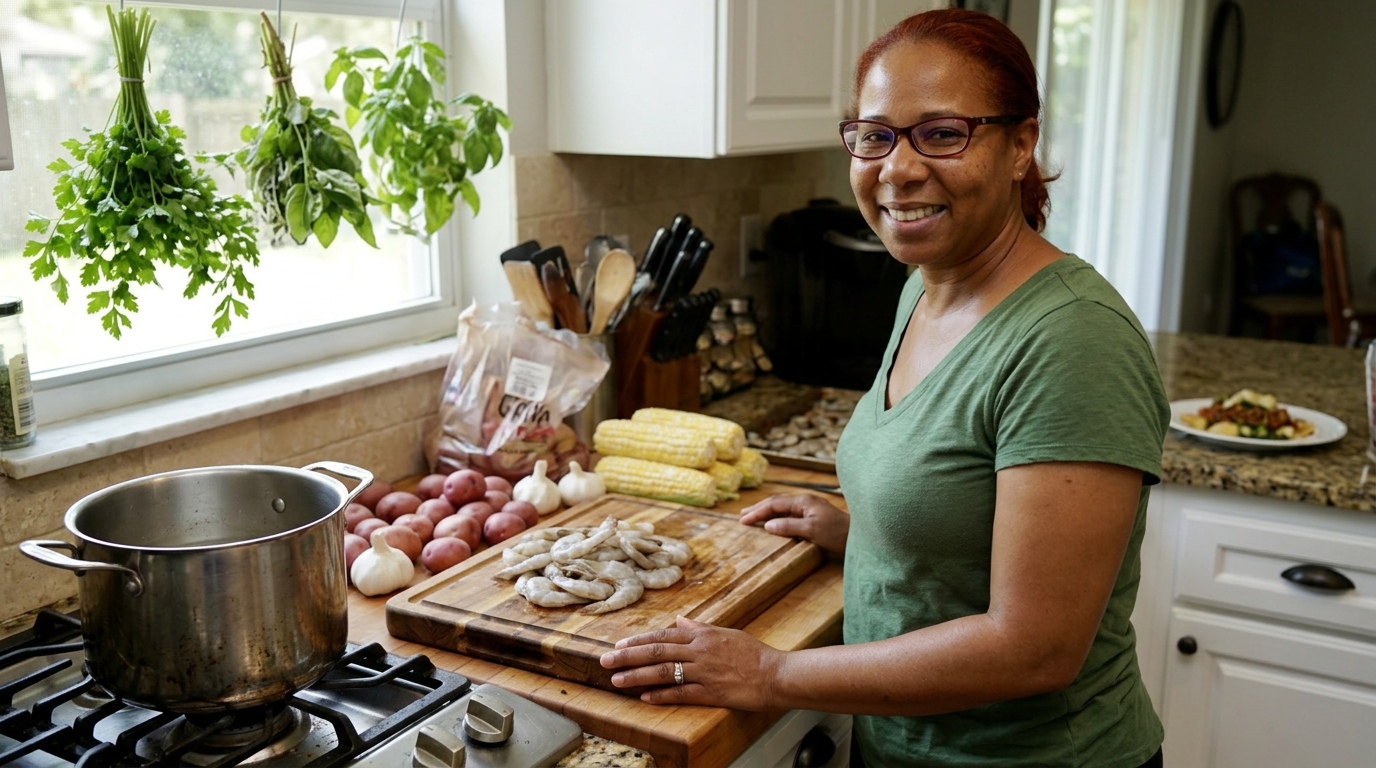
I started by prepping my aromatics and veggies. I took six small red-skinned potatoes and cut them in half so they would cook evenly, leaving the skins on for that rustic texture. Next came the sweet corn—three fresh ears I picked up from the local market, shucked and cut into thirds. For the sausage, I chose a high-quality smoked andouille. I sliced it into thick, coin-shaped rounds; I wanted them robust enough to hold up to the boiling water without losing their bite.
For the boiling liquid, water alone wasn't going to cut it. I filled my largest eight-quart stockpot about halfway with water, then tossed in two halved lemons, a whole sweet yellow onion cut into wedges, four smashed garlic cloves, and a generous half-cup of old bay seasoning. As it came to a rolling boil, the kitchen instantly filled with that sharp, nostalgic, summery aroma. It smelled like a coastal fish camp right in the middle of Central Florida.
First into the pool went the potatoes. They need the most time to soften up, so I let them rolling-boil for about twelve minutes. This was my first test of patience. While they bubbled, I prepped the seafood. I had two clusters of snow crab legs, which I rinsed in cold water, and a pound of raw, deveined jumbo shrimp with the shells still on. Keeping the shells on is crucial—it protects the delicate meat from drying out and locks in the sweet flavor.
At the twelve-minute mark, I poked a potato with a fork. It was just starting to yield, which was my cue to drop in the andouille sausage and the corn wheels. I let that simmer together for another eight minutes. The starches from the potatoes and the fat from the sausage were starting to meld with the spiced broth, turning it into a rich, golden-red elixir. My kitchen was getting warm, but the smell was incredible.
Now, it was time to make the legendary garlic butter sauce. On my smaller burner, I melted two entire sticks of unsalted butter over medium-low heat. You have to be careful here; butter can burn in a heartbeat. Once it was bubbling gently, I threw in a staggering amount of minced garlic—nearly ten cloves. The aroma was absolute heaven. I let the garlic soften for about two minutes, making sure it didn't turn brown or bitter.
To elevate the butter, I whisked in two tablespoons of cajun seasoning, a squeeze of fresh lemon juice, a dash of hot sauce, and a teaspoon of brown sugar to balance the heat. The sauce transformed into this thick, emulsified, deep orange glaze. I took a quick spoonful to taste—it was salty, sweet, intensely garlicky, and had just enough kick to wake up your tongue. I turned the heat to low to keep it warm.
Back to the main pot. It was time for the seafood finale. I carefully nestled the crab clusters into the bubbling broth, pushing them down so they were mostly submerged. Since snow crab is usually sold pre-cooked and frozen, it really just needs to heat through. After about four minutes, I dropped in the jumbo shrimp. This is the critical moment. I stood over the stove, watching them intensely as they curled and transitioned from translucent gray to a beautiful, opaque pink.
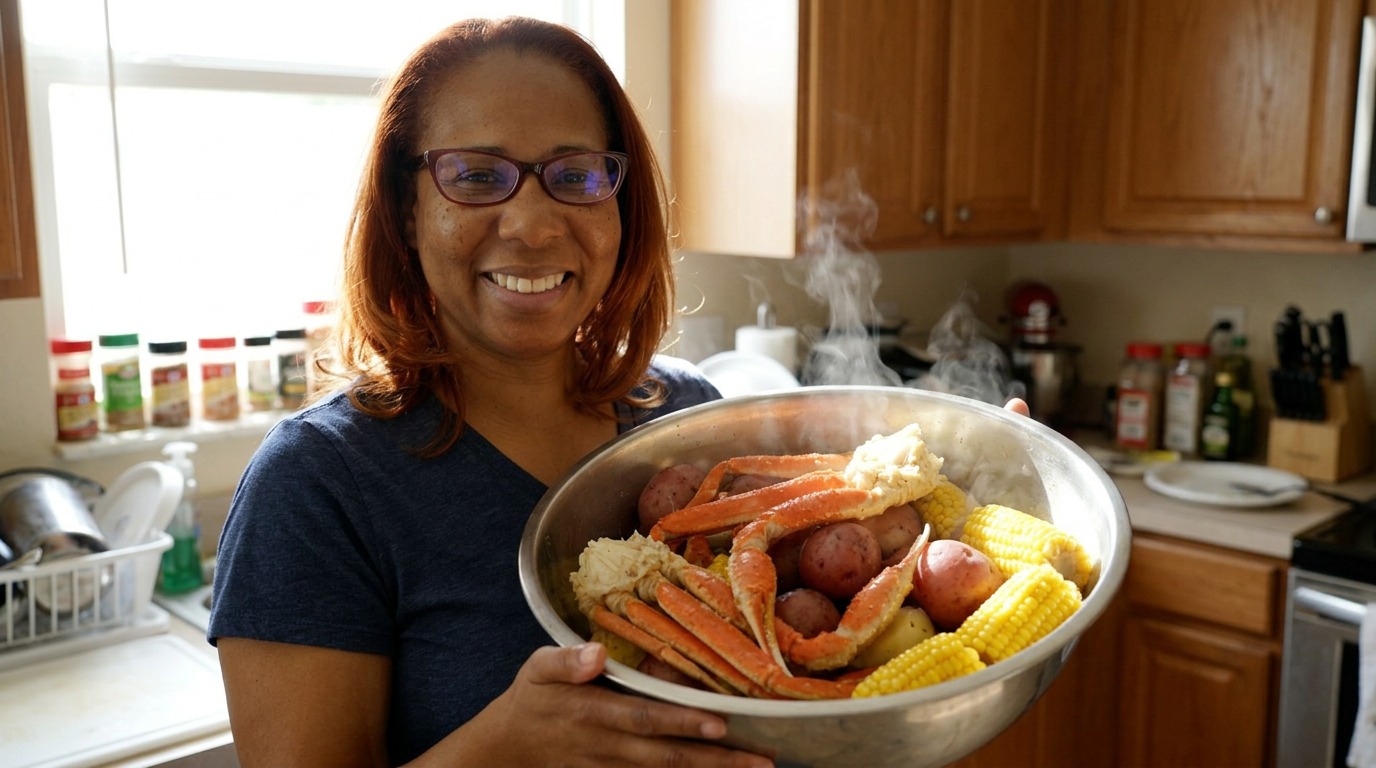
It only took about three minutes for the shrimp to cook perfectly. Any longer, and they would have shrunk into tough little nubs. I immediately turned off the heat. Using a large slotted spoon and metal tongs, I carefully transferred the steaming mountain of crab, shrimp, sausage, corn, and potatoes into a massive stainless steel mixing bowl. I poured about half of that warm, glorious garlic butter sauce directly over the hot food, tossing it gently so every crevice was coated.
Handheld shots tracking the steam rising from the pot, close-ups of the bubbling red broth, the sizzle of garlic in the butter pan, and the dramatic tossing of the seafood in the large metal bowl.
To serve, I did away with plates entirely. I lined our dining table with heavy brown butcher paper, grabbed the giant bowl, and dumped the entire shimmering feast right in the center. The steam rose up, carrying the scent of sweet corn, spiced crab, and that rich garlic butter. I drizzled the remaining sauce over the top and scattered a handful of freshly chopped parsley and lemon wedges around the pile.
My family didn't wait for an invite. We dug in with our hands, cracking open the sweet crab legs, peeling the shrimp, and using the tender potatoes to mop up the extra butter pooling on the paper. The shrimp were incredibly sweet and snappy, the sausage brought a beautiful smoky depth, and that garlic butter sauce tied everything together with a rich, savory hug. It was messy, loud, and absolutely perfect.
Looking back, the only thing I would change next time is making even more garlic butter—you can truly never have enough. Doing this at home proved that you don't need a beachside restaurant or a massive outdoor burner to make a spectacular seafood boil. All you need is one big pot, some fresh ingredients, and a willingness to get your fingers a little messy. Clean up was as simple as wrapping up the parchment paper and tossing it. Until next time, keep cooking, keep sharing, and I'll see you in the next video.
A warm wide shot of the family hands reaching into the frame, cracking crab legs and sharing food over the paper-lined table, ending with Tara smiling directly at the camera with butter on her fingers.
Shot List
| Type | Description | Audio | Duration |
|---|---|---|---|
| Close-up | Steam rising off a mountain of freshly boiled crab, shrimp, and corn coated in shimmering garlic butter. | TARA (VO): There is nothing quite like a backyard-style seafood boil brought indoors. | 5s |
| Medium | Tara standing in her Orlando kitchen, holding a bag of fresh shrimp and smiling warmly at the camera. | TARA: Hey guys, welcome back to the kitchen. Today, we are making a massive, messy seafood boil. | 10s |
| Overhead | Tara slicing a red onion and chopping red potatoes in half on a wooden cutting board. | TARA (VO): We're starting with the prep. Potatoes and corn are the foundation of any good boil. | 8s |
| Close-up | Andouille sausage being sliced into thick coin shapes on the cutting board. | TARA (VO): I love using smoky andouille sausage. It adds this amazing depth to the broth. | 6s |
| B-roll | Tara adding Old Bay seasoning, halved lemons, and onions into a large pot of boiling water. | TARA: Do not be shy with the seasoning. This water needs to taste like the ocean. | 12s |
| Timelapse | Red potatoes bubbling rapidly in the spiced, deep red boiling liquid. | TARA (VO): The potatoes go in first because they take the longest to get tender. | 10s |
| Close-up | Minced garlic hitting a pan of melted, foaming butter, sizzling gently. | TARA (VO): Now for the main event: a ridiculous amount of garlic butter sauce. | 8s |
| Detail | Whisky blending cajun spices and lemon juice into the bubbling garlic butter, turning it orange. | TARA: Look at that color. It’s rich, velvety, and smells absolutely incredible. | 7s |
| Medium | Tara carefully lowering snow crab clusters into the boiling stockpot with metal tongs. | TARA: In go the crab legs. They just need a few minutes to heat through and absorb the spices. | 9s |
| Close-up | Shrimp turning pink and curling in the bubbling broth next to the corn and sausage. | TARA (VO): Watch the shrimp closely. The second they turn pink, they are done. | 8s |
| B-roll | Tara dumping the hot, drained seafood boil from a giant metal bowl onto brown butcher paper on the table. | TARA: This is the best part. No plates allowed today! | 10s |
| Close-up | Warm garlic butter being drizzled over the pile of seafood in a slow, glossy stream. | TARA (VO): A final, generous bath of our homemade garlic butter sauce. | 7s |
| Medium | Tara cracking a crab leg, dipping the meat in a small bowl of butter, and taking a bite with a big smile. | TARA: Oh my gosh. That is sweet, spicy, and so garlicky. Perfect. | 12s |
| Detail | Hands reaching into the frame, peeling shrimp and laughing around the messy paper-covered table. | TARA (VO): Food tastes better when you eat it with your hands with the people you love. | 8s |
- Capture the steam rising off the boiling pot against a dark background to make it pop visually.
- Get macro shots of the spice grains mixing into the melted butter to show texture.
- Record the cracking sound of the crab legs close to the microphone for satisfying ASMR elements.
- Show the quick cleanup process of rolling up the butcher paper to emphasize how easy the aftermath is.
- 0:00 — Upbeat, warm acoustic guitar intro to set a cozy, inviting home-vlog mood.
- 1:15 — Calm, steady instrumental indie-folk as prep work on the cutting board begins.
- 3:30 — Slightly faster-paced, bouncy rhythm as the boiling process starts and elements are timed.
- 5:45 — Smooth, jazzy blues track during the garlic butter sauce creation to match the rich visual.
- 7:15 — High-energy, celebratory acoustic track as the boil is compiled and plated.
- 9:00 — Soft, happy acoustic outro music as family eats and Tara delivers her final thoughts.
- Use a warm, slightly saturated color grade to highlight the rich reds of the cajun spice and the bright yellows of the corn.
- Apply quick, snappy cuts during the ingredient prep to keep the introductory pace energetic.
- Add a subtle textural paper sound effect when the butcher paper is rolled out onto the table.
- Include simple, clean text overlays showing the boil timing guide (e.g., 'Potatoes: 12 mins', 'Corn/Sausage: 8 mins') for easy viewer reference.
| Call | Provider | Model | Input Tokens | Output Tokens | Compute / Credits |
|---|---|---|---|---|---|
| Script | abacus.ai | gemini-3.5-flash | 1,075 | 3,509 | — |
| Image 1 — The Pour Plan | abacus.ai | nano_banana2 | — | — | 6,753.575 |
| Image 2 — Garlic Butter Sizzle | abacus.ai | nano_banana2 | — | — | 6,753.275 |
| Image 3 — The Table Dump | abacus.ai | nano_banana2 | — | — | 6,753.3 |
I Made a Giant Seafood Boil at Home (And Saved $100)
I wanted that messy, garlic-drenched, backyard seafood boil experience without the tourist-trap price tag, so I brought the steam and the spice to my own Orlando kitchen.
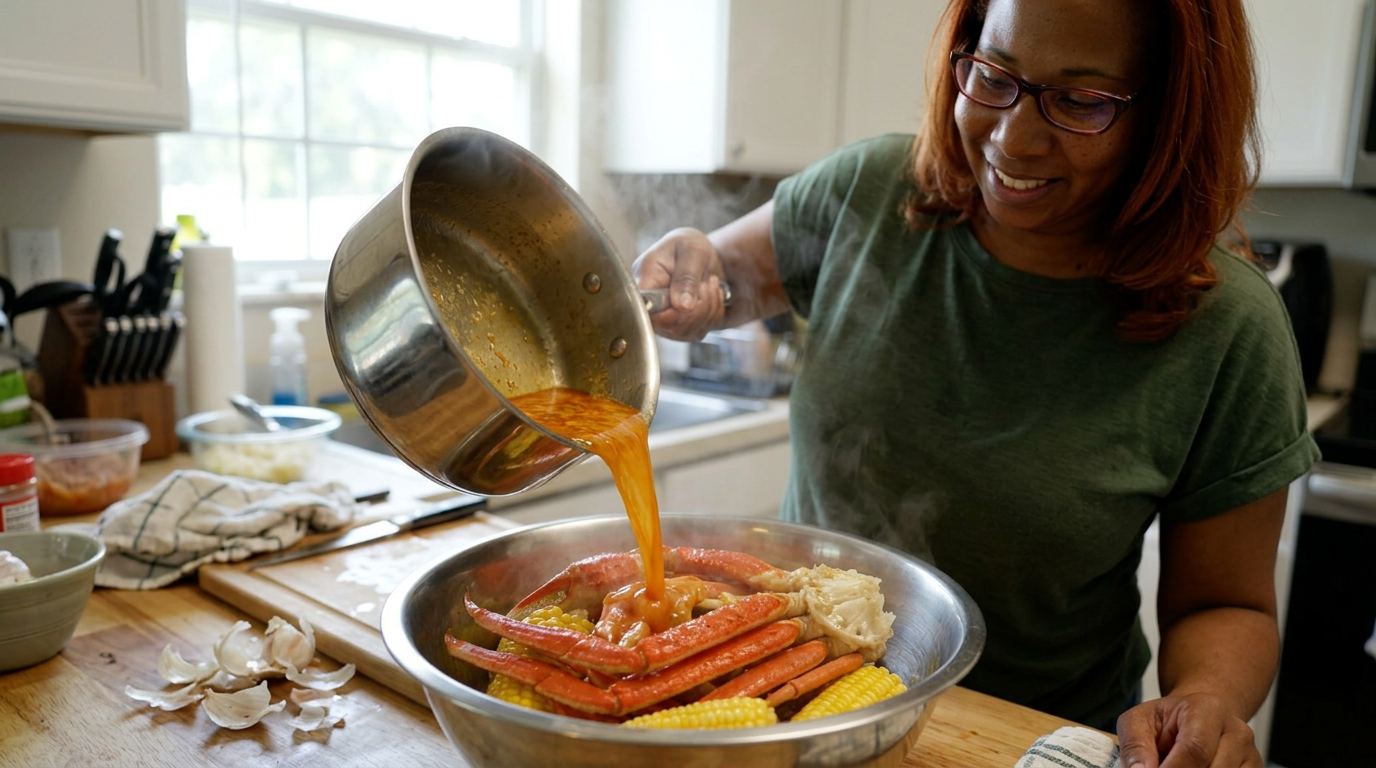
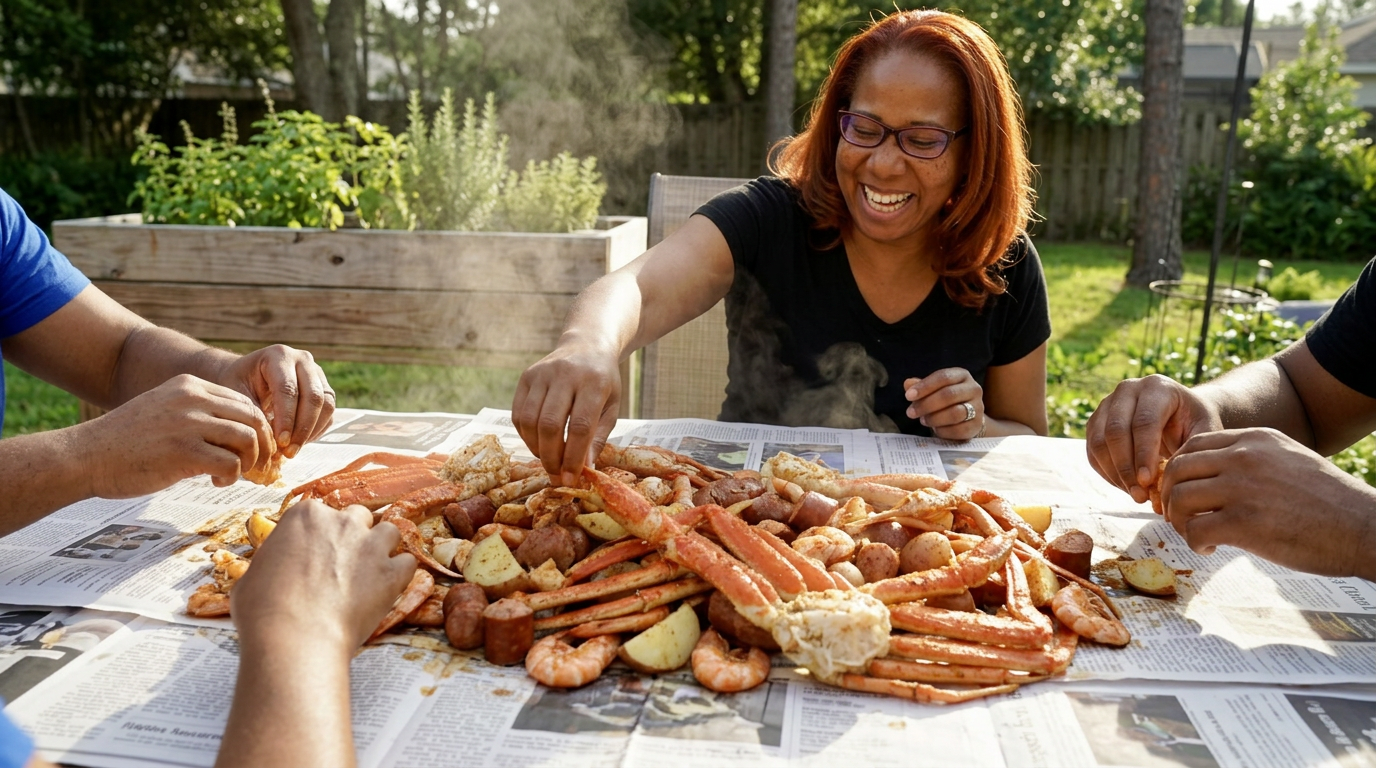
You do not need a beachside shack or a hundred-dollar bill to get the ultimate, garlic-dripping, newspaper-spread seafood boil. Today, we are bringing the low-country steam right to our kitchen counter.
Close-up of Tara cracking open a steaming, bright red snow crab leg, thick garlic-herb butter dripping back onto a newspaper-lined table.
It was one of those typical, sweltering Tuesday afternoons in Orlando where the humidity just hangs in the air, and you crave something salty, messy, and celebratory. Usually, when my family wants a seafood boil, we head over to one of those tourist spots near the parks, wait an hour in line, and pay a small fortune for a plastic bag of food. I looked at my bank account this week and said, 'No way.' We are doing this at home, from scratch, for a fraction of the price. My goal today was to feed four hungry people with sweet snow crab, plump shrimp, smoky sausage, and tender potatoes, all smothered in a rich, homemade Cajun garlic butter sauce.
I started by heading to my local Publix. The seafood counter is always my happy place, but today I had to be smart. Fresh crab is incredible, but high-quality frozen wild-caught snow crab clusters are actually much more affordable and often fresher since they are frozen right on the boat. I grabbed two pounds of those, a pound of wild-caught Gulf shrimp with the shells still on—crucial for flavor—and a package of smoky, pre-cooked Andouille sausage. For the veggies, I kept it classic: small red creamer potatoes and a few ears of fresh Florida sweet corn.
The plan seemed simple: throw everything into a massive pot of boiling water and hope for the best, right? Well, not exactly. The real danger with a seafood boil is timing. If you toss everything in at once, you end up with mushy potatoes, rubbery shrimp, and overcooked, watery crab. I needed a staging plan. Each ingredient had its own cooking timeline, and I had to be precise. Plus, I needed to master the garlic butter sauce—the glue that holds this whole messy masterpiece together. I wanted it thick, heavily spiced, and punchy enough to cut through the rich seafood.
I hauled out my massive 12-quart stockpot, which barely fits under my kitchen faucet, and filled it about halfway with water. To build a deeply flavorful base, I didn't just throw in salt. I sliced a whole lemon in half, squeezed the juice right in, and tossed the halves into the pot. Next went a whole yellow onion, halved, a smashed head of garlic, and a generous half-cup of Old Bay seasoning. As that water started to heat up, the kitchen immediately began to smell like a coastal crab shack. It was loud, spicy, and incredibly comforting.
While waiting for that giant pot to reach a rolling boil, I prepped the ingredients. I cut the Andouille sausage into thick, diagonal coins—about one-inch thick—so they would sear nicely later. I cut the ears of corn into thirds and washed the red potatoes, leaving the skins on so they wouldn't break apart in the bubbling liquid. For the shrimp, I decided to keep the shells and tails on. Cooked shell-on shrimp stay incredibly juicy and absorb all that beautiful spiced broth, plus peeling them at the table is half the fun.
Once the pot was roaring, I dropped the red potatoes in first. They are the marathon runners of this dish, needing a solid fifteen minutes to cook through. I set my timer, hovering over the stove, watching the red skins bob in the orange, spice-flecked water. About ten minutes in, I poked a potato with a paring knife. It was resisting slightly, which was my cue to add the Andouille sausage and the corn. The sweetness of the corn and the smoky fat of the sausage immediately mingled with the Old Bay broth, creating a rich layer of flavor on top of the water.
Now came the nerve-wracking part: the seafood. Snow crab clusters are already fully cooked when you buy them frozen, so they really only need about five to six minutes to thaw and heat through in the boiling liquid. I gently nestled the crab clusters into the pot, pushing them down with a wooden spoon so they were fully submerged. The steam rising from the pot was intense, carrying the smell of ocean brine, sweet corn, and heavy spices straight into my face.
With only two minutes left on the crab, I turned off the heat entirely and dumped in the raw shrimp. The residual heat of that massive pot is more than enough to cook shrimp perfectly without turning them into rubber. I watched them turn from a translucent gray to an elegant, opaque pink in less than ninety seconds. I quickly grabbed my huge spider strainer and began scooping everything out into a massive metal mixing bowl. I had to work fast to stop the cooking process; leaving them in the hot broth even a minute too long would ruin the texture.
With the boil resting, I turned my attention to the real star of the show: the Cajun garlic butter sauce. I placed a saucepan over medium-low heat and melted three whole sticks of unsalted butter. Yes, three sticks. This is not a diet recipe! Once melted, I tossed in two entire heads of finely minced garlic—about twenty cloves. The key here was patience. I kept the heat low to gently cook the garlic until it was soft, fragrant, and translucent, making sure not to let it brown or turn bitter.
To turn this melted butter into a thick, clinging sauce, I whisked in a heavy tablespoon of Old Bay, a tablespoon of smoked paprika for color, a teaspoon of cayenne pepper for heat, a squeeze of fresh lemon juice, and a splash of the boiling liquid from the big pot. The starch from the potato water helped the butter emulsify into a rich, glossy, bright orange sauce that smelled absolutely heavenly. I gave it a quick taste off a wooden spoon—it was salty, sweet, intensely garlicky, and had a slow-burning kick at the back of my throat.
I took half of that glorious garlic butter and poured it directly over the metal bowl of hot seafood, tossing everything gently with tongs until every crevice of the crab shells, every shrimp, and every potato was coated in a shimmering, orange glaze. The remaining butter was poured into small ramekins for dipping. By this time, my husband and kids had wandered into the kitchen, drawn in by the unmistakable, mouth-watering aroma of garlic and spiced steam.
Handheld shots tracking Tara moving between the massive boiling pot and the sizzling butter saucepan, capturing steam rising, spices being whisked, and the dramatic tossing of the seafood in the metal bowl.
To serve this the right way, I bypassed our normal dinner plates entirely. I went out to the recycling bin, grabbed yesterday's Orlando Sentinel, and lined our outdoor patio table with three layers of newspaper. I carried the massive bowl outside, took a deep breath, and dumped the entire shimmering, steaming feast right in the center of the table. It was a beautiful, chaotic mountain of bright red crab, pink shrimp, charred sausage, yellow corn, and red potatoes, all glistening with garlic butter.
We sat down, cracked open a couple of cold drinks, and just dug in with our hands. Crack, peel, dip, repeat. The crab meat was incredibly sweet and slipped easily out of the shell, dripping with that spicy butter. The shrimp were plump and snappy, and the potatoes had absorbed all that beautiful seasoned broth. There is something so special about eating food this way—no manners, no phones, just sticky fingers, laughter, and a shared mess. It felt like a mini-vacation in our own backyard.
Looking back, I am so glad I didn't spend a hundred dollars at a restaurant. This homemade version was fresher, more customizable, and honestly, way more fun to eat. Next time, I think I'll add some littleneck clams or maybe some crawfish to the mix, but this classic combination was absolutely perfect. If you want to bring your family together for a meal they won't forget, skip the restaurant, prep your big pot, and make a mess at home. You can find the full ingredient list and step-by-step instructions in the description box below. Don't forget to subscribe for more real home cooking, and I'll see you next week!
A slow, sweeping overhead shot of the messy, half-eaten seafood pile on the newspaper, transitioning to Tara smiling and waving goodbye to the camera with butter on her hands.
Shot List
| Type | Description | Audio | Duration |
|---|---|---|---|
| Close-up | Thick garlic butter dripping off a bright red crab leg onto newspaper. | [Sizzling, cracking sound] TARA (V.O.): You do not need a beachside shack or a hundred-dollar bill... | 5s |
| Wide | Tara in her Orlando kitchen, waving warmly at the camera with her kitchen counter prepped behind her. | TARA: Hey everyone, welcome back to the kitchen! Today, we are making a massive, messy seafood boil... | 10s |
| Detail | Bag of frozen snow crab clusters and fresh shrimp being unpacked on the counter next to a Publix grocery bag. | TARA (V.O.): I wanted that classic, garlic-drenched experience without the tourist-trap price tag... | 8s |
| Overhead | Tara chopping red creamer potatoes and cutting Andouille sausage on a wooden cutting board. | TARA (V.O.): We are prepping our potatoes, smoky sausage, and fresh sweet corn... | 12s |
| Close-up | Spices (Old Bay, onion, lemon) being dropped into a massive, steaming pot of water. | [Splashing water, bubbling sounds] TARA (V.O.): First, we build a heavy spice base with lemon, garlic, and plenty of Old Bay. | 10s |
| Timelapse | The pot coming to a rolling boil, red potatoes bobbing in the bright orange water. | TARA (V.O.): Timing is everything here. Potatoes go in first because they take the longest... | 15s |
| Medium | Tara sliding the pre-cooked snow crab clusters into the bubbling pot with tongs. | TARA: In go the crab legs. They only need about five minutes to heat through and absorb that broth. | 12s |
| Close-up | Raw grey shrimp turning bright pink in the hot residual water of the pot. | [Steam rising sound] TARA (V.O.): I turn the heat off and drop the shrimp. They cook perfectly in the residual warmth. | 8s |
| Detail | Three sticks of butter melting in a saucepan with a mountain of minced garlic bubbling gently. | [Soft bubbling sound] TARA (V.O.): Now, the real star of the show: the garlic butter sauce. Twenty cloves of garlic, low and slow. | 12s |
| Close-up | Whisking smoked paprika, cayenne, and lemon juice into the glossy garlic butter. | TARA: Look at that color! It's rich, spicy, and emulsified with a splash of our potato water. | 10s |
| B-roll | The cooked seafood being tossed in a giant metal bowl with the orange sauce coating everything. | [Clanging metal, squishing sounds] TARA (V.O.): Pouring that liquid gold all over our fresh boil... | 10s |
| Wide | The dramatic dump of the steaming seafood boil onto the newspaper-covered table outside. | [Splat, steam rising] TARA: Oh my goodness, look at this mountain of food! | 15s |
| Medium | Tara's family reaching in, cracking crab claws, and dipping potatoes into the small butter cups. | [Laughter, cracking shell sounds] TARA (V.O.): No plates, no manners, just sticky fingers and great memories. | 15s |
| Close-up | Tara taking a bite of a juicy shrimp, nodding and smiling happily at the camera. | TARA: Mmm! The shrimp are so snappy and that garlic kick is unbelievable. | 10s |
- Capture extreme close-ups of the boiling water bubbling around the red potato skins to show texture.
- Film the steam rising from the pot against a dark background if possible for dramatic visual effect.
- Get slow-motion footage of the crab leg cracking open, showing the juicy meat inside.
- Show the messy cleanup at the end—crumpling up the newspaper to emphasize how easy the cleanup is.
- 0:00 — Upbeat, warm acoustic guitar and light percussion to introduce the vlog.
- 1:30 — Smooth, rhythmic jazz-pop as Tara preps the vegetables and sausage.
- 3:45 — Tension-building, slightly faster acoustic tempo as the giant pot begins to boil.
- 5:15 — Cozy, low-fi chill beats during the slow melting of the garlic butter.
- 7:00 — High-energy, celebratory brass and acoustic music as the seafood is tossed.
- 8:30 — relaxed, happy backyard guitar music as the family eats and enjoys the boil.
- Use quick, snappy cuts during the ingredient prep to keep the pacing energetic and fun.
- Add a warm, slightly golden color grade to the outdoor eating scenes to emphasize the sunny Florida afternoon vibe.
- Include simple, clean text overlays showing the cooking times for each ingredient (Potatoes: 15 mins, Crab: 5 mins, Shrimp: 2 mins).
- Keep the natural cooking sounds (bubbling water, cracking shells, sizzling butter) loud in the audio mix during B-roll sequences.
| Call | Provider | Model | Input Tokens | Output Tokens | Compute / Credits |
|---|---|---|---|---|---|
| Script | abacus.ai | gemini-3.5-flash | 1,075 | 3,909 | — |
| Image 1 — The Golden Pour | abacus.ai | nano_banana2 | — | — | 6,753.65 |
| Image 2 — Tara's Kitchen Setup | abacus.ai | nano_banana2 | — | — | 6,753.675 |
| Image 3 — The Backyard Feast | abacus.ai | nano_banana2 | — | — | 6,753.575 |
I'm Banning Lettuce From My Salads (And Making These 3 Instead)
I got so tired of soggy, sad romaine sitting in my Orlando fridge, so I spent a week making three incredibly textured, lettuce-free salads that actually taste better the next day.
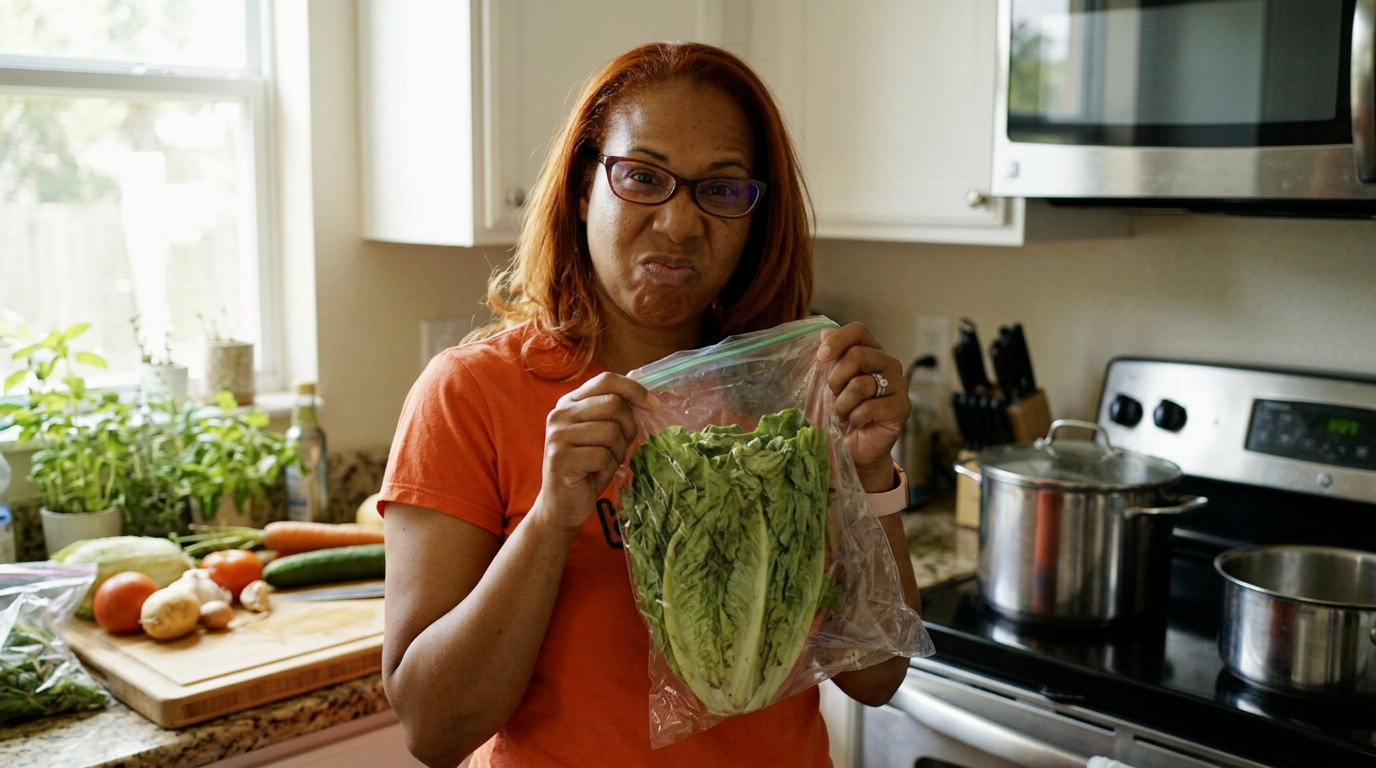
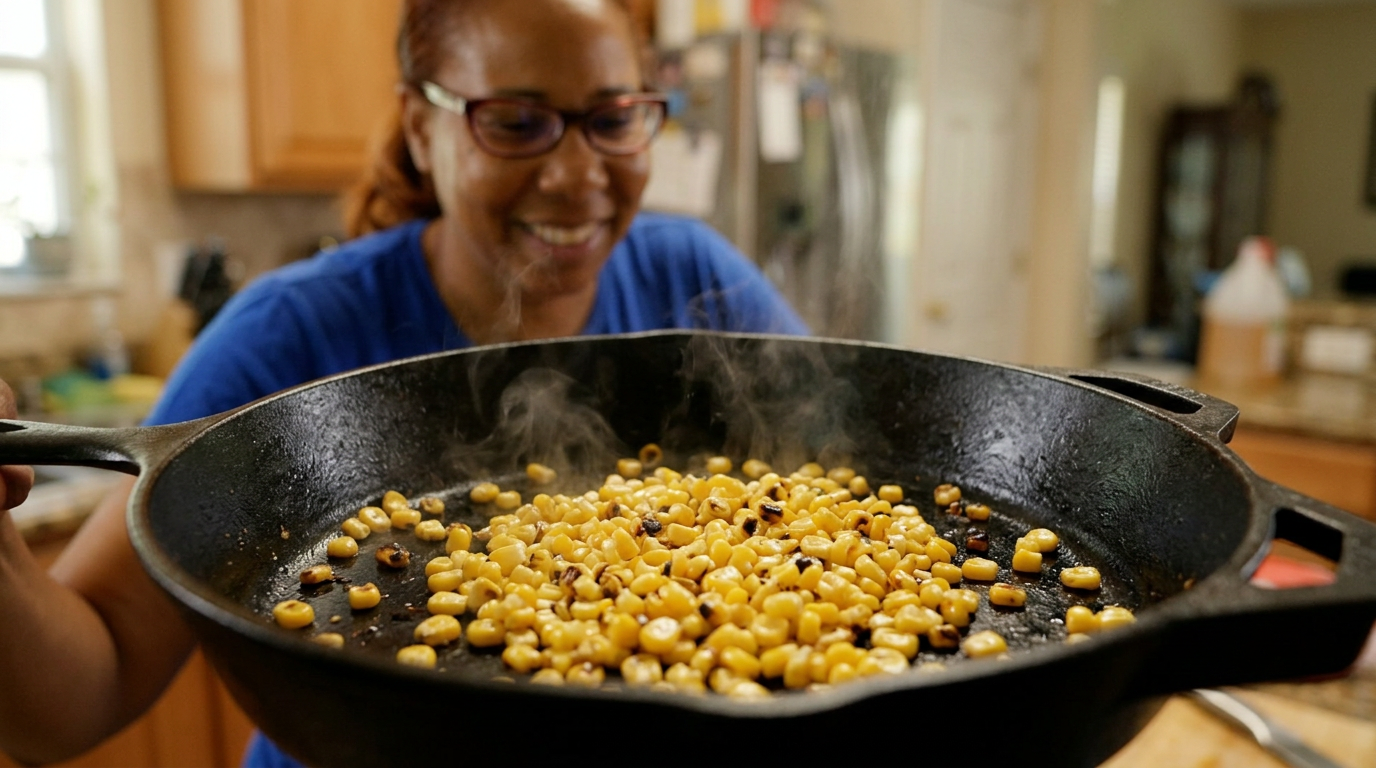
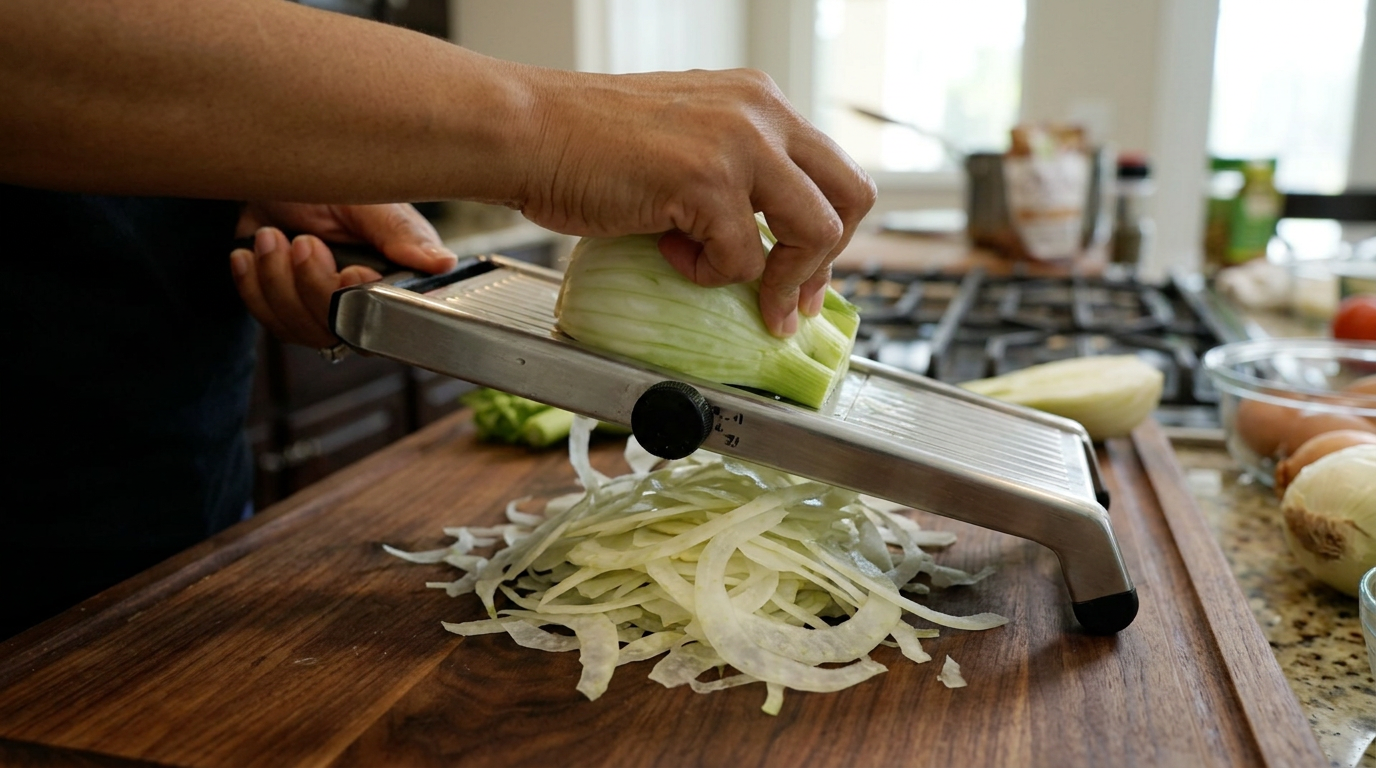
Let's be honest: lettuce is the weakest link in the salad family. Today, we are banning the leafy greens and making three vibrant, crunchy salads that actually get better as they sit in the fridge.
Tara stands in her sunlit kitchen, holding a sad, limp plastic tub of pre-washed spring mix, sighs, and dramatically tosses it into the compost bin before smiling directly at the camera.
It was a Tuesday afternoon here in Orlando, the kind where the humidity clings to your skin the second you step outside, and the absolute last thing I wanted to do was turn on the oven. I opened my fridge, hoping for inspiration, and there it was: a half-empty, slightly slimy container of baby spinach staring back at me. It felt like a chore. That's when I realized we've been conditioned to think a salad has to start with a bed of green leaves that wilt if you even look at them wrong. I decided right then and there to banish lettuce from my crisper drawer for the week.
The plan was simple but ambitious. I wanted to create three distinct, hyper-textured salads where vegetables, grains, and cheeses were the stars, not just the supporting cast. I needed a crunchy, bright Mediterranean chickpea and cucumber salad that could survive a backyard picnic; a charred corn, black bean, and cotija salad inspired by the street corn I love getting at the local food trucks downtown; and a shaved fennel, celery, and parmesan salad with a sharp lemon vinaigrette that feels like something you'd pay twenty dollars for at a trendy bistro.
The stakes were surprisingly high for a weekday lunch. If these failed, I was looking at a week of sad, dry sandwiches, and my husband, Tony, who is a self-proclaimed 'salad skeptic,' was going to be my tough-to-please taste tester. I cleared my wooden cutting board, sharpened my favorite chef's knife, and lined up my ingredients. It was time to prove that the best salads don't need a single leaf of lettuce to shine.
I started with the Mediterranean chickpea salad, which is all about texture and contrast. I drained two fifteen-ounce cans of chickpeas, rinsing them thoroughly in the sink until the water ran clear. The key here is drying them completely; if they're wet, the dressing won't stick, and you lose that clean bite. I dumped them onto a clean kitchen towel and gently rolled them around. For the crunch, I chose English cucumbers because their skin is thin and sweet, meaning no tedious peeling required. I diced them into neat half-inch cubes, matching the size of the chickpeas.
Next came the red onion. Now, I love onion flavor, but raw red onion can be incredibly aggressive. To tame its bite, I used a trick my grandmother taught me: I diced it finely and soaked the pieces in a small bowl of ice water for ten minutes while I prepped the rest. It takes away that sharp, lingering sulfur burn but keeps the satisfying crunch. I tossed the cucumbers, drained onions, a pint of halved sweet cherry tomatoes, and a cup of briny Kalamata olives into my largest ceramic mixing bowl.
For the dressing, I kept it classic: a third of a cup of good Greek olive oil, the juice of one fat lemon, two minced garlic cloves, dried oregano, and a generous pinch of kosher salt. As I whisked it, the kitchen filled with that sharp, citrusy aroma. I poured it over the vegetables, crumbled in an entire block of high-quality sheep's milk feta—none of that pre-crumbled stuff that tastes like sawdust—and folded it all together. It looked gorgeous, a mosaic of red, green, and deep purple.
The second salad was the charred corn and black bean rustic bowl. I wanted smoky, sweet, and creamy elements. Since I wasn't firing up the backyard grill in the middle of a sudden afternoon rainstorm, I heated my seasoned cast-iron skillet on the stovetop until it was smoking hot. I tossed in three cups of frozen sweet corn—no oil, just dry heat. Within five minutes, the kernels started to pop and develop these beautiful, dark-brown charred spots. The smell was incredible, like sweet, toasted popcorn.
I slid the charred corn into a bowl to cool down so it wouldn't cook the other ingredients. Once cool, I added a drained can of black beans, a diced red bell pepper for sweetness, and a big handful of chopped fresh cilantro. For the dressing, I whisked together mayonnaise, sour cream, lime juice, chili powder, and a dash of hot sauce. This is where I made a minor mistake: I originally added too much lime, making the dressing split slightly. I corrected it quickly by whisking in another tablespoon of sour cream to emulsify the mixture back to a velvety state.
To finish the corn salad, I crumbled in a generous cup of salty cotija cheese. It immediately absorbed the creamy dressing, creating this rich, street-corn-style coating over every single kernel. I took a quick spoonful to test the seasoning. It needed a pinch of smoked paprika and a touch more salt, which I quickly adjusted. This salad felt hearty enough to be a main course, and I knew the flavors would only deepen as it sat in the fridge overnight.
Finally, I tackled the shaved fennel and celery salad, which is the ultimate test of knife skills and texture. Fennel can be intimidating with its strong anise, licorice-like aroma, but when sliced paper-thin, it becomes incredibly delicate and sweet. I sliced off the tough stalks, cut the bulb in half, and used my mandoline to shave it into translucent ribbons. If you don't have a mandoline, just take your time with a very sharp knife. I did the same with four stalks of celery, slicing them on a steep diagonal for elegant, elongated shapes.
I tossed the shaved fennel and celery into a bowl with a handful of toasted pine nuts and a cup of flat-leaf parsley leaves. The dressing was a simple, bright lemon and white balsamic vinaigrette with a touch of honey to balance the fennel's natural sweetness. As I tossed the delicate ribbons in the dressing, I finished the dish by shaving large, paper-thin shards of Parmigiano-Reggiano over the top using a vegetable peeler. The contrast of the pale green vegetables and the rich, golden cheese looked incredibly sophisticated.
B-roll shows close-ups of hands dicing cucumbers, onions soaking in ice water, corn charring and popping in a hot cast-iron skillet, and a mandoline shaving translucent ribbons of fennel.
With all three salads completed, I lined up the bowls on my kitchen island. The contrast was stunning: the bright, Mediterranean mosaic, the rich and smoky street-corn bowl, and the elegant, pale green shaved fennel ribbon salad. There wasn't a single green leaf in sight, yet they looked fresher and more inviting than any traditional salad I’d made in months. I called Tony into the kitchen for the ultimate test.
We started with the Mediterranean chickpea salad. Tony took a big spoonful and immediately pointed out how nice it was not to fight with large, floppy lettuce leaves. The cucumbers were incredibly crisp, and the feta had softened slightly into the dressing. Next, the charred corn salad was an absolute hit—smoky, creamy, and packing a punch from the chili and lime. But the real surprise was the shaved fennel salad. Tony, who usually avoids fennel, loved the crunch of the celery combined with the nutty parmesan and toasted pine nuts.
This week-long experiment proved that lettuce is completely optional. These salads didn't wilt, they didn't get soggy, and we actually enjoyed eating the leftovers three days later. Next time, I think I'll add some toasted chickpeas to the fennel salad for an extra layer of crunch, but for now, my crisper drawer is officially a lettuce-free zone. If you're tired of throwing away half-eaten bags of greens, give one of these a try. Your weekday lunches will thank you.
Tara and Tony sit at the kitchen island, laughing and sharing bites from the three bowls. Camera zooms in on a perfect forkful of the charred corn and cotija salad.
Shot List
| Type | Description | Audio | Duration |
|---|---|---|---|
| Medium | Tara stands in her bright kitchen, holding a limp, sad bag of spring mix and looking disappointed. | Let's be honest: lettuce is the weakest link in the salad family. Today, we are banning the leafy greens... | 5s |
| Close-up | Limp greens fall into a green compost bin with a soft thud. | ...and making three vibrant, crunchy salads that actually get better as they sit in the fridge. | 3s |
| Wide | Tara stands behind her kitchen island, gesturing to an array of colorful vegetables, chickpeas, corn, and cheeses. | It was a Tuesday afternoon here in Orlando, hot and humid, and the absolute last thing I wanted to do was turn on the oven. | 8s |
| Close-up | Cucumbers being sliced into precise, small half-inch cubes on a wooden cutting board. | For the crunch, I chose English cucumbers because their skin is thin and sweet, meaning no tedious peeling required. | 5s |
| Detail | Finely diced red onions being submerged into a small glass bowl filled with icy water. | To tame its bite, I used a trick my grandmother taught me: I diced it finely and soaked the pieces in a small bowl of ice water... | 6s |
| Overhead | Whisking olive oil, lemon juice, minced garlic, and oregano in a small glass bowl until emulsified. | For the dressing, I kept it classic: a third of a cup of good Greek olive oil, the juice of one fat lemon, garlic, and oregano. | 6s |
| Close-up | A block of Greek feta cheese being crumbled by hand over the colorful chickpea and cucumber mixture. | I folded it all together with a whole block of high-quality sheep's milk feta. It looked like a gorgeous, Mediterranean mosaic. | 5s |
| B-roll | Yellow corn kernels popping and charring in a dry, hot cast-iron skillet, sending up wisps of light steam. | I tossed in three cups of sweet corn into a smoking hot cast-iron skillet. Within minutes, the kernels started to char. | 7s |
| Close-up | A wooden spoon stirring black beans, charred corn, red bell peppers, and fresh cilantro in a large bowl. | Once cool, I added a drained can of black beans, a diced red bell pepper for sweetness, and a big handful of chopped fresh cilantro. | 6s |
| Detail | A mandoline slicing paper-thin, translucent ribbons of fresh fennel bulb onto a cutting board. | Fennel can be intimidating, but when sliced paper-thin, it becomes incredibly delicate and sweet. | 5s |
| Close-up | A vegetable peeler shaving wide ribbons of Parmigiano-Reggiano over the shaved fennel and celery salad. | I finished the dish by shaving large, paper-thin shards of Parmigiano-Reggiano over the top. | 6s |
| Medium | Tara and her husband Tony sitting at the kitchen island, tasting the salads and nodding in approval. | Tony took a big spoonful and immediately pointed out how nice it was not to fight with large, floppy lettuce leaves. | 8s |
| Close-up | A fork lifting a perfect bite of the charred corn salad, showing the creamy coating and cotija crumbles. | The charred corn salad was an absolute hit—smoky, creamy, and packing a punch from the chili and lime. | 5s |
| Wide | Tara smiling at the camera, holding up the bowl of Mediterranean chickpea salad, with the other two bowls sitting beautifully on the counter. | Next time, I think I'll add some toasted chickpeas to the fennel salad, but for now, my crisper drawer is a lettuce-free zone. See you next week! | 10s |
- Capture the condensation on the glass bowl when soaking the red onions in ice water to emphasize the heat of the Florida afternoon.
- Get a slow-motion shot of the lemon vinaigrette being drizzled over the translucent fennel and celery ribbons.
- Film the crumbling of the block feta in extreme close-up to show the creamy, non-chalky texture of high-quality cheese.
- Show a quick montage of the storage containers being snapped shut and stacked in the fridge to prove these are meal-prep friendly.
- 0:00 — Upbeat, quirky acoustic guitar and light percussion to match the lighthearted intro.
- 1:15 — Smooth, breezy indie-pop lounge music starts as Tara introduces the Mediterranean salad plan.
- 3:30 — Warm, sunny Spanish classical guitar joins as the ingredients for the chickpea salad are prepped.
- 5:15 — Slightly faster, rhythmic jazz drumbeat and bassline as the corn starts charring in the hot skillet.
- 7:45 — Soft, elegant piano and acoustic strings play during the delicate shaving of the fennel and celery.
- 9:00 — Cheerful, celebratory acoustic indie pop swells as Tony enters for the tasting test and final wrap-up.
- Keep the transition cuts quick and rhythmic during the chopping sequences to maintain high energy.
- Apply a warm, sunny color grade to emphasize the bright, fresh ingredients of the Orlando setting.
- Add clean, minimalist text overlays indicating the exact measurements of ingredients as they are added to the bowls.
- Incorporate a subtle sizzling sound effect in post-production to enhance the sensory impact of the corn charring in the cast-iron skillet.
| Call | Provider | Model | Input Tokens | Output Tokens | Compute / Credits |
|---|---|---|---|---|---|
| Script | abacus.ai | gemini-3.5-flash | 1,072 | 3,938 | — |
| Image 1 — The Lettuce Rejection | abacus.ai | nano_banana2 | — | — | 6,754.125 |
| Image 2 — The Skillet Sizzle | abacus.ai | nano_banana2 | — | — | 6,753.675 |
| Image 3 — The Shaved Fennel Ribbon | abacus.ai | nano_banana2 | — | — | 6,753.825 |
I Tried Making Jerk Chicken on a Sheet Pan (Without Losing the Smoke)
I wanted those deep, smoky Jamaican jerk flavors on a chaotic Tuesday night, so I bet everything on a single, crowded sheet pan and a very hot oven.
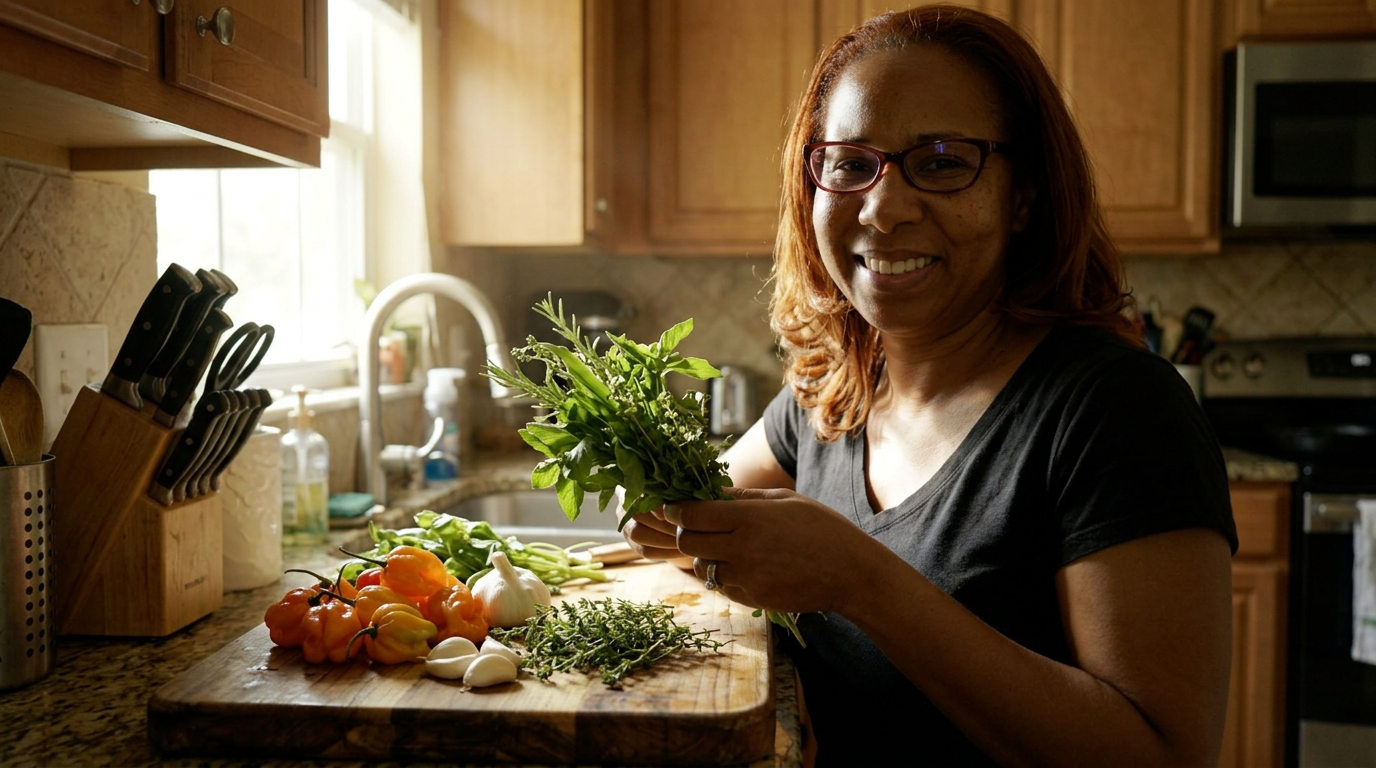
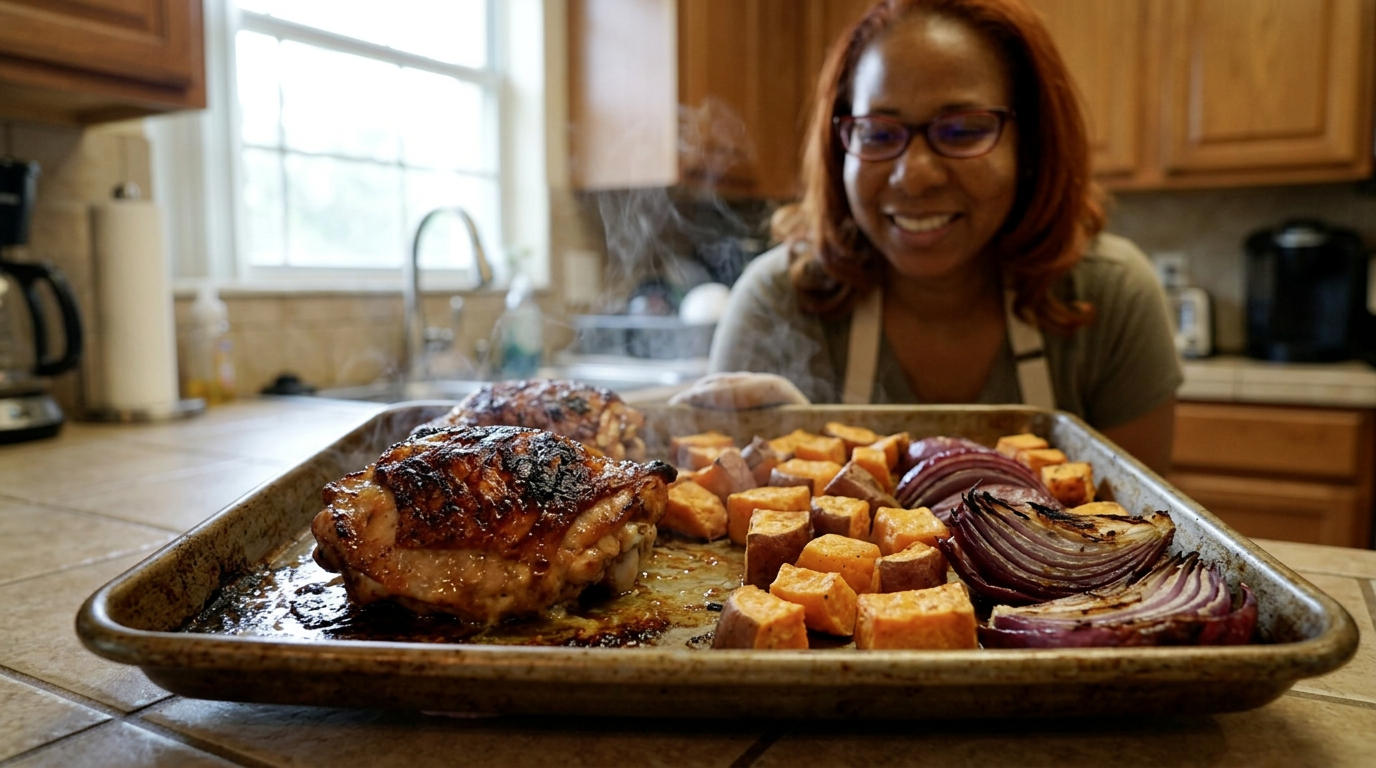
People will tell you that real jerk chicken requires a metal drum, pimento wood, and four hours of open-air smoke. They aren't wrong, but it's 6:30 PM on a rainy Tuesday in Orlando, and I have exactly one sheet pan and a massive craving.
Slightly shaky handheld shot of Tara in her kitchen, holding up a charred, glistening chicken thigh with tongs as steam rises directly into the camera lens.
It was one of those humid, heavy Central Florida afternoons where the sky turns the color of bruised plums by 4:00 PM. I had just gotten back from the local Caribbean market off Orange Avenue with a bag of fresh scotch bonnet peppers, a bunch of scallion, and a heavy craving for the kind of jerk chicken that makes your forehead sweat and your heart happy. My uncle used to slow-smoke chicken over charcoal for hours, but tonight, I didn't have hours. I had about forty-five minutes before my family started scavenging the pantry for cereal.
My mission was simple but risky: translate that deeply layered, aromatic, smoky-sweet jerk profile into a quick weeknight sheet-pan dinner. The stakes were high because bad jerk chicken is just sad, dry baked chicken with a bit of cinnamon on it. I needed high heat, a marinade thick enough to cling and caramelize, and a smart layout so the vegetables wouldn't turn into soggy mush under the dripping chicken fat.
My plan centered around bone-in, skin-on chicken thighs. They are incredibly forgiving under intense heat and carry enough fat to baste the sweet potatoes and bell peppers sharing the pan. I decided to make my own quick marinade using a food processor rather than buying a bottled sauce, because you just can't replicate the bright, sharp bite of fresh ginger, garlic, thyme, and scotch bonnets. The real challenge was going to be the crowded pan—if I packed it too tight, everything would steam instead of roast.
I started by tossing my marinade ingredients into the food processor. I used six scallions, a two-inch thumb of fresh ginger, five garlic cloves, a tablespoon of allspice berries—which I crushed first in my mortar and pestle to release those warm, clove-like oils—a splash of soy sauce, brown sugar, lime juice, and a drizzle of vegetable oil. Then came the gatekeeper: the scotch bonnet pepper. I decided to use one whole pepper, seeds included, and half of another. A quick food safety tip here: please, for the love of your eyes, wear gloves when handling these, or at least wash your hands with dish soap immediately after. I once forgot, rubbed my eye, and spent twenty minutes crying over my sink.
The smell of that marinade hit me the second I pulsed it. It was incredibly fragrant—herby from the thyme, sharp from the fresh ginger, and fiercely spicy. I patted four large chicken thighs completely dry with paper towels. This is crucial because moisture is the enemy of crispy skin. I made a few deep slashes in the skin of each thigh so the marinade could penetrate deep into the meat, then rubbed the green-speckled paste all over them, making sure to get under the skin too.
While the chicken sat for a quick fifteen-minute marinade at room temperature, I prepped the supporting cast. I peeled and cubed two large sweet potatoes into one-inch chunks and sliced a red bell pepper and a red onion into thick wedges. I wanted them to finish cooking at the exact same time as the chicken, so size consistency was everything. If the sweet potatoes were too big, they'd still be chalky when the chicken was done; too small, and they'd dissolve into baby food.
Then came the assembly, and this is where I made my first tactical mistake. I grabbed my standard half-sheet pan, dumped the sweet potatoes and peppers on it, and nestled the four chicken thighs right in the center. I looked at it and winced. It was packed wall-to-wall. A crowded pan meant the vegetables would catch all the escaping steam from the chicken, turning them soggy. I needed that high-heat roasting environment to mimic the dry heat of a grill.
So, I made an executive decision. I pulled half of the sweet potatoes off the pan and saved them for another day. I spaced out the remaining potatoes and peppers, leaving clear channels of metal showing around the chicken thighs. This allowed the 425-degree oven air to circulate freely. I drizzled the vegetables with a little olive oil, salt, and black pepper, keeping them simple since the dripping chicken fat and runaway marinade would season them as they roasted.
I slid the pan onto the middle rack of my preheated oven and set the timer for 35 minutes. Around the 20-minute mark, the kitchen started smelling absolutely unbelievable. It was that unmistakable, heady aroma of toasted allspice, sweet onions, and roasting chicken fat. But when I peeked through the oven glass, I noticed a problem: the tops of the chicken thighs were browning beautifully, but the sweet potatoes directly underneath the chicken were sitting in a pool of liquid and looking a bit pale.
To solve this, I carefully pulled the hot sheet pan out, used a metal spatula to toss the vegetables, turning them over so they could brown on their other sides, and basted the chicken skin with some of the rendered fat pooling on the sheet. I popped it back in but cranked the oven to a high broil for the final four minutes. I stood right there, watching through the glass, because broilers can go from 'perfectly charred' to 'fire alarm' in thirty seconds.
The chicken skin bubbled and blistered, turning a deep, dark mahogany color with beautiful charred edges that looked incredibly close to what you get off a real charcoal grill. I pulled the pan out, and the sizzle was loud enough to hear over the hum of my fridge. Before touching anything, I checked the thickest part of the chicken thigh with my digital thermometer. It registered 178 degrees Fahrenheit. While breast meat dries out past 165, chicken thighs are actually much juicier and have a better texture when cooked to 175 or 180 degrees because it breaks down the connective tissue.
A fast-paced sequence showing Tara peeling ginger with a spoon, the food processor pulsing the vibrant green marinade, hands in gloves rubbing the paste onto chicken, and the sizzling pan sliding out of a glowing oven.
I let the chicken rest on the pan for about seven minutes to let the juices redistribute. If you cut into hot chicken immediately, all that liquid just runs out onto the pan, leaving the meat dry. To finish the dish, I squeezed fresh lime juice over the whole pan to cut through the rich fat and scattered a handful of fresh cilantro and sliced green onions over the top for a bright, fresh contrast.
I plated a charred chicken thigh alongside a generous scoop of the roasted sweet potatoes and caramelized red onions. The sweet potatoes had absorbed the runaway jerk marinade and chicken fat, turning crispy on the edges and incredibly sweet and spicy. My first bite of the chicken was a total relief. The skin shattered, the meat was incredibly juicy, and the heat from the scotch bonnet hit me at the back of my throat—sharp but balanced by the warm sweetness of the allspice and brown sugar. It wasn't my uncle's smoked chicken, but for a 45-minute weeknight dinner, it was a massive triumph.
Next time, I think I'll toss some fresh pineapple chunks onto the pan during the last ten minutes of roasting to add a bright, acidic sweetness that would play beautifully with the heat of the scotch bonnet. Clean-up took exactly five minutes because of the single pan, which meant I actually got to sit on my porch, listen to the evening rain, and enjoy my dinner in peace. If you want big, bold island flavors without the weekend commitment, this is your sign to crowd a sheet pan tonight.
Tara taking a big, satisfying bite of the chicken, nodding in approval, then smiling directly at the camera as the camera slowly pulls back to show the messy, beautiful reality of her kitchen counter.
Shot List
| Type | Description | Audio | Duration |
|---|---|---|---|
| Wide | Tara stands in her bright Orlando kitchen as afternoon rain streaks the window behind her. She introduces the sheet-pan jerk chicken concept. | Hey everyone, welcome back to the kitchen. Today, we are chasing big, smoky Jamaican jerk flavor on a tight weeknight timeline. | 15s |
| Close-up | On a wood cutting board, Tara's hands slice green onions and garlic. Fresh thyme and bright orange scotch bonnets sit nearby. | We are making our own marinade because the bottled stuff just doesn't have that fresh, vibrant kick we need. | 12s |
| Detail | Tara uses a mortar and pestle to crush whole allspice berries, showing the texture changing from round seeds to a coarse powder. | Crushing whole allspice berries releases those warm, aromatic oils. It smells like a mix of cloves, cinnamon, and nutmeg. | 10s |
| Close-up | The ingredients tumble into a food processor. Tara pulses it until it forms a thick, textured, emerald-green paste. | In go the scallions, ginger, garlic, our crushed allspice, soy sauce, lime, and one very potent scotch bonnet pepper. | 15s |
| Overhead | Four raw bone-in, skin-on chicken thighs on a cutting board. Tara cuts deep diagonal slashes into the skin. | I'm slashing the skin here so this delicious, spicy marinade can sink deep into the meat, not just sit on top. | 12s |
| Detail | Wearing black prep gloves, Tara thoroughly rubs the green marinade over and under the chicken skin. | Make sure you get under the skin too. And seriously, wear gloves. Scotch bonnets do not play around. | 14s |
| Medium | Tara chops sweet potatoes into even cubes and slices red onions into thick, rustic wedges. | While that marinates, we prep our sweet potatoes and red onions. Keeping them uniform means they cook at the exact same rate. | 18s |
| Close-up | Tara piles chicken and veggies onto a single sheet pan, looking closely at how crowded it is, then reacts with a grimace. | And here is our classic mistake: overcrowding. If we leave it like this, everything is going to steam instead of roast. | 15s |
| B-roll | Tara removes a handful of sweet potatoes from the pan, spreading the rest out to reveal bare metal spaces. | Much better. Now the hot oven air can actually circulate and crisp up those edges. | 10s |
| Timelapse | Through the oven door glass, the chicken skin bubbles, darkens, and the sweet potatoes caramelize under a warm oven light. | Into a preheated 425-degree oven for about 35 minutes. At the very end, we're going to hit it with the broiler for that signature char. | 20s |
| Close-up | A digital thermometer probe is inserted into the thickest thigh, reading 178 degrees Fahrenheit. | Perfect. 178 degrees. For thighs, this higher temp breaks down the collagen, making them incredibly tender. | 10s |
| Detail | Tara squeezes a fresh lime half over the sizzling sheet pan. Steam rises, and she scatters cilantro and scallions over the top. | A final squeeze of fresh lime juice to wake up all those rich, savory spices and a handful of cilantro. | 12s |
| Overhead | A beautiful plate featuring a charred chicken thigh, caramelized sweet potatoes, and soft red onions with a side of lime. | Look at that char. It looks like it came straight off a grill, but it only took us one pan and under an hour. | 15s |
| Medium | Tara sits at her kitchen table, takes a bite of the chicken thigh, closes her eyes, and smiles as she chews. | Oh, wow. The skin is crispy, the meat is ridiculously juicy, and that scotch bonnet heat sneaks up on you perfectly. | 18s |
| Wide | Tara waves goodbye to the camera while holding her plate. The camera pans down to show the single dirty sheet pan in the background sink. | If you try this one-pan island escape, let me know in the comments. See you next week! | 15s |
- Capture the sound of the mortar and pestle grinding the allspice berries—boost the audio in post for a satisfying crunch.
- Get a slow, rotating close-up of the food processor bowl as the vibrant green marinade is being scraped out with a spatula.
- Film a quick, handheld insert of the steam fogging up the camera lens when the oven door is first opened.
- Show a real, unedited shot of the dirty sheet pan sitting in the sink at the very end to emphasize how easy the cleanup is.
- 0:00 — Warm, acoustic indie-folk guitar starts softly, establishing a cozy, rainy-day mood.
- 1:15 — A gentle, rhythmic percussion layer enters as Tara starts chopping ingredients, adding a light, playful energy.
- 3:10 — The music swells slightly with a pleasant, upbeat bassline as the marinade blend sequence begins.
- 5:30 — Music transitions to a softer, ambient acoustic strumming as the food goes into the oven, creating a sense of waiting.
- 7:15 — An energetic, cheerful acoustic rhythm kicks in as the finished sheet pan is pulled out of the oven, celebrating the success.
- 9:00 — The music mellows back down to a warm, solo acoustic guitar as Tara tastes the food and wraps up the video.
- Keep the pacing relaxed and conversational; do not over-edit or cut too quickly during the recipe setup.
- Use clean, minimalist text overlays in a soft green font to display ingredient measurements as Tara adds them.
- Boost the ambient kitchen sounds—the sizzle of the pan, the chop of the knife, and the crunch of the chicken skin—for an immersive ASMR quality.
- Color-grade the footage with warm, golden tones to contrast the rainy, blue light coming through the kitchen windows.
| Call | Provider | Model | Input Tokens | Output Tokens | Compute / Credits |
|---|---|---|---|---|---|
| Script | abacus.ai | gemini-3.5-flash | 1,084 | 3,944 | — |
| Image 1 — The Fresh Marinade Setup | abacus.ai | nano_banana2 | — | — | 6,754.375 |
| Image 2 — The Sizzling Sheet Pan Reveal | abacus.ai | nano_banana2 | — | — | 6,754.125 |
My Secret to Crispy Mango Habanero Wings (Without a Fryer!)
I spent all afternoon balancing the perfect sweet-heat glaze for game night, and I finally figured out the exact scientific moment to toss the wings so they stay shattering-crisp.
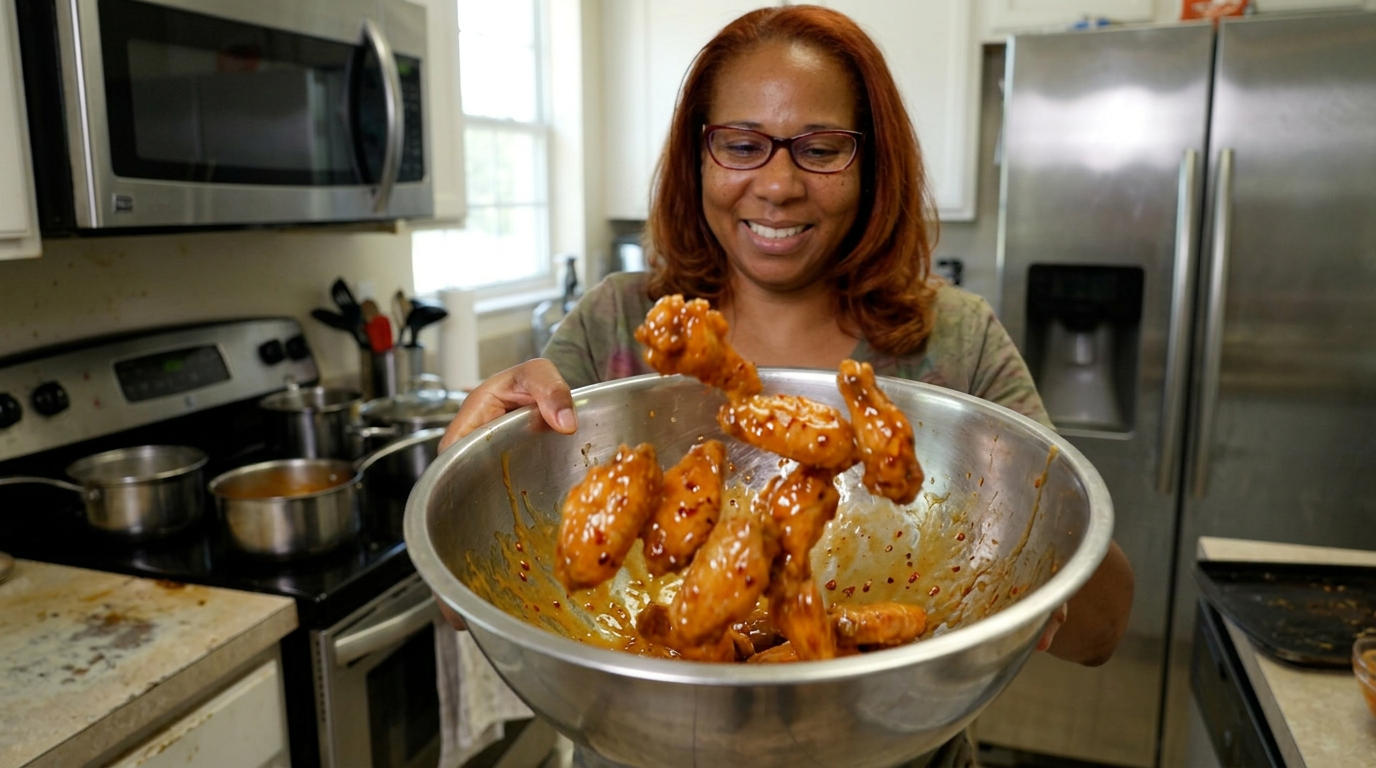
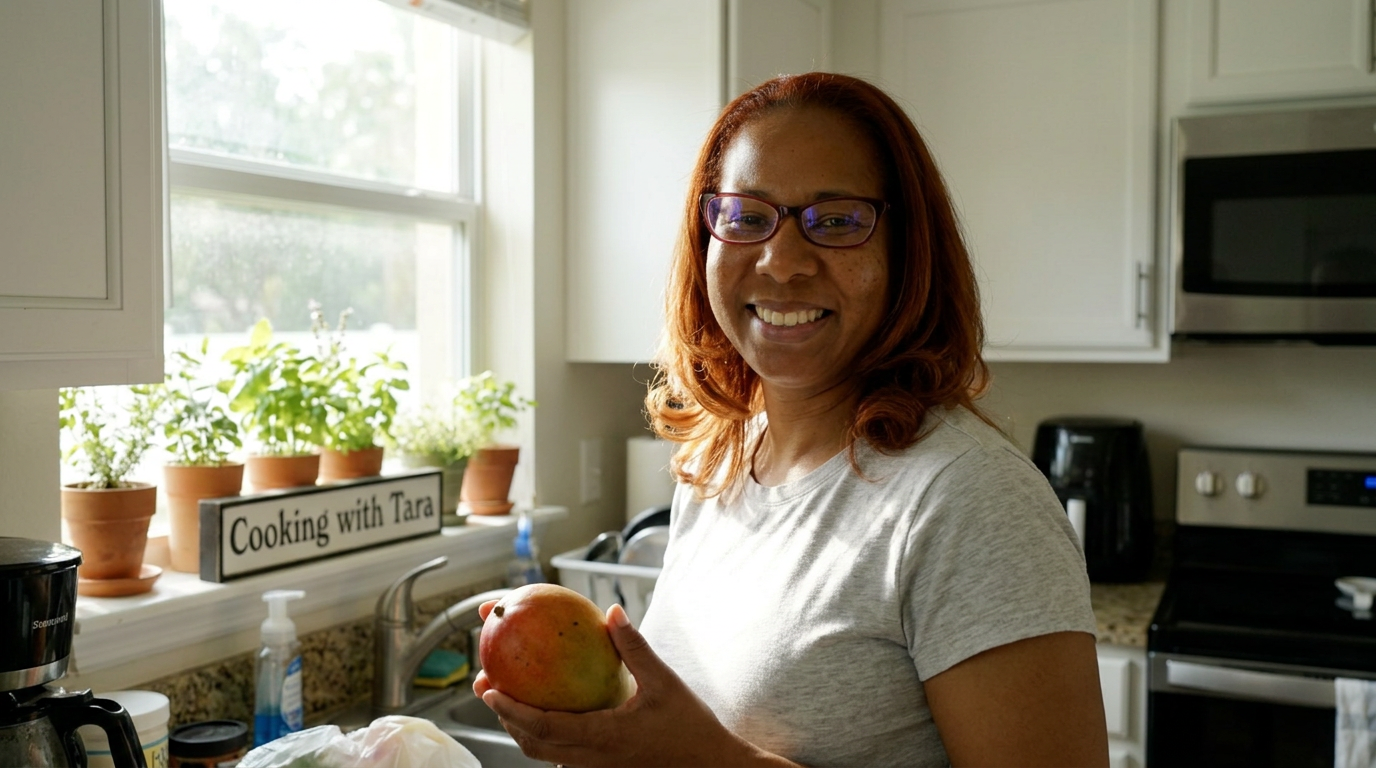
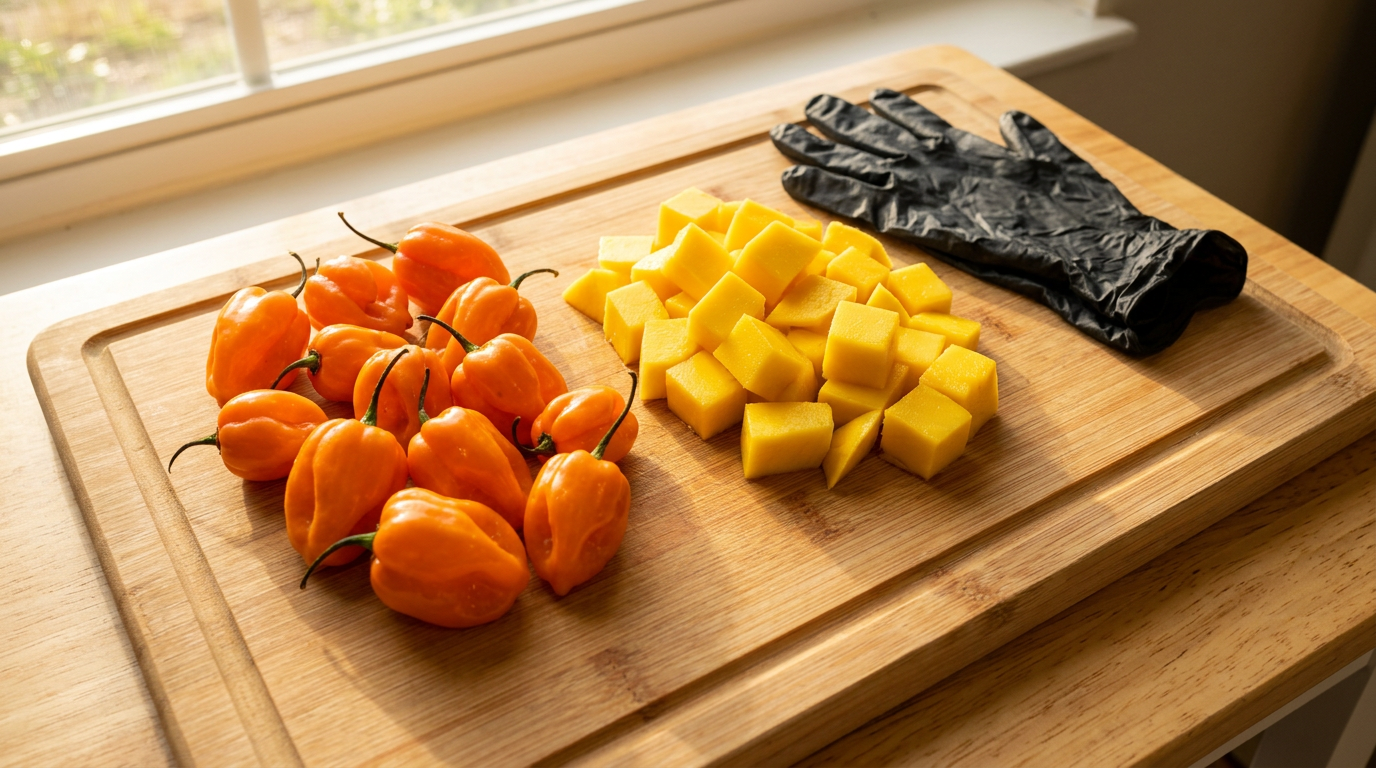
If you've ever bitten into a wing that was either soggy from too much sauce or so hot it ruined your night, you know the struggle. Today, we are fixing both of those problems with the ultimate game-day mango habanero wing.
Close-up of Tara tossing golden, incredibly crispy chicken wings in a glossy, vibrant orange glaze inside a large metal bowl. The sound of the crisp skin hitting the metal is loud and satisfying.
It was a sticky, humid Saturday afternoon here in Orlando, the kind of day where the sky threatens a thunderstorm at 4:00 PM on the dot. Tony had his college football friends coming over around 6:30, and I had promised them wings. Now, normally, I’d just order a couple of platters from a local spot down the road, but lately, their mango habanero wings have tasted less like real fruit and more like high-fructose corn syrup mixed with battery acid. It was just pure, stinging heat with no soul. I knew I could do better right here in my own kitchen.
My mission for the day was two-fold: first, I needed to achieve that ultimate, deep-fried crunch without actually setting up a messy, dangerous deep-fryer on my counter while people were trying to hang out. Second, I had to tame the wild, unpredictable beast that is the habanero pepper. Tony loves heat, but one of his friends practically cries if a bell pepper is too spicy, so I had to find that exact, magical sweet spot where the fruit and the fire actually shake hands instead of fighting each other.
I started by heading over to the Publix down the street to grab my ingredients. I bypassed the frozen section entirely and went straight to the meat counter for fresh, whole chicken wings that I could split myself—they just cook up so much cleaner. Then, I hit the produce section. I bypassed the pale, rock-hard mangoes and dug through the display until I found two beautiful, plump, red-and-yellow Tommy Atkins mangoes that gave just slightly when I pressed them. I also grabbed a small handful of bright orange habaneros, praying they wouldn't burn my face off during prep.
Back in the kitchen, the first major hurdle was the chicken prep. To get oven-baked wings to mimic the crunch of a commercial fryer, you have to get rid of the surface moisture. I patted each wing dry with about three layers of paper towels until they were bone-dry to the touch. Then came my secret weapon: baking powder. Not baking soda—that will make your chicken taste like soap. Just a tablespoon of aluminum-free baking powder mixed with a teaspoon of kosher salt. This little chemical trick raises the pH level on the skin, breaking down the proteins and drawing out moisture so the skin bubbles up into a gorgeous, blistered crunch in the oven.
I tossed the wings in that dry mixture, arranged them on a wire rack set inside a rimmed baking sheet—airflow is absolutely key here—and popped them into a screaming hot oven at 425 degrees Fahrenheit. I set the timer for forty-five minutes. Now, while the oven was doing the heavy lifting, it was time to tackle the glaze. This is where things got a little intense. I peeled the ripe mangoes, chopped the juicy flesh away from the flat inner pit, and threw it into my blender. It looked so sweet and innocent, but the real test was about to begin.
Working with habaneros is like handling hazardous waste. I put on a pair of yellow dish gloves because I learned the hard way years ago that habanero oil does not wash off easily, and rubbing your eyes six hours later is a mistake you only make once. I sliced the stems off two habaneros. For the mild-heat crowd, I carefully scraped out the white ribs and the seeds from one of them—that’s where the capsaicin, the chemical compound that carries the heat, is most concentrated. I left the seeds in the second one because, let’s be honest, Tony deserves a little kick.
I threw the mango, the habaneros, two cloves of garlic, a splash of apple cider vinegar for tang, and a couple tablespoons of honey into the blender and buzzed it until it was completely smooth. When I lifted the lid, a sweet, tropical aroma wafted up, followed immediately by a sharp tickle at the back of my throat that made me cough. Oh yeah, the heat was definitely alive in there.
I poured the thick, orange purée into a small saucepan on the stove to simmer. The goal here was to reduce the moisture and concentrate the sugars so the glaze would cling to the chicken instead of just pooling at the bottom of the bowl. As it started to bubble, the kitchen filled with this incredible, warm, fruity scent. I took a tiny taste off the back of a wooden spoon. It was close, but it was missing depth. It needed balance. I squeezed in the juice of half a fresh lime for brightness and added a tiny pinch of salt. Boom. Suddenly, the mango popped, the honey smoothed out the sharp edges, and the habanero heat crept up slowly at the very end, warm and glowing rather than aggressive.
By now, the thirty-minute mark had hit, and it was time to flip the wings. I pulled the baking sheet out, and they were already looking incredible—golden, bubbling, and sizzling in their own rendered fat. I carefully flipped each one over with my tongs and slid them back in for another fifteen minutes. This second blast of heat is what really crisps up the underside. My mouth was watering, but I knew I had to be patient. If you sauce wings too early, the moisture in the sauce immediately steam-cooks the crispy skin you worked so hard to build, turning it into a soggy, rubbery mess.
At exactly 5:15 PM, the oven timer beeped. I pulled the tray out, and the wings looked absolutely stunning. They were deeply golden brown, with tiny, crispy bubbles covering the surface of the skin. When I tapped one with my tongs, it made a distinct, hollow 'clack' sound. That is the sound of success, my friends. But here was the crucial decision point: do I sauce them immediately? Absolutely not. If I poured that warm glaze over piping hot chicken straight out of the oven, the thermal shock would make the skin pull in the moisture, ruining the crunch. I let them rest on the wire rack for exactly four minutes to let the crust set.
B-roll sequence showing the blending of the mango and habanero, the bubbling reduction on the stovetop, the sizzling wings flipping in the oven, and the final close-up of the crispy skin being tapped with metal tongs.
Finally, the moment of truth. I transferred the warm, rested wings into a large stainless steel bowl. I drizzled about half a cup of the warm, glossy mango habanero glaze around the edges of the bowl—not directly on top of the wings, which is another great trick to ensure even coating—and gave them a series of high, dramatic tosses. The wings clattered against the metal, turning a beautiful, lacquered, glowing orange. Every single crevice of that blistered skin caught the glaze, but they still looked incredibly crisp.
I piled them high on a white serving platter, garnished them with some finely chopped fresh cilantro from our backyard herb garden for a pop of green, and served them with a side of cool, creamy ranch dip to act as a fire extinguisher just in case. Tony was the first to grab one. He took a huge bite, and the crunch was so loud I could hear it from across the island. He looked at me, his eyes wide, and said, 'Tara, this is better than any sports bar in Florida.' Even the spice skeptic managed to eat three of them without crying, declaring the sweet-to-heat ratio absolutely perfect.
Looking back, the real triumph was the patience in the timing. Waiting those four minutes before tossing them in the glaze kept the chicken unbelievably crunchy, even after sitting on the platter for half an hour during the pre-game show. Next time, I think I might experiment with adding a touch of smoked paprika to the glaze to give it a subtle, wood-fired flavor, but for today, this was an absolute kitchen win. The storm finally started rolling in outside, the rain tapping against our window, but inside, we had a plate of tropical sunshine and a very happy crowd.
Medium shot of Tara sitting at her kitchen island, taking a bite of a glazed wing, smiling at the camera as she chews, followed by a slow pan down to the beautiful, colorful platter of wings next to a bowl of ranch.
Shot List
| Type | Description | Audio | Duration |
|---|---|---|---|
| Close-up | Slow motion shot of glossy, bright orange mango habanero glaze being poured over crispy wings in a metal bowl. | TARA (VO): If you've ever bitten into a wing that was either soggy from too much sauce or so hot it ruined your night, you know the struggle. | 5s |
| Medium | Tara standing in her sunny kitchen, speaking directly to the camera with a warm smile, holding a fresh mango. | TARA: Hey guys, welcome back to the kitchen! Today we are tackling game-day wings, but we're doing them Orlando-style with fresh mangoes and a touch of habanero fire. | 12s |
| Detail | Extreme close-up of paper towels pressing down on raw chicken wings to show the moisture being completely absorbed. | TARA (VO): The absolute first rule of crispy baked wings is moisture removal. If they are wet, they will steam instead of crisp. | 8s |
| Overhead | Overhead shot of baking powder and salt being sprinkled over the dry wings, followed by hands tossing them. | TARA (VO): Then, we use a little kitchen chemistry. A tablespoon of baking powder breaks down the skin proteins for that blistered texture. | 10s |
| Timelapse | Wings baking in the 425-degree oven, showing the skin bubbling and turning golden brown. | TARA (VO): Into a 425-degree oven they go. No deep-fryer grease, no mess, just pure convection crunch. | 12s |
| Close-up | Tara wearing bright yellow kitchen gloves, carefully slicing a small orange habanero pepper on a cutting board. | TARA: Safety first, guys. Do not skip the gloves unless you want your fingers burning for the next twelve hours. | 7s |
| B-roll | Fresh diced mango, garlic, and habanero dropping into a high-speed blender, followed by the blades turning it into a smooth purée. | TARA (VO): We blend our fresh mangoes with the peppers, a bit of garlic, and some honey to balance out that intense habanero kick. | 9s |
| Detail | The bright orange glaze simmering in a stainless steel saucepan, bubbles gently popping on the surface. | TARA (VO): Simmering this down concentrates the natural sugars and creates a sticky glaze that will actually cling to the wings. | 11s |
| Close-up | Tara dipping a wooden spoon into the sauce, blowing on it, and taking a quick taste. | TARA: Oh wow. That heat is back there, but the sweetness of the mango really cushions the blow. It just needs a squeeze of lime. | 8s |
| B-roll | Tara pulling the sizzling baking sheet out of the oven, flipping the wings with tongs, showing the deep golden undersides. | TARA (VO): After thirty minutes, we flip them to ensure both sides get that beautiful, uniform golden finish. | 10s |
| Close-up | Metal tongs tapping a finished wing on the wire rack, producing a distinct, sharp clicking sound. | TARA (VO): Do you hear that? That's the hollow tap of a perfectly crispy wing. Now, we let them rest for four minutes so they don't lose that crunch. | 8s |
| B-roll | Slow motion shot of Tara tossing the rested wings in the metal bowl, the glaze coating them perfectly under the warm kitchen lights. | TARA (VO): We toss them in a large metal bowl, letting that vibrant glaze lacquer every single crispy fold of the skin. | 10s |
| Wide | Tara placing the beautiful platter of wings on her kitchen island where Tony grabs one and takes a loud, crunchy bite. | TONY: Oh my gosh, Tara. The crunch on these is unbelievable! TARA: Right? And the heat doesn't kill you! | 12s |
| Close-up | A single glazed wing being dipped into a bowl of white ranch dressing, leaving a trail of herbs in the sauce. | TARA (VO): Crisp, sweet, and perfectly spicy. Cooking doesn't get much better than this on a rainy Florida Saturday. | 8s |
- Capture the high-pitched 'clack' sound of the tongs tapping the crispy baked chicken skin to emphasize the texture.
- Show the steam rising from the saucepan as the mango-habanero glaze reduces on the stovetop.
- Do a slow-rolling pan across the finished platter of wings, highlighting the fresh green cilantro garnish against the orange glaze.
- Record a close-up of the sticky glaze dripping slowly off a wooden spoon to visually demonstrate the correct syrup-like thickness.
- 0:00 — Upbeat, acoustic acoustic guitar and light percussion to matches the energetic intro.
- 1:15 — Smooth, breezy indie-pop track during the ingredient setup and prep talk.
- 3:40 — Slightly faster, playful synth-pop beat during the fast-paced pepper chopping and blending process.
- 6:10 — Warm, relaxing lo-fi hip hop beat as the sauce simmers and the wings bake in the oven.
- 8:25 — High-energy, celebratory kitchen instrumental during the big wing-tossing climax.
- 9:30 — Warm, fading acoustic outro as Tara and Tony enjoy the food together.
- Keep the transition cuts quick and snappy during the prepping phase to maintain a high-energy, engaging pace.
- Use a subtle text overlay on screen showing '4-MIN RESTING RULE' in a clean, modern font when Tara discusses the cooling step.
- Amplify the natural kitchen sound design (the crunch of the bite, the sizzle of the oven, the clink of the metal bowl).
- Color-grade the footage to emphasize the warm, tropical orange hues of the mango glaze and the bright green of the cilantro.
| Call | Provider | Model | Input Tokens | Output Tokens | Compute / Credits |
|---|---|---|---|---|---|
| Script | abacus.ai | gemini-3.5-flash | 1,234 | 4,531 | — |
| Image 1 — The Crispy Toss | abacus.ai | nano_banana2 | — | — | 6,753.65 |
| Image 2 — Tara's Mango Selection | abacus.ai | nano_banana2 | — | — | 6,753.475 |
| Image 3 — The Pepper Prep | abacus.ai | nano_banana2 | — | — | 6,753.475 |
Creamy Cajun Chicken Pasta (How I Get Restaurant Flavor Without the Heavy Cream Coma)
I wanted that deep, cozy restaurant-style Cajun pasta, but without the heavy cream coma that usually follows, so I engineered a lighter, velvety sauce that still packs a punch.
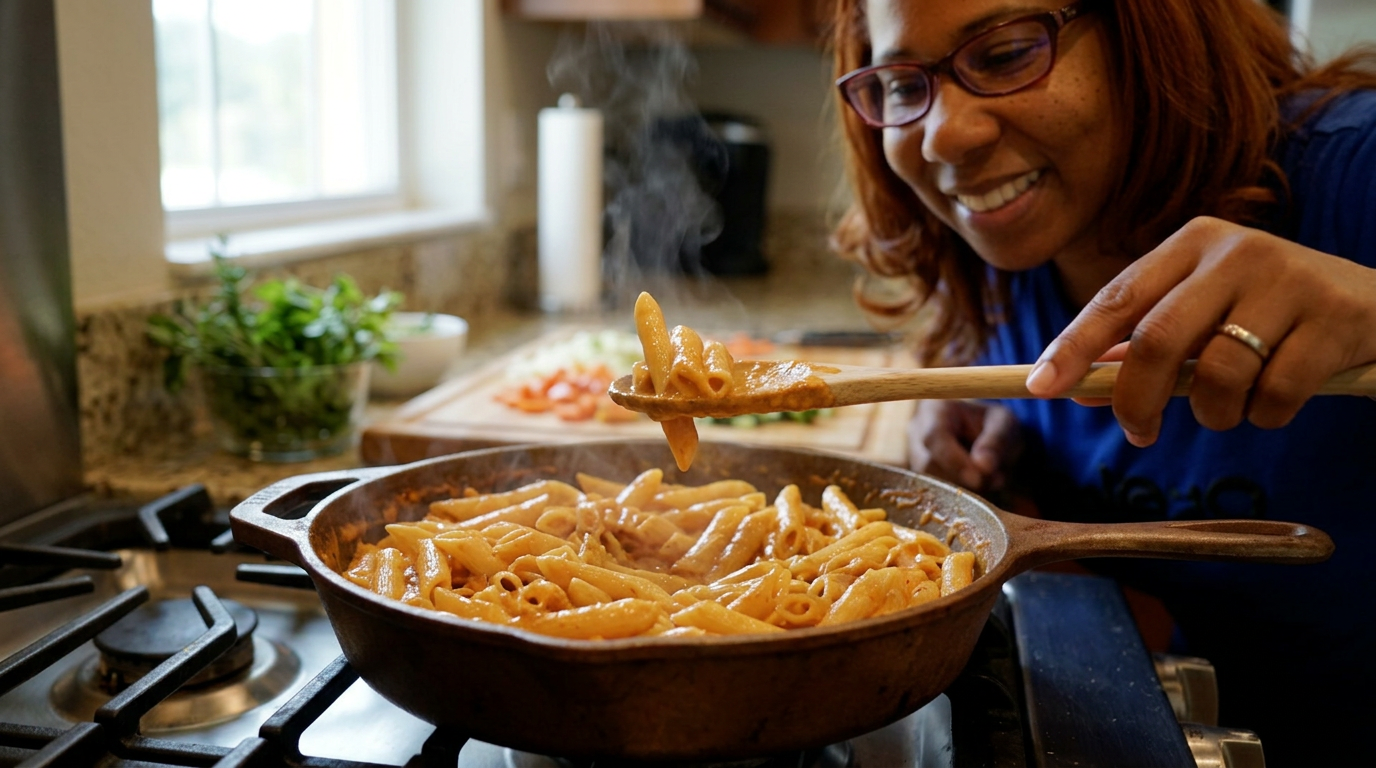
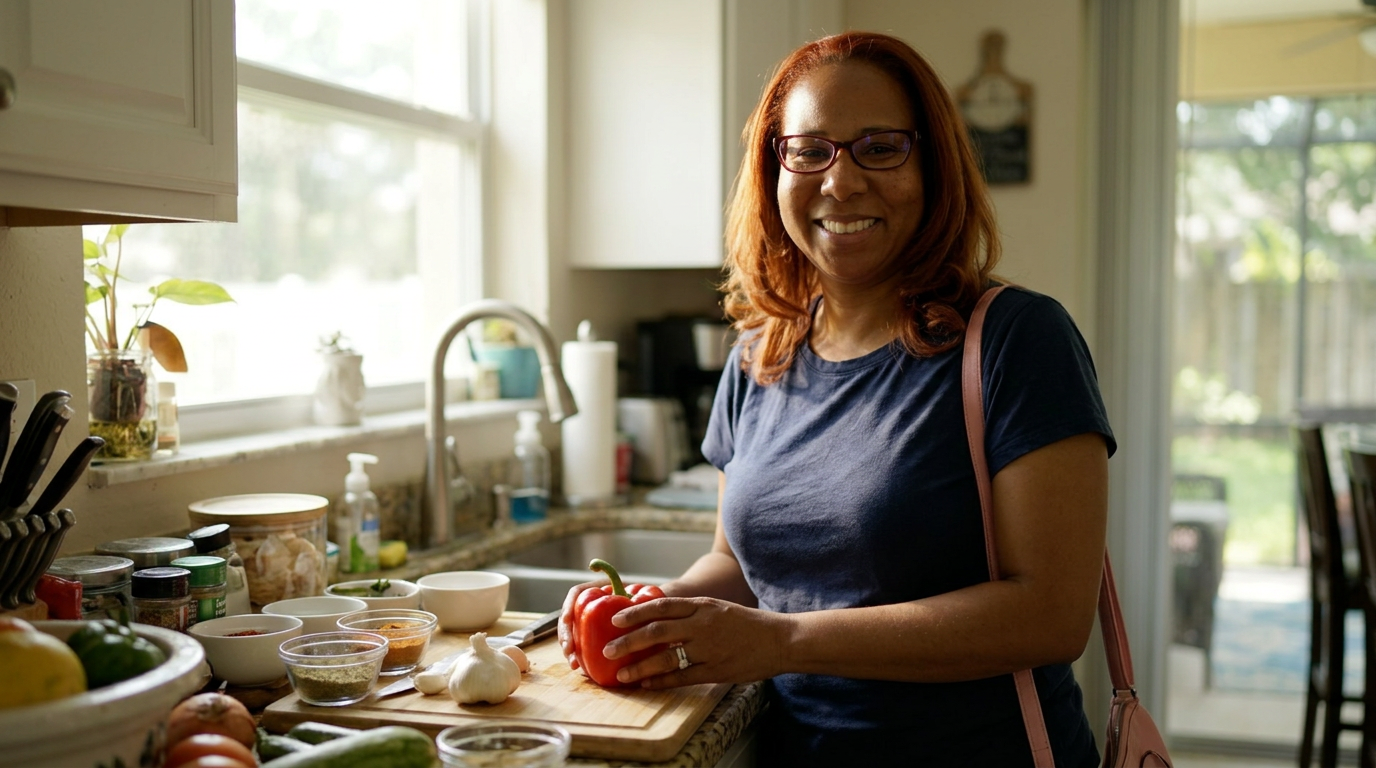
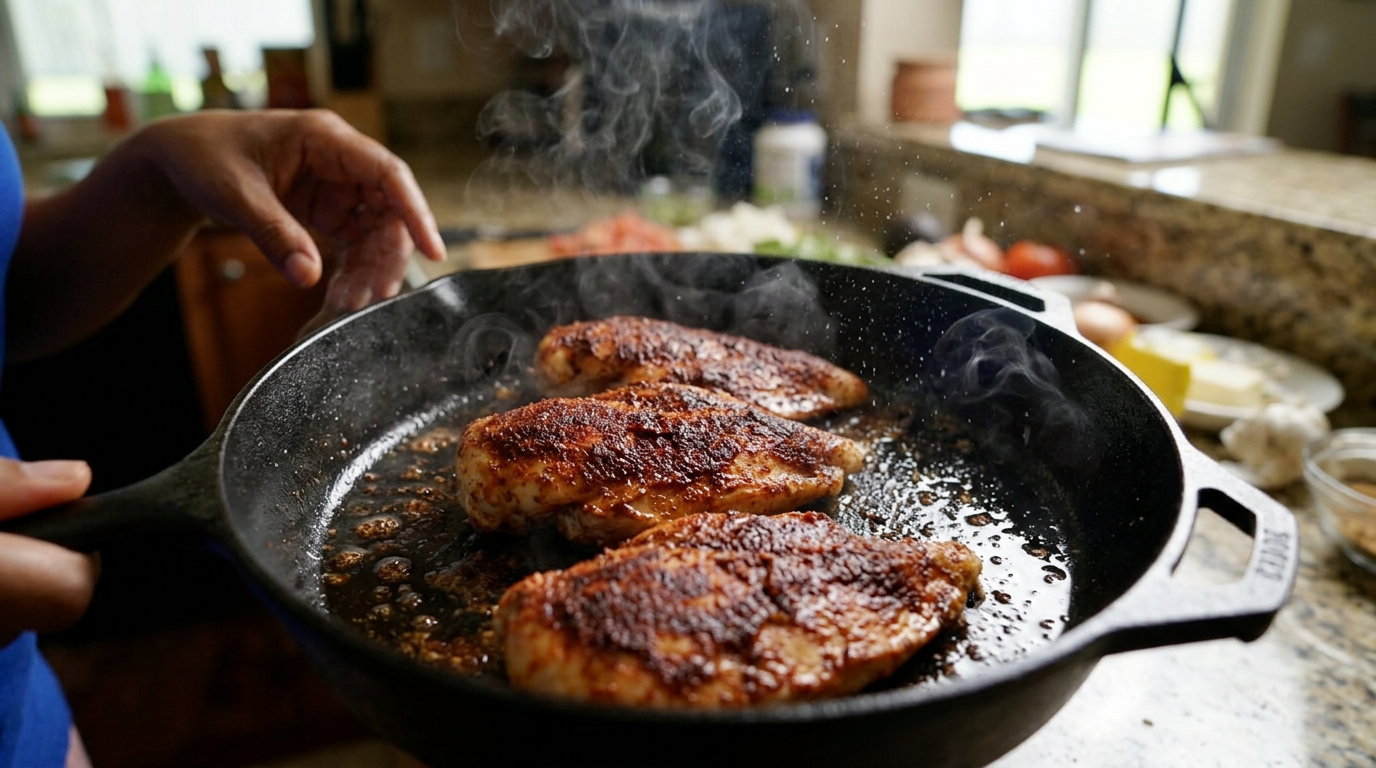
We all know that feeling after a massive bowl of restaurant pasta—you're completely defeated by the heavy cream. Tonight, I wanted to see if we could get that exact same velvety, spicy luxury at home, but actually stay awake for the movie afterward.
Close-up of a wooden spoon lifting a glossy, orange-tinted penne noodle, sauce dripping slowly back into a steaming skillet. Camera pulls back to show Tara smiling in her kitchen, holding the pan.
It was one of those typical humid Orlando Tuesdays where the afternoon rain had just let up, leaving the air thick, and honestly, Tony and I were both craving something incredibly comforting but not utterly exhausting. We used to go to this little spot near Winter Park that served a legendary Cajun chicken pasta. It was delicious, but it felt like eating a lead brick. You'd take five bites, and your evening was officially over. I wanted to see if I could recreate that deep, smoky, spicy flavor profile at home while keeping the sauce velvety and light enough that you'd actually want a second helping.
My plan was simple but required some careful technique. Instead of relying on a pint of heavy whipping cream to build body, I decided to use a combination of unsalted butter, chicken stock, a splash of whole milk, and a secret weapon: pasta cooking water. By using the starchy pasta water to emulsify the fats, we could get that glossy coating without the grease. But the real challenge was going to be the chicken. Restaurant chicken in these dishes is often dry and tossed in at the end like an afterthought. I wanted mine deeply seasoned, seared to a crust, and incredibly juicy.
I dug through the pantry and pulled out a box of penne rigate—the ridges are non-negotiable here because they act like tiny fingers grabbing onto the sauce. I also grabbed some bell peppers and onions from the crisper drawer to give us that sweet, aromatic base that plays so well with Cajun spices. The stakes were moderately high for a Tuesday night: Tony was starving after a long day, and if I messed up the sauce emulsification, we’d end up with a broken, watery mess of noodles and spices. It was time to get to work.
I started with the chicken breasts. I butterfly-cut them so they were even in thickness, which is my favorite trick for preventing that rubbery, overcooked edge while waiting for the center to cook. I patted them bone-dry with paper towels—an absolute must if you want a real sear and not just grey, steamed meat. Then came the rub. I made a quick blend of smoked paprika, garlic powder, onion powder, dried oregano, thyme, cayenne pepper, and a generous pinch of kosher salt. I rubbed this spice mix onto the chicken until it was completely coated in a beautiful, dark red crust.
I heated two tablespoons of olive oil in my heavy cast-iron skillet over medium-high heat. When the oil started to shimmer, I laid the chicken in. That sizzle is always the most satisfying sound of the day. The smell of the spices hitting the hot oil immediately filled the kitchen—smoky, peppery, and incredibly warm. I let them sear untouched for about five minutes to build that gorgeous crust. When I flipped them, they had this beautiful, blackened exterior that looked like it came straight out of a Louisiana kitchen.
Once the chicken reached an internal temperature of 165 degrees Fahrenheit, I pulled it out to rest on a cutting board. Ground rule of home cooking: never skip the rest. If I sliced it right now, all those beautiful juices would run all over the board, leaving the chicken dry. While the chicken rested, I dropped the heat on the skillet to medium. The bottom of the pan was covered in fond—those caramelized browned bits of spice and chicken goodness. That is pure gold, and it was going to be the foundation of our sauce.
I tossed in a tablespoon of butter, followed by a finely diced yellow onion and a sliced red bell pepper. As they cooked, they started softening and picking up all that dark seasoning from the bottom of the pan. I added three minced garlic cloves, letting them cook for just about thirty seconds until they became fragrant. You have to be careful here; burnt garlic will ruin the entire dish with a bitter aftertaste. To deglaze, I poured in half a cup of low-sodium chicken stock, scraping the bottom of the skillet with a wooden spoon. The liquid immediately bubbled and turned a rich, deep brown.
Meanwhile, my pasta water was boiling in the big pot behind me. I salted the water heavily—it should taste like the ocean—and dropped the penne. I set my timer for eight minutes, aiming for just under al dente. Because the pasta is going to cook further in the sauce, if you boil it completely soft now, it will turn to mush later.
Back to the skillet. I turned the heat down to low and poured in a cup of whole milk. Now, this is the critical moment. If the pan is too hot, the milk will curdle. I stirred it constantly, watching the pale milk marry with the dark, spicy vegetable mixture to create a gorgeous, pale-orange sauce. To give it that signature restaurant richness without the heavy cream, I stirred in half a cup of freshly grated parmesan cheese. Not the stuff from the green shaker bottle, but real Parmigiano-Reggiano. It melts beautifully and helps thicken the liquid naturally.
Just as the pasta timer beeped, I used a spider strainer to transfer the penne directly from the boiling water into the skillet. I didn't drain the pasta in a colander because I wanted that starchy water clinging to the noodles. This is where the magic happens. I ladled about a quarter-cup of the hot, starchy pasta water into the skillet and began tossing everything together over medium-low heat. The starch in the water and the fat in the cheese and butter emulsified perfectly, turning our light sauce into a thick, glossy, velvety coating that clung to every single ridge of the penne.
Finally, I sliced our rested chicken. It was incredibly juicy, with a perfect pinkish-red spice rim. I folded the chicken slices back into the pasta, along with all the resting juices from the cutting board. I tossed in a handful of chopped fresh parsley for a pop of brightness to cut through the richness. The dish looked absolutely spectacular—vibrant, glossy, and smelling of garlic, sweet peppers, and deep Cajun spices.
Handheld B-roll tracking the chicken as it is sliced on a wooden board, showing the juice glistening on the meat, followed by a slow-motion shot of the pasta being tossed in the orange sauce with steam rising.
I plated the pasta in wide, shallow bowls and finished it with a little extra parmesan and a crack of black pepper. Tony was already sitting at the kitchen island, fork in hand, waiting. I handed him his bowl, and we both took our first bites. The flavor was incredible—it had that punchy, smoky heat from the Cajun spices, the sweetness of the bell peppers, and a sauce so creamy you would swear there was a pint of heavy cream in there. But it felt light. We finished our bowls and didn't feel like we needed an immediate three-hour nap.
This experiment was a total success. By focusing on building a deep fond in the pan, using real parmesan, and leveraging the power of starchy pasta water, we got all the luxury of a restaurant dish with none of the heavy, greasy weight. Next time, I think I might throw in some wild-caught Florida shrimp alongside the chicken to make it a true surf-and-turf Cajun night. But for a Tuesday in Orlando, this was absolutely perfect.
If you want to make this yourself, the full recipe is down below. Don't skip the pasta water, buy a block of real parmesan, and let your chicken get that beautiful dark crust. Let me know in the comments if you try it, and I'll see you in the next video!
Tara takes a bite of the pasta, looks directly at the camera, and gives an enthusiastic nod. The camera pans down to a beautiful, steaming bowl of the finished pasta sitting on a rustic wooden placemat.
Shot List
| Type | Description | Audio | Duration |
|---|---|---|---|
| Close-up | Saucy penne pasta dripping from a wooden spoon back into a pan. | [Sizzling and bubbling sounds] We all know that feeling after a massive bowl of restaurant pasta... | 5s |
| Medium | Tara in her bright Orlando kitchen, waving and introducing the episode. | Hey everyone, welcome back! Today we are tackling a classic comfort food: Creamy Cajun Chicken Pasta. | 10s |
| Overhead | Chicken breasts being butterflied on a cutting board. | I started by butterflying two chicken breasts so they cook evenly without drying out. | 8s |
| Close-up | Spices being mixed in a small bowl and rubbed onto the chicken. | Then I coated them in my homemade Cajun seasoning rub. Smoked paprika, oregano, and garlic. | 12s |
| Medium | Chicken breasts hitting the hot cast-iron skillet with a loud sizzle. | [Loud sizzle] That sear is everything. We want a deep, caramelized crust. | 7s |
| Detail | The golden-brown fond left at the bottom of the skillet after removing the chicken. | Do not clean this pan! That fond on the bottom is where all the restaurant flavor lives. | 6s |
| Close-up | Sliced red peppers and onions sizzling in the skillet. | In goes a little butter, our sweet bell peppers, onions, and garlic to soak up those spices. | 10s |
| B-roll | Chicken stock being poured into the pan, bubbling instantly. | Deglazing with a splash of chicken stock to lift all those beautiful browned bits. | 5s |
| Timelapse | Penne pasta boiling rapidly in a large pot. | Meanwhile, the penne goes into heavily salted water. We're cooking it just shy of al dente. | 8s |
| Close-up | Whole milk and freshly grated parmesan being stirred into the skillet. | With the heat on low, we stir in whole milk and real Parmigiano-Reggiano. No heavy cream needed. | 12s |
| Overhead | Pasta being transferred directly from the pot to the skillet with a spider strainer. | Transfer the pasta directly in, bringing some of that starchy cooking water along to bind the sauce. | 10s |
| Close-up | Tara slicing the rested chicken, showing the juicy interior. | Look how juicy that chicken stayed. Slice it up and toss it back into the pan. | 8s |
| B-roll | Pasta being tossed in the pan, creating a creamy, glossy emulsion. | [Spatula folding sounds] See how glossy that is? That is the magic of starch water and cheese. | 7s |
| Medium | Tara plating the pasta in a wide bowl and garnishing with fresh parsley. | A little fresh parsley for brightness, and dinner is served. | 8s |
| Close-up | Tony taking a big bite of the pasta and giving a thumbs up. | Tony approved! Deep, smoky spice, and a velvety sauce that doesn't weigh you down. | 10s |
- Capture a slow-motion shot of the spices being sprinkled onto the chicken from a height.
- Get a macro shot of the cheese melting into the warm milk to show the texture change.
- Film the pasta water pouring from a ladle to show its cloudy, starchy consistency.
- Do a close-up of the knife cutting through the seared chicken breast to highlight its juiciness.
- 0:00 — Upbeat, warm acoustic guitar intro to set a cozy afternoon mood.
- 1:15 — Soft, rhythmic percussion kicks in as the prep work begins.
- 3:00 — Slightly faster, jazzy tempo as the chicken hits the hot skillet.
- 5:30 — Calm, smooth ambient track during the delicate sauce emulsification process.
- 7:45 — Triumphant, uplifting acoustic swell as the pasta is tossed and plated.
- 9:15 — Warm, fading acoustic outro as Tara finishes the tasting and signs off.
- Keep the pacing brisk during prep, but slow down during key sauce-building moments to emphasize texture.
- Use clean, minimalist text overlays for ingredient amounts as they are added to the pan.
- Amplify the natural kitchen sounds: the sizzle of the chicken, the boil of the water, and the scrape of the wooden spoon.
- Apply a warm, golden color grade to match the sunny Orlando afternoon aesthetic.
| Call | Provider | Model | Input Tokens | Output Tokens | Compute / Credits |
|---|---|---|---|---|---|
| Script | abacus.ai | gemini-3.5-flash | 1,230 | 4,324 | — |
| Image 1 — The Perfect Glaze | abacus.ai | nano_banana2 | — | — | 6,753.75 |
| Image 2 — Tara's Kitchen Setup | abacus.ai | nano_banana2 | — | — | 6,753.975 |
| Image 3 — The Searing Sizzle | abacus.ai | nano_banana2 | — | — | 6,753.625 |
The 20-Minute Dinner That Saved My Week: Blackened Mahi-Mahi with Pineapple Salsa
When the Florida humidity hit 90% and my fish was looking a little sad in the fridge, I had to rely on a bright, punchy pineapple salsa to completely rescue our Tuesday night dinner.
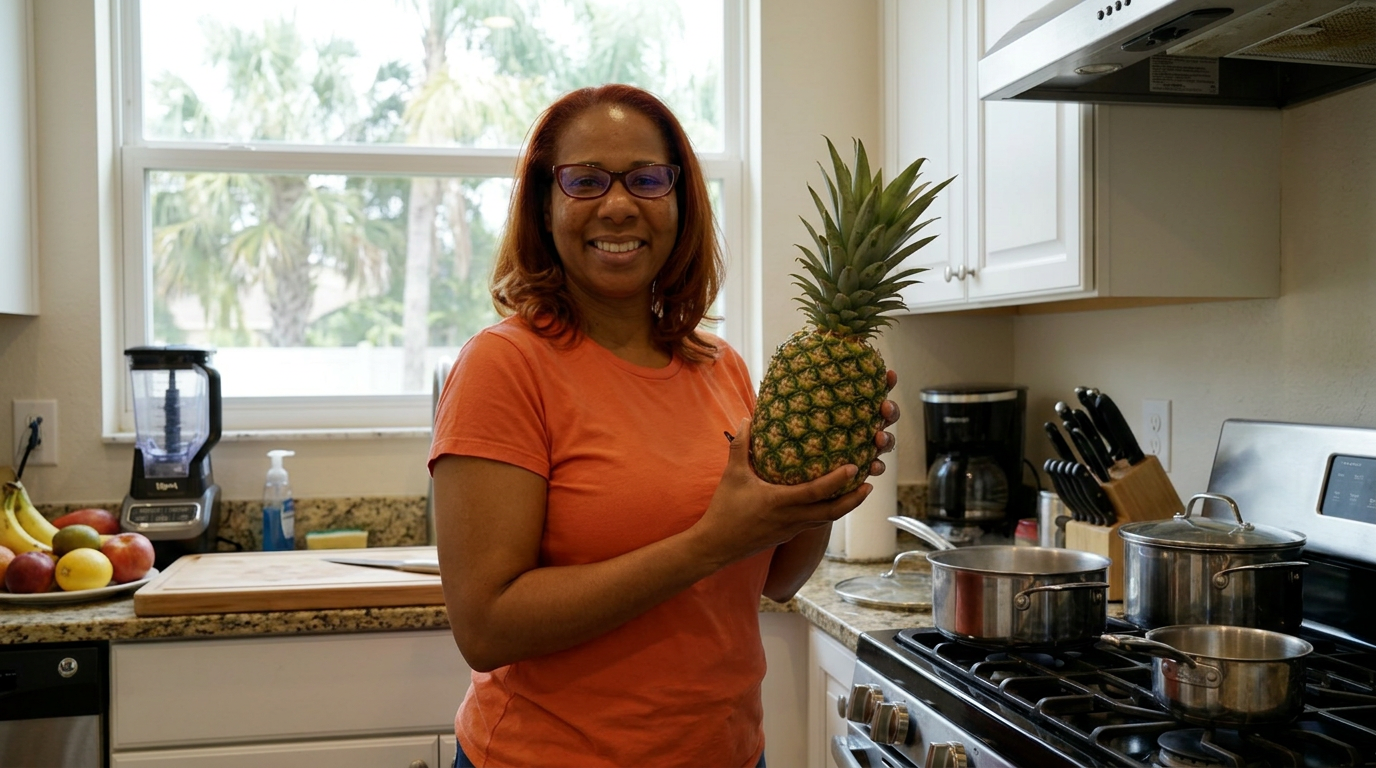
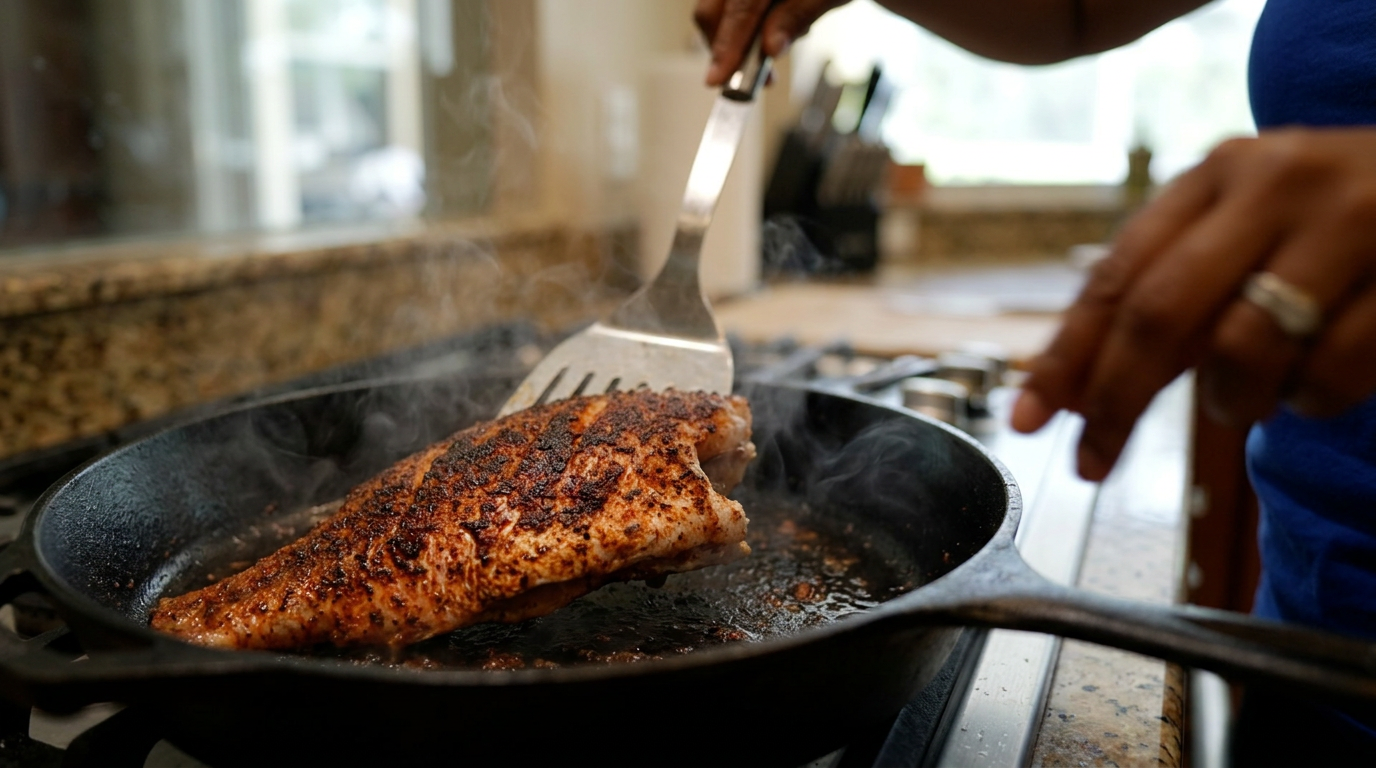
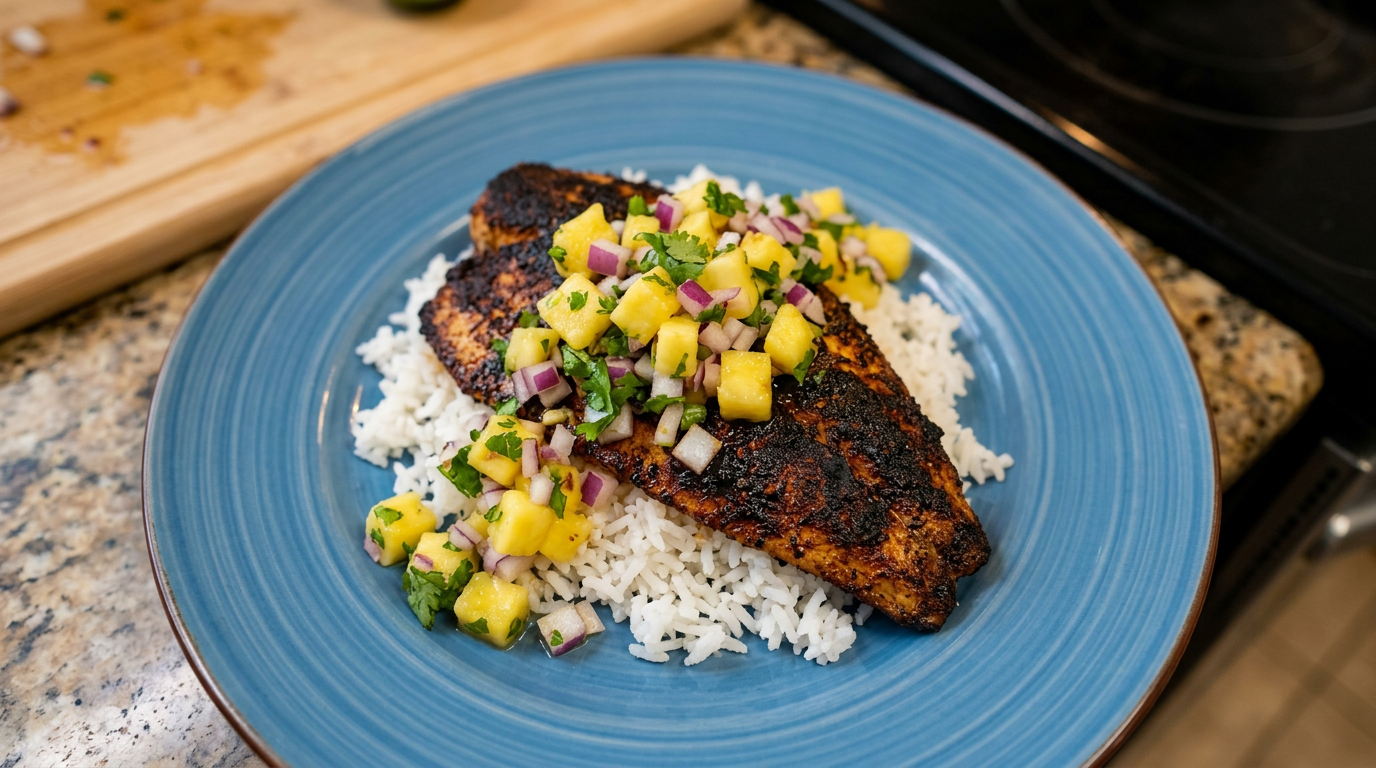
If you've ever had one of those days where the Florida heat drains every ounce of your energy, you know the absolute panic of staring into a fridge with zero plan. Tonight, we are saving a plain piece of fish with a sweet, spicy, and smoky trick that takes exactly twenty minutes.
Handheld, slightly shaky camera moving past a condensation-fogged window showing Orlando palm trees, then panning quickly to Tara standing in her kitchen, holding a fresh pineapple and looking directly at the camera with a relieved smile.
It was one of those classic mid-July Orlando afternoons where the sky turns the color of charcoal by 4:00 PM, the humidity wraps around you like a wet wool blanket, and the last thing you want to do is turn on a heavy oven. Tony had just walked through the door after a brutal commute down I-4, and I could tell by the way he dropped his keys that we both needed something bright, fast, and satisfying. I had two beautiful, wild-caught mahi-mahi fillets sitting in the fridge from our Publix run yesterday, but to be completely honest, they were looking a little pale and uninspiring. They needed a serious wake-up call.
My plan was simple but high-stakes: a heavy-handed dusting of homemade blackening seasoning, a screaming hot cast-iron skillet, and a vibrant, freshly chopped pineapple-jalapeño salsa to cut through the intense, smoky heat. The stakes are always a bit high when you're working with fish on a Tuesday night; if you overcook it by even sixty seconds, you're left with dry, rubbery blocks that no amount of lime juice can rescue. Plus, Tony is always my toughest critic when it comes to seafood—he grew up on the Gulf coast, so he knows when fish is treated with respect.
The secret weapon tonight had to be the salsa. A good blackened fish relies entirely on contrast. You need that dark, deeply spiced, almost charred crust on the outside of the fish to clash beautifully with something cool, sweet, crisp, and acidic on top. I didn't want a sad, watery salsa from a jar; I wanted something that tasted like a tropical storm in the best way possible. So, I cleared off the messy cutting board, grabbed my favorite heavy chef's knife, and decided to let the pineapple do the heavy lifting.
I started with the pineapple salsa because it absolutely needs a few minutes to sit, letting the salt draw out those sweet juices and allowing the flavors to fuse together. I cut the crown off a ripe gold pineapple—you want one that smells incredibly sweet right at the base—and sliced away the prickly skin. There is something so satisfying about dicing fresh fruit on a warm evening. I kept the dice relatively small, about a quarter-inch, so that every single forkful of fish would get a perfect, balanced mountain of topping rather than giant, clumsy chunks.
Next came the red onion for a sharp, clean crunch, followed by a fat jalapeño. Now, here was my first decision point: to seed or not to seed? Because the blackening seasoning was already going to carry a decent kick from cayenne and white pepper, I decided to scrape out the white ribs and seeds of the jalapeño. We wanted heat, yes, but not the kind that numbs your tastebuds to the actual flavor of the fish. I tossed in a massive handful of chopped fresh cilantro from my backyard herb pot—which is somehow surviving the summer heat—and squeezed the juice of two incredibly juicy Key limes directly over the bowl.
With the salsa mingling in its own juices on the counter, it was time to address the mahi-mahi. I patted the fillets completely dry with paper towels. This is a non-negotiable step, guys. If your fish is wet when it hits the pan, it will steam instead of sear, and you'll miss out on that iconic, gorgeous blackened crust. I rubbed a tiny drizzle of neutral avocado oil on both sides of the fish just to give the spices something to cling to.
For the blackening blend, I didn't reach for a pre-made jar. I mixed up my own: smoked paprika for that gorgeous red color, garlic powder, onion powder, dried oregano, thyme, a pinch of cayenne, and plenty of kosher salt and black pepper. I coated the fillets generously, pressing the spices into the flesh until they looked completely blanketed. Your kitchen should already start smelling like a coastal fish shack before the heat even hits.
I pulled out my seasoned twelve-inch cast-iron skillet. To get a true blacken, you need heat, but you have to be careful with your fat choice. Traditional Louisiana style uses melted butter, but butter burns incredibly fast at high heat. My compromise? A tablespoon of high-smoke-point avocado oil in the pan first, and then, right before the fish goes in, a tiny pat of butter just for that rich, nutty flavor. I let the skillet get hot enough that a drop of water instantly danced and evaporated.
The moment of truth. I laid the mahi-mahi down away from me so I wouldn't splash hot oil. The sizzle was instant, loud, and incredibly satisfying. Smoke billowed up immediately—this is definitely a 'turn your stove fan on high and open the back door' kind of recipe. I resisted every urge to move them. If you poke at the fish too early, the crust will stick to the pan and tear. I let them sit undisturbed for exactly three minutes.
Using a thin fish spatula, I gently slipped underneath and flipped them. They were absolutely stunning—a deep, dark mahogany crust, perfectly caramelized without being burnt to a cinder. I dropped the heat slightly to medium because these fillets were on the thicker side, about an inch thick. To ensure they were perfectly safe and incredibly flaky, I used my digital thermometer, aiming for an internal temperature of exactly 137 degrees Fahrenheit. They would carry over to a perfect 140 degrees while resting, keeping them incredibly juicy.
B-roll sequence showing hands dicing vibrant yellow pineapple, bright green cilantro being chopped, red onion skin being peeled, spices being mixed in a small glass bowl, the seasoned fish hitting a smoking hot cast-iron skillet, and a dramatic flip revealing a perfect dark crust.
I transferred the mahi-mahi to a warm platter and let them rest for just two minutes, allowing the juices to redistribute through the fish. I plated a fillet over a simple bed of coconut rice, then spooned a mountain of that bright, glistening pineapple salsa right over the top. The contrast of the dark, spiced fish against the brilliant yellows, reds, and greens of the salsa looked like summer on a plate. I called Tony over, gave him a fork, and held my breath as he took the first bite.
The reaction was instant. He didn't even say anything at first—just closed his eyes and nodded, which is his ultimate sign of approval. When he finally spoke, he said, 'Tara, this salsa is ridiculous. It completely cuts through the spice of the fish.' I took a bite myself and smiled. The mahi-mahi was incredibly tender and flaky, the blackening seasoning had this smoky, earthy punch, and then that cold, sweet, lime-drenched pineapple salsa came in to sweep away the heat. It was absolute perfection.
What I loved most about this meal was how it turned a potentially stressful, hot Tuesday night into something that felt like a beachside vacation. Next time, I think I might throw some diced avocado into the salsa for a bit of creamy richness, or maybe even grill the pineapple slices first to carry that smoky theme all the way through the dish. But honestly, as we sat at the kitchen island with the back door open, listening to the rain finally start to pour outside, we wouldn't have changed a single thing.
Extreme close-up of a fork breaking off a flaky piece of mahi-mahi covered in pineapple salsa, followed by a medium shot of Tara and Tony sitting at their kitchen island, clinking water glasses and laughing as they eat.
Shot List
| Type | Description | Audio | Duration |
|---|---|---|---|
| Wide | Tara in her sunny Orlando kitchen, smiling and explaining her dinner dilemma as rain taps against the window behind her. | Hey guys, welcome back to the kitchen! Today we're making a quick twenty-minute savior meal: Blackened Mahi-Mahi with a fresh pineapple salsa. | 12s |
| Close-up | Tara's hands slicing the top off a bright yellow pineapple on a rustic wooden cutting board. | It all starts with this gorgeous gold pineapple. On hot days like today, we need something that requires almost zero stove time. | 8s |
| Detail | Close-up of the jalapeño being scraped of its seeds with a spoon. | I'm removing the ribs and seeds here because we want the jalapeño flavor, but we don't want to burn our tastebuds off. | 6s |
| Overhead | Beautiful, colorful shot of the diced pineapple, red onion, cilantro, and jalapeño being tossed in a clear glass bowl with lime juice. | Look at those colors! This is pure sunshine in a bowl. We'll let this sit so all those gorgeous juices can mingle. | 10s |
| Close-up | Paper towel pressing firmly onto the raw mahi-mahi fillets to dry them. | Now, the absolute golden rule of blackening: pat your fish completely, totally dry. Moisture is the enemy of a good sear. | 8s |
| Detail | Red blackening spices being sprinkled generously over the fish from a small dish. | Don't be shy with this seasoning. We want a thick, flavorful blanket of spices on every single square inch. | 7s |
| B-roll | A cast-iron skillet on the stove, a pat of butter melting into the oil and bubbling rapidly. | My cast-iron is screaming hot. Adding a little avocado oil for high heat, and just a touch of butter for flavor. | 6s |
| Close-up | The seasoned mahi-mahi hitting the hot skillet with a dramatic, loud hiss and a puff of aromatic steam. | Hear that? That is the sound of absolute success. We are going to let this sit undisturbed for exactly three minutes. | 9s |
| Detail | A metal fish spatula flipping the mahi-mahi to reveal a spectacular, dark, caramelized crust. | Oh, look at that crust! That is beautiful, dark mahogany color, not burnt, just perfectly caramelized spices. | 8s |
| Close-up | A digital thermometer being inserted into the thickest part of the fish, displaying 137 degrees. | I'm checking the temp—perfectly at 137. We'll pull it off now and let it carry over to a juicy 140 while resting. | 7s |
| Overhead | Plating the fish over white coconut rice and spooning a massive, colorful heap of pineapple salsa on top. | And now, the magic moment. We crown this hot, spicy fish with our cool, sweet, tangy salsa. | 10s |
| Close-up | A fork cutting cleanly through the flaky white fish, lifting a bite loaded with pineapple and onion. | Just look at how flaky and moist that is inside. Let's see what Tony thinks of this Tuesday night rescue mission. | 10s |
| Medium | Tony taking a bite, smiling warmly, nodding his head in approval, and giving a thumbs up to the camera. | Tony says the sweetness of the pineapple completely balances out the heavy kick from the spices. I call that a win! | 10s |
| Wide | Tara leaning against her kitchen counter, holding the recipe card plate, waving goodbye with a big smile. | Thank you guys so much for cooking with me tonight! The full recipe is below—let me know if you try it. See you next time! | 11s |
- Capture the condensation on the lime skin as it is being sliced to emphasize the Florida humidity angle.
- Get a slow-motion shot of the lime juice squeezing over the colorful salsa ingredients.
- Record the actual sizzling audio clearly when the fish hits the cast-iron; that sound is a key sensory hook.
- Show the real, messy counter space with discarded pineapple skin to keep the vlog feeling authentic and unpretentious.
- 0:00 — Upbeat, warm acoustic guitar and light percussion to match the friendly intro.
- 1:30 — Smooth, breezy bossa-nova style background track as Tara starts chopping the pineapple.
- 3:45 — Slightly faster, playful rhythm during the dry-rubbing and spice-mixing process.
- 5:15 — Faded-down music, letting the loud, natural sizzle of the cast-iron skillet take center stage.
- 7:00 — Light, celebratory acoustic track as the fish is successfully flipped and plated.
- 8:30 — Warm, relaxing acoustic folk melody as Tony and Tara taste and chat at the counter.
- Use a warm, slightly vintage color grade to highlight the sunny, tropical Florida vibe of the ingredients.
- Keep the pacing fast during the chopping sequences, using quick match-cuts to keep the energy high.
- Add a subtle, playful text overlay of the spice measurements on screen as Tara mixes them, using a clean, handwritten font.
- Prioritize the natural sound design (the crisp crunch of onions, the squeeze of the lime, the loud pan sizzle) over the background music.
| Call | Provider | Model | Input Tokens | Output Tokens | Compute / Credits |
|---|---|---|---|---|---|
| Script | abacus.ai | gemini-3.5-flash | 1,233 | 4,344 | — |
| Image 1 — The Humid Orlando Opening | abacus.ai | nano_banana2 | — | — | 6,753.675 |
| Image 2 — The Sizzling Cast-Iron Flip | abacus.ai | nano_banana2 | — | — | 6,753.625 |
| Image 3 — The Perfect Plated Bite | abacus.ai | nano_banana2 | — | — | 6,753.525 |
Making Turkey Burgers Actually Juicy (No Dry Patties Allowed!)
I tried to make backyard herb turkey burgers that were juicy enough for nobody to ask where the beef was.
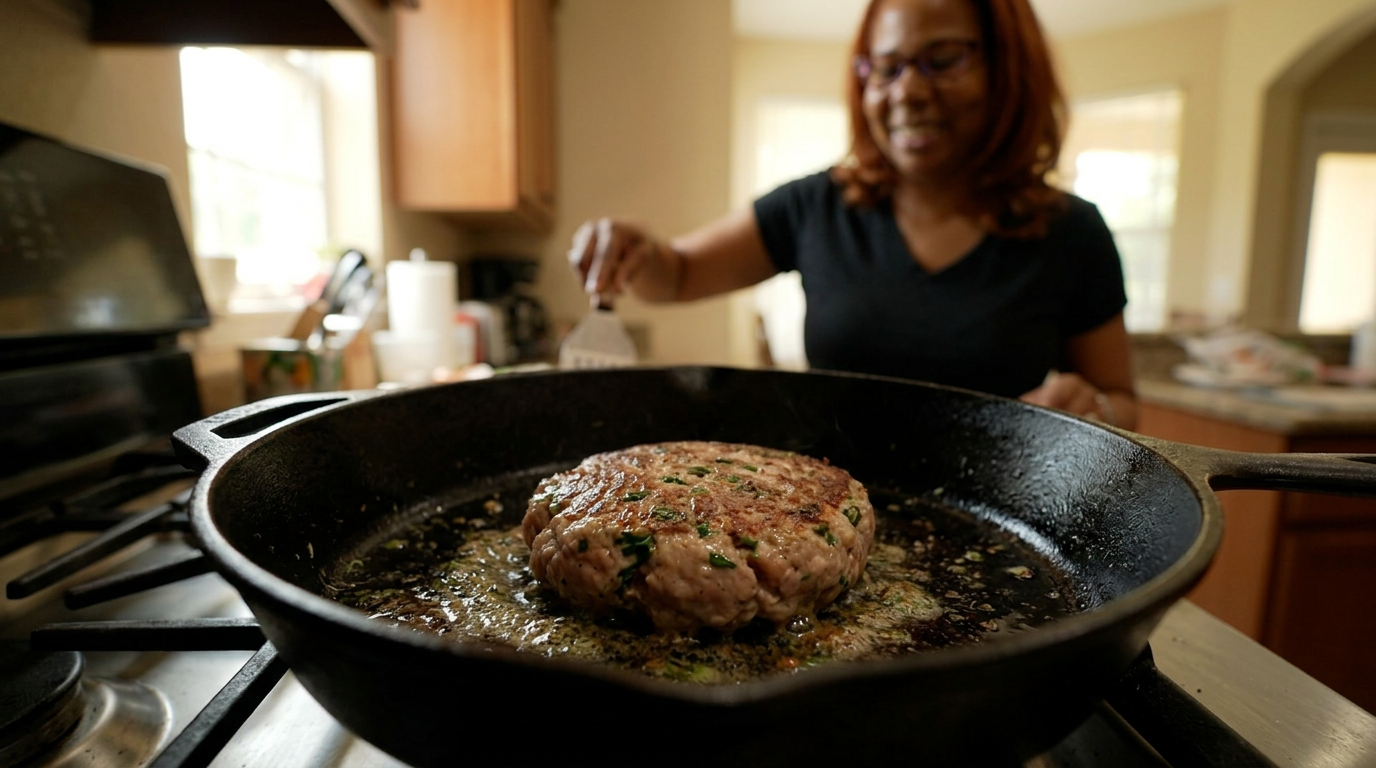
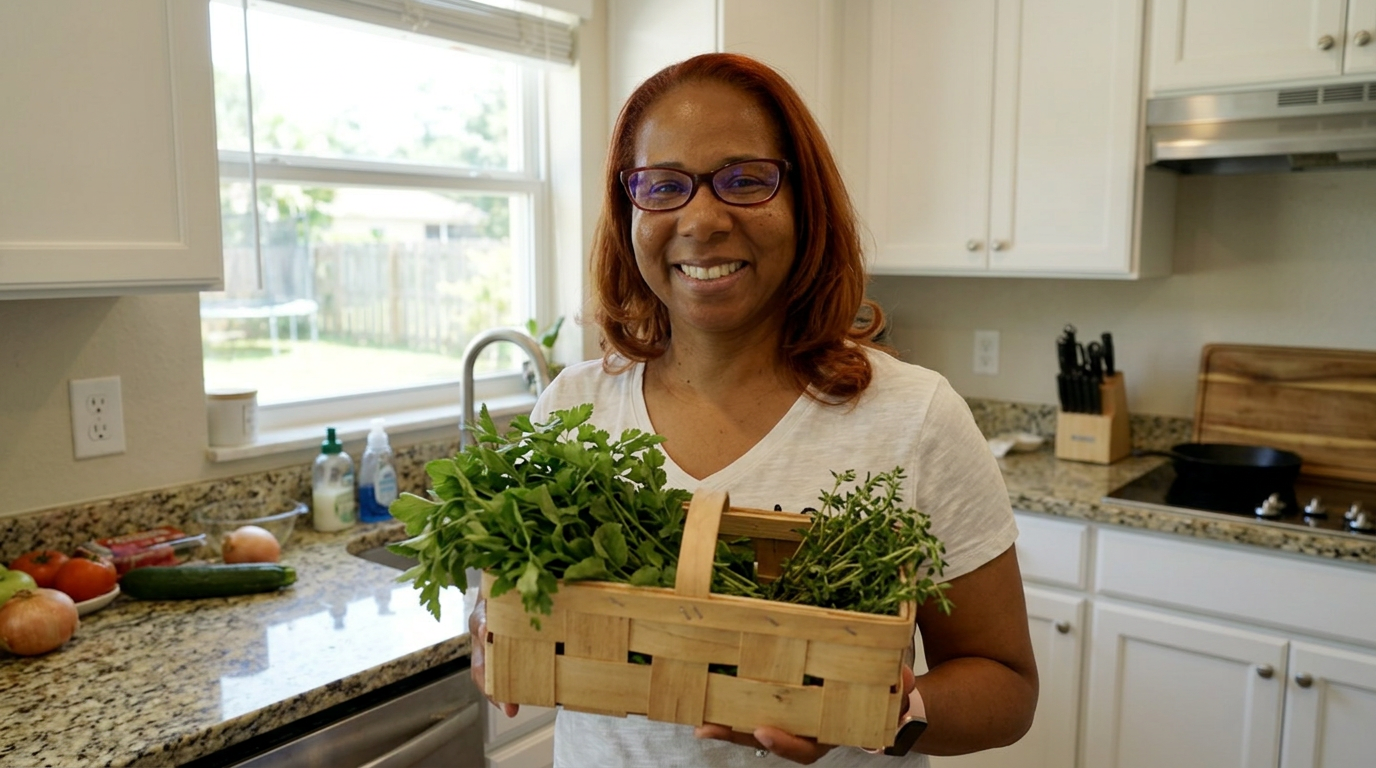
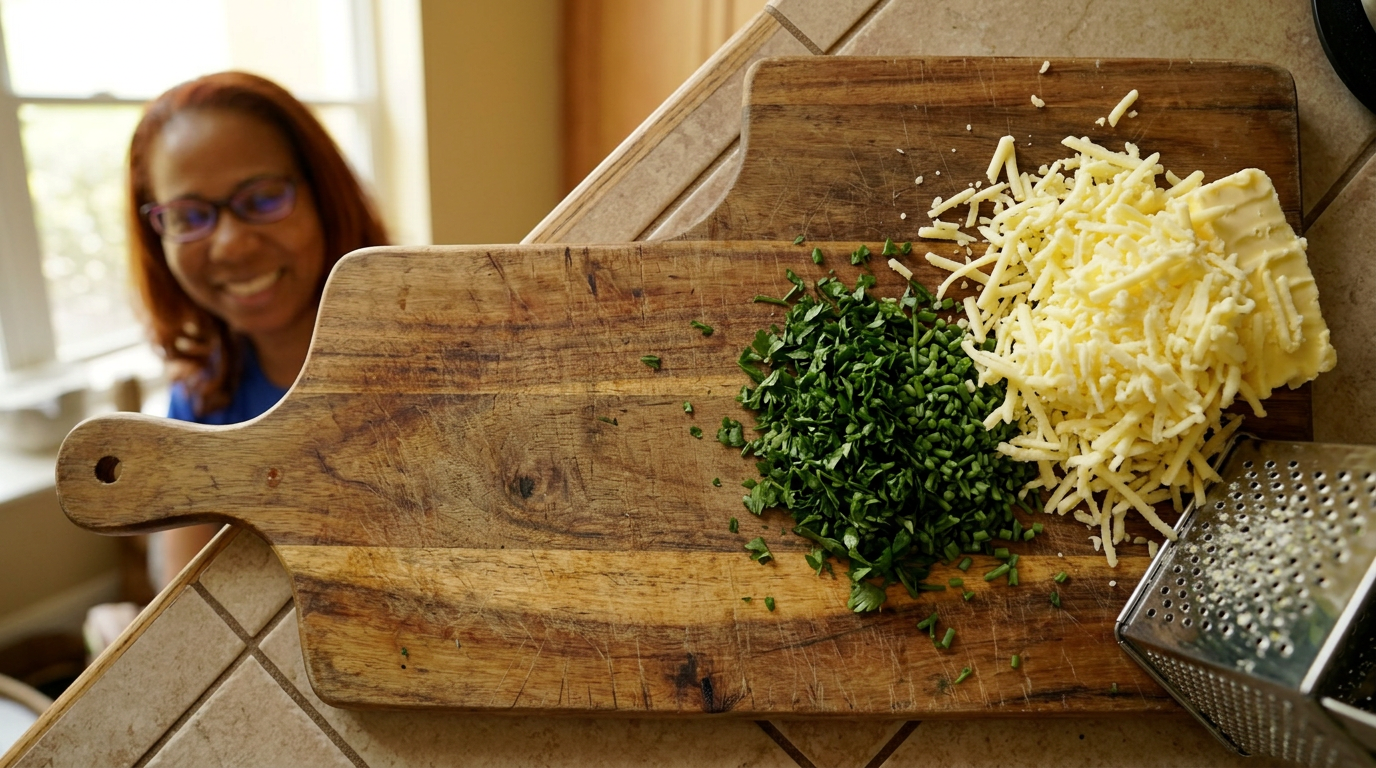
We have all been victims of the dry, hockey-puck turkey burger. Today, I am risking my reputation with Tony to see if we can make a poultry burger so juicy, herb-flecked, and savory that nobody even misses the beef.
Close-up of Tara's hand pressing a spatula onto a sizzling, thick turkey patty in a cast-iron skillet. Juices bubble up around the edges alongside charred bits of green herbs. Steam rises, obscuring the lens slightly before we pull back to Tara smiling nervously.
It was one of those classic, sweltering Orlando afternoons where the humidity wraps around you like a wet blanket the second you step outside. Tony and I had spent the morning trying to tame our backyard garden, which is currently a chaotic jungle of rosemary, sweet basil, and flat-leaf parsley. After two hours of pulling weeds under the Florida sun, we were absolutely starving, but the thought of a heavy beef burger felt like too much. I wanted something lighter, but Tony is a traditionalist. To him, 'turkey burger' is usually code word for 'dry, bland cardboard.'
I knew the stakes were high. If I served him a crumbly, sawdust-textured patty, he would quietly finish it out of politeness, but then we'd end up ordering a late-night pizza. I needed to engineer a turkey burger that wasn't just 'good for being healthy,' but genuinely delicious in its own right. The plan was to raid our freshly trimmed backyard herb patch, lean heavily on some fat-retaining moisture tricks, and cook them inside on my trusty cast-iron skillet where I could control the sear without losing all the precious fat to the grill grates.
The secret to a great turkey burger isn't trying to make it taste like beef; it's embracing what poultry does best. Turkey is a blank canvas. It loves aromatic herbs, garlic, and bright acid. But because 93% lean ground turkey has almost no fat, it dries out the second it hits heat. My strategy involved a double-whammy of moisture: finely grated zucchini to act as a hidden sponge, and a healthy dollop of cold, unsalted butter grated directly into the meat mixture to mimic the marbled fat of a high-end chuck blend.
So, with our hands still smelling like rich soil and crushed basil, I cleared off our cluttered kitchen island, washed our harvest, and set out to prove that turkey could wear the crown. Tony sat at the counter, sipping an iced tea, looking skeptical but hopeful. I fired up the stove, pulled out the ground turkey, and got to work.
I started by gathering the herbs we just rescued from the backyard heat. I had a massive handful of flat-leaf parsley, some delicate sprigs of fresh oregano, and a few woody stems of rosemary. Rosemary can easily overpower a dish, so I only stripped off about a teaspoon's worth of leaves, chopping them incredibly fine alongside the parsley and oregano. The smell immediately filled the kitchen—medicinal, earthy, and bright. I tossed them into a large mixing bowl with three grated cloves of garlic and the zest of half a lemon to cut through the richness.
Next came the moisture insurance policy. I grabbed a small zucchini from the crisper drawer and grated it on the fine holes of my box grater. You don't want giant green worm-like strands in your burger, just a fine mist of vegetable moisture. I squeezed out about half the liquid in a paper towel—we want moisture, not a soggy soup—and added about half a cup of the grated zucchini to the bowl. Then, I grabbed a stick of frozen butter from the freezer and grated exactly two tablespoons of it directly into the mix. This is a trick I learned from high-end burger joints; as the burger cooks, those tiny pockets of butter melt, basting the lean turkey from the inside out.
I added a pound of ground turkey to the bowl. Now, here is where most people ruin their burgers: they overwork the meat. If you squeeze and mash ground turkey like you're kneading bread, you end up with a dense, rubbery texture. I seasoned the meat generously with kosher salt, cracked black pepper, and a pinch of smoked paprika for that backyard grill depth. Using my fingertips like a claw, I gently tossed the ingredients together just until combined. It looked incredibly colorful—flecked with green herbs and tiny white dots of butter.
I divided the mixture into three generous patties. Because turkey is soft and sticky, I wet my hands with cold water first to keep it from sticking to my palms. I shaped them slightly larger than the buns, making sure to press a shallow well into the center of each patty with my thumb. This is crucial because burgers puff up in the middle as they cook; the indentation ensures they finish flat and cook evenly, rather than turning into round tennis balls.
I popped the patties into the fridge for about fifteen minutes. This is a step you cannot skip. It allows the grated butter to firm back up and helps the loose turkey structure bind together so they don't fall apart on the pan. While they chilled, I whipped up a quick garlic-herb mayo using the remaining lemon zest, a squeeze of juice, a spoonful of chopped basil, and a pinch of salt. I toasted our brioche buns in a dry skillet until they were golden brown, setting them aside to keep them crispy.
With the prep done, it was time for the main event. I placed my seasoned cast-iron skillet over medium-high heat and let it get hot enough that a drop of water flicked onto it sizzled away instantly. I swirled in a tablespoon of high-smoke-point avocado oil. Taking the chilled patties from the fridge, I carefully lowered them into the pan. The sizzle was immediate and loud, a gorgeous sound that instantly got Tony's attention from the living room.
I let them sear undisturbed for a full five minutes. With turkey, you have to resist the urge to move them around or press down on them with a spatula. Pressing them just squeezes out all that moisture we worked so hard to trap inside. After five minutes, I slid a thin fish spatula underneath, feeling that satisfying release as the beautifully browned, herby crust lifted cleanly from the iron. I flipped them over, revealing a deep, caramelized mahogany sear.
To ensure they stayed juicy but were completely safe to eat, I placed a slice of sharp white cheddar cheese on top of each patty, poured a splash of water directly into the hot pan, and immediately covered it with a lid. The steam melted the cheese in about thirty seconds while gently finishing the interior of the burgers. I pulled them off the heat once my instant-read digital thermometer registered exactly 165 degrees Fahrenheit in the thickest part of the patty. I transferred them to a warm plate to rest for five minutes, letting the juices redistribute.
As they rested, I watched a tiny pool of savory, buttery juices collect on the plate, mingling with the melted cheese. There was no sign of dry, chalky meat here. The aroma of toasted herbs, melted sharp cheddar, and seared poultry was absolutely incredible, easily rivaling any steakhouse we’ve been to.
A fast-paced montage of chopping fresh green herbs on a wooden board, grating zucchini and frozen butter on a metal grater, gently folding the colorful meat mixture by hand, pressing thumbprints into the raw patties, placing them in a smoky cast-iron skillet, flipping to reveal a dark golden crust, and covering the pan with a lid as steam billows out.
I assembled the burgers on the toasted brioche buns, spreading a generous layer of the lemon-herb mayo on both sides. I laid down a crisp piece of butter lettuce, the juicy herb-forward turkey patty with its blanket of melted white cheddar, and a couple of thin slices of heirloom tomato from our local farmers market. It looked picture-perfect—height, color, contrast, and cheese dangling beautifully over the edge.
I handed one to Tony, who looked at it with genuine surprise. When he took his first bite, there was an audible crunch from the toasted bun, followed by a pause. A tiny drop of juice literally ran down his wrist. He looked at me, chewed, swallowed, and said, 'Okay, Tara. This is not a turkey burger. This is a real burger.' The grated butter and zucchini had done their job perfectly; the meat was incredibly tender, almost velvety, and the bright pop of rosemary and lemon cut right through the rich cheese.
I took a bite of my own and was blown away by how much the fresh garden herbs lifted the whole experience. It tasted like summer in the best way possible. Next time, I think I might experiment with adding a little chopped jalapeño to the mix for a kick, or maybe swap out the cheddar for some salty feta. But for a hot Orlando afternoon after a long day in the dirt, this was absolute perfection. We cleaned our plates in complete, happy silence.
Medium shot of Tara and Tony sitting at their kitchen counter. Tony takes a huge, messy bite of the burger, nods approvingly with wide eyes, and points at the burger in praise. Tara laughs, takes a bite of her own, and winks at the camera as she wipes her hands with a napkin.
Shot List
| Type | Description | Audio | Duration |
|---|---|---|---|
| Close-up | Sizzling turkey patty in cast iron, juices bubbling with green herbs visible. | [Sizzling sound intensifies] | 5s |
| Medium | Tara in her sunny kitchen, explaining her mission to make a juicy turkey burger. | Today we are tackling the dry hockey puck stereotype of poultry burgers. | 15s |
| B-roll | Tara cutting fresh rosemary and parsley in her sunny backyard garden. | [Light acoustic guitar music starts playing] | 10s |
| Overhead | Tara's hands finely chopping herbs on a wooden cutting board. | Fresh herbs are key here because turkey is incredibly neutral. | 12s |
| Detail | Grate frozen butter on a microplane directly over the mixing bowl. | This frozen butter is our secret fat marbling cheat-code. | 8s |
| Close-up | Grated zucchini being squeezed in a paper towel to remove excess liquid. | We want moisture, but not soggy, falling-apart patties. | 8s |
| Close-up | Tara's hand gently mixing the turkey meat and herbs together. | Be gentle here. Overworking the turkey makes it rubbery. | 10s |
| Overhead | Tara shaping the patties and pressing a thumbprint into the center. | Don't skip the thumbprint, or you'll end up with football-shaped burgers. | 10s |
| Timelapse | Patties sitting in the refrigerator to chill and firm up. | [Music tempo increases slightly] | 6s |
| Medium | Tara searing the patties in a hot cast-iron skillet, smoke rising. | Hear that? That's the sound of a perfect sear locking in flavor. | 12s |
| Close-up | Flipping the burger to reveal a gorgeous, dark caramelized crust. | Look at that crust! Beautiful deep mahogany color. | 7s |
| Detail | A splash of water hits the hot pan and Tara immediately covers it with a lid. | [Loud steam hiss] | 6s |
| Close-up | A digital thermometer inserting into the cheese-covered patty showing 165 degrees. | Perfect. One hundred and sixty-five degrees. Ready to rest. | 8s |
| Medium | Tony taking a large bite of the burger, juices dripping, nodding happily. | Tony: 'Wow, Tara. This is actually incredibly juicy. Best one yet.' | 12s |
| Wide | Tara smiling at the camera holding her half-eaten burger, kitchen in background. | And that is how you conquer the dry turkey burger. See you next time! | 10s |
- Capture a slow-motion shot of the water hitting the hot skillet and the steam billowing up before covering with the lid.
- Get a macro shot of the herb chopping to emphasize the fresh, backyard aspect of the recipe.
- Show the real-life aftermath of the prep: a messy counter with parsley stems and the box grater, to keep the video feeling authentic.
- Film a tight shot of the cheese melting over the sides of the patty under the glass lid if possible.
- 0:00 — Warm, upbeat acoustic guitar and light percussion to match the energetic cold open.
- 1:15 — Soft, breezy indie-folk track starts as Tara transitions to talking about her backyard garden.
- 3:30 — Playful, rhythmic acoustic track during the prep work (chopping herbs, grating butter).
- 5:45 — Slightly faster, bluesy guitar groove as the patties hit the hot cast-iron skillet.
- 7:50 — Warm, mellow ambient music as the burgers rest and assembly begins.
- 9:10 — Bright, celebratory acoustic theme for the tasting and final sign-off.
- Keep the pacing brisk but relaxed—allow the natural sounds of the kitchen (chopping, sizzling, steam) to shine through over the music.
- Use clean, minimalist text overlays for ingredient amounts as they appear on screen rather than cluttering the frame.
- Color grade with warm, golden tones to emphasize the sunny Florida afternoon vibe.
- Include a subtle 'pop' sound effect when showing the recipe card graphic at the end.
| Call | Provider | Model | Input Tokens | Output Tokens | Compute / Credits |
|---|---|---|---|---|---|
| Script | abacus.ai | gemini-3.5-flash | 1,234 | 4,503 | — |
| Image 1 — The Sizzle Hook | abacus.ai | nano_banana2 | — | — | 6,753.575 |
| Image 2 — Welcome to Tara's Kitchen | abacus.ai | nano_banana2 | — | — | 6,753.8 |
| Image 3 — The Secret Ingredient Prep | abacus.ai | nano_banana2 | — | — | 6,753.675 |
Cast Iron Cornbread & Slow-Simmered Chili | Cozy Rainy Day Dinner in Orlando
When a classic Orlando thunderstorm rolled in, I decided to warm up our kitchen with the ultimate comfort food double-header: a rich, smoky beef chili and a crispy, honey-glazed cast-iron cornbread.
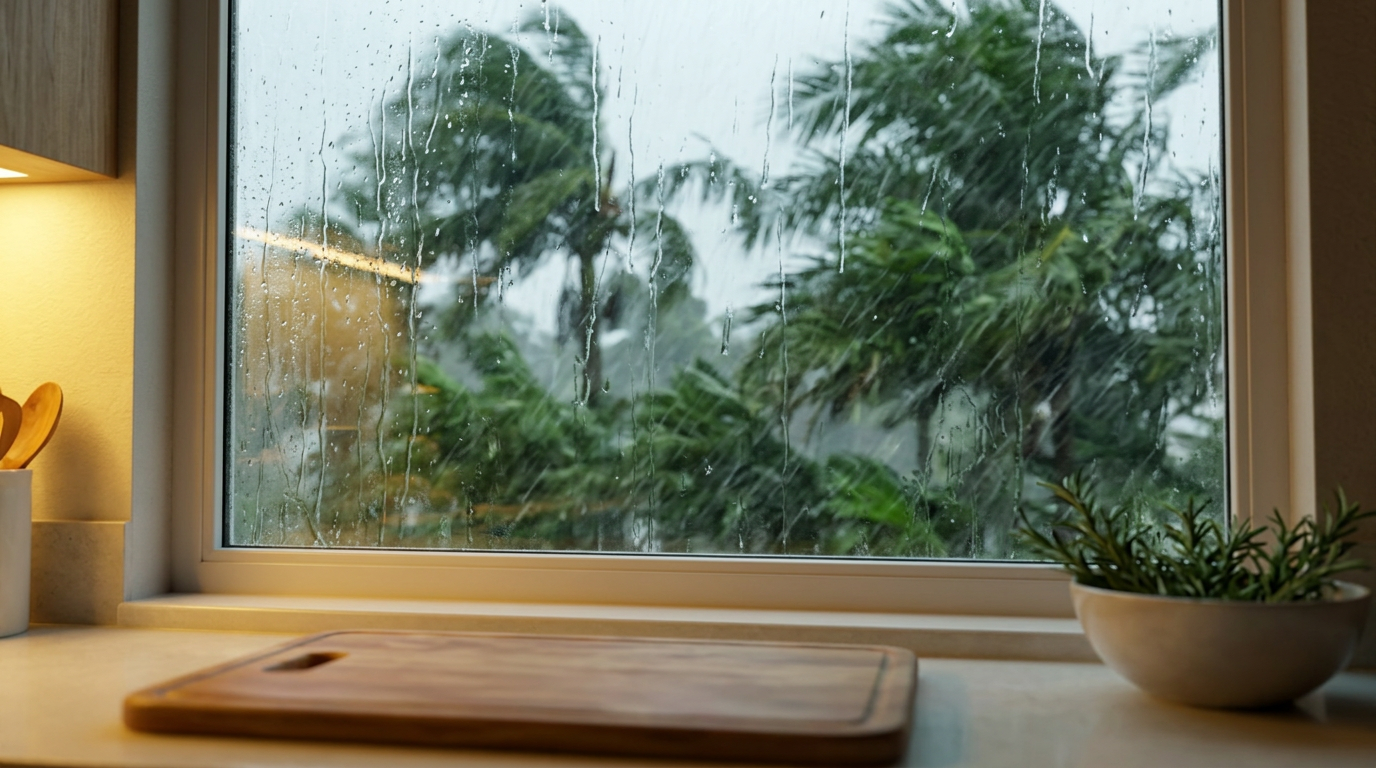
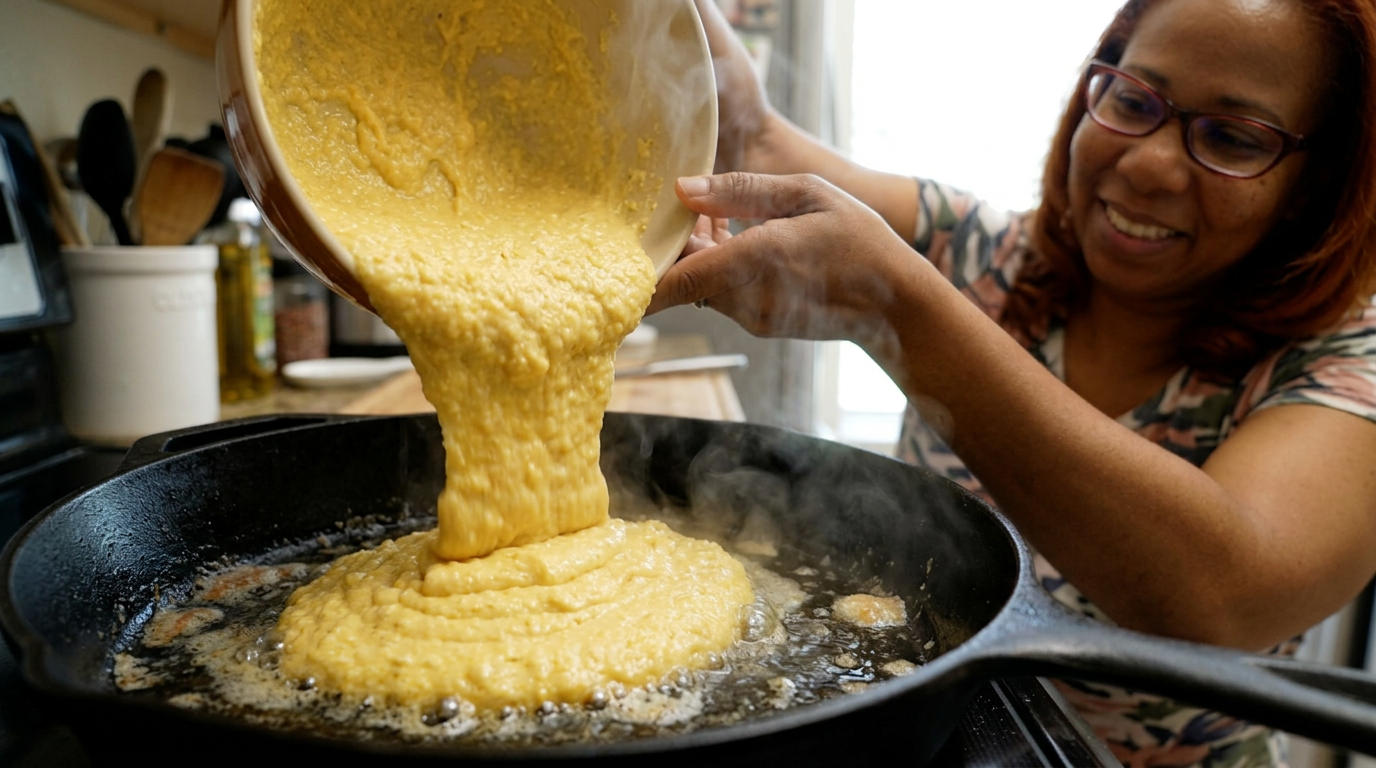
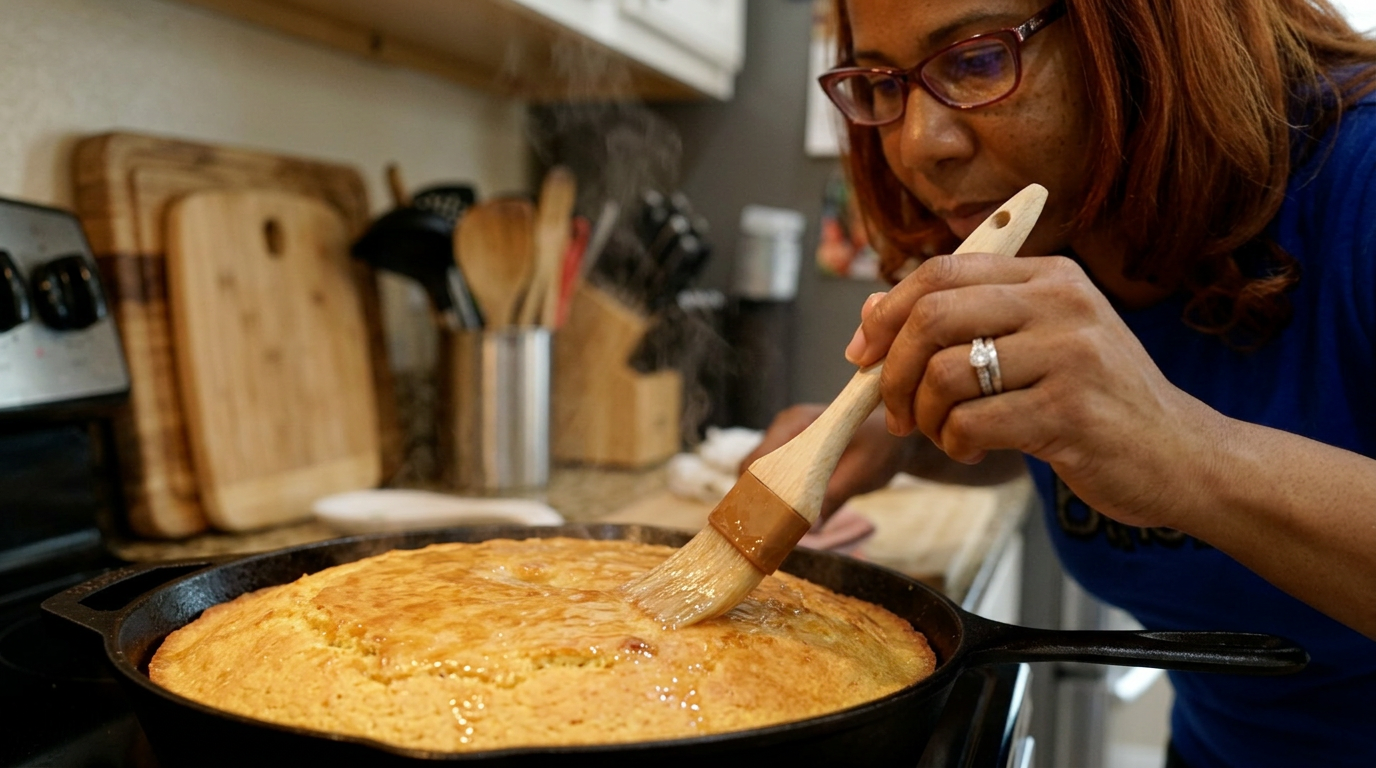
There is nothing quite like the sound of a sudden Florida downpour hitting the metal roof while a pot of smoky chili bubbles on the stove and sweet cornbread bakes to a perfect golden crust.
Medium shot of Tara standing in her warm, bright kitchen, steam rising from a Dutch oven behind her as rain streaks the window pane in the background. She smiles and holds up a wedge of steaming, golden cornbread.
It was one of those classic Orlando afternoons where the sky turns a heavy, bruised purple in a matter of minutes. The humidity had been building all morning, and by three o'clock, the wind was whipping through the palms in our backyard. Tony ran around closing all the windows as the first heavy drops of rain started to pelt our roof. That kind of sudden weather shift does something to your appetite. I immediately abandoned my plans for a light salad dinner and started rummaging through the pantry for comfort food essentials.
I found a bag of stone-ground yellow cornmeal, a can of fire-roasted tomatoes, and some dried chilis. It was settled: we were having beef chili and cast-iron cornbread. But this couldn't be a rushed weeknight job. With the storm trapping us inside for the evening, I wanted to take my time, building layers of flavor in our heavy Dutch oven and getting that cast-iron skillet screaming hot so the cornbread would get those prized, crispy, almost fried-tasting edges.
My plan was to make a rich, thick chili using ground beef and smoky bacon for depth, spiced with cumin, coriander, and a touch of unsweetened cocoa powder to give it a dark, savory complexity. For the cornbread, I wanted a true Southern-style crumb—not too sweet, but balanced with a generous drizzle of honey-butter immediately after it pulled out of the oven. The stakes were simple but high: keeping Tony and myself warm, dry, and thoroughly well-fed while the storm did its worst outside.
I started by getting the chili base going. I chopped up four thick slices of bacon and tossed them into my cold Dutch oven, letting the fat render out slowly over medium heat until the kitchen smelled incredible. Once the bacon was crispy, I scooped it out, leaving all that liquid gold in the bottom of the pot. In went a pound of ground beef. I resisted the urge to stir it immediately; the secret to deep beef flavor is letting it sit undisturbed for a few minutes to get a really dark, caramelized sear on the bottom.
While the beef browned, I finely diced a large sweet onion, a red bell pepper, and a jalapeño from our backyard garden. I tossed them into the pot with the beef, letting them soften in the rendered fat. It was at this point that the power flickered. The kitchen went black for a split second, and my heart stopped—did I just commit to a two-hour simmer on an electric stove that was about to lose power? Fortunately, the lights hummed back to life, and I decided to speed things up just a tiny bit, just in case.
Next came the spices. I toasted a tablespoon of chili powder, a teaspoon of cumin, half a teaspoon of oregano, and a pinch of cinnamon directly in the hot fat at the bottom of the pot for thirty seconds. This ‘blooming’ process wakes up the essential oils in the spices, and the aroma that hit my face was absolutely intoxicating. I then deglazed the pot with a splash of dark beer we had in the fridge, scraping up all those delicious browned bits from the bottom.
I poured in a large can of crushed tomatoes, a cup of beef stock, and a can of rinsed black beans. I know some chili purists scoff at beans, but in our house, black beans are a non-negotiable. I turned the heat down to low, popped the lid on, and let it begin its slow simmer. Now, it was time for the main event: the cornbread.
I pulled out my grandmother's twelve-inch cast-iron skillet. The key to a legendary cornbread crust is preheating the skillet. I dropped a tablespoon of bacon fat into the pan and slid it into a hot, 425-degree oven while I mixed the batter. In a large bowl, I whisked together equal parts yellow cornmeal and all-purpose flour, along with baking powder, baking soda, and salt. In another bowl, I beat two eggs with a cup of buttermilk and a quarter-cup of melted butter.
I folded the wet ingredients into the dry, keeping it brief. Over-mixing cornbread batter makes it tough, and I wanted a tender, moist crumb. By now, the oven was roaring. I carefully pulled out the screaming-hot skillet using a thick oven mitt. The bacon fat was shimmering and smoking slightly. I poured the batter in, and it made this beautiful, loud sizzling sound. That sizzle is the sound of the bottom crust forming instantly.
I quickly slid the skillet back into the oven and set a timer for twenty minutes. The rain was absolutely dumping outside now, coming down in sheets against the kitchen window. I checked on the chili, stirring in a tiny square of dark chocolate right at the end to deepen the color and round out the acidity of the tomatoes. I tasted it—it was smoky, rich, and had just the right amount of back-end heat from the jalapeño.
At exactly nineteen minutes, the timer buzzed. I peeped through the oven glass and saw a beautiful, domed, golden-brown crust cracked slightly across the top. I pulled it out, and while it was still bubbling-hot, I brushed the entire top crust with a mixture of melted butter and wildflower honey. The cornbread just drank it right up, leaving a shiny, sweet, slightly sticky glaze.
Show close-ups of bacon sizzling, beef searing, spices blooming in the pot, the batter hitting the hot, greased cast-iron skillet with a loud sizzle, and the golden cornbread being pulled from the oven to be brushed with honey-butter.
I let the cornbread rest for about five minutes—just long enough so it wouldn't crumble entirely when sliced—and ladled the thick, dark chili into two wide ceramic bowls. I topped each bowl with a generous mountain of sharp cheddar cheese, a dollop of sour cream, and a scattering of fresh green onions. I cut the cornbread into thick, wedge-shaped slices. The crust on the bottom was so crispy it actually made a scraping sound against the knife.
Tony came into the kitchen, drawn by the smell of toasted cornmeal and smoky chili. We sat down at the kitchen table while the storm raged outside, the rain still drumming a steady beat on the roof. Tony took his first bite of the chili, followed immediately by a piece of the warm, honey-glazed cornbread dipped straight into the bowl. 'Tara,' he said, his mouth half-full, 'you could sell this.' That's his ultimate compliment.
The combination of the rich, spicy beef and the sweet, crispy-edged cornbread was absolute perfection. It was exactly what we needed to turn a gloomy, stormy Florida afternoon into a cozy, memorable night. Next time, I think I’ll add some fresh corn kernels directly into the batter for a little extra texture, but tonight, this was absolute home-cooked perfection. If you're facing a rainy day—or just need a little comfort—I highly recommend pulling out your cast iron.
Slow motion shot of a spoon dipping into the chili, pulling up melted cheddar cheese, followed by a piece of cornbread being dipped into the chili. The video ends with Tara and Tony clinking their bowls together with a smile.
Shot List
| Type | Description | Audio | Duration |
|---|---|---|---|
| Medium | Tara in her warm kitchen, rain visible on the window behind her, holding a wedge of steaming cornbread. | There is nothing quite like the sound of a sudden Florida downpour hitting the metal roof while a pot of smoky chili bubbles on the stove. | 6s |
| B-roll | Quick montage of dark storm clouds rolling over Orlando palm trees, rain starting to splatter on a window pane. | It was one of those classic Orlando afternoons where the sky turns a heavy, bruised purple in a matter of minutes. | 5s |
| Close-up | Tara's hands chopping thick-cut bacon on a wooden cutting board. | I immediately abandoned my plans for a light salad dinner and started rummaging through the pantry for comfort food essentials. | 6s |
| Close-up | Bacon sizzling in a hot, blue enameled Dutch oven, releasing its fat. | I started by getting the chili base going. I chopped up four thick slices of bacon and tossed them into my cold Dutch oven. | 7s |
| Overhead | Ground beef being pressed into the hot bacon fat, showing a deep brown sear forming on the bottom. | In went a pound of ground beef. I resisted the urge to stir it immediately to get a really dark, caramelized sear. | 8s |
| Detail | Spices (chili powder, cumin, oregano) being dumped directly into the hot beef fat and bubbling. | I toasted a tablespoon of chili powder, a teaspoon of cumin, and half a teaspoon of oregano directly in the hot fat. | 6s |
| Wide | Tara pouring dark beer into the Dutch oven; a dramatic cloud of steam rises up as she smiles at the camera. | I then deglazed the pot with a splash of dark beer we had in the fridge, scraping up all those delicious browned bits. | 7s |
| Close-up | Pouring yellow cornmeal and flour into a large ceramic mixing bowl. | For the cornbread, I wanted a true Southern-style crumb. I whisked together equal parts yellow cornmeal and all-purpose flour. | 6s |
| B-roll | Tara carefully removing a smoking-hot cast iron skillet from the oven using a thick red kitchen mitt. | The key to a legendary cornbread crust is preheating the skillet. I dropped a tablespoon of bacon fat into the pan and slid it into a hot oven. | 8s |
| Close-up | Pouring the pale yellow cornbread batter into the hot skillet, showing it bubble and sizzle instantly at the edges. | I poured the batter in, and it made this beautiful, loud sizzling sound. That sizzle is the sound of the bottom crust forming instantly. | 8s |
| Timelapse | Through the oven door glass, the cornbread rises, cracks slightly, and turns a rich golden-brown color. | I quickly slid the skillet back into the oven and set a timer for twenty minutes. | 5s |
| Detail | A pastry brush spreading a glistening mixture of melted butter and honey over the cracked crust of the hot cornbread. | I pulled it out, and while it was still bubbling-hot, I brushed the entire top crust with a mixture of melted butter and wildflower honey. | 8s |
| Close-up | A sharp knife slicing through the crunchy crust of the cornbread, making an audible crackling sound. | I let the cornbread rest for about five minutes. The crust on the bottom was so crispy it actually made a scraping sound against the knife. | 6s |
| Medium | Tony taking a bite of the chili-dipped cornbread at the dinner table, nodding enthusiastically to Tara. | 'Tara,' he said, his mouth half-full, 'you could sell this.' That's his ultimate compliment. | 7s |
| Close-up | A steaming bowl of chili with melted cheese and a side of golden cornbread, with rain lashing against the window in the soft-focus background. | If you're facing a rainy day—or just need a little comfort—I highly recommend pulling out your cast iron. See you next time! | 8s |
- Capture close-up ambient audio of the rain hitting the window and the metal roof to layer into the background of the video.
- Get a slow, macro shot of the square of dark chocolate melting into the dark red, bubbling chili.
- Record the actual sound of the knife slicing through the crispy cornbread crust; this ASMR moment is highly satisfying.
- Film a quick sequence of setting up the table with simple bowls, spoons, and a damp towel to keep the homey, unpretentious vibe.
- 0:00 — Cozy, acoustic guitar folk music begins softly, matching the rainy day mood.
- 1:30 — Music swells slightly as the bacon starts sizzing, transitioning to a warm, uplifting kitchen rhythm.
- 3:15 — The tempo slows down slightly during the power-flicker moment, building light comedic tension.
- 4:45 — A warm, steady acoustic fingerpicking pattern resumes as Tara mixes the cornbread batter.
- 7:10 — The music becomes richer and more triumphant as the golden cornbread is pulled from the oven.
- 8:45 — Soft, jazzy acoustic background music plays during the tasting and cozy table scene with Tony.
- 9:45 — The music fades out slowly with gentle acoustic guitar strums as the screen transitions to the recipe card.
- Keep the video pacing relaxed and cozy, allowing the natural kitchen sounds (sizzling, rain, chopping) to breathe between voiceovers.
- Use warm, amber color grading to emphasize the contrast between the cold, blue rainy day outside and the warm, inviting kitchen inside.
- Add a subtle textured paper overlay for the on-screen recipe instructions to give it an old-fashioned cookbook feel.
- Do not over-edit or use fast transitions; instead, use soft cross-dissolves to transition between the long, slow-simmering steps.
| Call | Provider | Model | Input Tokens | Output Tokens | Compute / Credits |
|---|---|---|---|---|---|
| Script | abacus.ai | gemini-3.5-flash | 1,234 | 4,731 | — |
| Image 1 — Stormy Orlando Opening | abacus.ai | nano_banana2 | — | — | 6,753.6 |
| Image 2 — The Sizzling Cast-Iron Pour | abacus.ai | nano_banana2 | — | — | 6,753.6 |
| Image 3 — The Honey-Butter Glaze | abacus.ai | nano_banana2 | — | — | 6,753.65 |
Turning Leftovers Into The Ultimate Sweet Potato Breakfast Hash
I had a fridge full of random leftovers and a massive craving for a diner-style weekend breakfast, so I set out to make a crispy sweet potato hash that needed one absolutely perfect fried egg to pull it all together.
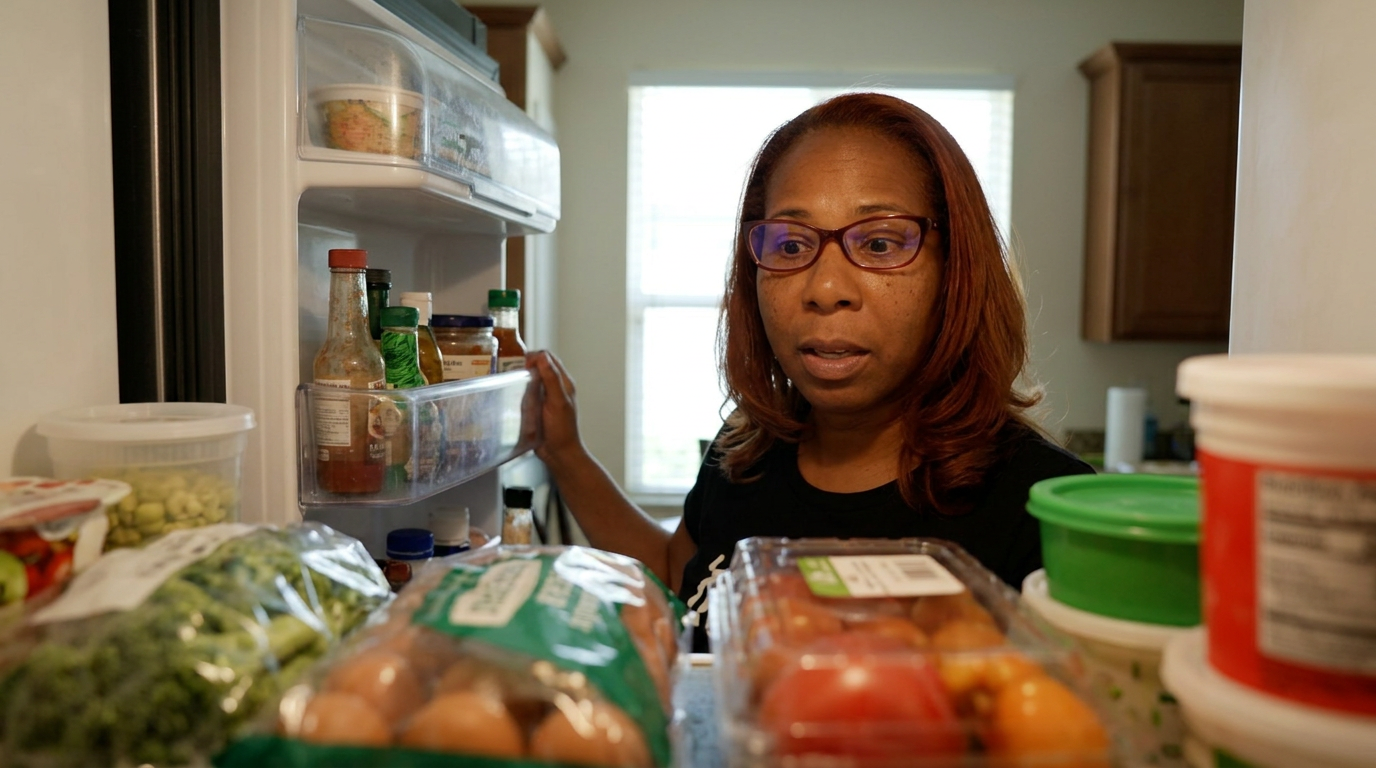
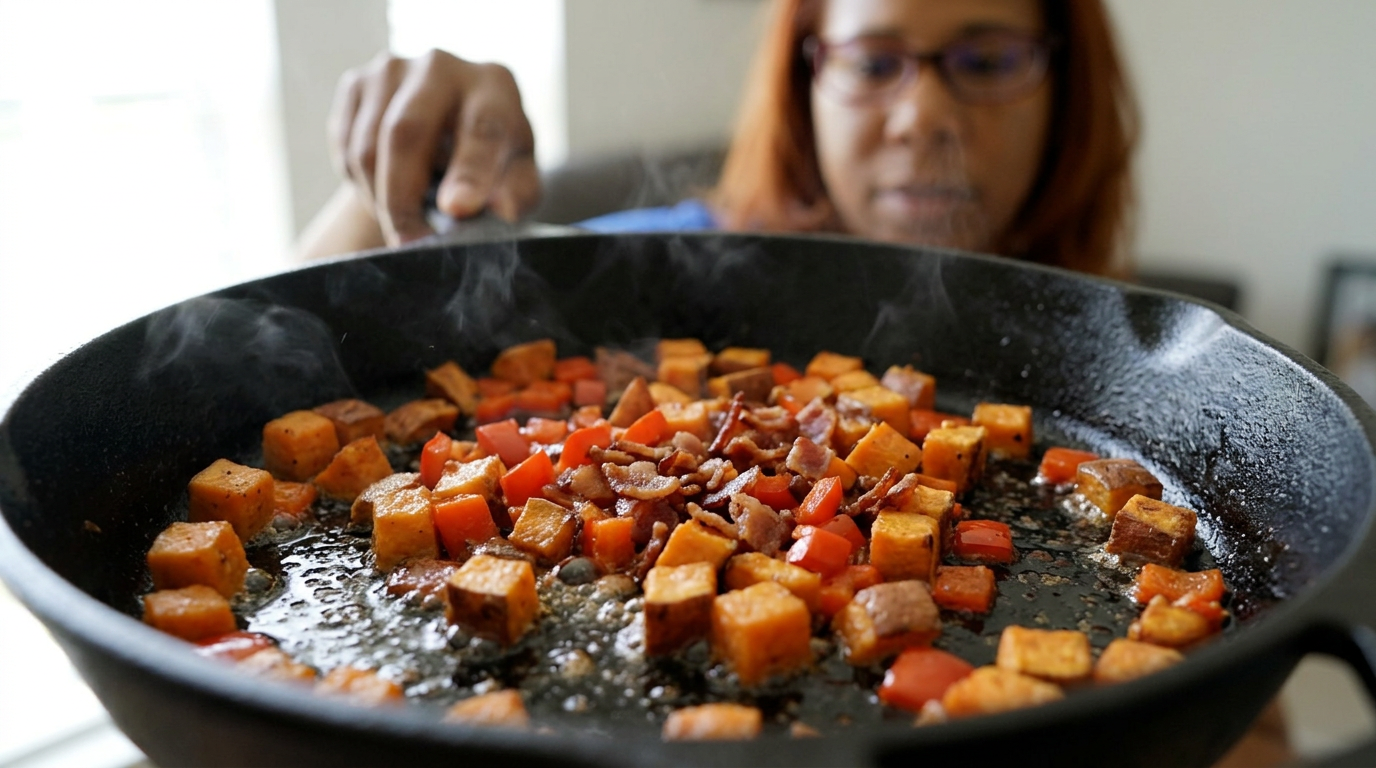
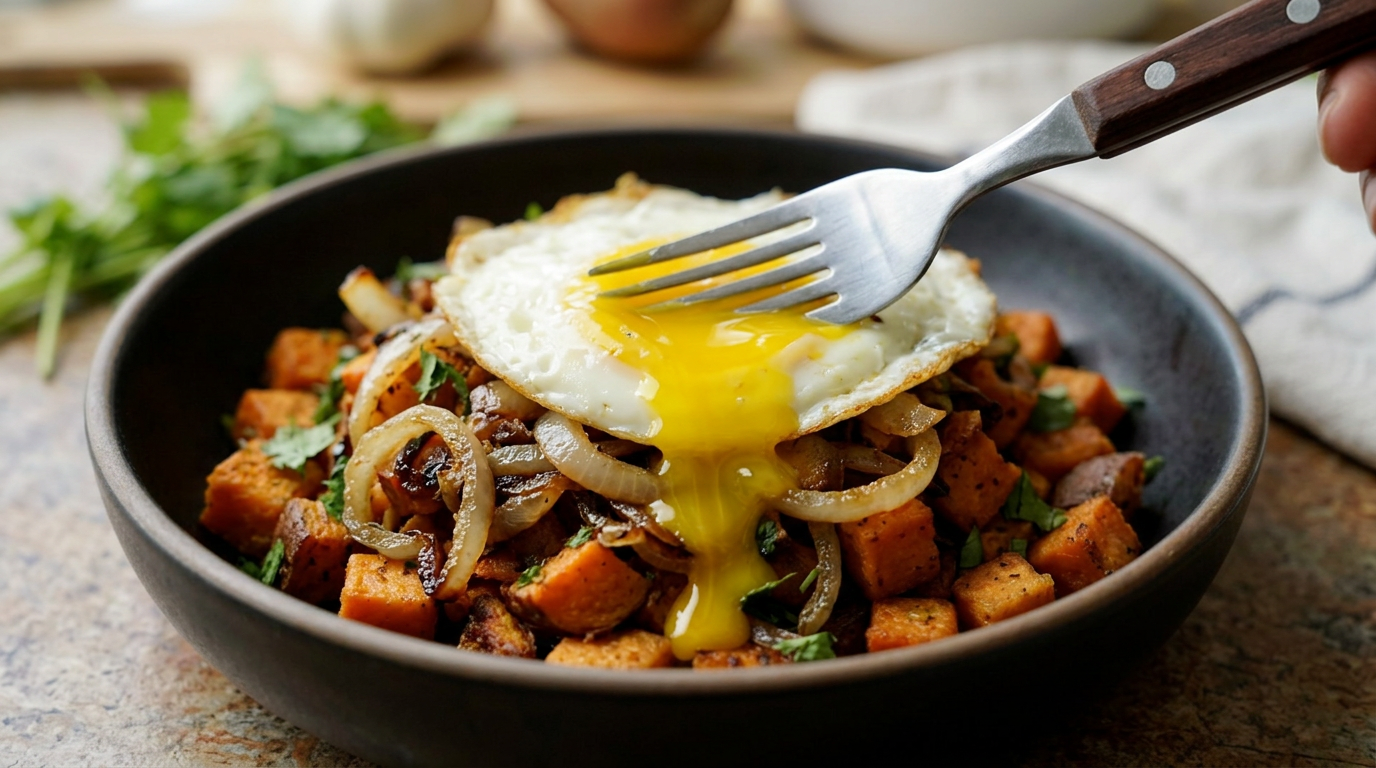
We had half a bag of sweet potatoes rolling around the pantry, some leftover bacon from Tuesday, and a serious need for a slow, comforting Saturday morning. This is how we turned a fridge-cleaning mission into the best breakfast hash we've ever eaten.
Close-up of a perfectly fried egg sitting on top of a steaming, crispy, colorful hash. Tara's fork gently punctures the yolk, which slowly spills over a beautifully charred cube of sweet potato.
It was one of those humid, slow Saturday mornings in Orlando where the AC is hummed high and you just want to linger in your pajamas for as long as possible. Tony and I woke up starving, but the thought of driving out to a packed brunch spot and waiting forty-five minutes in the Florida heat sounded exhausting. I opened the fridge hoping for a sign, and what I found was a classic mismatch of leftovers: three slightly soft sweet potatoes, half a package of bacon, a lonely red bell pepper, and exactly two eggs left in the carton.
Now, the easy route would have been scrambled eggs with toast, but my heart was set on something hearty, crispy, and savory. A breakfast hash is the ultimate blank canvas, but it's also incredibly easy to mess up. If you've ever had a soggy, mushy hash where the potatoes are half-raw and half-mashed, you know exactly what I mean. I wanted distinct, caramelized cubes of sweet potato, smoky bacon, sweet peppers, and a runny egg yolk to tie the whole thing together like a rich sauce.
The stakes were surprisingly high for a lazy Saturday. Tony was already on his second cup of coffee, looking at me with those hopeful 'is breakfast ready yet?' eyes. I had a plan, but it required a bit of kitchen physics. Sweet potatoes have a ton of natural sugar and moisture, which means they love to burn on the outside before they cook through on the inside. To get that perfect diner-style crust without ending up with charred charcoal bits, I had to balance my heat, time the ingredients perfectly, and use my favorite cast iron skillet to get the job done.
I started by prepping the sweet potatoes. I didn't want giant chunks that would take twenty minutes to cook, so I aimed for a small, uniform dice—about half an inch. Precision here is key; if your cubes are all different sizes, the small ones turn to mush before the big ones even soften. As my knife hit the cutting board, the smell of fresh cedar and sweet starch filled the kitchen. I also diced up the red bell pepper and a medium yellow onion to bring that essential sweet-and-savory balance to the base.
To solve the raw-middle problem, I decided on a quick par-cook. I threw the diced sweet potatoes into a bowl with a tablespoon of water, covered it with a damp paper towel, and microwaved them for exactly three minutes. This softens the starches just enough so that when they hit the hot pan, they focus entirely on getting crispy and caramelized. If you skip this step, you'll be standing over the stove forever, waiting for the centers to cook while your onions burn to a crisp.
Next came the bacon. Instead of using butter or oil, I wanted to cook the entire dish in rendered bacon fat for maximum flavor. I took four strips of thick-cut bacon, chopped them into half-inch pieces, and dropped them into my cold twelve-inch cast iron skillet. Starting bacon in a cold pan is a pro-move; it allows the fat to render out slowly and evenly, leaving you with incredibly crispy bacon bits and a beautiful pool of liquid gold in the bottom of the pan.
Once the bacon was perfectly crisp and deep mahogany brown, I scooped it out with a slotted spoon, leaving about two tablespoons of the hot fat in the skillet. The rest went into our little grease jar by the stove. I cranked the heat up to medium-high. You want that fat shimmering. I tossed in the sweet potatoes and spread them out into a single, even layer. Here is the hardest part of cooking a hash: doing absolutely nothing. You have to resist the urge to stir. I let them sit undisturbed for a solid five minutes.
When I finally flipped a potato cube over, it had this gorgeous, deep golden-brown crust. That's the magic of cast iron. I gave them a good toss, then added the diced onions and bell peppers, along with a heavy pinch of kosher salt, cracked black pepper, half a teaspoon of smoked paprika, and a pinch of garlic powder. The kitchen instantly smelled incredible—like a high-end Southern diner. The sweet, smoky aroma of the paprika mixing with the rendering onions is honestly one of my favorite smells in the world.
As the onions softened and caramelized, they released just enough moisture to help deglaze the bottom of the pan, scraping up all those delicious, sticky bacon bits. I stirred the crispy bacon back into the mix. Everything was looking perfect, but we were approaching the critical moment: the egg. A hash is just a side dish until you put an egg on it. It transforms the starch into a cohesive, decadent meal.
I cleared a little well in the center of the hash, exposing the bottom of the hot skillet. I added a tiny pat of butter right into that space, watching it foam up instantly. I carefully cracked our first egg into the well. Because I wanted a perfect sunny-side-up egg with crispy, lacy edges and a completely runny yolk, I kept the heat at medium. I watched the egg white slowly turn from translucent to opaque, spooning a little bit of the hot bacon fat over the white to help it set without flipping it.
The tension in the kitchen was real. If I overcooked the egg, the yolk would solidify, and we'd lose that luscious, saucy element. I hovered over the pan, checking the jiggle of the yolk. Just as the whites fully set but the yolk remained a bright, golden sphere of liquid gold, I slid the skillet off the heat. I finished the whole pan with a handful of fresh chopped green onions from our backyard garden and a pinch of flaky sea salt right on top of the yolk.
Handheld shots switching between the sizzling cast iron skillet, close-ups of the wooden spoon scraping the caramelized bits, and Tara's focused expression as she watches the egg cook.
I carried the hot cast iron skillet straight to the dining table, placing it on a thick wooden trivet. The hash was still sizzling and popping, sending up steam carrying the scents of smoky bacon, sweet caramelized onion, and earthy paprika. Tony was already sitting down with plates and forks ready. I handed him the spatula so he could get the first scoop, making sure he got a generous portion of the crispy potato crust and, of course, that perfect egg.
As he broke the yolk, it ran beautifully down the sides of the sweet potatoes, coating the crispy edges in a rich, velvety yellow sauce. He took his first bite, closed his eyes, and just nodded. That's when you know it's a home run. The sweet potatoes were incredibly tender on the inside but had this spectacular, salty-smoky crunch on the outside. The sweetness of the peppers balanced the rich bacon fat, and the fresh green onions cut through the heavy savory notes with a bright, clean bite.
Looking back, the only thing I would change next time is maybe adding a splash of hot sauce or a sprinkle of goat cheese right at the end for a little bit of creamy tang. But honestly, for a meal made entirely out of random fridge scraps on a humid Saturday morning, it was absolute perfection. It just goes to show that you don't need a massive grocery haul to make something that feels special. You just need a hot pan, a little patience, and one really good egg.
Medium shot of Tara and Tony sitting at the sunny dining table, laughing and enjoying their breakfast directly from the skillet, followed by a final slow-motion close-up of the fork picking up a perfect bite of hash.
Shot List
| Type | Description | Audio | Duration |
|---|---|---|---|
| Close-up | Slow-motion puncture of a bright yellow egg yolk sitting atop crispy sweet potato hash. | Sizzling background sounds, the gentle scraping of a fork. | 5s |
| Wide | Tara standing in her bright Orlando kitchen, waving at the camera with a warm smile. | Tara: 'Hey everyone, welcome back to the kitchen! Today we are tackling the ultimate weekend comfort food.' | 8s |
| Medium | Tara opening her refrigerator door, looking inside, and pulling out sweet potatoes and bacon. | Tara: 'I woke up starving with a fridge full of random leftovers, and instead of ordering takeout, we are making a diner-worthy breakfast.' | 10s |
| Overhead | Fast-paced chopping of sweet potatoes, onions, and red bell peppers on a wooden cutting board. | Upbeat, acoustic acoustic music starts playing. Rhythmic chopping sounds. | 12s |
| Detail | Tara putting sweet potato cubes in a bowl, covering with a wet paper towel, and starting the microwave. | Tara: 'My secret weapon to avoid mushy hash is a quick three-minute microwave par-cook. It works every single time.' | 8s |
| Close-up | Chop bacon dropping into a cold cast iron skillet, then transitioning to sizzling on the stovetop. | Loud, satisfying sizzle of bacon rendering in the pan. | 10s |
| B-roll | Tara using a slotted spoon to transfer crispy bacon to a paper towel-lined plate, leaving shimmering fat in the pan. | Tara: 'We are keeping all this liquid gold in the pan. This is where all our flavor is going to come from.' | 7s |
| Close-up | Sweet potatoes hitting the hot bacon fat, making a loud hiss, then being pressed flat into the skillet. | Intense sizzling sound. | 8s |
| Timelapse | The sweet potatoes sitting undisturbed for 5 minutes, slowly browning on the bottom. | Music swells slightly, cooking sounds continue. | 10s |
| Medium | Tara tossing the potatoes, revealing a perfect golden crust, then adding onions, peppers, and spices. | Tara: 'Look at that crust! Now we toss in our aromatics and spices. Smoked paprika is absolutely non-negotiable here.' | 12s |
| Close-up | Tara clearing a well in the hash, dropping butter in, and cracking an egg directly into the center. | Soft sizzle of the egg white hitting the butter. | 8s |
| Detail | Tara spooning hot bacon fat over the egg whites to help them cook evenly. | Tara: 'Just baste the whites slightly so they cook through while keeping that yolk completely liquid.' | 7s |
| Close-up | Sliced green onions being scattered over the finished, steaming skillet. | Sizzling slowly dies down as the heat is turned off. | 5s |
| Medium | Tara bringing the hot skillet to the table where Tony is waiting with plates. | Tony: 'Oh my gosh, Tara, that smells incredible!' Tara laughs. | 8s |
| Close-up | Tony taking a bite, smiling, and giving a thumbs up to the camera. | Tara: 'And that is how you turn simple kitchen scraps into weekend magic. Try this one out! See you next time.' | 10s |
- Capture the condensation on the kitchen window to emphasize the warm, humid Orlando morning contrast with the cozy interior.
- Get macro shots of the spices (smoked paprika and cracked black pepper) falling onto the hot potatoes in slow motion.
- Record the audio of the knife scraping against the wooden cutting board when transferring the onions.
- Show the physical steam rising from the skillet when the fresh green onions hit the hot hash at the end.
- 0:00 — Soft, acoustic guitar intro—warm, lazy Sunday morning vibe.
- 1:15 — Uptempo, light percussion joins in as prep work and chopping begins.
- 3:30 — Music drops to a minimal, warm bassline during the intense bacon rendering and potato frying.
- 5:45 — Light, playful acoustic instruments return as the colorful peppers and spices are added.
- 7:15 — Slightly tense, soft strings as the egg is cracked and carefully basted.
- 8:30 — Warm, celebratory acoustic folk music swells as the dish is plated and tasted.
- Pacing should feel relaxed but intentional; don't rush the sizzle shots. Let the natural sounds of cooking play loudly.
- Use clean, minimal lower-thirds text overlays when highlighting ingredients and measurements.
- Color grade with warm, golden tones to emphasize the comforting, sunny weekend morning aesthetic.
- Boost the high-frequency audio during the bacon sizzle and the egg crack to make the sounds crisp and satisfying.
| Call | Provider | Model | Input Tokens | Output Tokens | Compute / Credits |
|---|---|---|---|---|---|
| Script | abacus.ai | gemini-3.5-flash | 1,228 | 4,320 | — |
| Image 1 — The Fridge Clean-Out | abacus.ai | nano_banana2 | — | — | 6,753.925 |
| Image 2 — Cast Iron Sizzle | abacus.ai | nano_banana2 | — | — | 6,753.725 |
| Image 3 — The Yolk Break | abacus.ai | nano_banana2 | — | — | 6,753.65 |
The 25-Minute Steak Dinner That Saved My Weeknight
I wanted to see if I could turn cheap sirloin and a couple of russet potatoes into a restaurant-quality garlic butter skillet dinner in under thirty minutes, without setting off my Orlando apartment's hyper-sensitive smoke detector.
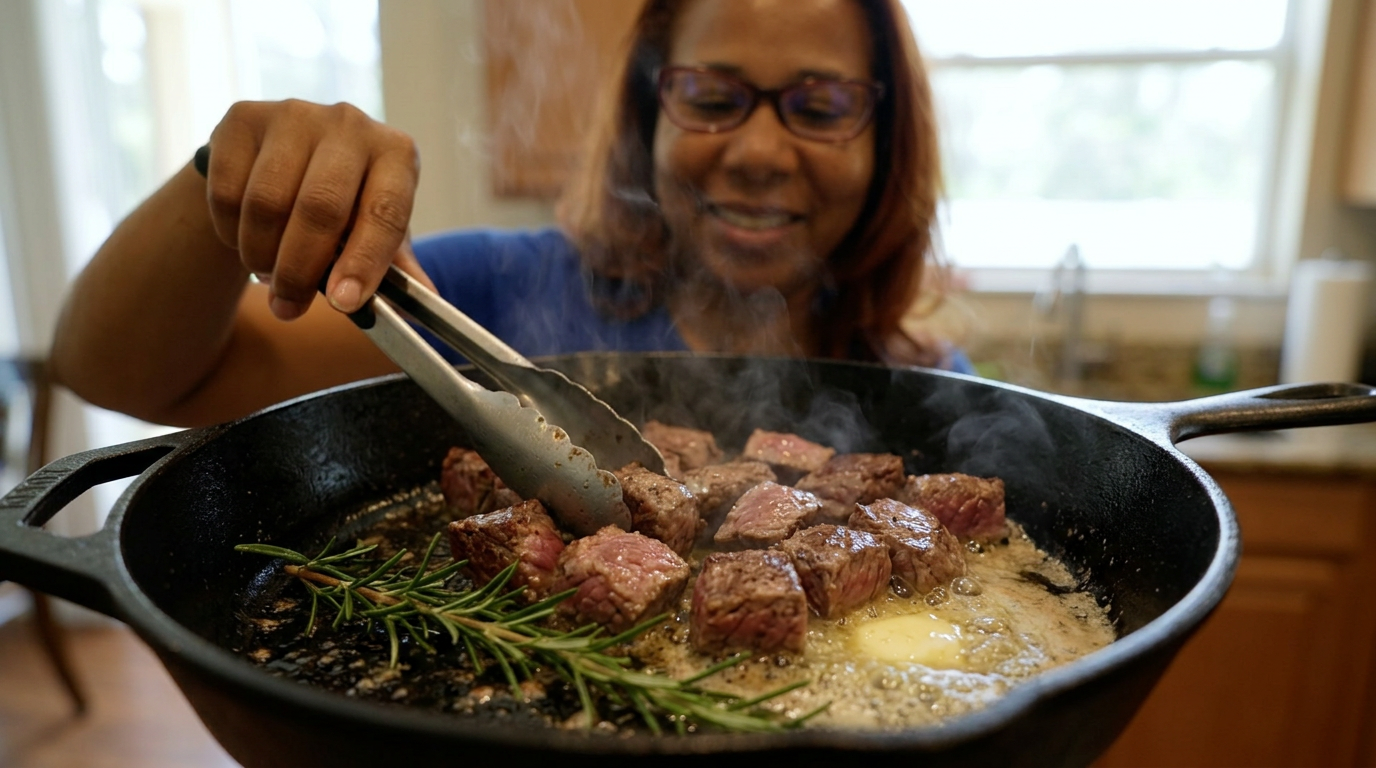
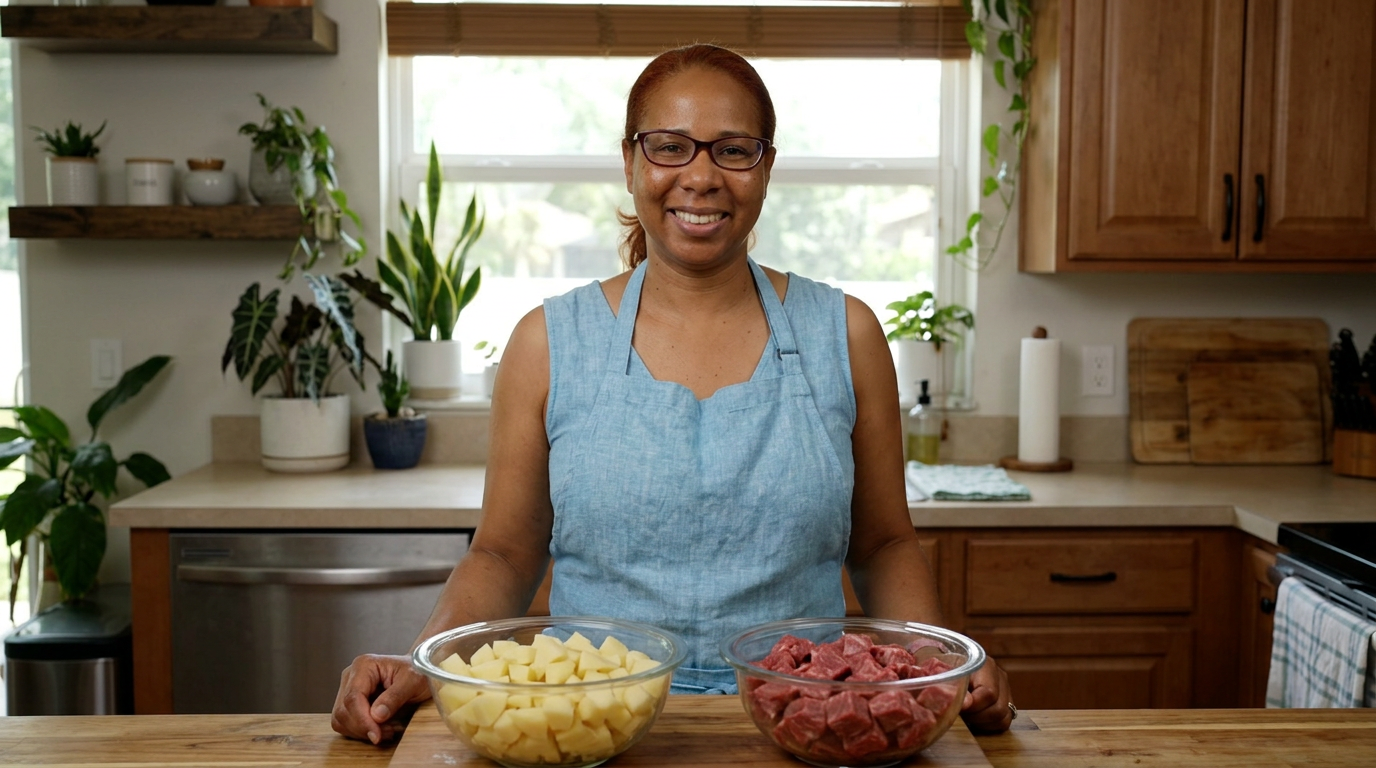
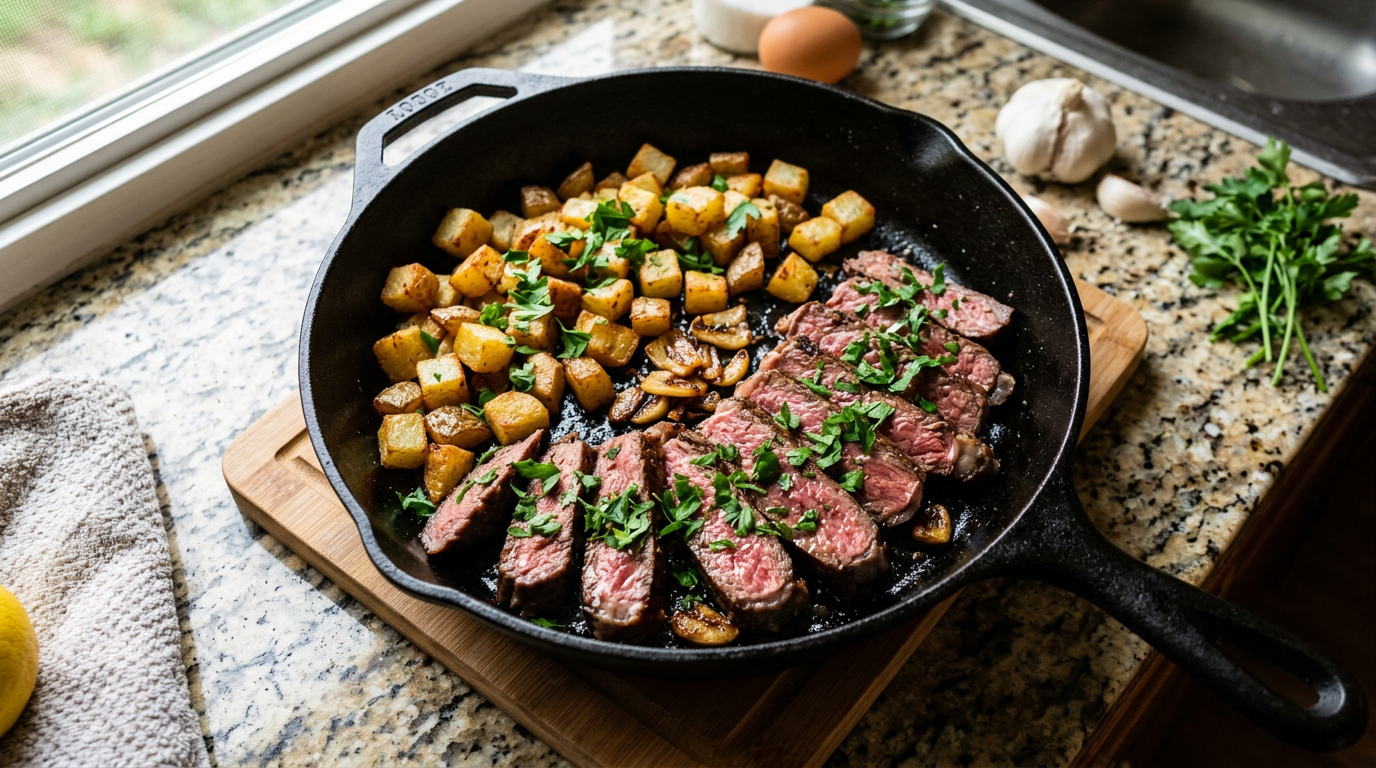
It is Tuesday at 6:15 PM, we are both exhausted, and I am betting my entire evening on a single cast-iron skillet, four cloves of garlic, and twenty-five minutes.
Close-up of a hot cast-iron skillet as cubed steak hits the oil, creating a massive, satisfying sizzle. Smoke rises gently as a wooden spatula turns them over quickly.
We have all been there. It is one of those humid, heavy Orlando evenings where the sky turns that deep, stormy purple and the last thing you want to do is spend an hour leaning over a boiling pot of water or waiting for a massive roast to cook. Tony had a brutal day at work, my inbox was still screaming at me, and we were both dangerously close to ordering takeout for the third time this week. But instead of opening an app, I stood in front of the fridge, stared at a package of top sirloin I bought on sale at Publix, and made a decision.
The challenge was simple but risky: could I make a steak-and-potatoes dinner that felt like a seventy-dollar steakhouse meal, but do it all in one pan, in under half an hour? Typically, steak bites get tough and rubbery if you overcook them, and potatoes take forever to get that perfect crispy exterior if you do not boil them first. I did not have time to boil anything. I had to figure out how to get crispy, golden potatoes and perfectly seared, juicy medium-rare steak bites in the exact same pan, without one ruining the other.
So, here was my plan. I was going to dice two large russet potatoes into small, half-inch cubes. Keeping them small was my secret weapon—it meant they would cook through fast. Then, I would cube the sirloin, dry it thoroughly to get a good crust, and sear it at a screaming high heat first. I would pull the steak out to rest, toss the potatoes into that beautiful left-behind steak fat, and finish everything off with a mountain of garlic, fresh rosemary from my patio planter, and a generous knob of salted butter. It sounded perfect in my head, but with my stove's temperamental burners, timing was going to be absolutely everything.
I started by prepping the steak. I grabbed the sirloin—about a pound and a half—and patted it thoroughly dry with paper towels. If there is one thing I have learned, it is that moisture is the enemy of a good sear. If your meat is wet, it steams instead of browning, and steam means gray, sad steak bites. I cut them into neat, bite-sized cubes, roughly one inch square. I tossed them in a bowl with a tablespoon of olive oil, a heavy pinch of kosher salt, and a generous amount of coarse black pepper. Simple, clean, and classic.
Next came the potatoes. I went with russets because they have that high starch content that yields the ultimate crispy edges. I diced them small—about half the size of the steak bites—so they would cook through in the pan without needing a lid to steam them. If they steamed, they would lose that crispy texture I was chasing. I tossed them in a separate bowl with a little garlic powder, onion powder, paprika, and a touch of salt. Already, the kitchen was starting to smell like a proper steakhouse prep station.
Now, the moment of truth. I pulled out my seasoned twelve-inch Lodge cast-iron skillet. I set it over medium-high heat and let it get hot. Not just warm, but smoking hot. I added a tablespoon of high-smoke-point avocado oil, waited for it to shimmer, and then dropped the steak bites in. The sound was deafening—a glorious, loud hiss that let me know the pan was doing its job. I made sure not to crowd the pan; I did them in two quick batches so they would actually sear instead of stewing in their own juices.
I let them sit undisturbed for exactly sixty seconds. This is the hardest part for any home cook—not touching the food. But you have to let that crust form! After a minute, I gave the pan a good shake and flipped them over for another minute. They looked incredible—deep mahogany crusts on the outside, but still beautifully tender. I quickly scooped them out onto a warm plate with a slotted spoon. They were slightly underdone, maybe a cool medium-rare, which was perfect because they were going to go back into the pan later.
I looked down at the skillet. It was coated in a beautiful dark layer of fond—those caramelized browned bits of steak flavor stuck to the bottom. I immediately dumped the diced potatoes directly into that hot grease. They sizzled instantly, soaking up all that rich beef fat. I spread them out into a single layer and resisted the urge to stir them for the first three minutes. I wanted them to get a gorgeous, golden-brown crust on that first side.
As the potatoes cooked, I realized I needed to move fast on the aromatics. I grabbed four large cloves of garlic and smashed them with the flat of my knife, then gave them a rough chop. I did not want to mince them too finely because tiny garlic pieces burn in a hot skillet, and burnt garlic is bitter and heartbreaking. I also ran out to our humid little balcony and snipped a few sprigs of fresh rosemary. The air was thick outside, and a light drizzle was starting to fall, but that fresh herb smell immediately made the whole effort feel worth it.
Back at the stove, I flipped the potatoes. They were looking stunning—crispy, golden-edged, and fork-tender after about eight minutes of total cooking time. I turned the heat down to medium-low. This was the critical transition. If the pan stayed too hot, the butter and garlic would burn instantly. I tossed in the chopped garlic and the rosemary sprigs, stirring them into the potatoes. Within ten seconds, the aroma hit me like a wave—warm, nutty, herbal, and intensely savory. My mouth was watering.
Finally, I dropped in three tablespoons of salted butter. It melted instantly, foaming up and swirling around the crispy potatoes. I slid the steak bites and all their accumulated juices back into the skillet. I tossed everything together for just one minute, spooning that rich, garlicky, rosemary-infused melted butter over the steak and potatoes until every single piece was glistening. I turned off the heat, grabbed a fork, and blew on a potato bite to taste it. It was incredibly hot, but the crunch was absolutely perfect.
Mid-shot of Tara standing at her stove, steam framing her face as she smiles and tosses the skillet. Close-ups of the butter foaming around the rosemary sprigs, and the rich brown color of the potatoes.
I carried the hot cast-iron skillet straight to the dining table and set it down on a wooden trivet. It was still sizzling, sending up little puffs of garlic-scented steam. Tony was already sitting there, fork in hand, eyes wide. We did not even bother plating it up; there is something incredibly comforting and intimate about eating straight out of a warm cast-iron skillet on a rainy Tuesday night. I sprinkled a little freshly chopped parsley over the top just to make it look pretty, and we dug in.
The steak was unbelievably tender—soft enough to cut with a fork, with a rich, salty crust that contrasted beautifully with the creamy interior of the crispy potatoes. Every single bite was coated in that silky, garlic-herb butter. Tony took one bite, closed his eyes, and just shook his head. 'Tara, this is better than the steakhouse downtown, and I didn't even have to put on real shoes,' he said. That was all the validation I needed. We finished the entire pan in about ten minutes, wiping up the last bits of garlic butter with a piece of crusty bread.
Looking back, this meal was a total triumph. It took exactly twenty-four minutes from the moment my knife hit the cutting board to the moment we took our first bite. The secret was definitely the size of the potato dice and searing the steak in batches to keep the pan hot. Next time, I think I might toss in some sliced mushrooms with the potatoes to add an extra layer of earthy savoriness. But tonight, this simple skillet dinner proved that you do not need hours of prep or a fancy kitchen to make a meal that feels like an absolute celebration.
Close-up of Tara and Tony's forks diving into the skillet together, picking up a glistening steak bite and a crispy potato, followed by a wide shot of Tony smiling and nodding in approval.
Shot List
| Type | Description | Audio | Duration |
|---|---|---|---|
| Close-up | Sizzling steak bites hitting hot oil in a dark cast-iron skillet, steam rising dynamic and fast. | Sizzling sound starts loud, then fades under Tara's opening voiceover. | 5s |
| Medium | Tara in her bright Orlando kitchen, smiling, wearing a simple apron, looking directly at the camera. | Hey guys, welcome back to the kitchen. Today we are testing a weeknight theory... | 12s |
| Overhead | Tara's hands patting down a beautiful slab of top sirloin with white paper towels on a wooden cutting board. | First things first: moisture is the absolute enemy of a good, crusty sear. | 8s |
| Detail | Sharp chef's knife slicing the sirloin into neat, even one-inch cubes. | I am cutting these into bite-sized pieces so they cook incredibly fast. | 7s |
| Close-up | Russet potatoes being diced quickly into small half-inch cubes, showing their clean white starch. | For the potatoes, we want them small. About half the size of the steak. | 10s |
| B-roll | Tara seasoning the potatoes with paprika, garlic powder, and salt, tossing them in a glass bowl. | This seasoning blend is simple, but it gives them that gorgeous diner-style color. | 8s |
| Close-up | Searing the first batch of steak. The camera catches the deep brown crust forming on the edges. | [Sizzle sounds loud] Do not crowd the pan! If you do, they will just steam. | 12s |
| Detail | Spoon transferring the seared steak bites to a white ceramic plate, leaving dark juices behind. | Pull them out while they are still a bit pink in the middle. They will finish later. | 6s |
| Overhead | Slicing fresh garlic cloves roughly on the cutting board, then snipping fresh green rosemary. | Smash the garlic, don't mince it. Tiny garlic burns, and we do not want bitter butter. | 9s |
| Timelapse | Potatoes browning in the skillet, shifting from pale white to deep golden brown. | [Upbeat acoustic guitar music builds slightly under the sizzle] | 15s |
| Close-up | A thick block of butter melting into the potatoes, foaming wildly around green rosemary sprigs. | And in goes the butter. Look at that foam! The smell right now is unreal. | 10s |
| Medium | Tara tossing the steak bites back into the skillet with the potatoes, a look of pure satisfaction on her face. | Bring everybody back to the pool! Just one minute to coat everything in that liquid gold. | 11s |
| Close-up | Glistening skillet on the dining table, steam rising as a fork picks up a perfect steak bite. | And there you have it. Under twenty-five minutes, one pan, zero stress. | 8s |
- Capture the satisfying 'hiss' audio when the wet steak hits the sizzling paper towel during the drying step.
- Get a slow-motion shot of the butter sliding off the spoon and melting into the center of the hot potato pile.
- Film the window glass showing the sudden Orlando afternoon rainstorm to set the cozy, warm-inside mood.
- Take a close-up of the steam rising from the skillet right as it is set on the wooden table trivet.
- 0:00 — Soft, warm acoustic guitar intro to set a cozy, welcoming home-kitchen mood.
- 1:15 — Upbeat, light fingerpicking folk music as Tara begins prepping the steak and chopping potatoes.
- 3:30 — Slightly faster, rhythmic acoustic percussion track to build excitement as the pan gets hot and steak sears.
- 5:45 — Smooth, jazzy piano-led background track as the potatoes slowly brown and the garlic is prepped.
- 7:50 — Rich, swell of warm acoustic strings as the butter melts and the final dish comes together.
- 9:15 — Calm, gentle acoustic guitar outro fading out during the final tasting and review.
- Keep the pacing fast and snappy during the first 3 minutes of setup, then slow down visually during the sizzle and butter-melting scenes to let the viewer enjoy the sensory details.
- Use clean, minimalist sans-serif text overlays for ingredient measurements as they appear on screen, keeping them in the lower-right corner.
- Do not use high-energy transition sound effects; stick to natural kitchen sounds (chopping, sizzling, pan scraping) mixed slightly higher than the background music.
- Color grade with warm, golden tones to emphasize the cozy, inviting home-cooked feel of the Orlando evening.
| Call | Provider | Model | Input Tokens | Output Tokens | Compute / Credits |
|---|---|---|---|---|---|
| Script | abacus.ai | gemini-3.5-flash | 1,231 | 4,395 | — |
| Image 1 — The Golden Sizzle | abacus.ai | nano_banana2 | — | — | 6,753.825 |
| Image 2 — Meet Tara in the Kitchen | abacus.ai | nano_banana2 | — | — | 6,754.375 |
| Image 3 — The Skillet Reveal | abacus.ai | nano_banana2 | — | — | 6,754.1 |
I Made 8-Hour Curry Chicken in Just 45 Minutes (My Secret Method)
I wanted that deep, rich, fell-off-the-bone Caribbean curry chicken flavor on a sticky Orlando Tuesday, but I only had forty-five minutes before Tony got home from work.
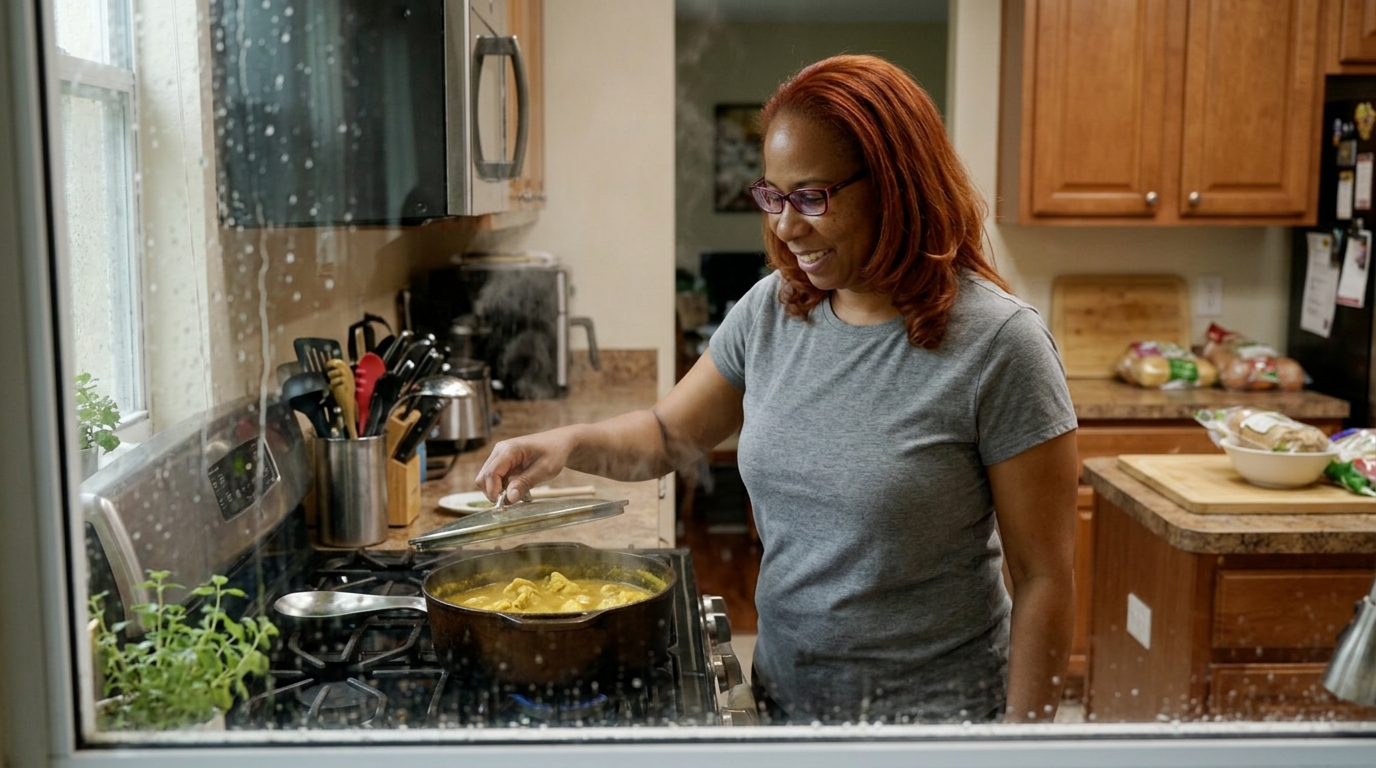
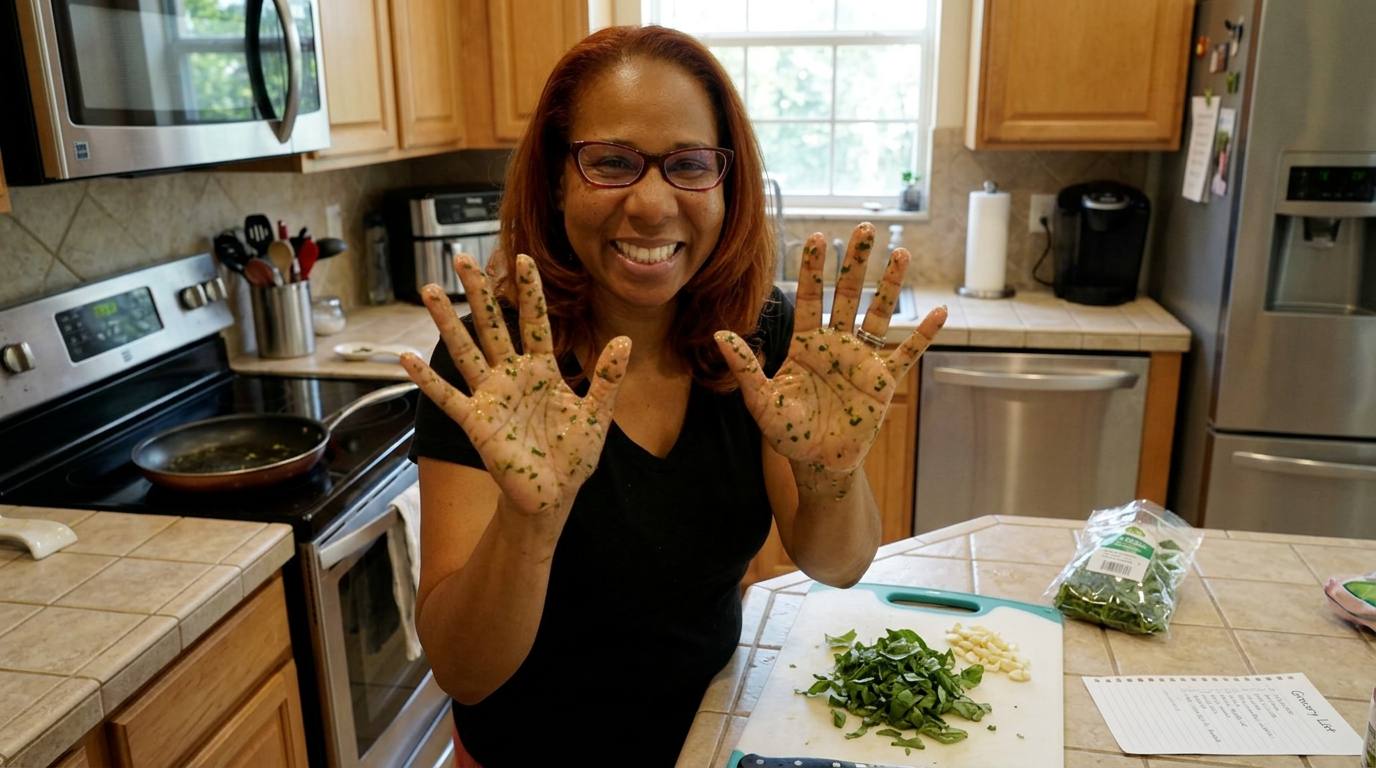
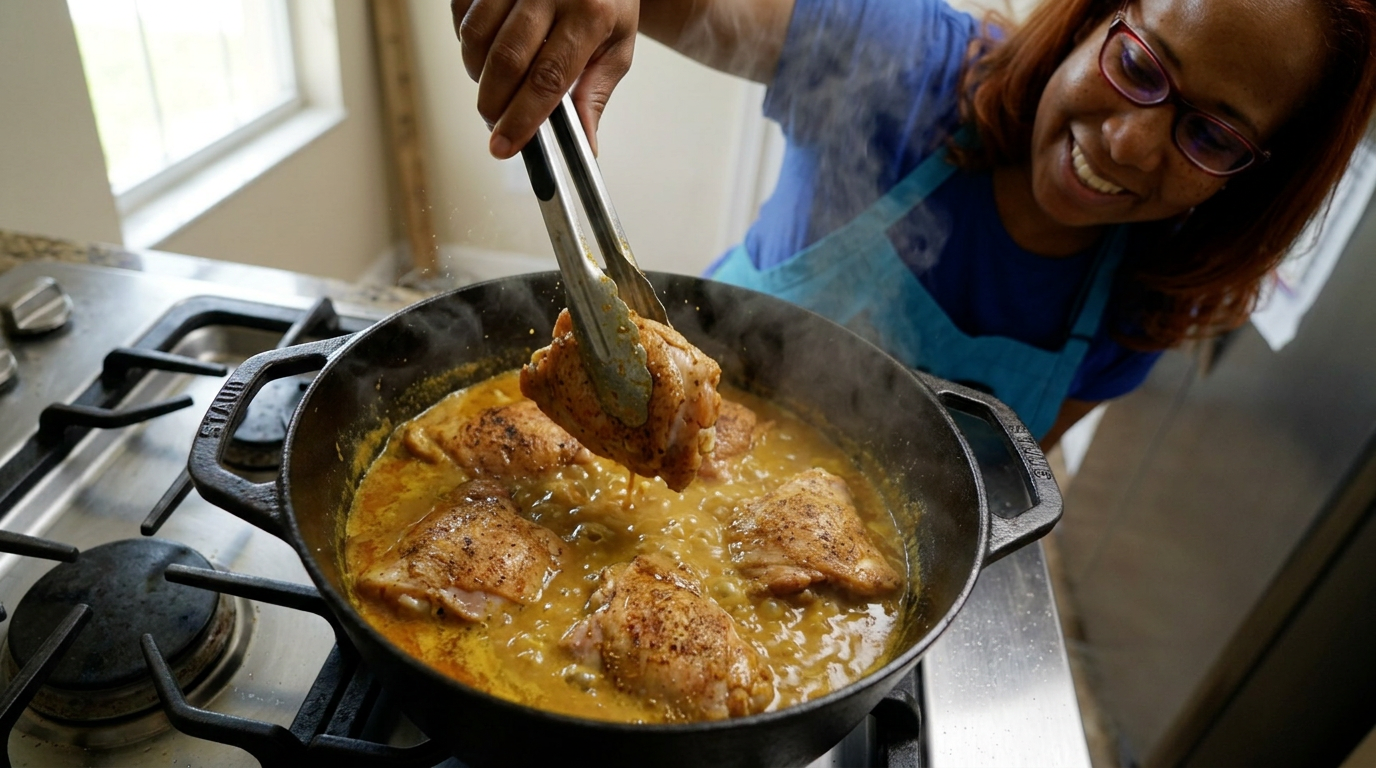
You know that rich, sticky, slow-simmered Caribbean curry chicken that usually takes half a Sunday to make? I'm going to show you how I pull off those exact same deep flavors on a humid Tuesday evening in under an hour.
Close-up of Tara lifting a heavy cast iron lid, steam rising to reveal rich, bubbling golden-yellow chicken curry with soft potatoes, then a quick cut to her taking a bite and nodding happily.
It was one of those typical Orlando afternoons where the humidity wraps around you like a wet blanket, the sky turns the color of bruised plums, and you just know a thunderstorm is about to dump three inches of water on your driveway. Tony was on his way home from a long shift, and I had promised him a proper, comforting Caribbean-style curry chicken. The problem? It was already 5:45 PM. Normally, my grandmother's curry chicken is a whole-afternoon affair—marinating the meat for hours, slowly rendering the fat, and letting the potatoes dissolve into the gravy over a lazy Sunday flame. I didn't have hours. I had forty-five minutes.
I stood in front of my open pantry, staring at a bag of Yukon Gold potatoes, a package of bone-in chicken thighs I'd hastily defrosted, and my favorite Jamaican-style curry powder. The pressure was on because Tony grew up eating some of the best West Indian food in South Florida, so he knows exactly what a good curry is supposed to taste like. If it's too thin, it just tastes like wet turmeric. If it's rushed, the chicken is rubbery and the spices taste raw and gritty on the back of your throat. I needed that deep, caramelized, fall-off-the-bone magic, and I needed it fast.
My plan to beat the clock relied on three non-negotiable kitchen hacks. First, hacking the marinade by blending my green seasoning into a wet paste to force the garlic, scallion, and scotch bonnet flavors deep into the chicken instantly. Second, blooming the curry powder directly in hot oil to toast the raw starchiness out of the spices in seconds instead of hours. And third, cutting my potatoes into tiny, starched-up half-inch cubes so they would cook through in fifteen minutes while releasing enough starch to thicken the gravy into a velvety glaze. It was a high-heat, fast-paced gamble, but I was ready to play.
I started by grabbing my bone-in, skinless chicken thighs. For a quick curry, you have to use bone-in thighs—chicken breasts will dry out into shoe leather, and boneless thighs don't possess enough marrow to enrich the quick gravy. I quickly hacked them into bite-sized pieces, leaving the bone in on the center cuts. I tossed them into a big stainless steel bowl and sprinkled them with kosher salt, black pepper, and a splash of green seasoning I had in the fridge. To make sure that seasoning penetrated immediately, I used my hands to aggressively massage the green paste into the meat until it looked completely coated and glossy.
Next came the crucial step: blooming the curry. I heated two tablespoons of canola oil in my heavy Dutch oven over medium-high heat. You want an oil with a high smoke point here, not olive oil. Once the oil started shimmering, I tossed in three tablespoons of Blue Mountain curry powder, a pinch of cumin, and half a diced yellow onion. The smell that hit my nose was instant heaven—earthy, warm, and slightly toasted. The trick here is to cook the curry powder in the oil for about two minutes until it darkens to a deep, wet-sand consistency. If you skip this, your curry will taste dusty and raw.
Just as the onions started turning translucent and the curry paste was bubbling, I heard the first rumble of thunder outside. Right on cue, the Orlando rain started hammering against our kitchen window. It was the perfect atmosphere for a cozy curry. I slid the marinated chicken into the hot pot, and the sizzle was absolutely deafening. I used my wooden spoon to scrape up all those beautiful, toasted curry bits stuck to the bottom of the pot, ensuring every single piece of chicken was stained a gorgeous, deep golden-yellow.
I let the chicken sear for about five minutes without moving it too much. You want to get a little bit of color on the meat to lock in those juices. While that was searing, I grabbed three small Yukon Gold potatoes. Instead of the big, chunky wedges you'd find in a traditional slow-cooked curry, I diced these into tiny half-inch cubes. Because they were so small, they would cook through in a fraction of the time, and their exposed edges would release starch directly into the liquid, acting as a natural, instant thickener.
With the chicken lightly browned, I tossed in the diced potatoes, three cloves of smashed garlic, a sprig of fresh thyme from my backyard herb garden, and a whole Scotch bonnet pepper. Now, here is a major safety warning: do not cut the Scotch bonnet! If you slice it open, you will release a wall of heat that will make your eyes bleed and ruin the dish for anyone who can't handle extreme spice. Just toss it in whole. It acts like a little flavor bomb, releasing its fruity, aromatic oils through its skin without releasing the blistering heat from the seeds.
I poured in just enough boiling water to barely cover the chicken—about two cups. Do not drown your chicken! Too much water is the number one mistake people make with quick curries; it dilutes the flavor and results in a sad, watery soup. I brought the liquid to a violent boil, then immediately dropped the heat to medium-low, popped the heavy lid on, and set my timer for twenty-five minutes.
While the curry simmered, I quickly washed a cup of jasmine rice and got it bubbling in the rice cooker next to the stove. Ten minutes into the simmer, I lifted the lid to check the progress. The kitchen smelled absolutely incredible—like a roadside cookshop in Trinidad. The potatoes were already softening around the edges, and the gravy was starting to take on a beautiful, glossy sheen. I gave it a gentle stir, making sure nothing was sticking to the bottom, and popped the lid back on to let the steam finish the job.
At the twenty-two minute mark, I pulled the lid off entirely to let the gravy reduce for the final three minutes. I fished out the whole Scotch bonnet pepper very carefully with a spoon and set it aside—its job was officially done. I took a fork and gently pressed a few of the potato cubes against the side of the pot, crushing them into the gravy to create an instant, velvety liaison. The sauce immediately transformed from a thin broth into a rich, luscious gravy that coated the back of my spoon perfectly.
Show Tara's hands chopping potatoes quickly, the sizzle of the chicken entering the golden curry oil in the Dutch oven, the rain hitting the window, and a close-up of the gravy bubbling and thickening as she mashes a potato against the side of the pot.
Exactly forty-two minutes after I first pulled the chicken out of the fridge, I heard Tony's truck pull into the driveway. The rain was still coming down hard, but inside, the kitchen was warm, dry, and filled with the most comforting aroma imaginable. I fluffed the jasmine rice, spooned a generous mound into a wide bowl, and ladled the hot, bubbling curry chicken right over the top. The gravy pooled beautifully around the rice, and the chicken was so tender it looked like it was practically falling off the bone just from the weight of the ladle.
Tony walked through the door, shook the rain off his umbrella, and immediately inhaled. \"Tell me that's curry,\" he said with a huge grin. I handed him the bowl and a spoon. He took a bite of the chicken, then a spoonful of the rice soaked in that rich, golden gravy. He closed his eyes and just chewed for a second. \"Tara, how long has this been on the stove? This tastes like it's been cooking since this morning.\" I just smiled and told him it was a magician's secret.
The depth of flavor we achieved in under an hour was honestly mind-blowing. The chicken was succulent, the potatoes were buttery and soft, and that gravy was so rich and thick you'd swear it had been reducing for half a day. Next time, I think I'll add a handful of drained chickpeas at the very end just to stretch it a bit further, but honestly, this quick-method curry is officially going into our permanent weeknight rotation. If you're craving comfort food but you're short on time, trust me—you have to try this.
Medium shot of Tony eating at the kitchen island, smiling and nodding, then a final slow-motion close-up of a fork shredding a tender piece of chicken covered in golden gravy.
Shot List
| Type | Description | Audio | Duration |
|---|---|---|---|
| Close-up | Lid lifting off a bubbling Dutch oven filled with golden curry chicken. | Sizzling and bubbling sounds, steam hissing. | 4s |
| Medium | Tara standing in her kitchen, looking at the camera with an empty counter. | Tara: 'It's 5:45 PM on a rainy Tuesday, and I'm going to make a curry that tastes like it took all day.' | 8s |
| Overhead | Tara chopping chicken thighs into bite-sized pieces on a wooden cutting board. | Rhythmic chopping sounds on wood. | 6s |
| Close-up | Tara's hands massaging green seasoning and spices into the raw chicken in a stainless bowl. | Tara: 'You've got to get in there with your hands to force those herbal flavors into the meat.' | 7s |
| Detail | Curry powder and onions sizzling in hot oil inside the Dutch oven, turning dark gold. | Loud, satisfying sizzling sound. | 5s |
| Medium | Tara glancing out the window at the heavy Florida rain falling on palm leaves. | Rain pattering heavily against glass. | 4s |
| Close-up | Slicing Yukon Gold potatoes into precise, small half-inch cubes. | Tara: 'Tiny potato cubes are the secret weapon to a fast, thick gravy.' | 6s |
| Detail | A whole red Scotch bonnet pepper being dropped gently into the bubbling curry liquid. | Tara: 'Keep it whole! Don't cut it, or you'll regret it.' | 5s |
| Timelapse | The curry simmering with the lid slightly ajar, steam rising as the liquid reduces. | Upbeat, warm acoustic transition music plays softly. | 8s |
| Close-up | A wooden spoon mashing a soft potato cube against the cast iron wall of the pot. | Squelch and bubbling gravy sounds. | 5s |
| Overhead | Laddling the thick, glossy yellow curry over a bed of steaming white jasmine rice in a dark bowl. | Wet, heavy ladle sounds. | 6s |
| Medium | Tony taking a big bite at the kitchen counter, looking surprised and smiling. | Tony: 'Wow. How long did you say this took?' | 7s |
| Close-up | A fork pulling a tender piece of chicken apart, showing the steam releasing from inside. | Tara: 'Under forty-five minutes. Dinner is served.' | 5s |
- Capture close-up b-roll of the rain splashing on the outdoor patio or window to set the cozy, humid Orlando atmosphere.
- Film the steam rising from the rice cooker when it clicks to 'Warm' to emphasize the timing of the meal.
- Get a macro shot of the Scotch bonnet skin showing the oil droplets on its surface before it goes into the pot.
- Show the messy kitchen counter at the end—the empty curry jar, the potato skins, and the cutting board to keep it feeling authentic and real.
- 0:00 — Warm, acoustic guitar intro with a gentle percussion beat, setting a cozy home feel.
- 1:30 — Slightly faster, rhythmic acoustic guitar strumming as the chopping and prep begins.
- 4:15 — Low, atmospheric soft rain sounds mixed with a light, warm ambient pad while the curry simmers.
- 6:45 — Upbeat, happy acoustic folk music swelling as the gravy begins to thicken and reduce.
- 8:30 — Relaxed, satisfying acoustic outro music playing softly in the background during the taste test.
- Keep the pacing fast in the beginning during prep to match Tara's rush against the clock, then slow it down once the pot starts simmering.
- Use a warm color grade to emphasize the golden yellows of the curry and the cozy atmosphere inside compared to the blue, rainy storm outside.
- Add a subtle sizzling sound effect overlay during the close-ups of the blooming spices to make the audio punchier.
- Display a clean, minimalist recipe ingredients list on-screen at 1:15 when Tara begins seasoning the chicken.
| Call | Provider | Model | Input Tokens | Output Tokens | Compute / Credits |
|---|---|---|---|---|---|
| Script | abacus.ai | gemini-3.5-flash | 1,232 | 4,158 | — |
| Image 1 — The Rain and the Pot | abacus.ai | nano_banana2 | — | — | 6,753.75 |
| Image 2 — Tara's Spiced Hands | abacus.ai | nano_banana2 | — | — | 6,753.5 |
| Image 3 — The Golden Sizzle | abacus.ai | nano_banana2 | — | — | 6,753.5 |
I Made a "Homemade" Peach Cobbler Using Every Shortcut I Could Defend
I wanted that bubbly, warm-spiced peach cobbler magic on a sticky mid-July Tuesday in Orlando, but I absolutely refused to make pie crust from scratch.
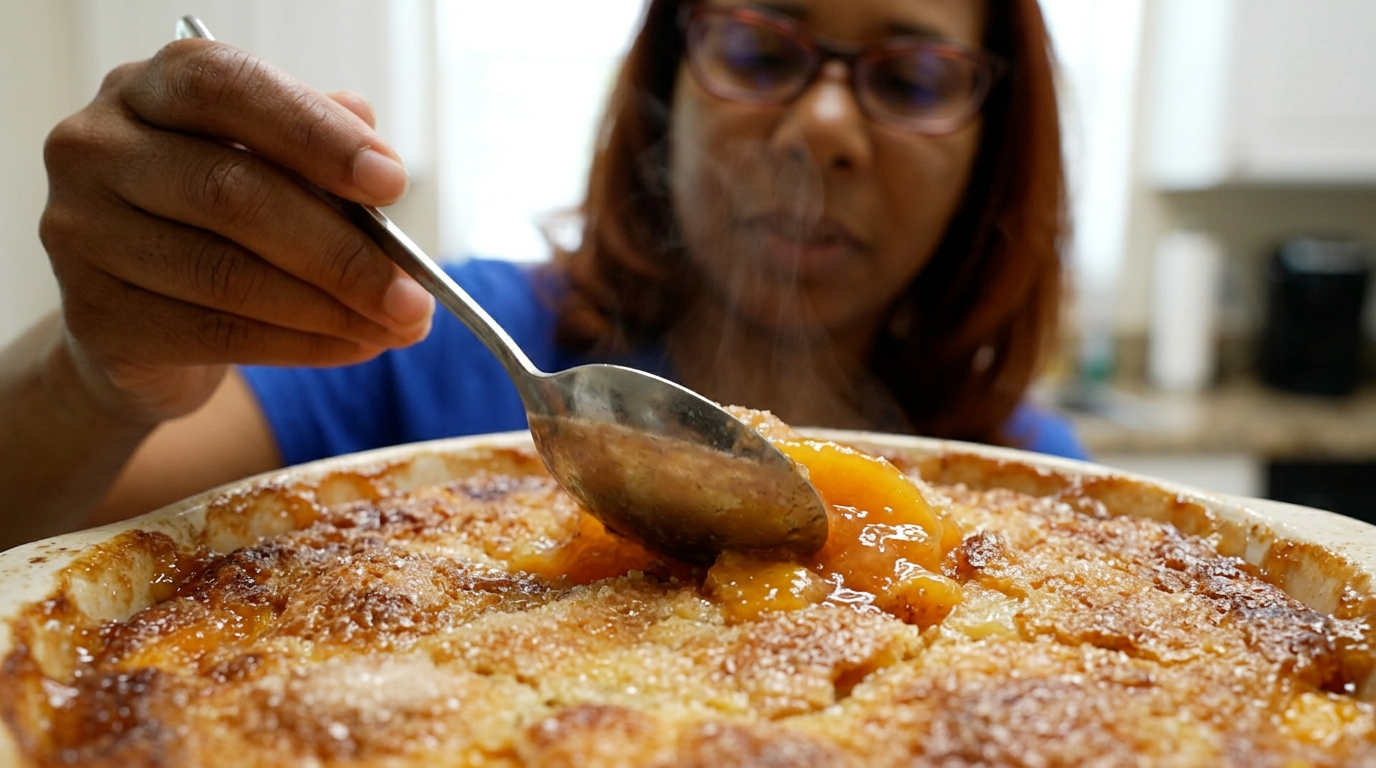
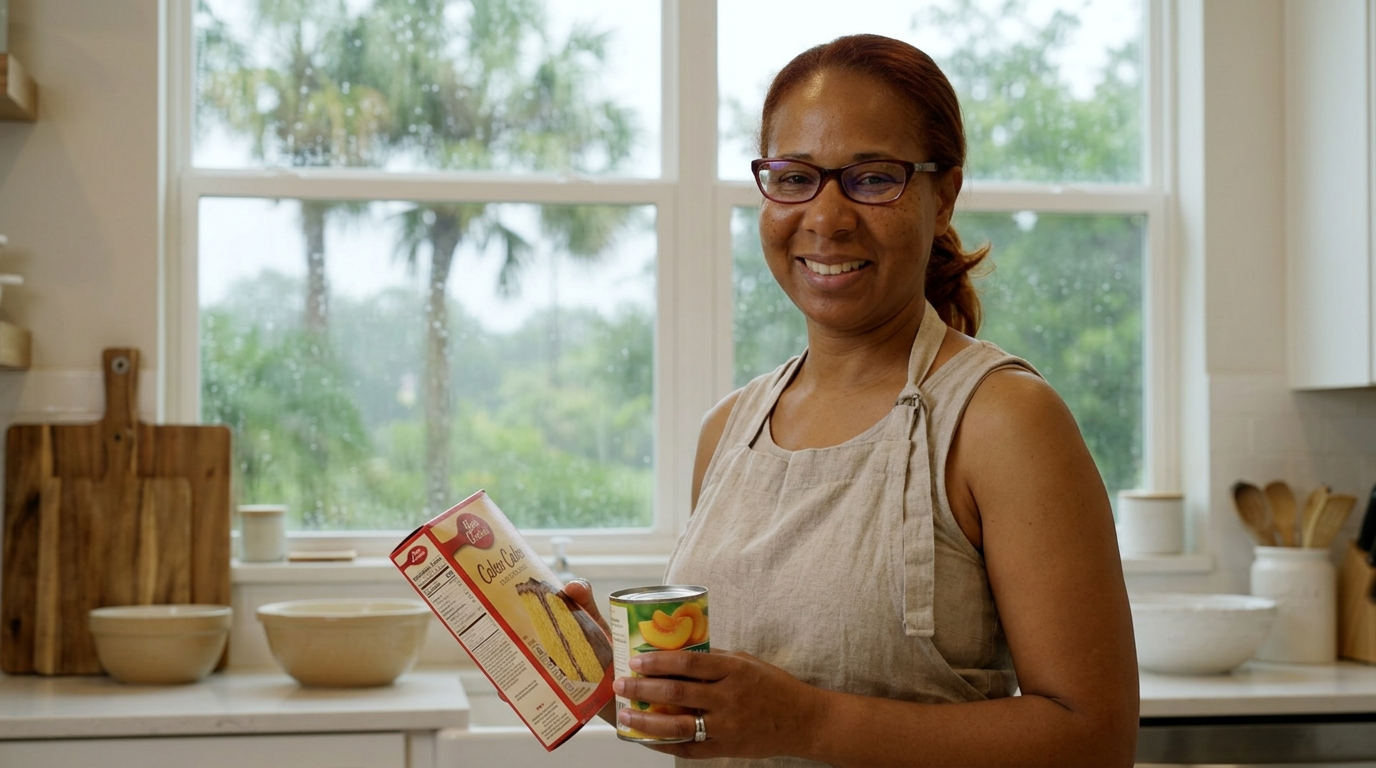
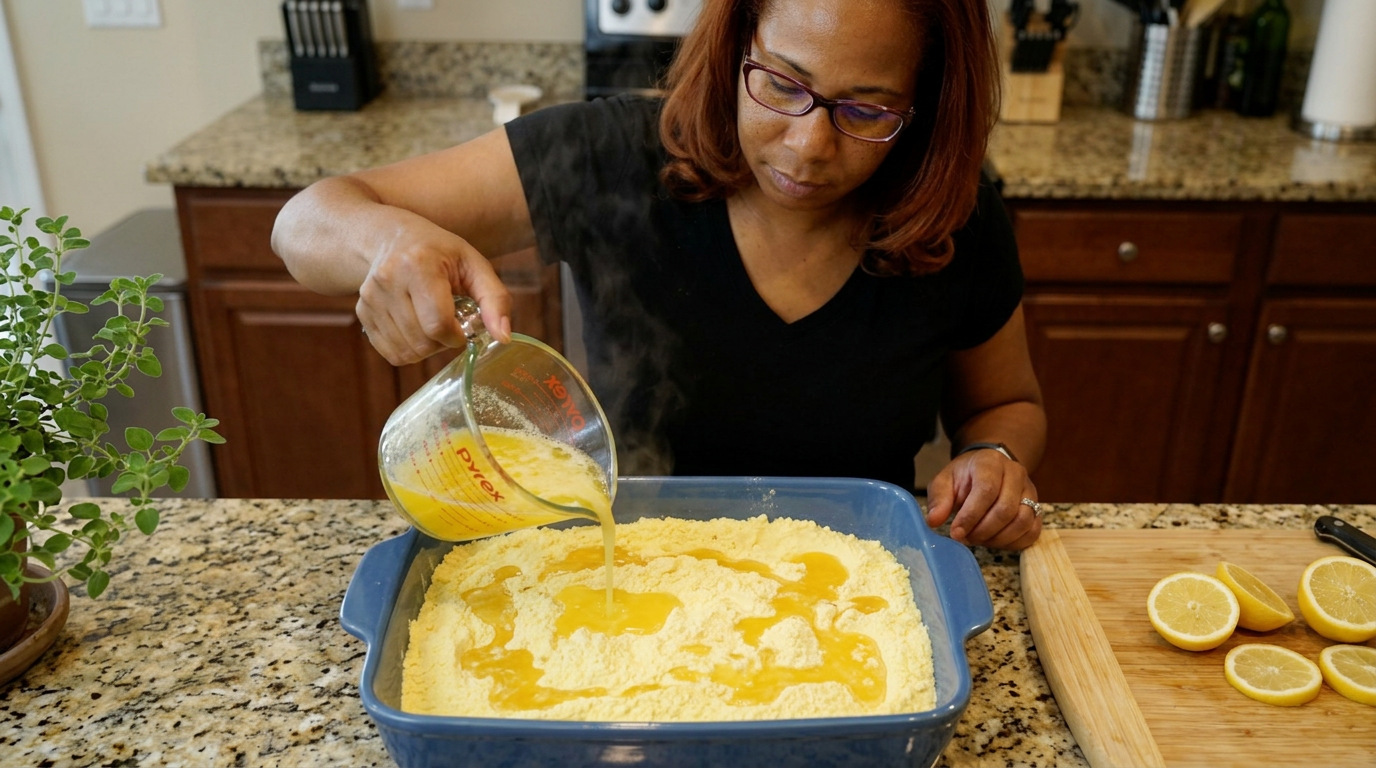
You do not have to spend three hours sweating over a pastry blender to get a warm, buttery, bubbling peach cobbler that tastes like summer in the South. Today, we are taking every single shortcut we can defend, and I promise you, nobody is going to complain.
Extreme close-up of a spoon cutting into a golden, caramelized cobbler topping, revealing steaming, jammy peaches bubbling underneath, shot in warm, natural Orlando afternoon light.
It was one of those typical mid-July afternoons in Orlando where the humidity hits you like a wet wool blanket the second you step outside, and a sudden thunderstorm was just starting to rumble in the distance. My husband, Tony, had been working out in the garage trying to organize his tools, and I wanted to surprise him with something sweet, warm, and comforting for after dinner. But here was the catch: our AC was already struggling against the Florida heat, and the absolute last thing I wanted to do was spend hours kneading butter into flour, chilling dough, and rolling out a temperamental pastry crust on a sticky counter.
I stood in front of the pantry, staring at a couple of cans of sliced peaches in heavy syrup that had been sitting there since hurricane season prep, and a box of yellow cake mix. Now, normally, I pride myself on making things from scratch on this channel. But sometimes, real life happens, and you need a dessert that delivers 90% of the joy with about 10% of the effort. I decided to run an experiment: could I doctor up canned peaches and a boxed mix so successfully that Tony wouldn't even realize I skipped the hard work?
My plan was simple but strategic. I wasn't just going to dump the cans and dry mix into a pan and call it a day—that results in a dry, powdery mess that tastes like cardboard. Instead, I planned to drain the peaches, elevate them with fresh lemon juice, brown sugar, and a heavy hand of warm spices like cinnamon and nutmeg. For the topping, I wanted to transform that standard yellow cake mix into a rich, buttery, melt-in-your-mouth cobbler crust by melting two whole sticks of salted butter and combining it with a splash of vanilla extract to mimic a true Southern buttermilk biscuit topping. The stakes were high; Tony has an incredibly sensitive palate for artificial flavors, so if I could fool him, I could fool anyone.
I started by preheating our oven to 375 degrees Fahrenheit. While that was warming up, I grabbed a 9x13-inch ceramic baking dish—the pretty blue one my mom gave us—and greased it generously with a tablespoon of softened butter. I opened three 15-ounce cans of sliced yellow cling peaches. Here was my first major decision: I chose to drain two of the cans completely, but I kept about half of the syrup from the third can. If you drain all of them, your cobbler ends up dry and sad; if you keep all the syrup, it turns into a soupy, cloying puddle. Finding that middle ground is the secret to a thick, jammy fruit layer.
I dumped the peaches directly into the baking dish to save myself from washing an extra bowl. To balance out that intense canned sweetness, I squeezed the juice of half a fresh backyard lemon over the fruit. The acidity is absolutely crucial here; it cuts through the heavy syrup and immediately makes the canned peaches taste bright and freshly picked. I then scattered a quarter cup of dark brown sugar, a teaspoon of ground cinnamon, a half teaspoon of freshly grated nutmeg, and a pinch of kosher salt over the top. Using a wooden spoon, I gently tossed everything right in the baking dish until the peaches were coated in a glossy, fragrant, amber-colored glaze.
Next came the shortcut of all shortcuts: the box of yellow cake mix. I opened the bag and sprinkled the dry mix evenly over the spiced peaches. As I did this, I noticed a few large lumps in the cake mix. I paused, grabbed a fork, and gently smoothed out the surface, making sure the dry powder completely covered the peaches like a blanket of fresh snow. If you leave huge clumps of dry cake mix untreated, they won't absorb the butter in the oven, and you'll end up biting into raw flour. It’s these tiny, ten-second adjustments that make or break a shortcut recipe.
Now, many dump cake recipes tell you to just slice cold butter and lay it on top of the dry mix. I’ve tried that, and it always leaves dry, powdery patches. Instead, I melted two sticks—yes, a full cup—of salted butter in a microwave-safe glass measuring cup. To that melted butter, I stirred in a teaspoon of pure vanilla extract. The smell of hot butter and vanilla immediately filled the kitchen, making it smell like a professional bakery before the dish even hit the oven.
Slowly, and with a very steady hand, I poured the melted vanilla-butter mixture over the cake mix. I didn't rush this. I moved the measuring cup in a zigzag pattern, trying to wet as much of the dry cake mix as humanly possible. There were still a few dry spots left, so I took a fork and very gently swirled the butter into the top layer of the cake mix, being careful not entirely to disturb or mix up the peach layer underneath. You want a distinct fruit bottom and a cakey, biscuit-like top.
For the grand finale before baking, I mixed one tablespoon of granulated white sugar with a half teaspoon of cinnamon in a small bowl and sprinkled it over the damp buttery topping. This little extra step creates a gorgeous, crunchy, caramelized sugar crust on top that mimics a high-end bakery cobbler. I carefully slid the heavy baking dish onto the middle rack of the 375-degree oven, set my timer for 40 minutes, and prayed the kitchen wouldn't get too hot.
About twenty-five minutes in, the most incredible aroma started wafting out of the oven. It smelled like toasted sugar, caramelized peaches, and warm vanilla. I peeked through the oven window and saw the edges of the cobbler bubbling furiously with thick, amber peach juices, while the center was puffing up and turning a beautiful, deep golden brown. I noticed one small spot in the center that still looked a little pale, so I rotated the pan 180 degrees to ensure even browning. This is a crucial step if your oven, like mine, has a cheeky hot spot in the back left corner.
When the timer finally buzzed at the 40-minute mark, I pulled the cobbler out. The middle was set but still had a slight, jiggly bounce, and the crust was a stunning, fractured golden-brown landscape. I set the hot dish on a wire cooling rack on our kitchen island. As tempting as it was to dive in immediately with a spoon, I knew from painful past experience that hot peach cobbler is essentially molten lava. It needs at least 15 to 20 minutes to sit, cool, and allow those juices to thicken up into a perfect, spoonable jam. I stood there, watching the bubbles slowly subside, listening to the rain patter against the window.
Handheld, dynamic shots tracking Tara's hands as she drains peaches, squeezes lemon, sprinkles cake mix, and carefully pours melted butter. The camera should capture steam rising, the texture of the caramelized crust, and the warm, golden lighting of the kitchen.
Once the cobbler had cooled down to a safe, warm temperature, I called Tony in from the garage. His eyes widened the second he walked through the door and caught a whiff of the cinnamon-sugar crust. I grabbed two shallow bowls and scooped out a massive portion for each of us. The crust made a satisfying, crispy crackling sound under the spoon, revealing the thick, glossy peaches underneath. To finish it off, I topped each warm bowl with a generous scoop of premium vanilla bean ice cream.
We sat down at the kitchen table while the storm poured outside. Tony took his first bite, closed his eyes, and just smiled. 'Tara, this is incredible,' he said, 'the crust is so buttery and crispy, and the peaches taste like you spent all morning peeling them.' I let out a huge breath of relief and took a bite myself. He was right. The fresh lemon juice totally masked the canned taste, and the melted butter-and-vanilla technique transformed the boxed cake mix into a rich, tender, cobbler topping with zero chalky residue. It was absolute perfection.
I ended up confessing my shortcuts to him about halfway through his bowl, and he honestly didn't believe me at first. It just goes to show that you don't have to do everything the hard way to make something that feels like home. Next time, I think I might throw in some fresh blackberries or a splash of bourbon to the peaches to elevate it even further, but for a rainy Tuesday afternoon, this shortcut cobbler was an absolute triumph. If you're craving something sweet but don't want to sweat over dough, give this a try. Your secret is entirely safe with me.
Medium shot of Tara and Tony sitting at the kitchen table, laughing and enjoying their bowls of cobbler with melting ice cream, followed by a final close-up of the nearly empty baking dish with just a few crumbs of caramelized crust left.
Shot List
| Type | Description | Audio | Duration |
|---|---|---|---|
| Close-up | A spoon scooping out a portion of warm peach cobbler, showing steam rising and vanilla ice cream beginning to melt over the golden crust. | Tara (VO): 'You do not have to spend three hours sweating over a pastry blender to get a warm, buttery, bubbling peach cobbler...' | 5s |
| Medium | Tara stands in her bright Orlando kitchen, smiling warmly at the camera with rain visible on the window behind her. | Tara: 'Hey everyone, welcome back to Cooking with Tara. Today, we are taking every single shortcut we can defend...' | 15s |
| Detail | Three cans of generic store-bought sliced peaches and a box of yellow cake mix sitting on a clean wooden cutting board. | Tara (VO): 'I had these pantry staples sitting around, and with the Florida summer humidity, I refused to roll out dough.' | 10s |
| Overhead | Tara pouring the drained peaches into a blue ceramic 9x13 baking dish. | Tara (VO): 'I drained two cans completely, but kept a little syrup from the third because we want jammy, not soupy.' | 12s |
| Close-up | Squeezing a fresh lemon half over the peaches, catching a stray seed with a finger. | Tara (VO): 'The absolute secret to making canned peaches taste fresh is a big squeeze of acid. Don't skip the lemon.' | 8s |
| B-roll | Brown sugar, cinnamon, and freshly grated nutmeg being sprinkled over the peaches and tossed with a wooden spoon. | Tara (VO): 'A little brown sugar and warm spices transform this from a canned dump cake into a real Southern dessert.' | 15s |
| Close-up | Dry yellow cake mix being shaken out of its plastic bag, blanketing the spiced peaches. | Tara (VO): 'Now for the big shortcut. A standard box of yellow cake mix. Just spread it out and break up any dry lumps.' | 10s |
| Detail | Pouring melted butter mixed with vanilla extract in a slow, steady stream over the dry cake mix. | Tara (VO): 'Instead of cold butter slices, I melt two sticks of salted butter with vanilla. This coats the dry mix perfectly.' | 18s |
| Close-up | A close-up of a fork gently swirling the melted butter into the dry patches of cake mix. | Tara (VO): 'Take ten seconds to swirl any dry pockets. We want a cohesive, biscuit-like topping, not pockets of raw flour.' | 12s |
| B-roll | Sprinkling cinnamon sugar over the wet butter layer before putting it into a preheated oven. | Tara (VO): 'A quick dust of cinnamon sugar on top creates that gorgeous, bakery-style crackled crust.' | 10s |
| Timelapse | The cobbler baking in the oven, rising, turning golden, and bubbling violently at the edges. | Tara (VO): 'At 375 degrees, it takes about 40 minutes. Watch those juices start to caramelize.' | 15s |
| Medium | Tara pulling the bubbling, golden-brown cobbler out of the oven using blue oven mitts, smiling proudly at the camera. | Tara: 'Oh my goodness, you guys, the smell in this kitchen right now is absolutely heavenly.' | 12s |
| Medium | Tony walks into the kitchen, smelling the air, and Tara hands him a warm bowl topped with melting vanilla ice cream. | Tony: 'Wow, honey, did you spend all afternoon making this?' Tara: 'Shh, just taste it first.' | 20s |
| Close-up | Tony taking a bite, nodding in approval with a huge smile. | Tony: 'This crust is incredible. It tastes totally homemade.' Tara (VO): 'Experiment successful.' | 10s |
| Wide | Tara talking directly to the camera, holding a spoonful of cobbler, with a call to action overlay on screen. | Tara: 'Sometimes, the best food is the food that lets you enjoy your afternoon. Give this a try, and I will see you next time!' | 15s |
- Capture the condensation on the kitchen window to emphasize the hot, humid Florida weather outside compared to the cozy kitchen.
- Get a slow-motion shot of the lemon being squeezed, with dramatic highlights on the juice droplets hitting the peaches.
- Focus on the sound design: ensure the microphone captures the crisp crackling sound of the spoon breaking through the caramelized sugar crust.
- Record a close-up of the vanilla ice cream slowly melting and running down the side of the warm cobbler mound in the serving bowl.
- 0:00 — Upbeat, acoustic acoustic guitar and light percussion to match the energetic cold open.
- 0:30 — Warm, mellow, homey folk music as Tara introduces the recipe and her Orlando kitchen setup.
- 2:15 — Playful, light acoustic track during the preparation and mixing of the canned peaches and spices.
- 4:30 — Slightly instructional, modern steady beat during the butter pouring and fork swirling technique.
- 6:15 — Cozy, slow-tempo acoustic guitar piece as the cobbler bakes and the rain pours outside.
- 8:00 — Bright, uplifting acoustic melody as the cobbler is pulled out of the oven and plated.
- 9:30 — Warm, comforting guitar theme fading out during the final tasting and sign-off.
- Keep the pacing conversational and relaxed, letting the natural ambient kitchen sounds (scraping, pouring, rain) breathe between voiceovers.
- Use clean, minimalist text overlays for ingredient amounts as they are introduced on screen, using a warm white, elegant sans-serif font.
- Apply a warm, slightly golden color grade to the footage to emphasize the cozy, comforting nature of a home-baked dessert.
- Ensure the transition between the baking timelapse and the finished dish is smooth, using a soft cross-dissolve to mimic the passage of time.
| Call | Provider | Model | Input Tokens | Output Tokens | Compute / Credits |
|---|---|---|---|---|---|
| Script | abacus.ai | gemini-3.5-flash | 1,236 | 4,941 | — |
| Image 1 — The Golden Scoop | abacus.ai | nano_banana2 | — | — | 6,754.325 |
| Image 2 — Welcome to Tara's Kitchen | abacus.ai | nano_banana2 | — | — | 6,754.75 |
| Image 3 — The Butter Pour | abacus.ai | nano_banana2 | — | — | 6,754.175 |
I Tried Making Traditional Cuban Guava Pastelitos from Scratch (And Failed Twice Before Getting It Right!)
I spent a hot August Saturday in Florida trying to master the flaky, sweet bakery classic that Tony and I always buy on road trips, and learned the hard way why puff pastry demands respect.
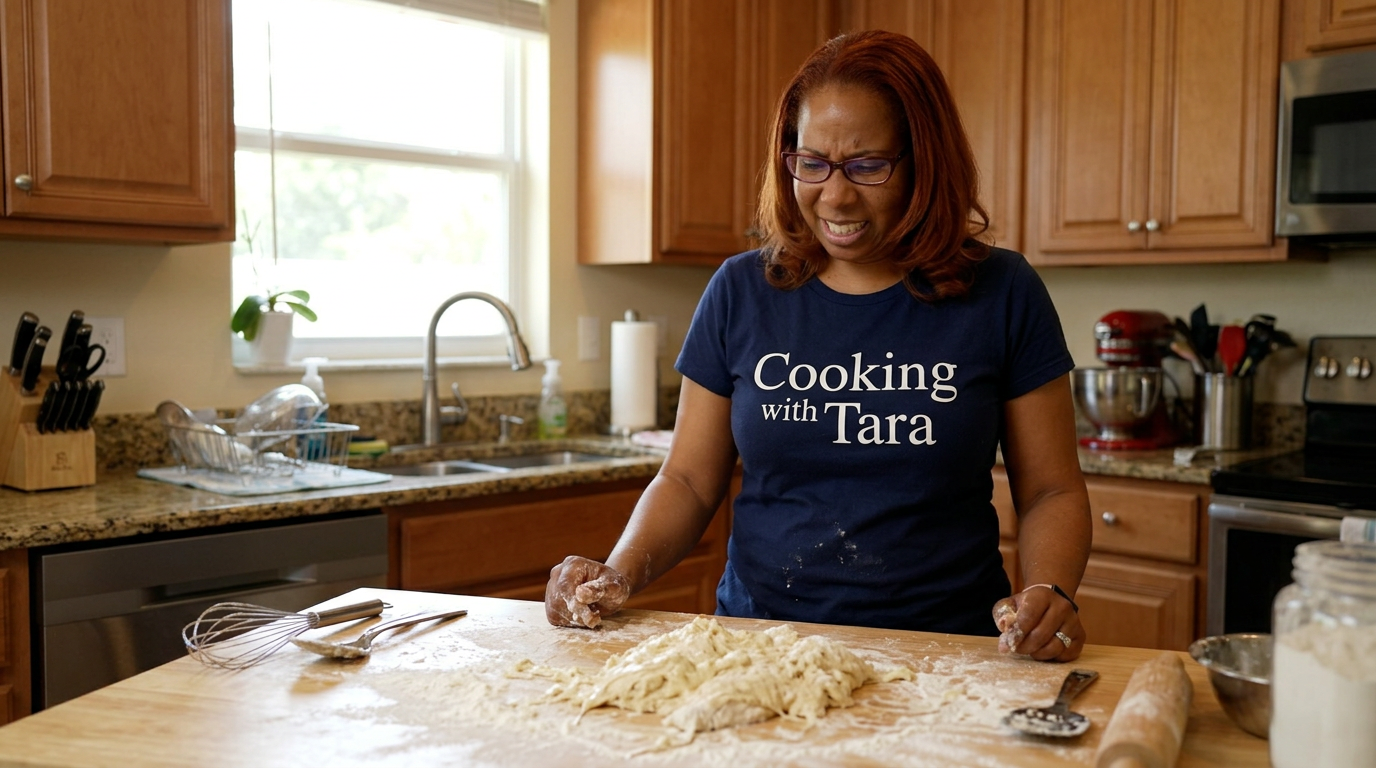
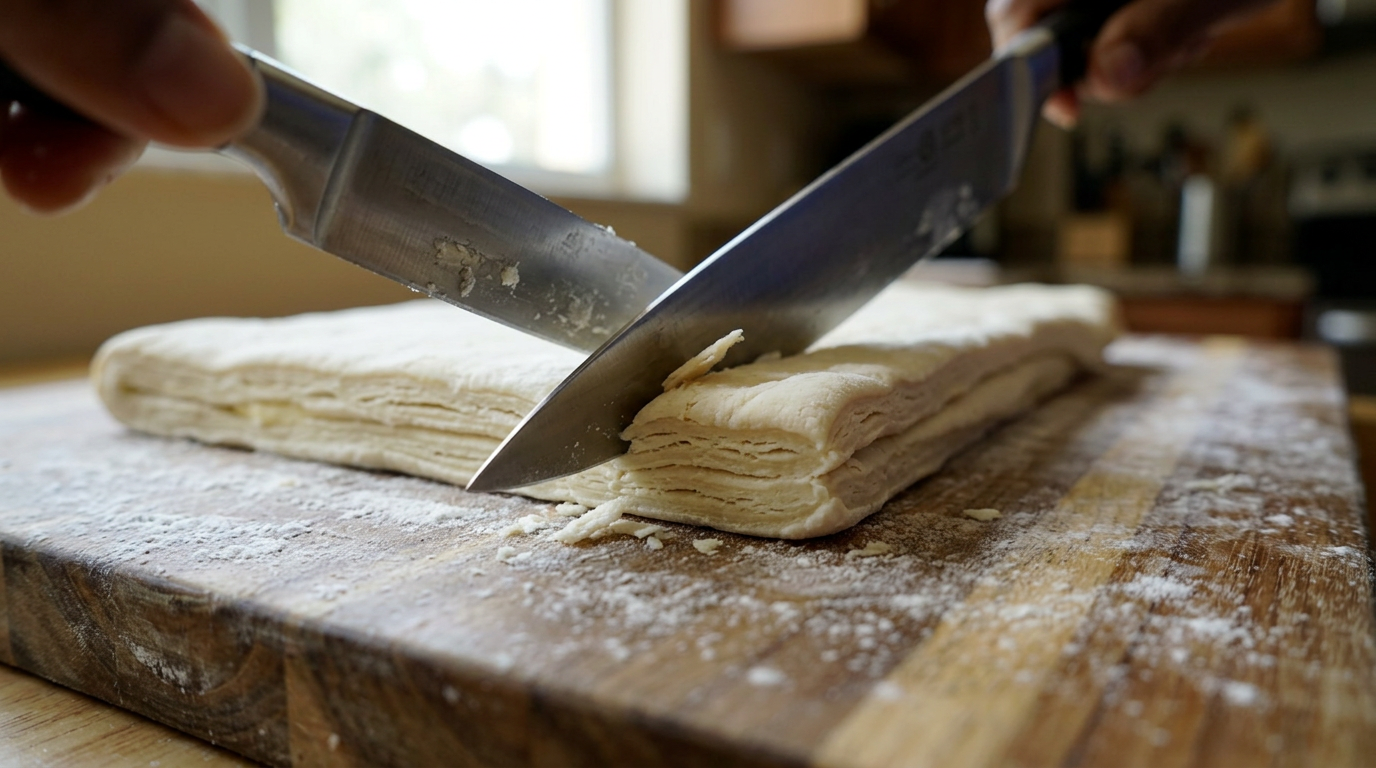
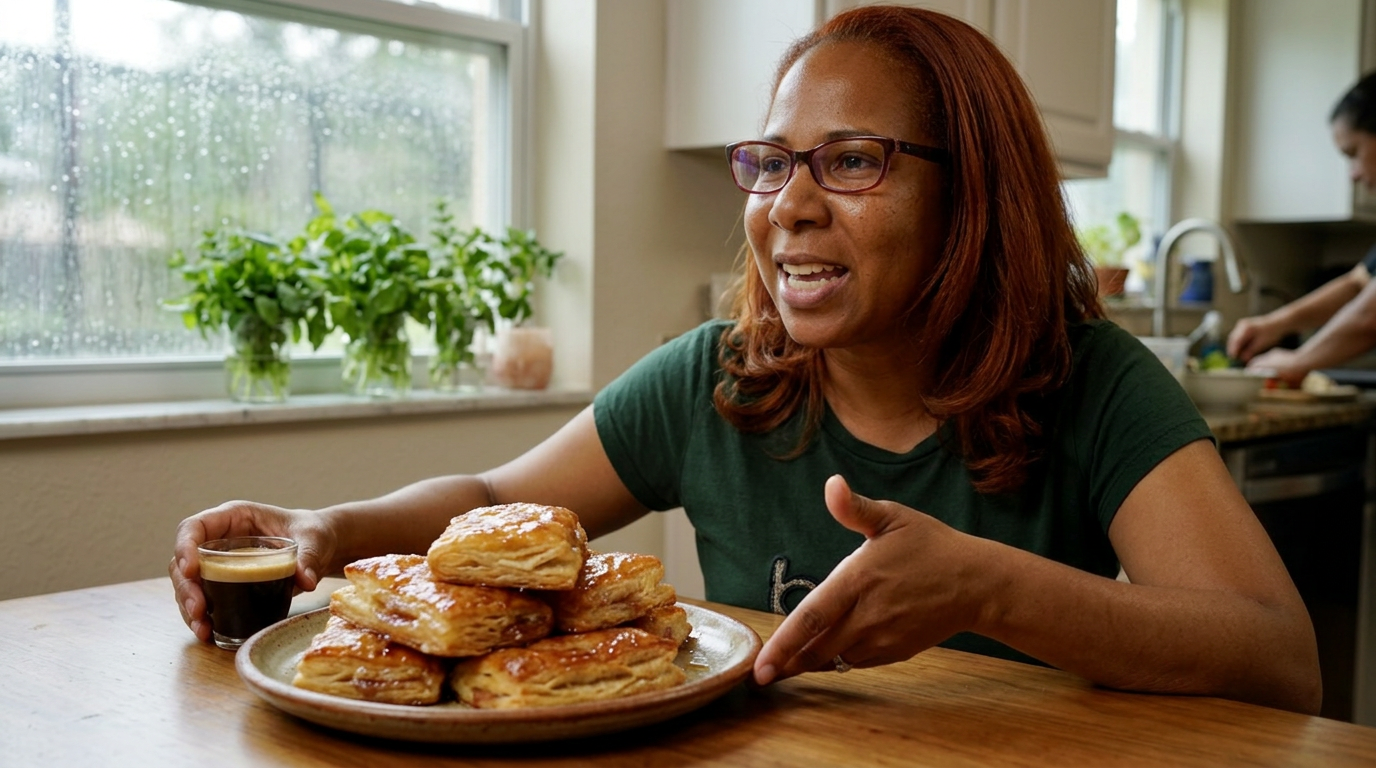
They say you shouldn't turn on your oven to four hundred degrees in the middle of a humid Florida August. After throwing away two batches of melted, soggy dough today, I was starting to think they were right.
Extreme close-up of flaky, golden brown pastry layers shattering under a knife, revealing a molten pink guava and cream cheese center. Steam rises as the camera pulls back to show Tara looking exhausted but triumphant in her kitchen.
It was a sticky Saturday morning here in Orlando, the kind of August day where the air feels like a warm, wet blanket the second you step outside. Tony and I had planned to drive down to our favorite little bakery in Miami this weekend, but our old car's air conditioning decided to give out on Friday afternoon. Stuck at home, staring at a blank weekend, my mind kept wandering back to the one thing I wanted most from that trip: a warm, flaky, shatter-in-your-mouth guava and cheese pastelito.
Now, I've eaten hundreds of these pastries since moving to Florida, but I had never actually tried to make them from scratch. I'm talking about the real deal—rough puff pastry made by hand, not the frozen sheets from the grocery store. I wanted to see if a home cook could actually replicate that bakery-level lamination without specialized equipment, or if our brutal summer humidity would ruin the dough before it ever hit the oven.
I cleared off our kitchen counter, cranked our house AC down to a chilly sixty-eight degrees to give the butter a fighting chance, and laid out my ingredients. The plan was simple: create a quick rough puff pastry, roll it out, layer it with sweet guava paste and tangy cream cheese, bake it until golden, and glaze it with a simple sugar syrup. My goal was twenty-four perfect, flaky squares. What I didn't plan for was how quickly a block of butter can turn to soup when you're working under hot studio lights.
Tony looked at me like I was a little crazy when he saw the five blocks of unsalted butter sitting on the counter. He reminded me that Publix is just a five-minute drive away and their bakery case is always stocked. But there's a stubborn streak in me that loves a kitchen challenge. If I could pull this off, we'd have a warm, fresh batch of Miami-style pastelitos right here in our Orlando kitchen, completely from scratch, without having to brave the interstate traffic.
I started with the dough, mixing four cups of all-purpose flour with a pinch of salt. The secret to a rapid puff pastry is keeping the butter cold and leaving it in visible, pea-sized chunks. I grated three sticks of frozen butter directly into the flour, tossing it gently with my fingertips so every little shred was coated. I added ice-cold water, tablespoon by tablespoon, just until the dough started to hold together. Everything was going beautifully—until I started the first roll-out.
As I began rolling the dough into a long rectangle on my wooden board, I noticed the dough was sticking terribly. The humidity in the kitchen was fighting me. The butter was softening faster than I could roll. Instead of neat layers, the butter was smearing into the flour. I panicked, folded it anyway, and shoved it into the freezer, hoping thirty minutes of intense cold would save it. It didn't. When I rolled it out the second time, the butter tore through the dough in greasy patches. Batch number one was a complete loss, destined to bake up flat and heavy.
I wiped down the counter, washed my rolling pin in ice water, and started over. This time, I didn't grate the butter; I cut it into small cubes and kept the dough in the fridge for twenty minutes between every single fold. It took twice as long, but as I performed the envelope folds, I could see the distinct, beautiful layers of butter and flour forming under my hands. By three o'clock in the afternoon, I finally had a beautiful, chilled block of laminated dough ready for filling.
For the filling, I sliced a brick of sweet, deep red guava paste—the kind you find in the Hispanic foods aisle—and softened it slightly with a splash of water in a saucepan so it would be spreadable but not runny. Alongside it, I whipped block cream cheese with a tiny splash of vanilla extract and a tablespoon of powdered sugar. The contrast between the intense, tropical sweetness of the guava and the tart, creamy cheese is what makes these pastries so addictive.
Assembly was a race against the clock. I rolled the dough out into two large, thin sheets. I placed dollops of the cream cheese and slices of guava paste about two inches apart on the bottom sheet. Then, I carefully draped the second sheet of dough over the top. Using my fingers, I pressed down around the mounds of filling to seal them, trying hard not to trap any air bubbles that would burst in the oven.
This is where I made my second mistake. I used a dull knife to cut the individual pastries into squares. A dull blade drags the dough, sealing the edges together and preventing the layers from rising. I watched the first three pastries in the oven bake into lopsided, dense lumps. I quickly pulled the remaining unbaked pastries out of the fridge and used a brand-new, razor-shred utility blade to trim the edges cleanly. This exposed the beautiful micro-layers of butter and dough, giving them room to expand.
I brushed the tops with a simple egg wash and scored them with three traditional diagonal slashes to let steam escape. I slid the baking sheet into the oven preheated to a scorching four hundred and fifteen degrees. For the first ten minutes, I did nothing but stare through the oven glass. It's a magical thing to watch dough rise—you can actually see the water in the butter turning to steam, pushing those paper-thin layers of flour upward into a delicate, towering crunch.
While they baked, I boiled equal parts sugar and water to create a simple syrup. The moment the pastries came out of the oven, sizzling and deeply caramelized, I brushed them with the warm syrup. It gives them that signature sticky, glossy bakery shine. The kitchen smelled absolutely incredible—sweet, buttery, caramelized, and tropical, like a perfect morning in Little Havana.
Cut between close-ups of Tara's hands folding the laminated dough, the knife slicing through sticky guava paste, steam escaping from the hot oven door, and the glossy syrup being brushed onto the golden, bubbling pastry tops.
By the time the pastelitos were cool enough to touch, the afternoon storm had started rolling in outside, drumming a heavy rhythm against our kitchen window. I plated a half-dozen of the best-looking pastries—the ones cut with the razor blade that had risen to nearly triple their original height, their layers visible like the pages of a golden book.
Tony walked into the kitchen just as I was pouring two cups of strong, sweet Cuban espresso. He took one bite of a warm pastelito, and the sound of the pastry shattering was louder than the thunder outside. Flakes of dough showered down onto his plate and his shirt. He didn't say anything for a second, just closed his eyes and nodded. 'Tara,' he said, 'this is better than the bakery. The pastry is so light it's like cloud, and the guava is actually warm.'
Looking at the messy kitchen, the flour-dusted counters, and the sink full of bowls, I knew the struggle had been entirely worth it. I learned that you can't rush pastry, especially not in the Florida heat, and that the right tools make all the difference. Next time, I'll make a double batch of dough and keep it in the freezer so we can have fresh pastelitos on demand. For now, we're sitting by the dry kitchen window, enjoying the rain, with sticky fingers and very full hearts.
Medium shot of Tara and Tony sitting at the kitchen island, laughing as Tony brushes pastry flakes off his shirt. The camera pans down to a beautiful plate of glossy, layered pastelitos next to two small cups of espresso.
Shot List
| Type | Description | Audio | Duration |
|---|---|---|---|
| Close-up | Flaky pastry shattering under a knife edge, revealing hot pink guava. | Shattering pastry crunch sound effect, very crisp. | 4s |
| Medium | Tara talking directly to the camera in her bright kitchen, looking determined. | Tara: 'Today we are tackling the ultimate Florida road-trip treat...' | 10s |
| Detail | A block of butter melting on a warm wooden cutting board under hot studio lights. | Tara voiceover: 'But first, we have to fight the August humidity.' | 6s |
| Overhead | Tara grating frozen butter into a large bowl of flour, flour dusting the camera lens slightly. | Upbeat, acoustic acoustic guitar music begins playing softly. | 8s |
| Close-up | Tara trying to roll out sticky, greasy dough that is tearing on the board. | Tara: 'Oh no, this is a total disaster. The butter is completely melting.' | 12s |
| Medium | Tara tossing the ruined dough into the trash with a sigh, smiling sheepishly at the camera. | Tara: 'Batch one is officially commercial grade glue. Let's try again.' | 8s |
| Timelapse | Tara rolling, folding, wrapping, and placing dough in the fridge repeatedly. | Fast-paced, cheerful percussion music. | 15s |
| Close-up | Slicing through a brick of dark red, sticky guava paste with a clean knife. | Thud of the knife hitting the cutting board. | 5s |
| Overhead | Assembling the pastries: dollops of cream cheese and guava squares lined up perfectly on dough. | Tara voiceover explaining the perfect balance of sweet and tart. | 10s |
| Detail | A brand-new utility blade cutting clean, sharp edges through the dough layers. | Tara voiceover: 'This razor blade is the secret. Look at those layers.' | 7s |
| B-roll | Golden, puffed pastelitos baking inside a hot oven, bubbling with steam. | Oven fan humming softly. | 8s |
| Close-up | Brushing shiny, clear sugar syrup over the sizzling hot pastries. | Sizzling sound as the syrup hits the hot pastry surface. | 6s |
| Medium | Tony taking a huge bite of a pastry, flakes falling everywhere, smiling wildly. | Loud crunch sound. Tony: 'Oh my gosh, Tara. You nailed it.' | 9s |
| Wide | Tara and Tony sitting together at the counter, drinking coffee and laughing as rain hits the window. | Soft rain sounds fade in with warm, acoustic ending music. | 12s |
- Capture close-up macro shots of the pastry layers expanding inside the oven to show the lamination process clearly.
- Film the rain hitting the kitchen window during the baking section to ground the video in the stormy Florida afternoon setting.
- Show the real, unedited messy counter moments—flour spills, sticky syrup drips, and dirty bowls in the sink—to keep the vibe authentic.
- Record high-quality, close-up audio of the pastry crunching when bitten into for satisfying ASMR sound design.
- 0:00 — Warm, acoustic guitar intro starts softly, setting a cozy, homey tone.
- 1:30 — Light, playful percussion joins in as Tara begins mixing the first failed pastry batch.
- 3:15 — Music stops abruptly with a record scratch sound as Tara throws the melted dough away.
- 3:45 — Determined, upbeat acoustic indie folk music starts as Tara begins the second, successful attempt.
- 6:20 — Soft, ambient instrumental music plays during the assembly and slow-motion baking sequence.
- 8:10 — Upbeat, joyful acoustic melody peaks as the hot, glossy pastries are pulled from the oven.
- 9:15 — Mellow, gentle acoustic guitar and soft rain sounds fade in for the final tasting and outro.
- Use warm, golden-hour color grading to emphasize the cozy home kitchen vibe and the tropical Florida setting.
- Include a playful 'Fail Counter' graphic overlay on screen when Tara struggles with the sticky dough in the humidity.
- Keep the pacing fast and engaging during the dough rolling, but slow down for sensory close-ups of the filling and baking.
- Incorporate clean, minimalist recipe text overlays at the bottom of the screen when detailing ingredient amounts.
| Call | Provider | Model | Input Tokens | Output Tokens | Compute / Credits |
|---|---|---|---|---|---|
| Script | abacus.ai | gemini-3.5-flash | 1,247 | 4,314 | — |
| Image 1 — The Humidity Struggle | abacus.ai | nano_banana2 | — | — | 6,753.775 |
| Image 2 — The Perfect Slice | abacus.ai | nano_banana2 | — | — | 6,753.7 |
| Image 3 — The Reward | abacus.ai | nano_banana2 | — | — | 6,753.925 |
I Tried Making Real Cuban-Style Mojo Roast Pork in an Orlando Summer (And Almost Melted)
Today I am tackling a legendary Florida classic—slow-roasted Cuban mojo pork—right in the middle of a sticky, ninety-five-degree August afternoon, hoping my home oven doesn't turn the house into a sauna.
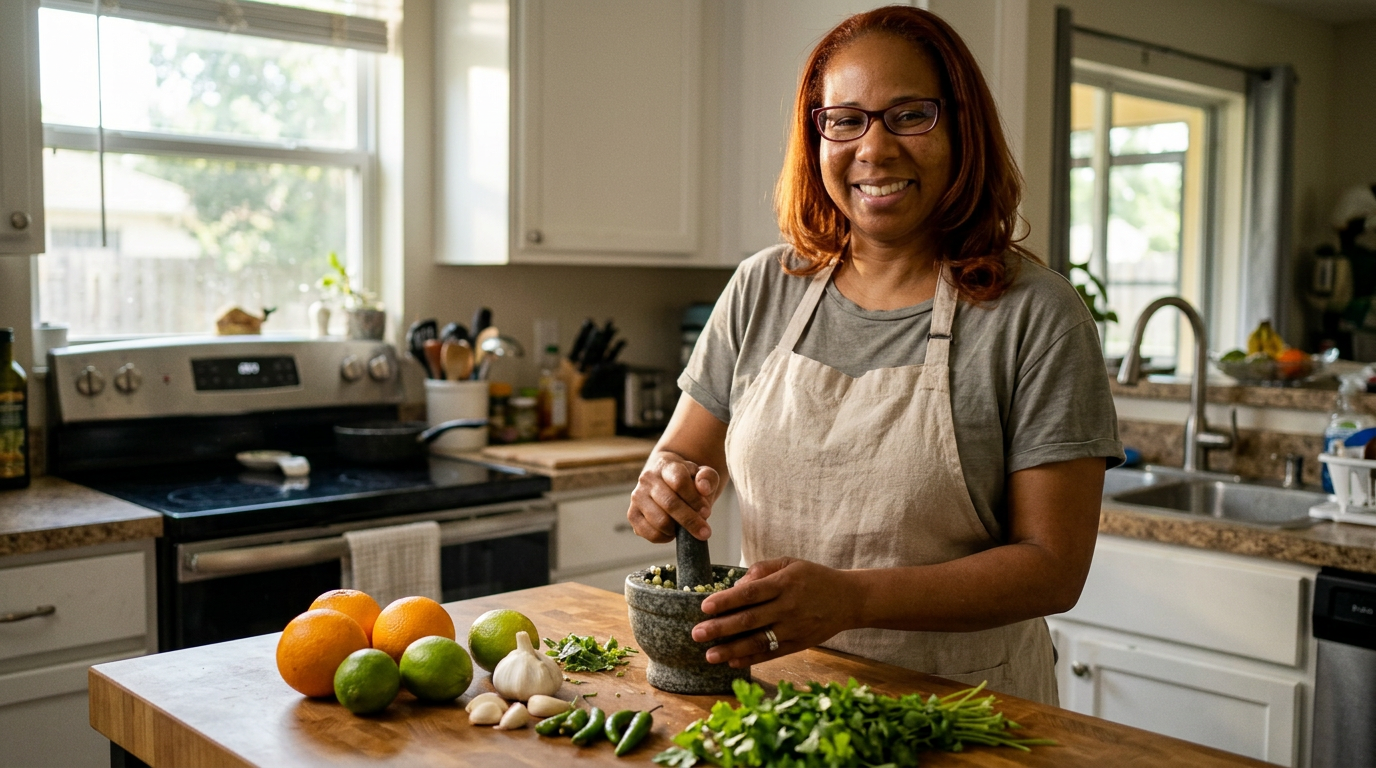
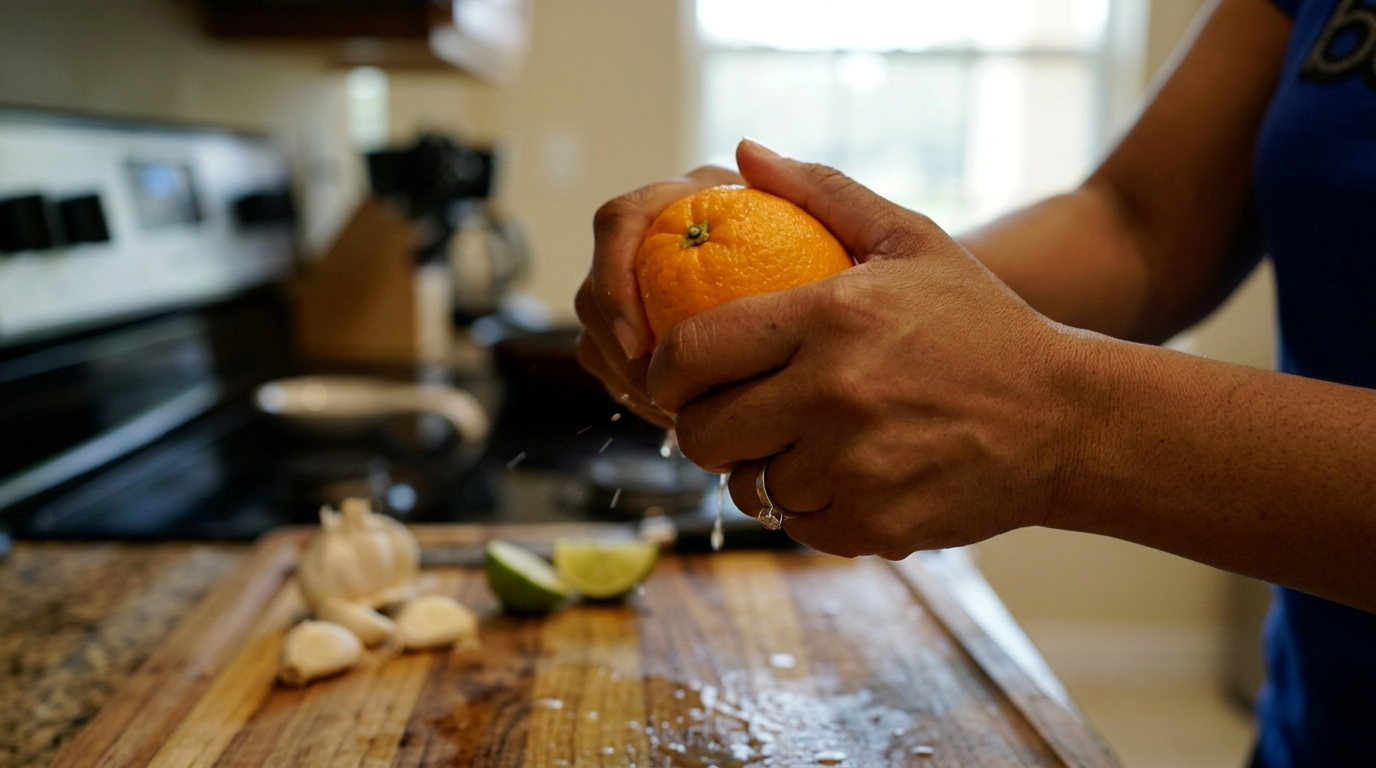
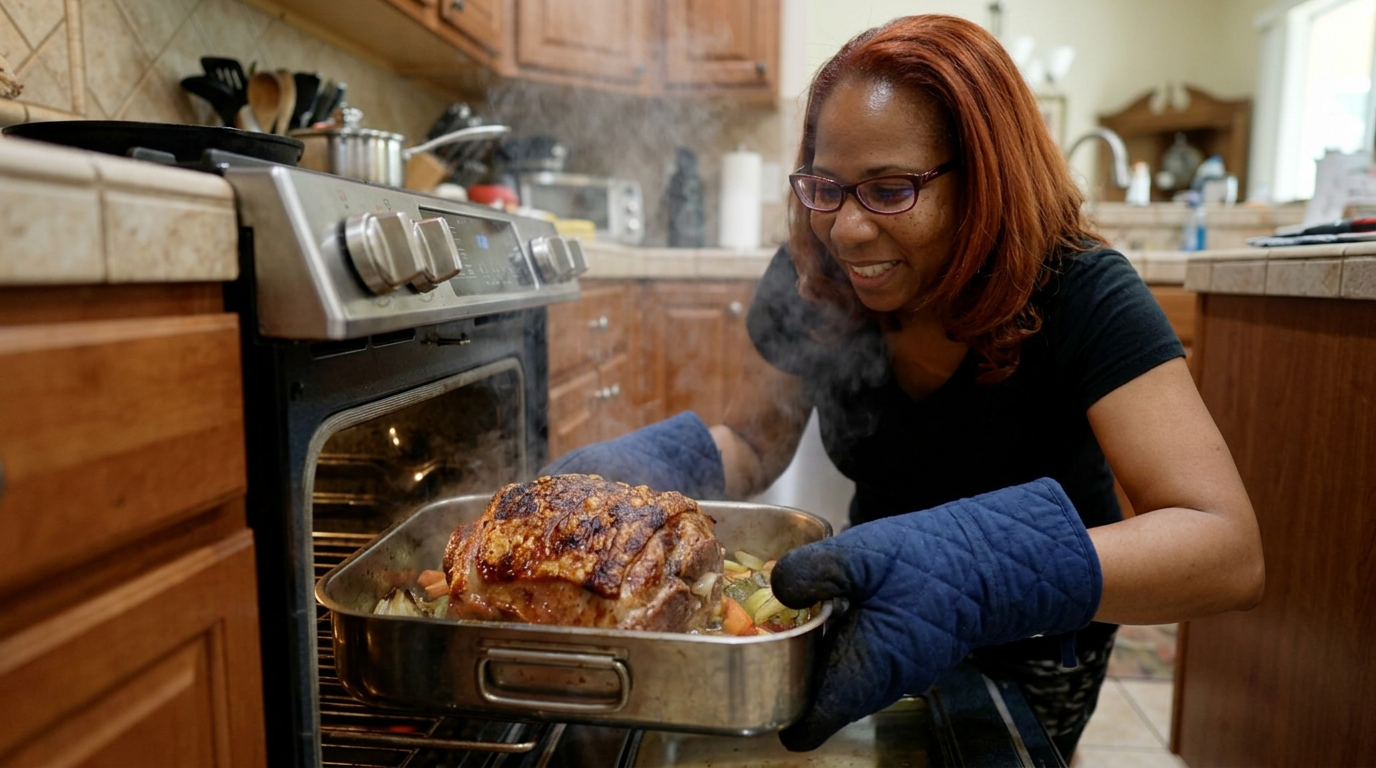
They say you shouldn't run a four-hundred-degree oven for four hours when it's ninety-five degrees outside in Orlando. But today, I had a craving for real, citrusy, garlic-loaded Mojo pork that no air conditioner could stand in the way of.
Close-up of Tara sweating slightly, wiping her brow with a kitchen towel, then pulling a massive, sizzling, deeply browned pork shoulder out of a steaming oven. The crackling sound is loud and satisfying.
It was one of those stifling Sunday afternoons in mid-August where the air feels like a warm, wet blanket before the daily 3:00 PM thunderstorm rolls through. Tony and I had planned to go out, but the sheer humidity made us retreat back inside. That is when the craving hit. I didn't just want food; I wanted that intense, garlic-and-citrus punch of a real Cuban mojo pork. The kind we usually buy down the road at our favorite local spot, but made right here in our kitchen. The stakes were high: if I messed this up, I would have heated up our entire house for a dry, tough piece of meat and a very grumpy husband.
My plan was ambitious but simple. I bought a beautiful seven-pound bone-in pork shoulder from the local Publix. The star of the show, though, had to be the mojo marinade. True Cuban mojo uses sour oranges—naranjas agrias. But finding them fresh can be a hit-or-miss game even here in Central Florida. I decided to make my own blend using fresh orange juice, lime juice, and a splash of lemon to mimic that distinct, sharp bitterness. I also committed to using an entire head of garlic. Not three cloves, not four. The whole head.
Before I even touched the meat, I had to prep the kitchen. Tony looked at me like I was crazy when I preheated the oven early. 'Are you trying to break the AC?' he asked, laughing as he adjusted the thermostat. I promised him the end result—shredded, crispy, citrusy pork piled high over black beans and rice—would be entirely worth the temporary tropical climate we were creating in our living room. With the rain starting to tap against the window, I grabbed my mortar and pestle and got to work.
I started by peeling the garlic. There is something incredibly therapeutic about smashing garlic cloves under the flat edge of a chef's knife when a summer storm is raging outside. I dropped the cloves into my heavy granite mortar and pestle along with a generous tablespoon of coarse kosher salt. The salt acts as an abrasive, helping to break the garlic down into a smooth, fragrant paste. As I ground it down, the sharp, pungent aroma filled the kitchen, instantly waking up my senses.
Next came the citrus experiment. I squeezed four plump navel oranges and three limes into a glass measuring cup. To get that authentic sour orange bite, I added a tablespoon of white vinegar. I whisked the fresh juices into the garlic paste, along with dried oregano, plenty of ground cumin, and a healthy glug of extra virgin olive oil. I took a quick taste. It was sharp, incredibly tangy, and had a massive garlic kick that made my eyes water a little. Perfect. This was going to pierce right through the rich fat of the pork.
Now, the pork shoulder itself. For the best flavor, you need a bone-in roast with a good cap of fat on top. I didn't want to just pour the marinade over it; I wanted it to penetrate deep into the meat. I took a paring knife and stabbed deep pockets all over the roast, twisting the blade to make room. Then, using my hands, I rubbed the thick garlic paste deep into those pockets, making sure the meat was thoroughly seasoned from the inside out. I poured the rest of the liquid mojo over the top, massaged it in, and let it sit on the counter for about thirty minutes to take the chill off.
The real test began when I put the pork into the oven. I started it at a high heat—four hundred and twenty-five degrees—for the first thirty minutes. This blast of heat helps to jumpstart the rendering of the fat cap and begins to develop that beautiful, dark crust. The smell of roasting pork, garlic, and citrus began to waft through the house within fifteen minutes. Tony poked his head into the kitchen, sniffing the air. 'Okay,' he admitted, 'it already smells incredible in here.'
After thirty minutes, I turned the oven down to three hundred and twenty-five degrees. This is the slow-and-low phase. I poured a cup of chicken broth into the bottom of the roasting pan to keep things moist, covered the whole thing tightly with heavy-duty aluminum foil, and set a timer for three hours. This was the hard part. The kitchen was getting warm, and the anticipation was building. I used the downtime to prep a simple pot of black beans and steam some long-grain white rice.
At the three-hour mark, I pulled the foil off. The pork was tender, but it looked pale and wet. This is where a lot of home cooks make a mistake—they stop here. To get those coveted, crispy, deeply caramelized edges, you have to let it roast uncovered for the final hour. I basted the meat with the pan juices, which had turned into a rich, golden, garlic-flecked sauce, and popped it back in.
By hour four, the rain outside had stopped, leaving that clean, steaming humidity on the patio. Inside, the kitchen smelled like heaven. I pulled the roasting pan out and let it rest on the stove. The pork had shrunk back from the bone, and the fat cap was a deep, mahogany brown, crackling softly as it cooled. I took a meat thermometer and slid it into the thickest part of the shoulder. It registered one hundred and ninety-eight degrees. Perfect for shredding.
I let the meat rest for twenty minutes—a crucial step to keep the juices from rushing out. When I finally took two large forks to pull it apart, the meat practically fell away from the bone. It was incredibly juicy, steaming hot, and infused with the bright, tangy mojo flavor. I tossed the shredded meat directly in the pan juices, letting it soak up all that concentrated garlic and citrus goodness.
Montage of Tara crushing garlic, squeezing fresh oranges and limes, stabbing the pork shoulder, rubbing the marinade in, placing it in the oven, checking the timer, checking the internal temp, and finally pulling the meat apart with two forks.
I piled a generous mountain of the shredded mojo pork over a bed of fluffy white rice and quick-seasoned black beans. For the final touch, I spooned a little extra of the warm, garlic-heavy pan juices right over the top. I handed a plate to Tony, who was waiting at the kitchen island, fork already in hand. He took a bite, closed his eyes, and just nodded. 'Tara, this is better than the restaurant,' he said. I took a bite myself, and he was right. The pork was rich and savory, but the bright pop of citrus and the warmth of the cumin completely cut through the fat, making it feel surprisingly light and perfect for a summer evening.
Looking back, the only thing I would change next time is making a double batch of the mojo marinade to keep in the fridge as a quick sauce for chicken or vegetables later in the week. And maybe I'll do this on a slightly cooler day—or just embrace the Florida heat. It proved to me that you don't need a professional kitchen or hard-to-find ingredients to make an authentic-tasting meal that carries so much warmth and comfort.
If you are sweating out a hot summer afternoon and want a kitchen project that rewards you with the most tender, flavorful pork you've ever tasted, give this mojo roast a try. Just turn your ceiling fans on high, pour yourself a cold glass of iced tea, and let the oven do the magic. Your family will thank you, and your house will smell amazing for days.
Medium shot of Tara and Tony sitting at the kitchen island, eating, laughing, and enjoying the meal together as the afternoon sun shines through the window.
Shot List
| Type | Description | Audio | Duration |
|---|---|---|---|
| Close-up | A heavy granite mortar and pestle grinding garlic cloves and coarse salt into a paste. | Sound of stone grinding, Tara's voiceover introducing the recipe. | 5s |
| Medium | Tara standing in her sunny Orlando kitchen, holding up a giant pork shoulder. | Tara: 'This is a seven-pound pork shoulder from Publix, and it's going to change our Sunday.' | 8s |
| Overhead | Juicing fresh oranges and limes into a glass measuring cup, seeds falling into a strainer. | Squeezing sounds, Tara explaining the DIY sour orange substitute. | 7s |
| Detail | A paring knife slicing deep pockets into the pink pork shoulder. | Tara explaining why we need to pocket the meat for seasoning. | 6s |
| Close-up | Tara's hands rubbing the thick, green-flecked garlic and herb paste deep into the meat. | Squishing sounds, Tara laughing about how messy this process is. | 8s |
| B-roll | The pork shoulder sliding into a preheated oven, heat waves shimmering slightly. | Oven door shutting firmly. Ambient hum of the kitchen. | 5s |
| Timelapse | Outside the kitchen window, heavy Florida rainstorm clouds rolling in quickly over backyard palm trees. | Low rumble of distant thunder, rain starting to patter on glass. | 10s |
| Medium | Tony walking into the kitchen, looking at the thermostat on the wall, then smiling at Tara. | Tony: 'It's getting like a sauna in here, Tara!' Tara: 'Trust the process, babe!' | 7s |
| Detail | Removing the aluminum foil from the roasting pan, releasing a massive cloud of garlic-scented steam. | Sizzling pan sounds, steam rushing up towards the camera. | 6s |
| Close-up | A metal spoon ladling rich, dark brown pan juices over the crispy, rendering fat cap of the pork. | Basting sounds, bubbling juices. | 5s |
| Detail | Two forks shredding the tender meat, revealing steaming, juicy pink interior strands falling apart effortlessly. | Tara: 'Look at that. Minimal effort, it just shreds.' | 8s |
| Overhead | Plating: Fluffy white rice, black beans, a mountain of shredded pork, and a splash of extra pan sauce. | Spoon scraping plate, rich sauce splashing over the meat. | 6s |
| Close-up | Tony taking a large bite of the pork and rice, nodding in slow, appreciative approval. | Tony: 'Oh wow. That is incredibly tender. The garlic is perfect.' | 7s |
| Medium | Tara tasting her own plate, smiling directly at the camera with her kitchen counter behind her. | Tara: 'Yes! It was totally worth the heat. Thanks for cooking with me today!' | 9s |
- Capture close-up slow-motion footage of the citrus juices mixing with the crushed garlic paste to show the vibrant textures.
- Show the physical effort of grinding with the mortar and pestle to emphasize the handmade, rustic nature of the dish.
- Record the actual sound of the pork crackling immediately after pulling it out of the oven for high-quality audio design.
- Capture a quick shot of the typical afternoon Florida rain outside the kitchen window to ground the video in its humid, cozy setting.
- 0:00 — Upbeat, warm acoustic guitar and light percussion to match the energetic cold open.
- 1:15 — Soft, rhythmic Spanish-influenced acoustic guitar as Tara begins prep work and citrus squeezing.
- 3:45 — Low, cozy, ambient background music as the rain starts outside and the pork goes into the oven.
- 6:10 — Slightly faster, playful tempo as the afternoon passes and the cooking smells fill the house.
- 8:00 — Warm, triumphant, acoustic folk music as the finished pork is pulled out of the oven and shredded.
- 9:30 — Gentle, happy outro music fading out as Tara wraps up her final thoughts.
- Keep the editing pace relaxed and conversational, avoiding rapid-fire cuts to maintain a cozy, real-home feel.
- Use subtle, clean text overlays to display ingredient measurements as Tara adds them to the bowl.
- Enhance natural kitchen sounds like the crunch of garlic, the sizzle of the meat, and the rain outside to create an immersive atmosphere.
- Apply a warm, slightly golden color grade to emphasize the cozy, sun-drenched Florida aesthetic.
| Call | Provider | Model | Input Tokens | Output Tokens | Compute / Credits |
|---|---|---|---|---|---|
| Script | abacus.ai | gemini-3.5-flash | 1,247 | 4,283 | — |
| Image 1 — The Warm Kitchen Setup | abacus.ai | nano_banana2 | — | — | 6,754.3 |
| Image 2 — The Citrus Squeeze | abacus.ai | nano_banana2 | — | — | 6,753.525 |
| Image 3 — The Roast Reveal | abacus.ai | nano_banana2 | — | — | 6,753.6 |
I Tried Making Orlando's Famous Citrus-Glazed Mojo Pork Belly (And Almost Ruined It)
I wanted to combine the crispy, melt-in-your-mouth magic of pork belly with the bright, garlicky punch of a classic Florida mojo, but getting that skin to crackle without burning the sugars in the glaze became a high-stakes kitchen battle.
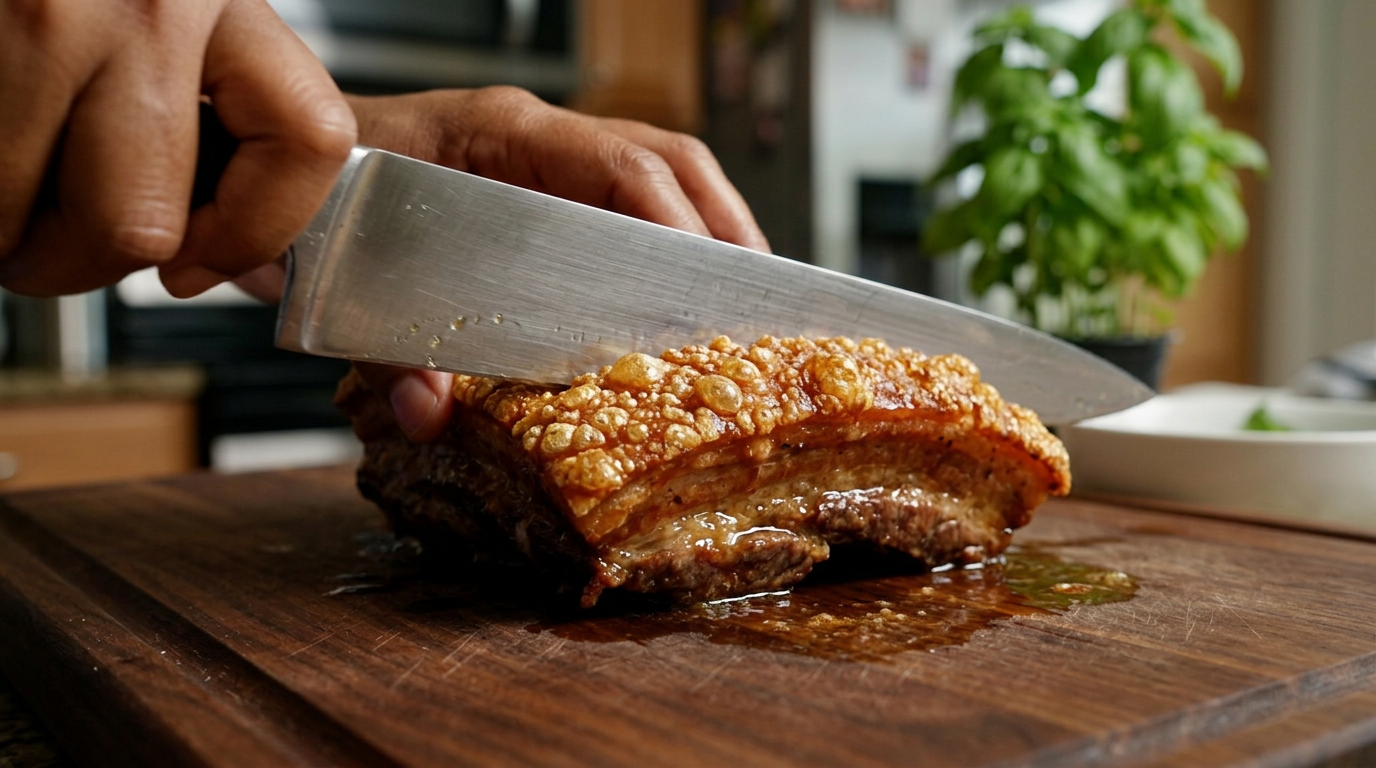
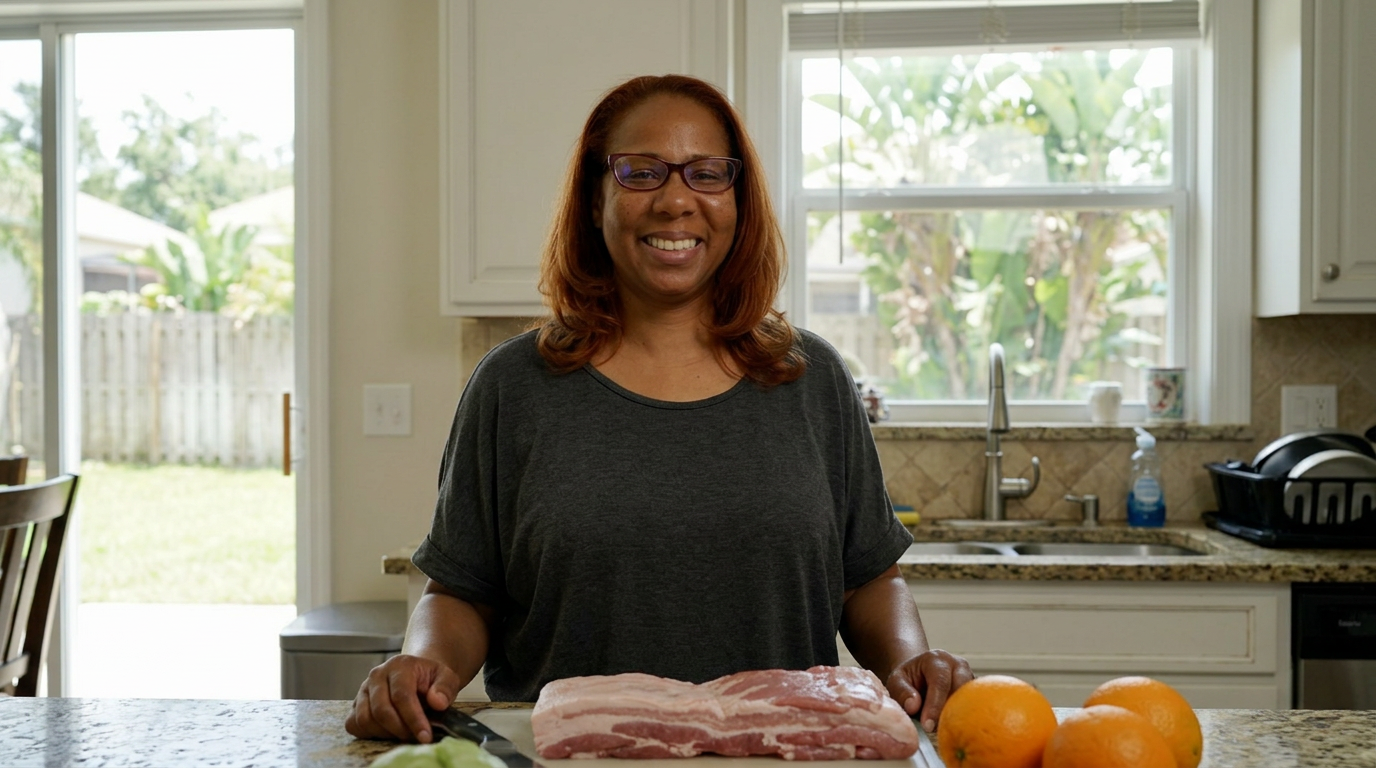
If you've ever tried to get perfectly crispy pork skin while simultaneously cooking down a sticky, sweet citrus glaze, you know the absolute panic of watching a forty-dollar piece of meat head straight toward charcoal territory. Today, I'm finding out if we can actually marry these two Florida classics, or if I just ruined our Sunday dinner.
Close-up of Tara's hand tapping a knife against a bubbly, blistered piece of pork skin, making a loud, satisfying 'crack-crack' sound, then immediately panning to a slightly charred edge of the pan where sticky glaze is bubbling angrily.
It was one of those August afternoons in Orlando where the humidity is so thick you can practically chew it, and the sky is doing that dramatic, pre-thunderstorm darkening. Tony and I had crawled back from the local market with this beautiful, three-pound slab of pork belly, and instead of doing the usual slow-roast or crispy bite-sized burnt ends, I had this wild hair to do a full-on Mojo glaze. I'm talking fresh sour oranges from our backyard tree, sweet limes, a mountain of garlic, and just enough oregano to make the kitchen smell like a dream.
But here was the problem: classic mojo has a lot of natural sugars from the citrus, and pork belly needs a long, slow cook to render the fat, followed by a blast of intense heat to puff up the skin. If I put the glaze on too early, the sugars would burn to a bitter black crust before the fat even thought about melting. If I put it on too late, it wouldn't penetrate the meat, leaving us with bland fat and a sad, watery sauce on the side.
So, the plan was a bit of a gamble. I decided to split the process. I would dry-cure the skin with kosher salt and baking powder to draw out every ounce of moisture—crucial for that crunch—while marinating the meat side underneath in a concentrated mojo paste. Then, I’d roast it low and slow, shield the skin, and apply a reduced citrus glaze only to the meat layers during the final stretch. Tony looked at my scribbled-on notepad, shook his head, and said, 'Tara, if this works, we're eating like royalty. If it doesn't, we're ordering pub subs.' The stakes were officially set.
I cleared off our messy counter, wiped down the cutting board, and got my sharpest knife out. Food safety was top of mind here—handling raw pork belly means constant handwashing and making sure no raw juices drip onto the fresh herbs waiting on the side. I scored the skin in a tight diamond pattern, being extra careful not to cut into the meat itself, which would let moisture escape and ruin the crackling. This was the point of no return.
I started by whisking together the dry cure for the skin: a tablespoon of kosher salt and a half-teaspoon of baking powder. The baking powder raises the pH level on the skin's surface, breaking down the proteins so they can form those tiny, beautiful micro-bubbles when the heat hits. I packed this mixture tightly onto the scored skin, keeping the meat side completely clear. For the meat underneath, I blended up a vibrant, fragrant paste of garlic, fresh sour orange juice, lime zest, cumin, oregano, and a splash of olive oil, painting it lovingly onto the bottom flesh layer.
I slid the whole seasoned slab into the fridge, uncovered, to let the dry air do its magic for about four hours. While the pork chilled, the sky finally opened up outside. A classic Orlando downpour started drumming against our kitchen window, casting a cozy, gray glow over the stove. To pass the time and prep for the glaze, I decided to reduce the remaining mojo marinade on the stovetop. I combined fresh sour orange juice, a squeeze of sweet tangerine juice for a little local flair, mashed garlic, and a touch of brown sugar in a small saucepan, letting it simmer until it coated the back of a spoon.
By 5:00 PM, the pork skin looked dry, matte, and slightly translucent—exactly what we wanted. I wiped off the excess salt mixture from the top, placed the slab on a wire rack set inside a foil-lined baking sheet, and popped it into a preheated oven at 325 degrees Fahrenheit. The goal here was a slow, two-hour bake to render out that thick layer of fat beneath the skin without drying out the meat. The smell of roasting pork fat and garlic slowly filled the house, bringing Tony wandering into the kitchen to sniff the air expectantly.
At the ninety-minute mark, disaster reared its head. I peeked through the oven window and noticed the pork belly was sloping to one side. The rendering fat was causing the slab to warp, which meant the rendering juices were pooling on one half of the skin while the other half was drying out. If that liquid stayed on the skin, it would boil instead of crisp, leaving us with a rubbery, inedible patch. I had to act fast.
I carefully pulled the hot tray out, grabbed some aluminum foil, and scrunched up a few tight wedges to prop up the sagging side of the pork, leveling it out. I used a paper towel wrapped around tongs to meticulously blot away the pooled grease on the surface. While it was out, I carefully brushed our sticky, reduced citrus glaze onto the exposed meat layers on the sides, keeping it far away from the top skin. My hands were shaking a little—one slip of the brush and the sugary glaze would ruin the skin's chances of puffing.
I cranked the oven up to 450 degrees for the final twenty minutes. This is the scariest part of cooking pork belly. You have to watch it like a hawk. I pulled a kitchen stool right up to the oven door, sitting there with my face practically pressed to the glass. For the first ten minutes, nothing seemed to happen. I started to panic. Had I wiped off too much salt? Was the oven not hot enough?
Then, right around the twelve-minute mark, the magic happened. Tiny white bubbles started to erupt across the surface of the skin like popcorn in slow motion. The kitchen filled with this deeply savory, caramelized aroma of roasted pork and toasted garlic. But then, the sugar in the glaze on the sides started smoking. The edges of the pan were turning black, and the fire alarm in the hallway gave a warning chirp. 'Tony, open the back door!' I yelled, grabbing my oven mitts.
Handheld shots capturing the frantic blotting of the pork skin, the bubbling glaze in the oven, Tara peering anxiously through the oven glass, and Tony waving a dish towel at the smoke detector.
I pulled the tray out just in time. The pork belly was a masterpiece of textures: a deeply blistered, golden-brown crown of crackling sitting on top of incredibly tender, juicy meat dripping with a dark, sticky, caramelized citrus glaze. I let it rest on the counter for a solid fifteen minutes to let the juices redistribute—cutting into it too early would mean losing all that moisture I worked so hard to keep inside.
When I finally ran the knife through the skin, it made the most glorious, shattering crunch sound I've ever heard in my kitchen. The meat underneath was incredibly tender, pulling apart with just a fork. I plated the thick slices over a bed of simple white rice and black beans, spooning a little extra of the unreduced mojo sauce over the top, and handed a plate to Tony. He took a bite, closed his eyes, and just nodded. 'No pub subs tonight,' he whispered. The crunch was so loud I could hear it from across the island.
This experiment was a wild ride, but it taught me that cooking is all about adapting in the moment. If I hadn't propped up that sloping meat with foil, half of the skin would have been a rubbery mess. Next time, I think I'll score the skin even tighter to let the fat drain even faster, and maybe add a touch of fresh orange zest right at the very end for an extra pop of color. But for now, we have a new Sunday favorite, born out of a rainy afternoon and a little bit of kitchen bravery.
A slow, mouth-watering close-up of a fork pressing into a slice of pork belly, showing the juicy meat yielding easily and the crispy skin shattering, followed by Tara and Tony clinking water glasses over the kitchen island.
Shot List
| Type | Description | Audio | Duration |
|---|---|---|---|
| Close-up | Tara's hand tapping a chef's knife against a perfectly blistered crust of roasted pork belly. | SOUND EFFECT: Crisp, hollow crackling sound as metal hits crunchy pork skin. | 5s |
| Medium | Tara standing in her sunny Orlando kitchen, smiling and holding a gorgeous raw slab of pork belly. | TARA: Hey guys, welcome back to the kitchen. Today, we are taking a massive gamble with this beautiful slab of pork belly and some fresh Florida citrus. | 12s |
| Overhead | Tara scoring the thick skin of the pork belly with a sharp knife in a diamond pattern. | TARA: The secret to great pork belly is scoring the skin perfectly. You want to cut through the tough skin and fat, but never touch the meat underneath. | 15s |
| Close-up | Spreading a bright green and orange garlic-herb paste onto the meat side of the belly. | TARA: This is our quick Mojo paste. It's packed with garlic, sour orange, cumin, and oregano. It smells like a warm breeze from a local food truck. | 18s |
| Detail | Baking powder and kosher salt being mixed in a small bowl, then rubbed onto the dry skin. | TARA: On top, we're doing a dry cure of salt and baking powder. This raises the pH and draws out moisture, which is the absolute key to crispiness. | 20s |
| B-roll | Rain pouring down outside a window with tropical plants visible; transition to a small pot of citrus glaze bubbling gently on the stove. | TARA: While the pork dries out in the fridge, the sky did what it always does in August here—it poured. Perfect weather to simmer our sweet citrus glaze. | 15s |
| Medium | Tara pulling the pork out of the fridge, showing the matte, dry texture of the skin. | TARA: See how dry and pale that skin looks now? That is exactly what we want. No wetness allowed if we want that legendary crunch. | 15s |
| Close-up | Pork belly sliding into a warm, glowing oven on a center rack. | TARA: In it goes at three-twenty-five for a slow, two-hour render. We want that thick fat layer to melt away slowly. | 10s |
| Medium | Tara peering through the oven window with a worried expression, then opening the door to show the pork sloping to one side. | TARA: Oh no, look at that. It's warping and sloping! The fat is pooling on one side. If I don't fix this, half our skin is going to be soggy rubber. | 22s |
| Detail | Tara using tongs to place scrunched foil under the pork belly, then dabbing the skin with a paper towel. | TARA: Emergency surgery! I'm propping it up with foil and drying off the surface. crisis averted... I hope. Now, let's paint on that glaze. | 25s |
| Timelapse | Through the oven glass, the pork skin begins to bubble, blister, and turn golden brown as the heat increases. | TARA: At four-fifty, the heat does its work. Look at those micro-bubbles forming! It's like watching popcorn pop in slow motion. | 15s |
| Close-up | The finished pork belly resting on a wooden board, glistening with dark orange glaze on the sides and a bubbly crest on top. | TARA: Look at this beauty. The skin is completely blistered, and the edges are beautifully caramelized with that sweet mojo glaze. | 18s |
| Detail | A large knife slicing cleanly through the crunchy pork, emitting a loud crackling sound. | SOUND EFFECT: Loud, satisfying crunch of the skin breaking under the knife. | 10s |
| Medium | Tony taking a bite of the pork belly with white rice, opening his eyes wide in delight, and giving a big thumbs up. | TONY: Wow, Tara. This is incredible. The crunch is real, and that citrus glaze is sweet, sour, and perfectly garlicky. | 15s |
| Wide | Tara leaning against the kitchen counter, holding a plate of food, smiling warmly at the camera. | TARA: This experiment taught me to embrace the mess and adapt when things slide. Thanks for cooking with me today. See you next time! | 15s |
- Capture close-up slow-motion shots of the sour orange juice being squeezed over a glass bowl, catching the pulp and seeds in a strainer.
- Get a crisp audio recording of the knife scoring the tough skin of the pork belly; the scratching sound adds great texture to the edit.
- Film the steam rising from the saucepan as the citrus marinade reduces down into a thick, glossy syrup.
- Ensure there is a shot of the messy cleanup process—wiping down the counters and washing hands—to emphasize the reality of home cooking.
- 0:00 — Upbeat, acoustic indie-folk intro music starts soft and builds warmth.
- 1:15 — Music transitions to a mellow, jazzy acoustic guitar line as the prep and scoring begins.
- 3:30 — A soft, rhythmic percussion and ambient track plays during the rainstorm and marinade reduction.
- 5:45 — Tension builds with a faster-tempo, playful acoustic track during the oven rescue scene.
- 7:15 — A triumphant, warm, and soulful acoustic melody swells as the crispy pork skin pops in the oven.
- 8:45 — Gentle, happy acoustic guitar plays as Tony tastes the dish and they celebrate the success.
- Keep the editing pace natural and conversational; do not over-edit or cut too quickly during the storytelling segments.
- Use a subtle text overlay in a clean, hand-written style font when displaying the ingredient names during the prep phase.
- Boost the natural kitchen audio (the crunch of the skin, the sizzle of the fat, the rain outside) to create an immersive, ASMR-like experience.
- Keep the color grading warm, inviting, and slightly golden to match the homey Florida kitchen aesthetic.
| Call | Provider | Model | Input Tokens | Output Tokens | Compute / Credits |
|---|---|---|---|---|---|
| Script | abacus.ai | gemini-3.5-flash | 1,247 | 4,637 | — |
| Image 1 — The Cracking Sound | abacus.ai | nano_banana2 | — | — | 6,753.275 |
| Image 2 — Tara's Orlando Kitchen Setup | abacus.ai | nano_banana2 | — | — | 6,753.5 |
| Image 3 — The Oven Vigil | abacus.ai | nano_banana2 | — | — | 6,753.325 |
I Tried Making Traditional Cuban Guava Pastelitos At Home (And Failed Twice Before I Got It Right)
Today I am tackling the flaky, sweet, cheese-stuffed Cuban pastelitos I grew up eating here in Florida, but I am skipping the store-bought puff pastry to see if a quick homemade rough-puff can survive our intense August humidity.
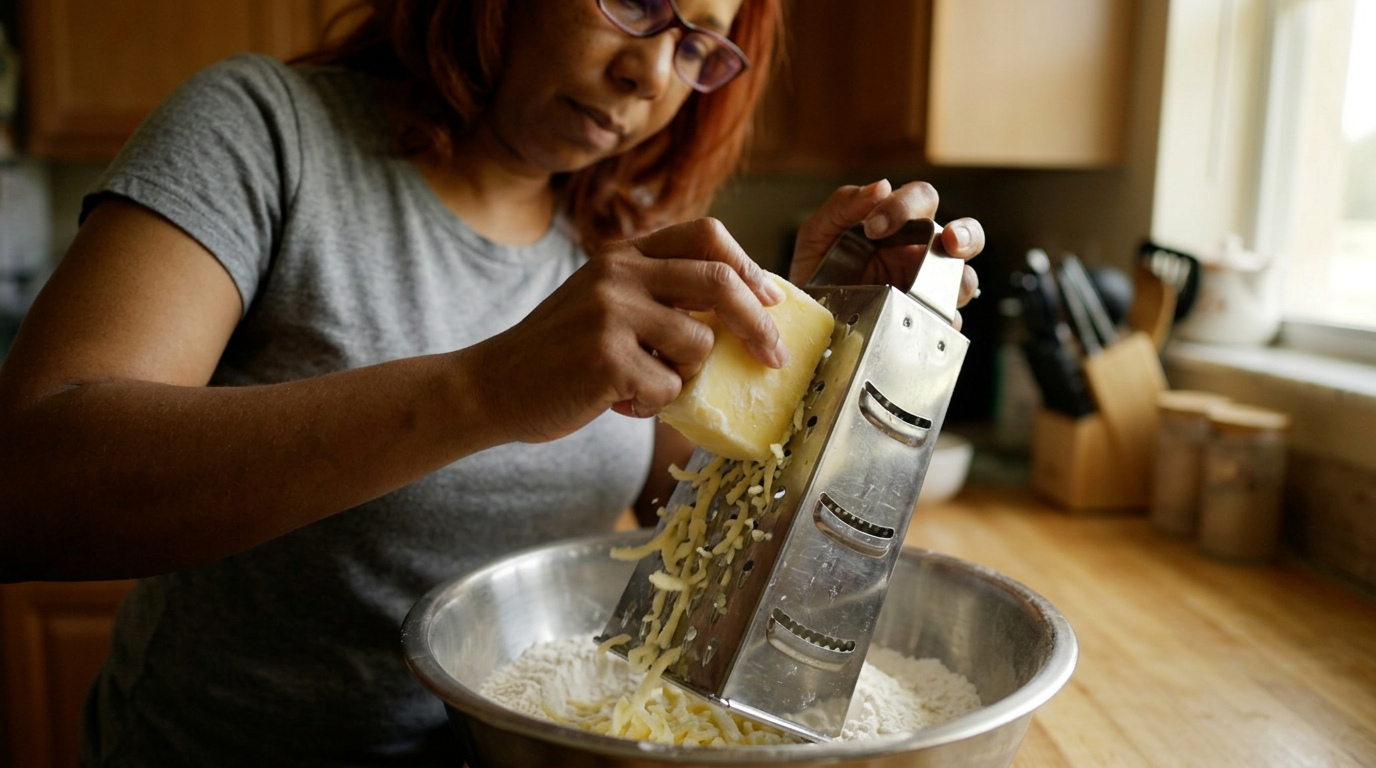
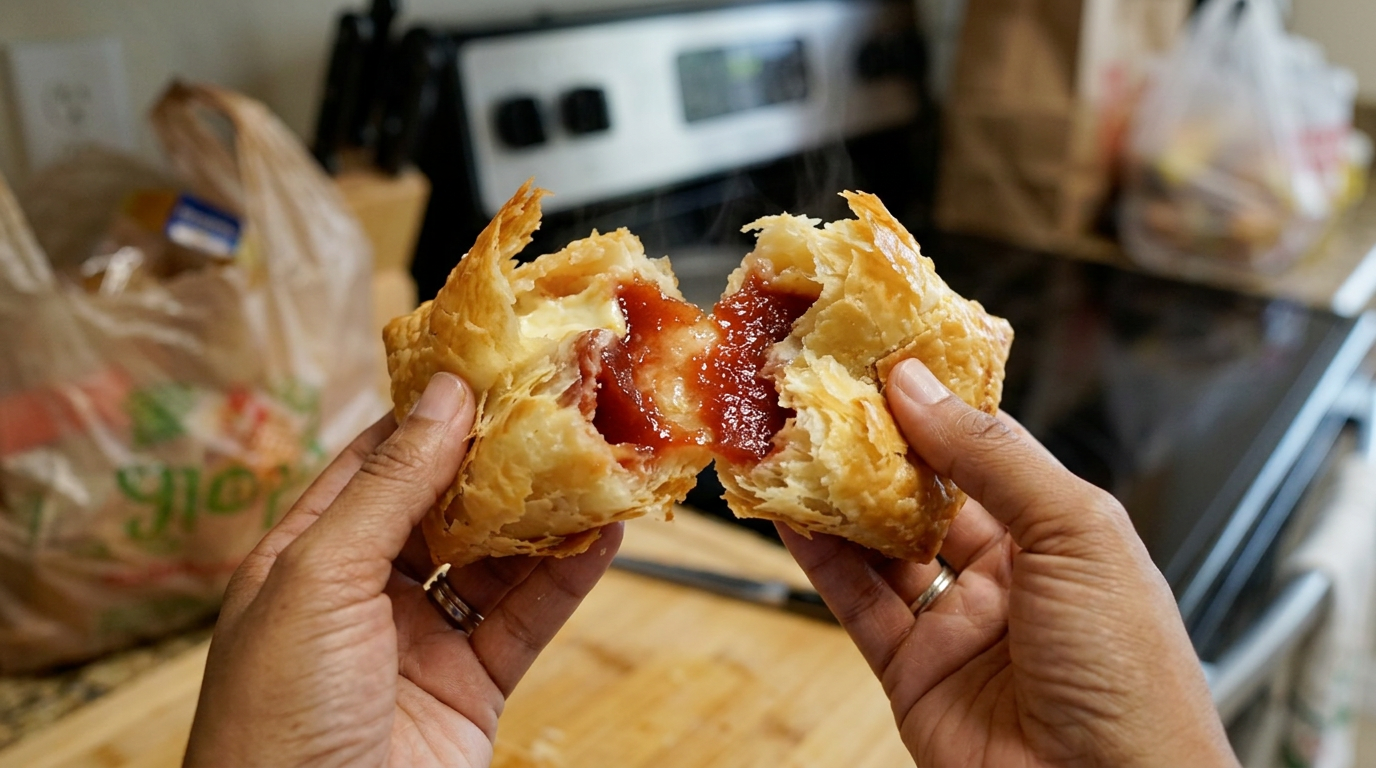
They say you shouldn't fight the Florida humidity in August, but today I’m trying to laminate butter into pastry dough anyway. If this works, we get warm, shatteringly crisp guava and cheese pastelitos straight from the oven.
Close-up of a pastry wheel slicing through golden, raw laminated dough, revealing dozens of delicate, buttery layers, followed by a quick shot of Tara looking directly at the camera with flour on her nose, laughing.
It was a Tuesday afternoon in mid-August, the kind of Orlando day where the air feels like warm soup the second you step outside, and the sky is already bruising for the daily 4:00 PM thunderstorm. Tony and I had gone to our local bakery over the weekend, and as I watched him devour three guava and cheese pastelitos in the car before we even left the parking lot, I had this sudden, ambitious urge. I wanted to make them from scratch. Not with the frozen, pre-made puff pastry sheets from the grocery store—which are great, don't get me wrong—but with a real, homemade rough-puff pastry that actually tastes like butter instead of shortening.
I knew it was risky. True puff pastry requires keeping the butter cold enough to create distinct steam pockets when it hits the oven, which is how you get those paper-thin, crispy layers. In an air-conditioned house that still struggles to stay below 75 degrees in the heat of summer, pastry dough can turn into a sticky, greasy puddle in about ninety seconds. But I had a plan: I was going to use a 'rough-puff' method, grating frozen butter directly into the flour, and do quick fifteen-minute blasts in the freezer between folds to keep the fats from melting.
The stakes were surprisingly high for a Tuesday. If I messed this up, I'd end up with a dense, greasy, heavy brick of baked flour instead of the light, cloud-like pastries Tony loves. Plus, I had promised to drop a box of these off at my neighbor Maria's house by 5:00 PM. She grew up in Miami and knows a real pastelito when she tastes one, so there was absolutely no hiding a subpar bake. I cleared off my kitchen island, turned our thermostat down to a chilly 70 degrees as a preemptive strike, and pulled my rolling pin out of the freezer.
I started by whisking together three cups of all-purpose flour with a pinch of kosher salt in a large metal bowl that I had also chilled. Then came the star of the show: two blocks of unsalted, high-fat European butter that had been sitting in the freezer overnight. Using a standard box grater, I quickly grated the frozen butter directly into the flour. My fingers were absolutely freezing, and bits of butter kept flying onto the counter, but this trick is a lifesaver because it keeps the butter pieces small and cold without overworking the gluten.
I gently tossed the butter shreds in the flour with two butter knives until everything looked like coarse, snowy pebbles. I drizzled in ice-cold water, literally one tablespoon at a time, mixing with a fork just until the dough started to barely hold together. When I dumped it onto my floured counter, it looked like a total disaster. It was crumbly, dry, and looked more like biscuit debris than pastry dough. I almost panicked and added more water, but I forced myself to stop. I gathered the shaggy mass, pressed it into a rough rectangle, and wrapped it tightly in plastic wrap to chill for thirty minutes.
After the first chill, it was time for the lamination folds. This is where things started to go sideways. As I rolled the dough out for the first 'letter fold'—folding the top third down and the bottom third up like a piece of mail—the kitchen was just too warm. By the second fold, the butter was starting to smear instead of staying in distinct layers. I could feel the dough getting sticky under my hands. I realized I couldn't rush this. I immediately slid the dough onto a baking sheet and shoved it into the freezer for ten minutes to rescue the butter.
While the dough took its emergency nap, I prepped the filling. True pastelitos de guayaba y queso need a very specific balance. I bought a block of hard Cuban guava paste at the local Latin market and sliced it into thin, dense rectangles. For the cheese component, I whipped together block cream cheese with a splash of vanilla extract and just a tablespoon of powdered sugar to cut the tanginess. Some bakeries use straight cream cheese, but I find that a tiny hint of vanilla makes the guava flavor absolutely pop.
By the time the dough had gone through four rounds of folding and chilling, it felt completely different. It was smooth, cold, matte, and had gorgeous visible streaks of flattened butter throughout. I rolled it out one final time into two large, thin sheets. On the bottom sheet, I spaced out dollops of the cream cheese and topped each one with a slice of the dark red guava paste. The kitchen smelled incredible already, just from the sweet aroma of the sliced guava paste sitting on the counter.
I brushed a simple egg wash—just one egg beaten with a splash of water—around the borders of each filling mound to act as glue. Then, I carefully draped the second pastry sheet over the top. Using my fingers, I pressed down around the fillings to seal the sheets together, trying my best to push out any trapped air pockets, which would expand in the oven and cause the pastries to burst at the seams.
I used a pastry wheel to cut them into traditional squares. For the final touch of magic, I slashed two small venting slits in the top of each pastelito. Before they went into my preheated 400-degree oven, I popped the entire baking sheet back into the freezer for five minutes. This cold shock is the secret to getting maximum puff. I set the timer for 25 minutes, sat down on the kitchen floor with a glass of iced tea, and watched through the oven door light as the daily thunderstorm finally rolled in outside, rattling the windowpanes.
Ten minutes in, the smell of caramelizing butter and sweet guava filled the entire house. But as I peered through the glass, my heart sank. One of the pastelitos on the edge was starting to leak. A bright red river of molten guava paste was bubbling out of a seam and spilling onto the parchment paper. I had to make a quick decision. I opened the oven door, grabbed a metal spatula, and gently nudged the leaking corner back together, using a little excess pastry dough from the scraps to patch the hole. It wasn't pretty, but it stopped the bleeding.
B-roll sequence showing hand grating frozen butter, tossing flour, rolling out dough on a marble slab, placing slices of dark red guava paste on cream cheese, crimping edges with a fork, splashing egg wash, and close-ups of the pastries rising and bubbling in the golden oven light while rain beats against the kitchen window.
When the timer finally went off, I pulled out a tray of absolute gold. Despite the humidity, the panic folds, and the minor guava leak, the pastelitos had puffed up beautifully. They were towering, with dozens of visible, flaky, paper-thin layers that shattered the second I touched them with a spatula. I brushed them immediately with a simple sugar syrup—just equal parts sugar and water boiled together—which gives them that signature glossy, sticky bakery finish.
After letting them cool for ten anxious minutes so the molten guava wouldn't burn our mouths, Tony walked into the kitchen, lured by the smell. I plated a warm square, handed it to him, and waited. He took a bite, and the sound of the crunch was so loud it picked up on my microphone. 'Oh my gosh, Tara,' he said, brushing flakes of pastry off his shirt. 'This is better than the bakery. The crust actually tastes like real butter, and it's not greasy at all.'
I took a bite myself and was instantly transported. The pastry was crispy, light, and salty enough to perfectly balance the rich, sweet guava and the creamy, tangy cheese. I packed up a half-dozen in a paper box and ran them over to Maria's just as the rain was clearing up. She texted me ten minutes later: 'You nailed the lamination. Don't ever buy them from the store again.' Next time, I think I'll chill my rolling pin even longer and maybe make a double batch of dough to keep in the freezer for unexpected rainy afternoons.
Extreme close-up of a pastelito being broken in half by hand, showing steam rising, molten red guava, melted white cream cheese, and hundreds of flaky pastry crumbs falling onto a ceramic plate.
Shot List
| Type | Description | Audio | Duration |
|---|---|---|---|
| Close-up | Flakes of golden pastry shattering under a knife cut. | Shattering crisp sound effects, upbeat acoustic intro music fades in. | 5s |
| Medium | Tara standing in her Orlando kitchen, gesturing to a grey sky outside the window. | Tara: 'It's ninety degrees and pouring outside, which means it is the absolute worst time to make laminated pastry from scratch. But we're doing it anyway.' | 12s |
| Overhead | Whisking flour and salt in a large metal bowl. | Tara: 'We start with basic pantry staples: flour, salt, and lots of cold air.' | 8s |
| Detail | Hand grating frozen butter on a box grater directly into the flour bowl. | Tara: 'The secret is freezing your butter solid. It keeps the fat pockets intact so they explode with steam in the oven.' | 15s |
| B-roll | Drizzling ice water into the bowl and mixing with a fork. | Soft, rhythmic indie folk music swells. | 10s |
| Close-up | Tara's hands struggling to roll out the sticky dough, butter smearing slightly on the counter. | Tara: 'Oh no, see this? The butter is starting to melt. The kitchen is just too warm. Emergency freezer trip time.' | 18s |
| Medium | Tara mixing cream cheese, sugar, and vanilla extract in a small bowl. | Tara: 'While that chills, we make the sweet cream cheese filling. Just a touch of vanilla makes all the difference.' | 14s |
| Overhead | Slicing dark red guava paste on a wooden cutting board. | Thudding sounds of the knife cutting the sticky paste. | 8s |
| Detail | Assembling the pastelitos: piping cream cheese, laying guava paste, and sealing the top sheet. | Tara: 'Make sure to press out all the air, or you'll get a guava blowout in your oven.' | 20s |
| Timelapse | Pastelitos rising, expanding, and turning golden brown inside the oven. | Warm, upbeat acoustic music peaks. | 15s |
| Close-up | Brushing shiny sugar syrup over the hot, fresh-baked pastelitos. | Sizzling sound of syrup hitting the hot pastry crust. | 10s |
| Medium | Tony taking a large bite of a warm pastelito, crumbs falling onto his shirt. | Loud, satisfying crunch sound. Tony: 'Oh wow, Tara. That's incredible.' | 12s |
| Wide | Tara packaging pastries into a bakery box and waving goodbye as she heads out the door. | Tara: 'Success! Time to deliver these to Maria before the rain starts up again. See you guys next week!' | 15s |
- Capture close-up slow-motion of the pastry wheel cutting through the raw laminated dough to show the distinct thin layers.
- Get a shot of the rain pouring down on the tropical plants outside the kitchen window to ground the video in its Florida setting.
- Record clean, isolated audio of the crunch when Tony bites into the pastry for satisfying ASMR sound design.
- Film a quick shot of the sticky kitchen counter cleanup at the end to keep the vlog feeling honest and real.
- 0:00 — Upbeat, light acoustic guitar and whistle to set a warm, energetic tone.
- 1:30 — Softer, slightly playful indie acoustic track as Tara explains the dough chemistry.
- 3:15 — Tense, upbeat percussion as the dough starts to melt and Tara rushes it to the freezer.
- 5:45 — Calm, jazzy lofi guitar track during the filling prep and pastry assembly.
- 7:30 — Warm, rising orchestral folk music during the oven timelapse and rising pastry shots.
- 9:00 — Happy, celebratory acoustic guitar strumming for the tasting and final review.
- Keep the pacing quick and conversational, cutting out long pauses but keeping the natural kitchen sounds like sizzling, mixing, and rain.
- Use a clean, hand-written style font for on-screen text overlays showing ingredient amounts and step titles.
- Enhance the ASMR elements by boosting the volume slightly during the butter grating, dough rolling, and pastry crunching.
- Maintain a warm, slightly warm-toned color grade to reflect the cozy, sunny Florida home vibe.
| Call | Provider | Model | Input Tokens | Output Tokens | Compute / Credits |
|---|---|---|---|---|---|
| Script | abacus.ai | gemini-3.5-flash | 1,247 | 4,434 | — |
| Image 2 — Grating the Frozen Gold | abacus.ai | nano_banana2 | — | — | 6,754.275 |
| Image 3 — The Perfect Pull-Apart | abacus.ai | nano_banana2 | — | — | 6,754.15 |
I Tried Making Traditional Cuban Mojo Pork in a Slow Cooker (Did It Actually Crisp Up?)
I wanted that legendary, garlic-citrus Cuban mojo pork, but with the Orlando humidity peaking, I refused to turn on my big oven for four hours—so I put my slow cooker to the ultimate crispy-skin test.
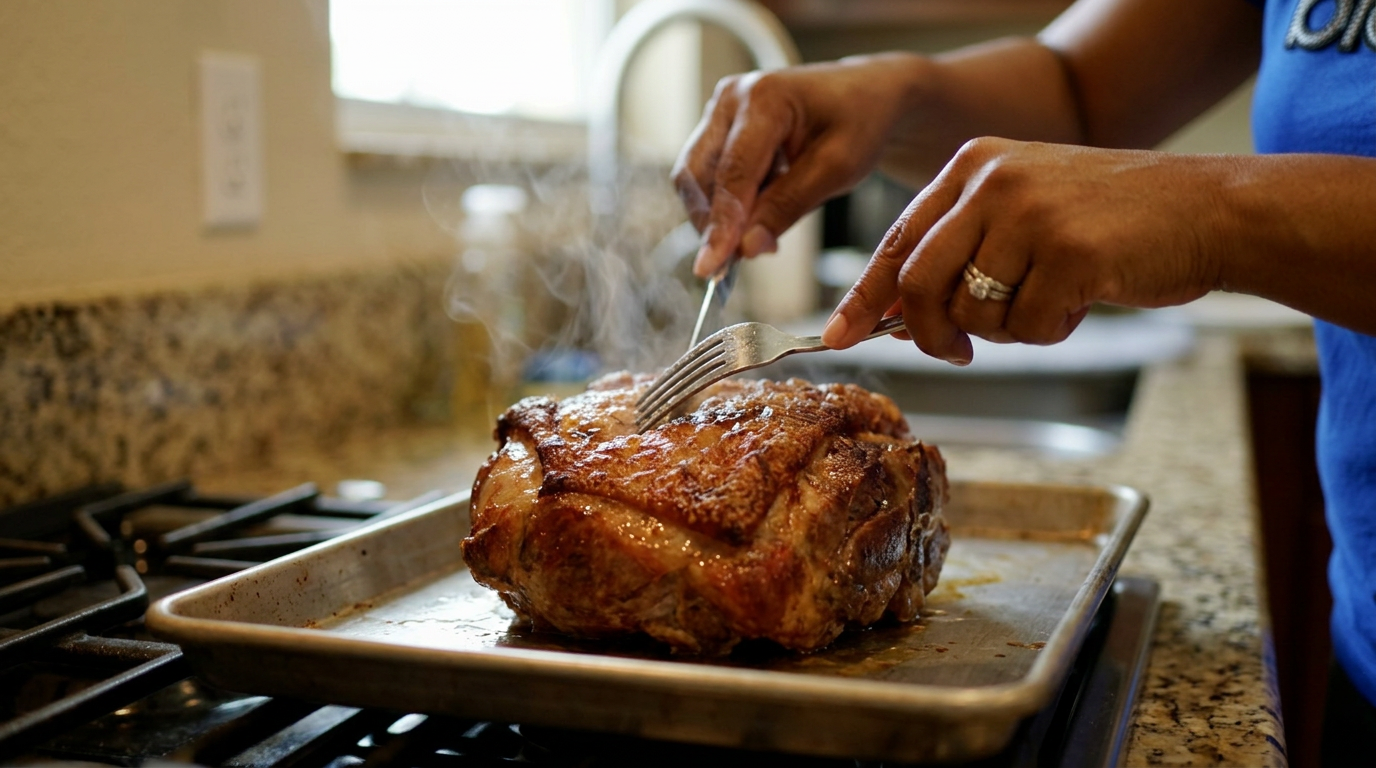
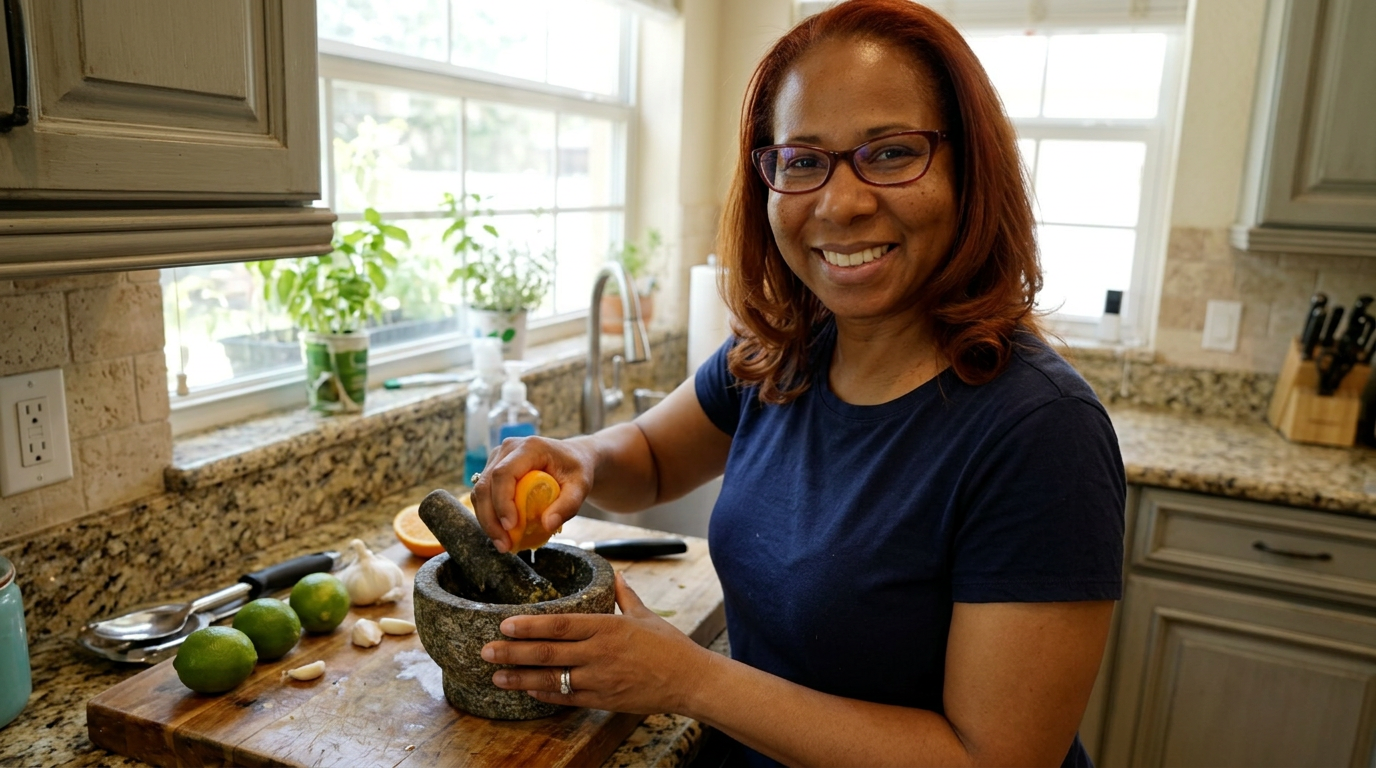
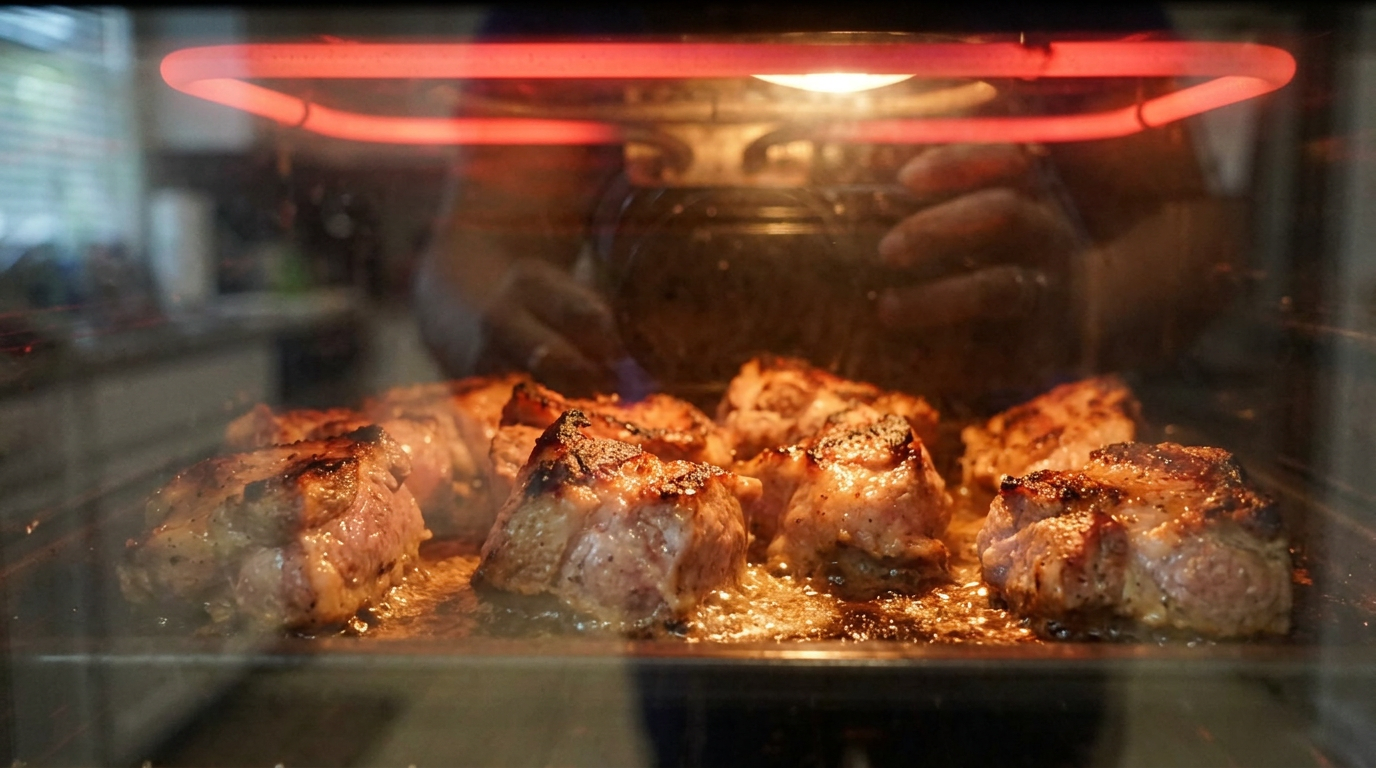
They told me you can't get that shatteringly crisp, garlic-perfumed crust on a pork shoulder if you use a slow cooker. Today, we are putting that rule to the test because it is too hot in Florida to bake an oven for four hours.
Tight, fast-cut close-up of Tara's hands scraping a fork across a deeply browned, sizzling pork shoulder crust, producing a loud, satisfying crunching sound.
It was one of those August afternoons in Orlando where the air feels like warm soup before the 4:00 PM thunderstorm even rolls in. Tony and I had been craving real, garlicky Cuban mojo pork—the kind with that intense sour orange punch and sticky, caramelized edges. But the thought of preheating our main oven to 325 degrees and letting it radiate heat into our kitchen for half the day made me want to cry. I looked at our slow cooker sitting in the pantry and thought, 'Why can't we do the heavy lifting in there, and just finish it under the broiler?'
I knew the purists would have thoughts. Traditional mojo lechón gets its magic from a long, slow roast in a hot box or oven, bathing in citrus and garlic until the fat renders down and crisps the exterior naturally. A slow cooker, by design, traps moisture. It creates steam. It makes things tender, yes, but it also makes things wet. If I wasn't careful, I would end up with soggy, shredded pork instead of those beautiful, chunky, crispy-edged pieces that bite back.
So, I came up with a three-part plan. First, I was going to make a completely scratch-made mojo marinade using a mix of fresh orange and lime juice to mimic the elusive sour oranges we find at our local Publix. Second, I'd slow-cook a five-pound bone-in pork shoulder just until it was tender but not completely falling apart into mush. Third, I'd shred it into large, rustic chunks, douse them in the reduced cooking juices, and run them under a screaming-hot broiler to force that caramelization. The stakes were high: dinner for Tony and my visiting parents, and a very real risk of serving them greasy, boiled-tasting meat if my broiler trick failed.
I started by gathering the garlic—and when I say garlic, I mean an entire head. Mojo is not the place to be polite. I peeled about twelve large cloves, feeling the sticky oils coat my fingers, and tossed them into my mortar and pestle with a big pinch of kosher salt to act as an abrasive. As I ground them down into a rough paste, that sharp, sulfurous aroma filled the kitchen. Tony walked in from the garage, sniffed the air, and immediately asked if we were having Cuban food. I told him he'd have to wait about eight hours to find out if my experiment actually worked.
Next came the citrus. Sour oranges can be hard to find consistently, even here in Florida, so I used my go-to ratio: two parts fresh orange juice to one part fresh lime juice. I squeezed them right over the garlic paste, watching the bright yellow and pale green juices swirl together. I added dried oregano, plenty of ground cumin, a splash of olive oil, and some freshly cracked black pepper. The marinade smelled incredibly bright, acidic, and complex—nothing like the bottled stuff from the store.
I took a five-pound bone-in pork shoulder and scored the fat cap in a cross-hatch pattern, cutting just deep enough to let the marinade penetrate but not so deep that the roast would fall apart in the pot. I rubbed that garlic-citrus paste into every single crevice, massaging it in like a spa treatment. I let it marinate on the counter for about thirty minutes just to take the chill off the meat before it went into the slow cooker.
I decided to cook it on LOW for seven hours. I resisted the temptation to use the HIGH setting because pork shoulder has so much tough connective tissue; it needs time to gently melt into gelatin. If you rush it on high, the muscle fibers tighten up and get dry, even while sitting in liquid. About four hours in, the afternoon storm rolled in right on schedule, shaking the windows, while the kitchen filled with this absolutely intoxicating smell of sweet citrus, roasted garlic, and rich pork fat.
When the timer finally beeped, I uncovered the pot. The pork was incredibly tender—the bone slid out with almost no resistance—but it looked pale and wet. This was the critical moment. If I served it like this, it would be a tragedy of textures. I carefully lifted the large chunks of pork out of the liquid and transferred them to a large, foil-lined baking sheet, keeping them in substantial, bite-sized pieces rather than shredding them into fine threads.
Meanwhile, I skimmed the thick layer of clear fat off the top of the remaining cooking liquid in the slow cooker pot. I poured about a cup of that intensely flavorful garlic-citrus broth over the pork chunks on the baking sheet to keep them moist, then saved the rest of the sauce for serving. I set my oven broiler to HIGH and adjusted the rack so the pork would sit about six inches below the heating element.
I slid the pan in and stood there, staring through the oven glass with a flashlight. For the first three minutes, nothing happened. Then, the liquid started bubbling fiercely. At five minutes, the pork fat began to hiss and pop. At seven minutes, the tips of the pork chunks started turning a deep, lacquer-like mahogany brown. I pulled the pan out, flipped the pieces over, basted them with a little more of the rendered fat from the bottom of the pan, and slid them back in for another four minutes.
The result was spectacular. The edges of the pork were bubbling, charred, and incredibly crispy, while the interiors remained juicy and pink from the citrus marinade. I let it rest on the counter for five minutes to allow the juices to redistribute, listening to the tiny crackles of the cooling meat. I squeezed some fresh lime juice over the top and sprinkled it with fresh cilantro before serving.
B-roll sequence of peeling a mountain of garlic, squeezing fresh oranges and limes, scoring the pork fat, massaging the meat with marinade, placing it in the slow cooker, and the dramatic transition from pale, wet cooked pork to sizzling, charred broiler-crisped meat.
I piled the crispy mojo pork onto a massive platter alongside a pot of black beans, some fluffy white rice, and sweet fried plantains. Tony and my parents were already at the table, plates in hand. I watched Tony take his first bite—he went straight for a heavily charred, crispy edge piece. He stopped chewing, looked at me, and said, 'Tara, if you told me this came out of a professional roasting box, I would believe you.' My mom immediately asked for the recipe, which is the ultimate seal of approval in our family.
The texture was absolutely perfect. The slow cooker had done the hard work of breaking down the tough pork shoulder into melt-in-your-mouth tenderness, while those ten minutes under the broiler gave it that essential, crunchy contrast that defines a great Cuban lechón. We ended up with zero leftovers, which is always the best sign of a successful kitchen experiment.
If I were to change one thing next time, I think I’d marinate the pork overnight in the fridge instead of just thirty minutes on the counter, just to let those garlic and citrus flavors penetrate even deeper into the center of the roast. But as a hot-weather shortcut that keeps your kitchen cool and delivers restaurant-quality crispy pork, this slow-cooker-to-broiler method is an absolute game-changer. I can confidently say this experiment was a massive success.
Slow, tight pan across the final dinner spread: a mound of crispy mojo pork garnished with onions and lime wedges, black beans, white rice, and steaming plantains, ending on Tony taking a bite and smiling.
Shot List
| Type | Description | Audio | Duration |
|---|---|---|---|
| Close-up | Fork scraping loudly against extremely crispy, bubbly pork shoulder skin. | [Crisp crunching sound of pork crackling] | 4s |
| Medium | Tara standing in her sunny kitchen, holding a fresh orange and explaining the hot-weather cooking dilemma. | Hey everyone, it is incredibly hot here in Orlando today, and I wanted Cuban mojo pork without heating up my whole house. | 12s |
| Overhead | Mashing 12 cloves of garlic with kosher salt in a heavy granite mortar and pestle. | [Rhythmic grinding and crushing sounds of garlic] | 8s |
| Close-up | Squeezing fresh oranges and limes directly into the mortar with the garlic paste. | To copy that sour orange flavor, we are mixing fresh orange and lime juice. | 7s |
| Detail | A sharp knife scoring a cross-hatch pattern into the thick fat cap of a pork shoulder. | Make sure you score the fat so all that garlicky citrus wash gets deep inside. | 6s |
| B-roll | Tara massaging the thick, herb-flecked marinade into the scored pork shoulder on a wooden cutting board. | [Wet, squelching sounds of marinade being massaged into meat] | 8s |
| Medium | Tara lowering the seasoned pork shoulder gently into the slow cooker pot and pouring the remaining marinade over it. | We are going low and slow for seven hours. No high setting allowed today! | 10s |
| Timelapse | Looking through a window at heavy Florida rain pouring down on tropical green leaves outside. | [Sound of heavy afternoon thunderstorm rain and distant thunder] | 5s |
| Close-up | Lifting the slow cooker lid, releasing a massive cloud of aromatic garlic steam. | Oh my goodness, the smell in this kitchen right now is unbelievable. | 8s |
| Detail | Using tongs to gently slip the clean clean bone out of the tender pork shoulder. | Look at that bone slide right out. Tender, but we need that crunch. | 6s |
| B-roll | Shredding the pork into large chunks on a baking sheet and pouring a ladle of hot broth over them. | [Sizzling and splashing of rich pork broth over meat] | 7s |
| Close-up | The pork chunks bubbling and blackening beautifully under the intense red glow of the oven broiler. | [Loud, intense sizzling and popping of pork fat] | 9s |
| Medium | Tara pulling the hot baking sheet out of the oven, steam rising from the deeply browned, crispy meat. | Look at that caramelization! The experiment worked beautifully. | 10s |
| Close-up | Squeezing a fresh lime wedge over the platter of crispy pork decorated with raw white onions and cilantro. | [Squeeze and hiss of lime juice hitting hot pork] | 6s |
| Medium | Tony taking a bite at the dinner table, chewing happily, and giving Tara an enthusiastic thumbs up. | Tony: 'Tara, this is absolutely incredible. It tastes like it was roasted all day in a box.' | 11s |
- Capture extreme close-up audio of the fork scraping the crispy pork skin to emphasize the successful texture.
- Show the physical contrast of the rainy Florida afternoon outside the window to ground the video in its humid, cozy setting.
- Film the slow cooker steam release in slow motion to make the aromatic reveal feel dramatic and satisfying.
- Keep the camera handheld and close to the cutting board during the garlic mashing to capture the messy, home-cooked reality.
- 0:00 — Upbeat, acoustic acoustic guitar with a light Latin percussion beat starts during the crispy preview.
- 0:45 — Music swells slightly as Tara introduces the recipe and the hot Florida weather dilemma.
- 2:15 — Rhythmic, playful acoustic track begins during the garlic grinding and citrus squeezing process.
- 4:30 — Cozy, mellow acoustic instrumental plays as the rainy afternoon storm rolls in outside.
- 6:15 — Tempo increases with a subtle, driving percussion line as the pork goes under the hot broiler.
- 8:00 — Bright, celebratory acoustic guitar and light brass play as the crispy pork is plated and served.
- 9:30 — Soft, warm acoustic outro music fades in during the final tasting and recipe wrap-up.
- Use a fast-paced, high-energy sequence of sound effects (crunching, squeezing, chopping) in the first 10 seconds of the video to hook viewers immediately.
- Keep color grading warm, bright, and natural to emphasize the sunny Florida kitchen vibes and the golden tones of the caramelized pork.
- Add a subtle on-screen pop-up showing the ratio of orange-to-lime juice when Tara explains the sour orange substitute.
- Ensure the sizzle of the broiler and the crunch of the pork skin are mixed slightly louder than the background music for maximum sensory impact.
| Call | Provider | Model | Input Tokens | Output Tokens | Compute / Credits |
|---|---|---|---|---|---|
| Script | abacus.ai | gemini-3.5-flash | 1,247 | 4,259 | — |
| Image 1 — The Crispy Skin Reveal | abacus.ai | nano_banana2 | — | — | 6,753.575 |
| Image 2 — The Citrus Squeeze | abacus.ai | nano_banana2 | — | — | 6,753.925 |
| Image 3 — The Broiler Magic | abacus.ai | nano_banana2 | — | — | 6,753.4 |
I Tried Making Traditional Cuban Guava Pastelitos At Home (And Failed Twice Before Getting It Right)
I spent three humid Orlando afternoons trying to recreate the perfect, flaky, bakery-style guava and cheese pastelitos in my own kitchen, and I finally cracked the code.
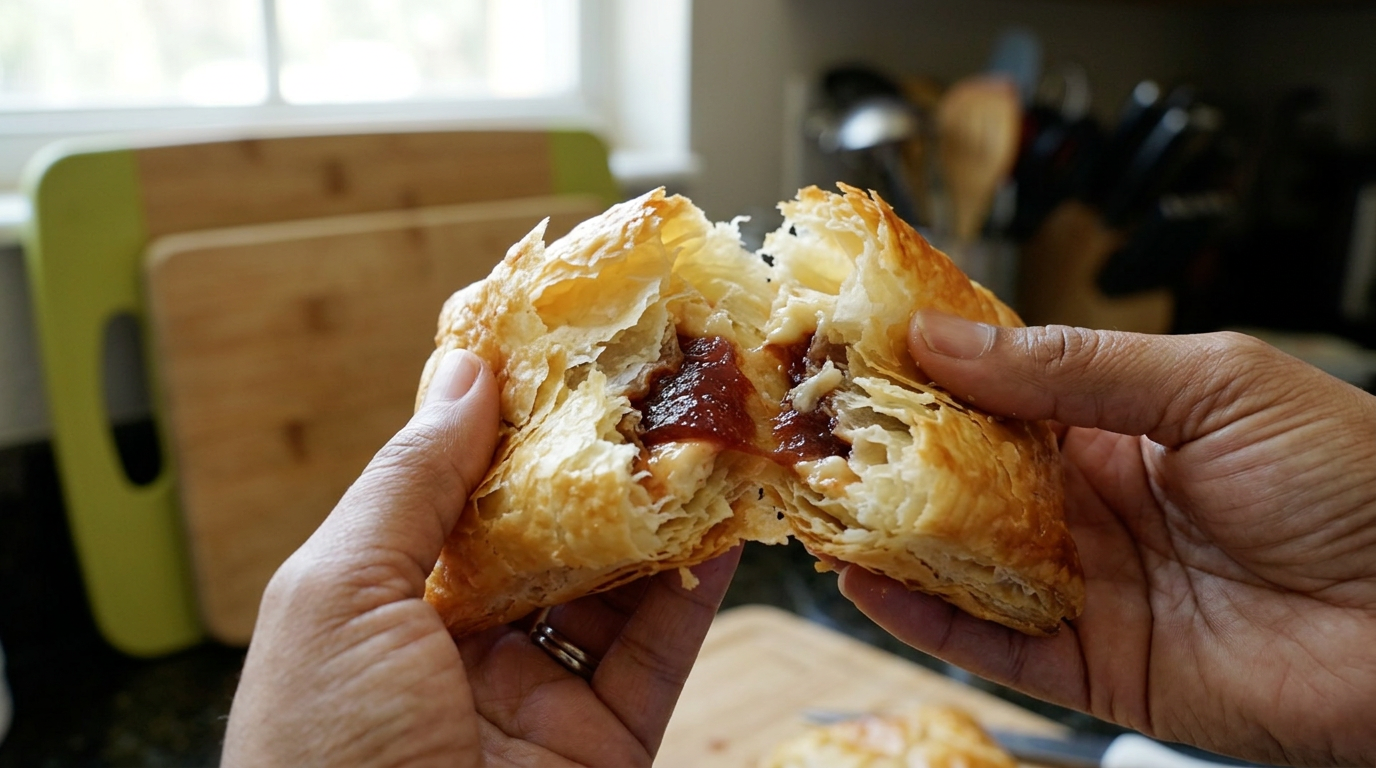
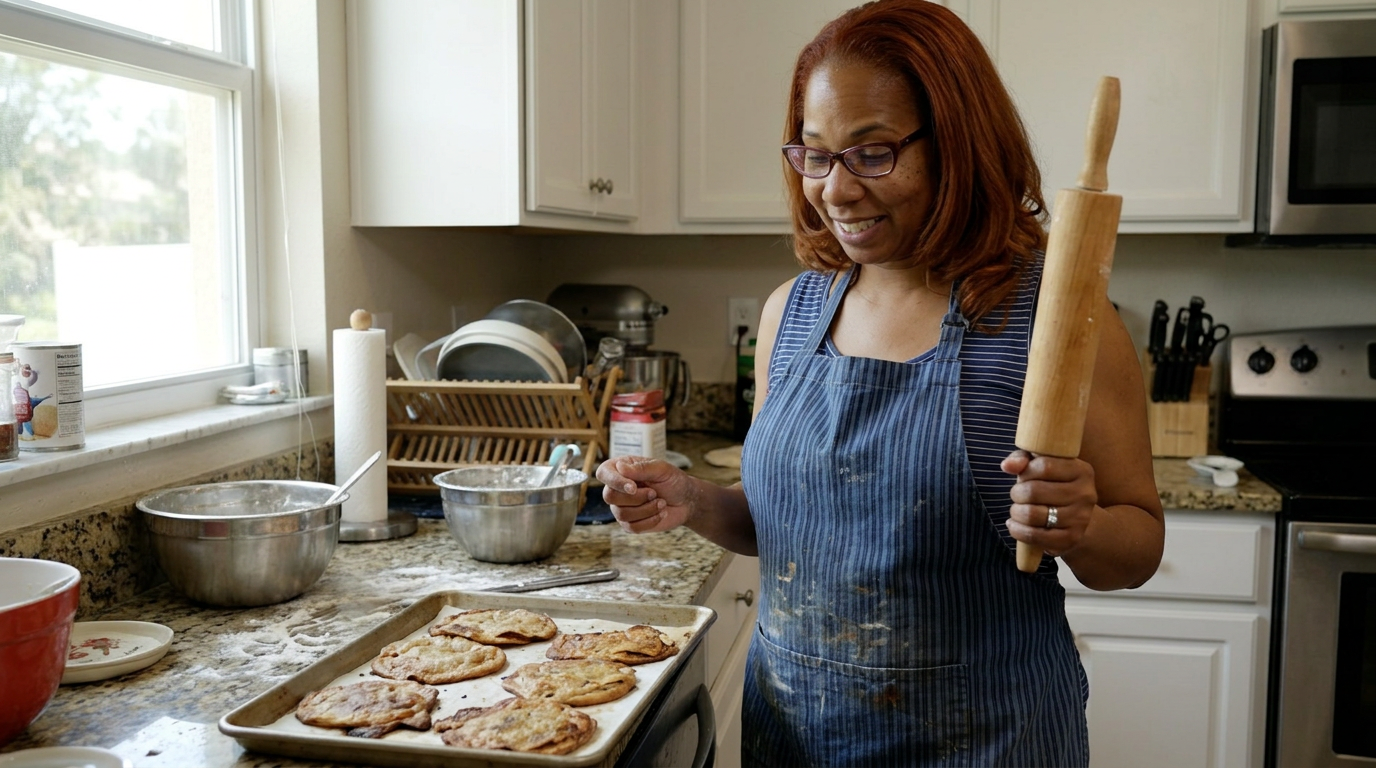
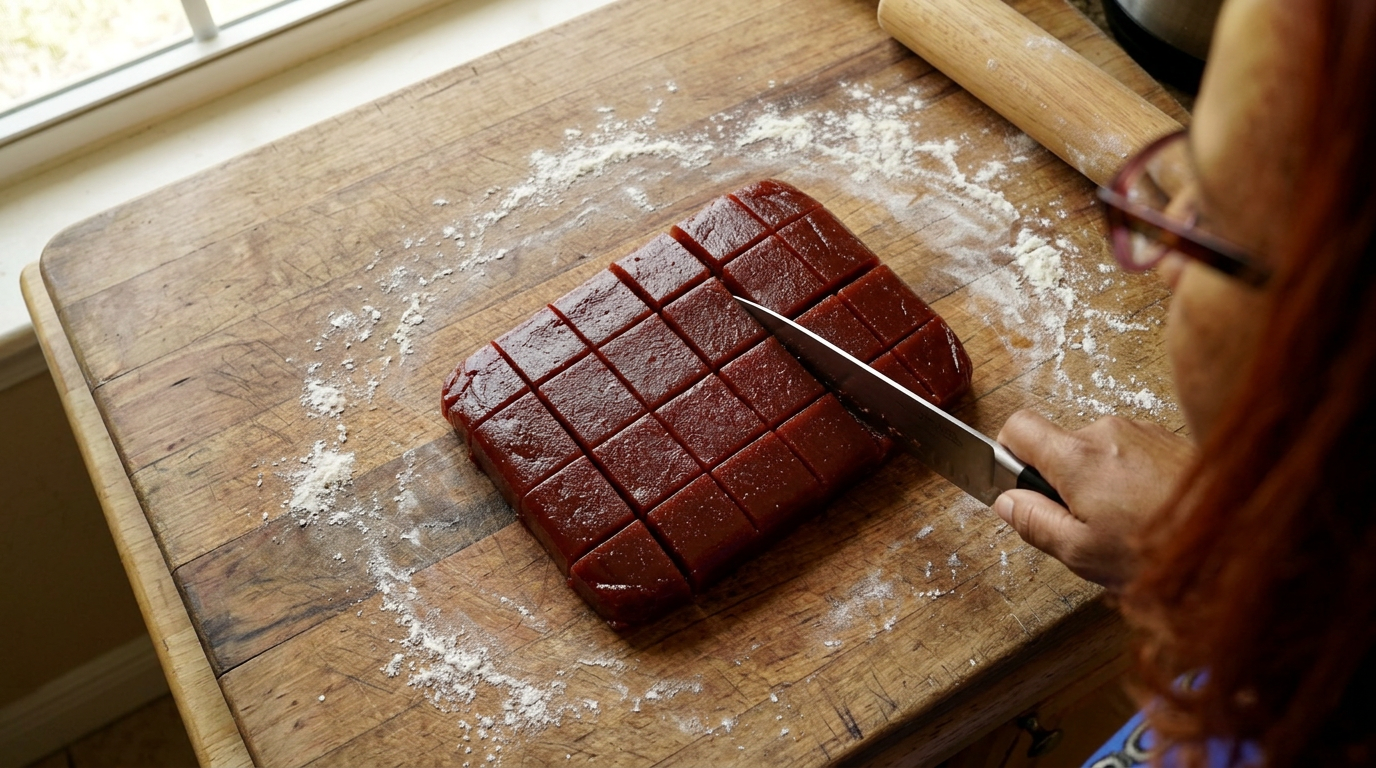
If you've ever bitten into a warm Cuban pastelito, you know that sound—the shattered crunch of a thousand buttery layers, followed by sweet guava and tangy cream cheese. But trying to get that bakery-level puff pastry at home in the middle of a ninety-degree Florida August? That is a whole different story.
Close-up of Tara's hand cutting into a golden, puffed pastry on a wooden board. The layers shatter beautifully, sending tiny flakes everywhere. Zoom out to show a messy counter with flour, a rolling pin, and a half-empty jar of guava paste.
It all started on Tuesday afternoon when Tony and I were running errands near downtown Orlando. The humidity was sitting at about eighty percent, the sky was bruised with those heavy, pre-storm clouds, and all I wanted was a glass of iced coffee and a warm, flaky pastelito de guayaba y queso. We stopped by our favorite little local bakery, but they were completely sold out for the day. Standing there in the parking lot as the first huge raindrops started to hit the windshield, I looked at Tony and said, 'Why don't we just make them?'
Tony looked at me with that gentle, skeptical smile he gets when he knows I'm about to turn our kitchen into a disaster zone. 'From scratch?' he asked. And that was the challenge. I didn't want to just buy a box of frozen puff pastry from Publix, thaw it out, and call it a day. I wanted to see if a home cook could actually recreate that magical, ultra-flaky, laminated dough that the best Cuban bakeries spend decades perfecting.
The plan was simple, or so I thought. I would make a rough puff pastry—not the full, grueling twenty-four-hour laminated dough, but a faster version that still relies on cold butter pockets to create steam and lift. I bought a brick of traditional Cuban guava paste—the absolute essential *pasta de guayaba*—and some standard cream cheese. The goal was to achieve that perfect balance: a pastry that stands three inches tall, doesn't leak its filling onto the baking sheet, and shatters the moment your teeth make contact.
But here was the real problem: our home kitchen isn't temperature-controlled like a professional bakery. The moment you bring butter out of the fridge in Florida, it starts to sweat. If that butter melted into the flour before it hit the oven, I wouldn't get layers; I would get a sad, heavy, greasy biscuit. I had one shot to get the temperature, the rolling technique, and the filling ratio exactly right before Tony's family came over for Sunday dinner.
My first attempt on Wednesday morning was a complete catastrophe. I got impatient. I tried to roll out the dough after only chilling it for twenty minutes. As I pushed the rolling pin down, I could see the butter marbling turn into greasy streaks. But I pushed ahead anyway, cutting the dough into squares, dropping in a slice of cream cheese and a slab of guava paste, crimping the edges with a fork, and sliding them into a four-hundred-degree oven. Fifteen minutes later, my kitchen smelled like burned sugar. The butter had leaked out completely, pooling on the sheet pan, and the pastries had melted into flat, sad, greasy puddles of purple-black goo. Back to the drawing board.
For the second attempt on Thursday, I decided to treat the butter with some absolute respect. I cut two sticks of unsalted butter into tiny cubes and threw them into the freezer for a full hour before touching them. I also swapped out the fork-crimping method. I realized that when you press down too hard on the edges of puff pastry with a fork, you actually seal the layers together, preventing them from rising. This time, I used a sharp pastry wheel to cut clean, open edges, allowing the layers to expand outward like an accordion.
The mixing process for the second dough felt much better. I worked fast, using my fingers to quickly snap the frozen butter cubes into the flour, leaving large, pea-sized chunks intact. I drizzled in ice-cold water—literally water with ice cubes floating in it—just until the dough barely held together. It looked incredibly shaggy, almost like a mess of wet sand, but I knew that was exactly what I wanted. I dumped it onto plastic wrap, shaped it into a rough brick, and let it rest in the coldest part of the fridge overnight.
Friday morning arrived, and it was time for the lamination. This is where the magic happens. I rolled the cold dough out into a long rectangle, folded it like a business letter into thirds, rotated it ninety degrees, and rolled it out again. I did this three times. With each fold, I was creating hundreds of micro-sheets of butter trapped between flour. But halfway through the third fold, I felt the dough getting soft. The humidity was creeping in through the kitchen window. I immediately stopped, wrapped the dough, and shoved it back into the freezer for fifteen minutes. In kitchen survival, patience is your only shield.
With the dough safely chilling, I prepared the filling. I learned from my first failure that you can't just throw raw cream cheese and hard guava blocks into a pastry and expect them to behave. The guava paste is incredibly dense. I sliced it thin, about a quarter-inch thick, and then whipped the cream cheese with just a tablespoon of powdered sugar and a splash of milk to make it spreadable and smooth. This creates a pillowy barrier that keeps the guava from sinking straight through the bottom pastry layer.
When I pulled the dough out for the final assembly, it felt beautiful—cold, firm, with visible white flecks of butter running through it like marble. I rolled it to about an eighth of an inch thick and cut it into perfect three-inch squares. On half of the squares, I spread a dollop of the sweetened cream cheese, topped it with a square of guava, and then draped the remaining dough squares over the top. Instead of smashing the edges, I gently pressed just the very inner rim around the filling with my fingertips, leaving the outer quarter-inch of the edges completely untouched.
Before they went into the oven, I made two crucial adjustments. First, I used a razor blade to score three light diagonal slashes across the top of each pastelito to let steam escape. Second, I brushed them with a simple egg wash—one egg beaten with a tablespoon of water—being incredibly careful not to let the egg drip down the cut sides of the pastry, which would glue the layers shut. I slid the pan onto the middle rack of the oven, preheated to a blistering four hundred and twenty-five degrees.
For the first ten minutes, I did not move from my spot on the kitchen floor, staring through the glass oven door. At minute five, nothing. At minute eight, I saw it—the edges began to lift, separating into distinct, paper-thin sheets. By minute fifteen, they had ballooned up, standing proud and incredibly tall, colored a beautiful, deep golden brown. The kitchen filled with the scent of toasted butter and caramelizing tropical fruit. I pulled them out and immediately brushed the hot tops with a simple sugar syrup—equal parts sugar and water boiled together—to give them that signature, sticky, glossy bakery shine.
A montage of hands cutting frozen butter, flour dusting onto a wooden surface, the rolling pin folding dough, close-ups of the red guava paste being sliced, assembly of the squares, egg washing, and a time-lapse of the pastries rising in the oven.
I let them cool on a wire rack for about twenty minutes—just long enough so the molten guava paste wouldn't burn our tongues—and then called Tony into the kitchen. We stood over the counter, the afternoon rain finally pouring down outside, and I handed him one. The second his teeth broke the surface, we heard that loud, satisfying *crack*. Flakes of pastry fell onto his shirt like winter snow. He chewed, closed his eyes, and just nodded. 'Tara,' he said, 'this is better than the bakery.'
Looking at the beautiful, layered structure, I could see exactly why the first attempt failed and why the second succeeded. The secret wasn't some hidden ingredient; it was temperature discipline and respecting the edges of the dough. By keeping the butter frozen, chilling the dough between rolls, and using a clean-cut edge instead of crimping, we created a home pastry that could rival any bakery in Miami or Orlando.
If I were to make these again next weekend—and let's be honest, Tony is already demanding I do—I might add a tiny pinch of lime zest to the cream cheese mixture just to cut through the sweetness of the guava a little bit more. But honestly? These were absolute perfection. They proved to me that even when a recipe seems intimidating, and even when you fail spectacularly on your first try, all it takes is a little patience, a cold fridge, and the willingness to try again.
Tara and Tony standing together in the kitchen, laughing as pastry flakes fall. Tara takes a bite, looking directly at the camera with a proud smile. Close-up on the final plated pastelito, glistening with syrup under warm kitchen lights.
Shot List
| Type | Description | Audio | Duration |
|---|---|---|---|
| Close-up | A warm pastelito being sliced in half, revealing the vibrant red guava and white cream cheese layers inside as pastry flakes scatter. | [Crunch of pastry shattering] Tara (VO): This is the story of how a rainy afternoon craving turned into a multi-day kitchen obsession. | 5s |
| Medium | Tara standing in her Orlando kitchen, talking directly to the camera with a cutting board in front of her. | Tara: Hey guys, welcome back to the kitchen. It is incredibly humid outside today, and honestly, Tony and I tried to get our favorite Cuban pastries earlier but they were totally sold out. So, we're making them from scratch. | 12s |
| Detail | A brick of guava paste being unwrapped from its packaging, showing its deep, ruby-red color. | Tara (VO): Traditional pastelitos rely on pasta de guayaba. It's thick, sweet, and absolutely beautiful. But wrapping this in homemade puff pastry in a hot kitchen? That's the real challenge. | 8s |
| Overhead | Tara's hands cutting cold butter into small cubes on a wooden cutting board. | Tara (VO): Step one of my plan was to make a quick rough puff. The key here is temperature. I'm slicing two sticks of unsalted butter and putting them straight into the freezer. | 10s |
| Close-up | A baking sheet showing the first batch of failed, flat, greasy pastries with leaked purple filling. | Tara: Okay, I have to be honest with you guys. This was my first attempt yesterday. It was a complete disaster. The butter melted before it could rise, and it turned into a sugary swamp. | 10s |
| B-roll | Tara quickly working flour and frozen butter together with her fingertips, keeping the pieces chunky. | Tara (VO): So for round two, we are not playing games. The butter is frozen solid, and I'm working as fast as humanly possible so the heat from my hands doesn't melt it. | 12s |
| Timelapse | The dough being rolled out, folded into thirds, turned, and rolled out again on a floured surface. | Tara (VO): This is lamination. Every fold creates thin layers of butter trapped in flour. When it hits the hot oven, the water in the butter evaporates, creating steam that lifts the dough. | 15s |
| Medium | Tara opening her refrigerator and sliding the wrapped dough plate inside. | Tara: And back into the freezer it goes for fifteen minutes. In Florida, the freezer is your best friend when baking. If the dough gets soft, you lose all those layers. | 8s |
| Close-up | Whipping cream cheese with powdered sugar in a small glass bowl until smooth and fluffy. | Tara (VO): While that chills, I'm whipping up some cream cheese with a little powdered sugar. This makes it spreadable and creates a barrier so the heavy guava paste doesn't sink. | 10s |
| Detail | A sharp pastry wheel cutting the rolled-out dough into neat, straight-edged squares. | Tara (VO): Instead of using a fork to press the edges together—which seals the layers shut—I'm using a sharp pastry wheel to cut clean edges. This lets the layers expand fully. | 12s |
| Overhead | Assembling the pastelitos: adding cream cheese, a slice of guava, placing the top dough square, and lightly pressing the inner rim. | Tara (VO): A little cream cheese, a slice of guava, and the top coat goes on. I'm gently pressing just around the filling, leaving the outer quarter-inch completely free to rise. | 15s |
| Detail | A pastry brush gently applying egg wash to the top of the pastry, carefully avoiding the cut edges. | Tara (VO): A light egg wash on top for shine, but be careful not to let it drip down the sides, or it'll glue your beautiful layers together. | 8s |
| Timelapse | Inside the oven hot-air environment as the pastelitos puff up dramatically, separating into visible golden layers. | [Upbeat, warm acoustic music swells] Tara (VO): Look at that! At four hundred and twenty-five degrees, the steam is doing its job. They are actually rising! | 15s |
| Close-up | A hot pastry being brushed with clear, glossy sugar syrup immediately after coming out of the oven. | Tara (VO): The moment they come out, we brush them with a simple sugar syrup. This gives them that sticky, glossy bakery finish that we love. | 8s |
| Wide | Tara and Tony standing together at the counter. Tony takes a bite, flakes fly, and he smiles warmly at Tara. | Tony: Oh wow. The crunch on this is insane, Tara. It's sweet, tangy, and so flaky. You absolutely nailed it. Tara: We actually did it! Cheers to patience! | 15s |
- Capture the high-speed crunch sound close to the microphone during the final tasting scene.
- Film the condensation on the kitchen window to emphasize the Florida humidity challenge.
- Get extreme close-ups of the raw dough layers after folding to show the visible lines of cold butter.
- Show a quick shot of the trash can with the first failed batch to emphasize the honest, trial-and-error nature of the vlog.
- 0:00 — Warm, acoustic guitar folk track starts softly during the cold open setup.
- 1:15 — Music transitions to a slightly playful, lighthearted acoustic tune as Tara describes her first cooking failure.
- 3:00 — Pacing picks up with a steady, rhythmic acoustic-pop track as the second dough preparation begins.
- 5:30 — Music drops to a quiet, focused ambient track during the delicate dough assembly and layering process.
- 7:45 — An upbeat, energetic acoustic track swells as the pastries begin to rise and puff beautifully in the oven timelapse.
- 9:15 — A warm, satisfying, happy acoustic-folk resolution track plays as Tara and Tony taste the final successful pastelitos.
- Maintain a warm, slightly warm-toned color grade to reflect the cozy, sunny Florida kitchen vibe.
- Use clean, minimalist text overlays to display ingredient measurements as they are added to the bowl.
- Keep the sound of the pastry crunching in the final scene raw and uncompressed for maximum sensory impact.
- Keep the pacing brisk but allow moments of silence and real kitchen ambient sounds (scraping dough, running water, oven bell) to ground the video.
| Call | Provider | Model | Input Tokens | Output Tokens | Compute / Credits |
|---|---|---|---|---|---|
| Script | abacus.ai | gemini-3.5-flash | 1,247 | 5,047 | — |
| Image 1 — The Golden Shatter | abacus.ai | nano_banana2 | — | — | 6,754.025 |
| Image 2 — Kitchen Reality Check | abacus.ai | nano_banana2 | — | — | 6,770.325 |
| Image 3 — The Perfect Slice | abacus.ai | nano_banana2 | — | — | 6,753.8 |
I Tried Making 12-Hour Smoked Mojo Pork in a Regular Apartment Oven (And Actually Succeeded)
I wanted that deep, smoky, crispy-edged Cuban lechón asado, but without a backyard smoker in the Orlando humidity, I had to see if my standard apartment oven could pull off a miracle.
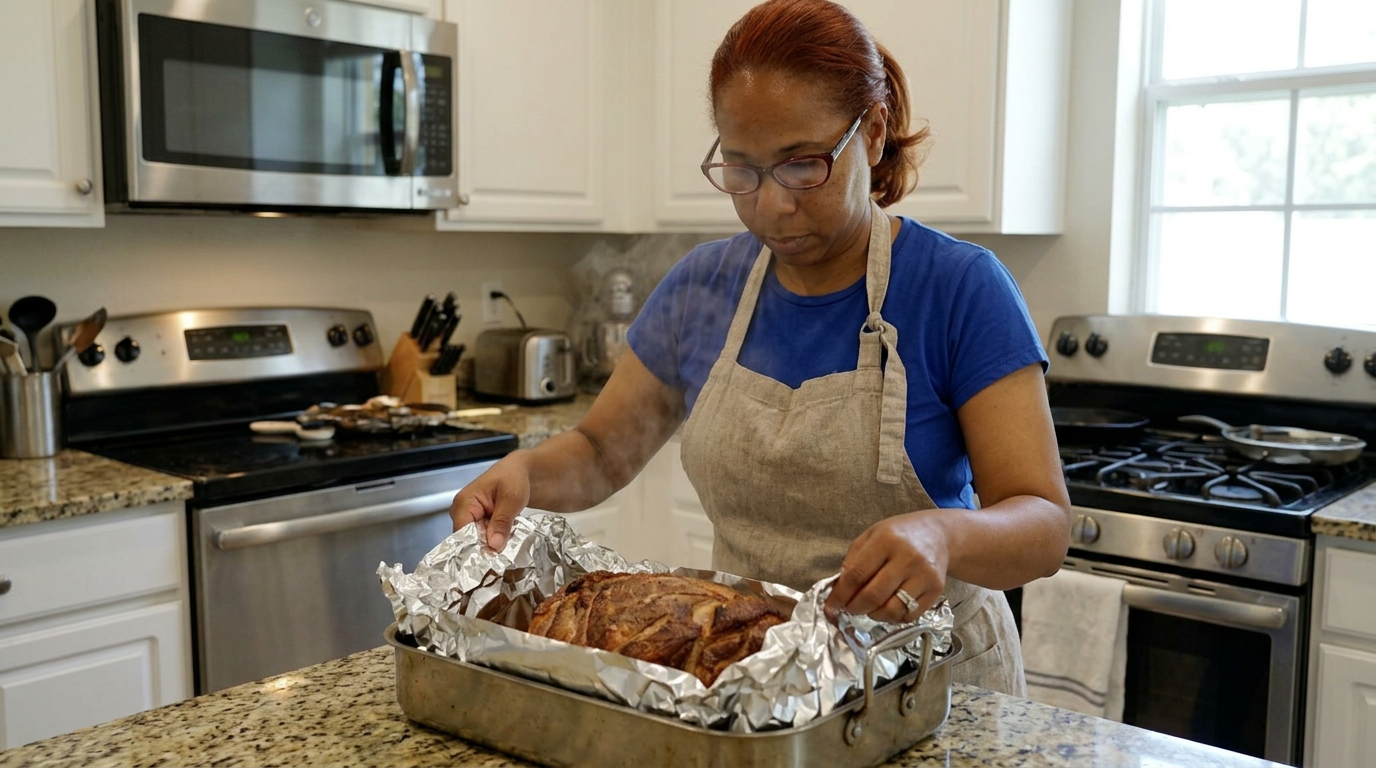
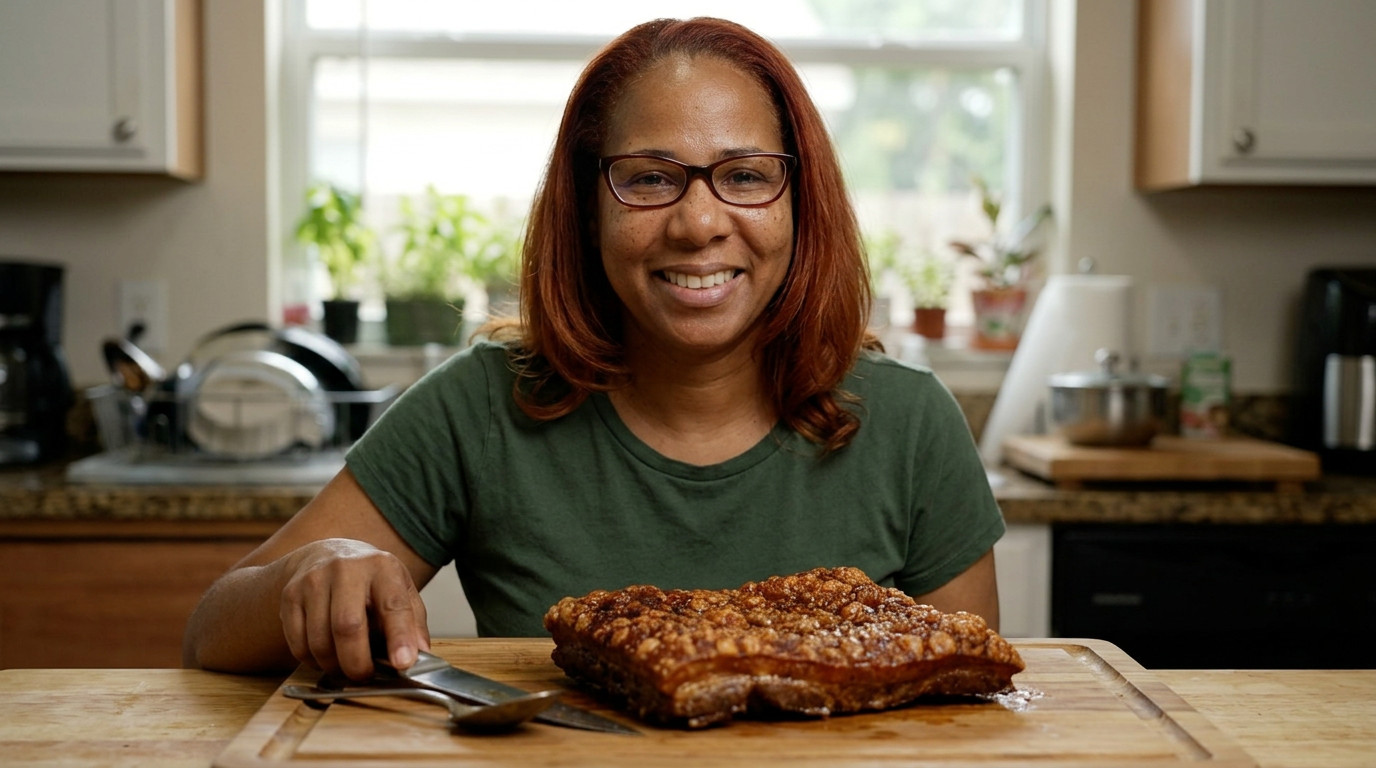
Can you actually get real, wood-smoked, shatteringly crispy Cuban pork shoulder using nothing but a standard apartment oven and some creative kitchen chemistry? Today, we are pushing my little Orlando kitchen to its absolute limits to find out.
Close-up of Tara's hands pulling apart incredibly tender, steaming shredded pork, revealing a deep pink 'smoke ring' and a glistening, dark, crispy bark.
It was one of those August afternoons in Orlando where the humidity clings to your skin the second you step outside, and the daily 4:00 PM thunderstorm was already rolling in. Tony and I were craving that classic, garlic-heavy, citrusy Cuban lechón asado you get at the local spot down the road, but the thought of standing outside tending a grill or a smoker in this heat felt like a punishment. I wanted that distinct, wood-fired depth, but I needed to find a way to make it happen entirely inside my air-conditioned kitchen.
So, I came up with a plan that felt a little bit crazy. I went to Publix and bought a massive, seven-pound bone-in pork shoulder. My goal was to mimic a low-and-slow wood smoker using a standard, temperamental apartment oven. I knew I couldn't just throw liquid smoke at it and call it a day; that always ends up tasting like a chemistry lab. I needed real wood combustion, a moisture-locking marinade, and a slow, twelve-hour dehydration and roasting process to build that signature crunchy bark.
The stakes were actually pretty high because Tony’s family was coming over the next day, and if this experiment failed, I was going to be left with seven pounds of dry, acrid, ruined meat and some very hungry guests. The plan involved a heavy overnight marinade in a scratch-made sour orange mojo, a homemade stovetop 'smoke packet' using wood chips in a cast-iron skillet to start the process, and a grueling, low-temperature cook that would test my patience and my smoke detectors.
The journey started the night before. I grabbed my mortar and pestle—the heavy granite one Tony got me for our anniversary—and smashed two entire heads of garlic with a generous pinch of coarse kosher salt until it formed a smooth, fragrant paste. To get that authentic Cuban flavor, I whisked in fresh orange and lime juice, plenty of oregano, cumin, and a splash of olive oil. I scored the thick pork skin in a diamond pattern, stabbed the meat all over to let the marinade penetrate, and rubbed that garlic-citrus paste into every single crevice. It went into the fridge to cure overnight.
At 6:00 AM the next morning, I woke up to start the smoking phase. This was the most experimental part of the whole process. I took a handful of hickory wood chips, soaked half of them in water, mixed them with the dry ones, and wrapped them tightly in heavy-duty aluminum foil, poking a few small holes in the top. I placed this foil packet directly into my seasoned cast-iron skillet and turned the stovetop burner to medium-high. Within about eight minutes, a thin, sweet, pale blue smoke started curling out of the packet.
I carefully transferred the smoking skillet to the bottom rack of my cold oven. On the middle rack right above it, I placed the marinated pork shoulder, sitting fat-side up on a wire rack set inside a sheet pan. I shut the oven door quickly to trap the smoke, turned the oven temperature to just 225 degrees Fahrenheit, and held my breath. For the first three hours, my main job was monitoring the smoke level. I didn't want to choke us out of our own home, but I needed enough circulation to mimic a real barbecue pit.
By hour four, the house smelled incredible—like a blend of sweet hickory wood, roasting garlic, and caramelized citrus. But when I peeked through the oven glass, I realized I had a problem. The wood chips had burned out, and the pork skin was looking incredibly pale and soggy. The low temperature wasn't doing anything to render the thick layer of fat. I realized that if I kept it at 225 the whole time, I’d end up with boiled-tasting meat instead of crispy lechón.
I made a executive decision to pivot. I pulled the spent foil smoke packet out of the oven, cranked the temperature up to 300 degrees, and tightly wrapped the entire roasting pan in foil to let the meat braise in its own juices for the next five hours. This is what pitmasters call the 'Texas crutch,' and I hoped it would accelerate the collagen breakdown without drying out the edges.
By hour nine, the kitchen was quite warm, and the anticipation was killing me. I carefully peeled back the foil wrapper, releasing a massive cloud of garlic-infused steam that instantly fogged up my glasses and camera lens. The meat had pulled back from the bone, which was a fantastic sign, but the skin was still soft. To get that legendary, crackling 'cuerito' skin, I basted the top with a little bit of the rendered lard from the bottom of the pan and turned the oven up to a blazing 425 degrees for the final forty-five minutes.
I stood right by the oven door, watching through the glass as the pork skin began to blister, bubble, and turn a deep, mahogany brown. The sound of sizzling fat was deafening. Just when the edges looked almost charred, I pulled the heavy pan out and set it on the counter. The crackling skin was so hard that tapping it with a metal spoon sounded like knocking on a wooden door. I let it rest for a full forty-five minutes to let the juices redistribute, which was easily the hardest part of the entire day.
Vibrant B-roll shots of garlic being crushed in a mortar, orange juice splashing, smoke rising from a cast-iron skillet inside an oven, steam rising from peeled-back foil, and a spoon tapping on ultra-crispy pork skin.
When I finally took two forks to shred the meat, it practically fell apart under its own weight. The bone slid out completely clean, without a single shred of meat sticking to it. Even though it was cooked entirely indoors, there was a distinct, beautiful pink smoke ring just beneath the surface of the meat from those first three hours of hickory wood combustion. It was impossibly juicy, with the tangy, bright acidity of the sour orange cutting right through the rich, smoky fat.
Tony came into the kitchen, lured by the smell, and stole a piece of the crispy skin right off the cutting board. His eyes went wide, and he just nodded—which is his universal sign for 'you absolutely nailed this.' We piled the tender, shredded pork onto warm tortillas with fresh cilantro, pickled red onions, and a squeeze of lime, though it was so good it didn't even need the toppings. The experiment was a massive success; we had achieved authentic, smoky flavor and perfect texture without setting foot outside.
Looking back, the only thing I would change next time is soaking the wood chips slightly longer to get a more sustained smoke in those early hours. But for anyone living in an apartment or dealing with a scorching summer afternoon, this technique is an absolute game-changer. It proved to me that with a little understanding of food science and some patience, you can recreate almost any outdoor cooking experience right in your own kitchen.
Slow-motion shot of Tara and Tony taking a bite of the pork tacos, smiling, and nodding in approval, followed by a beautiful, steaming close-up of the remaining shredded meat on a serving platter.
Shot List
| Type | Description | Audio | Duration |
|---|---|---|---|
| Close-up | Shredding hot, steaming pork with two forks, showing off the pink smoke ring. | Can you actually get real, wood-smoked, shatteringly crispy Cuban pork shoulder using nothing but a standard apartment oven? | 5s |
| Medium | Tara speaking directly to the camera in her warm, bright Orlando kitchen, holding a massive pork shoulder. | Today, we are pushing my little kitchen to its absolute limits to find out if this experiment actually works. | 8s |
| Detail | Mashing garlic cloves and coarse salt in a granite mortar and pestle. | It all starts with a classic mojo marinade. Heavy on the garlic, heavy on the salt, mashed into a perfect paste. | 6s |
| Overhead | Pouring fresh orange and lime juice into the garlic paste and whisking. | We add fresh sour citrus to tenderize the meat and give it that unmistakable vibrant Cuban flavor profile. | 7s |
| B-roll | Tara scoring the pork skin with a sharp chef's knife and rubbing the green-flecked marinade into the cuts. | I scored the skin and rubbed this marinade into every single crevice before letting it cure in the fridge overnight. | 9s |
| Close-up | A foil packet filled with wood chips smoking inside a hot cast-iron skillet on the stove. | The next morning, I created this DIY smoke packet. Once it started smoking, it went straight into the bottom of the cold oven. | 8s |
| Medium | Tara sliding the pork shoulder into the oven directly above the smoking skillet and closing the door quickly. | I set the oven to 225 degrees. The plan was to let it absorb that gentle hickory smoke for the first three hours. | 10s |
| Detail | Tara peering through the dirty glass oven door, looking at the pale pork. | By hour four, the wood chips were spent, but the pork skin was looking way too pale. It was time for a quick change of plans. | 7s |
| B-roll | Wrapping the entire roasting pan tightly with heavy-duty aluminum foil. | I pulled the smoke packet out, cranked the heat to 300, and sealed the pork in foil so it could braise in its own citrusy juices. | 8s |
| Timelapse | The oven temperature display rising from 300 to 425 degrees. | After five hours of braising, I uncovered it and blasted it at 425 degrees to finally crisp up that skin. | 6s |
| Detail | A metal spoon tapping against the golden-brown, blistered, rock-hard pork skin, making a loud knocking sound. | Listen to that. That is pure, blistered, crackling perfection. The oven actually did it. | 5s |
| Medium | Tony walking into the frame, grabbing a pinch of crispy skin, eating it, and giving Tara a thumbs up. | Tony approved instantly, which is always the ultimate test in this house. | 7s |
| Close-up | Plating the shredded pork into warm tortillas with cilantro and pickled onions. | Juicy, smoky, and unbelievably tender. This apartment oven experiment is officially a weeknight game-changer. | 8s |
- Capture the ambient kitchen sounds: the rhythmic thud of the mortar and pestle, the sizzle of the pork skin in the oven, and the crunch of the first bite.
- Show a close-up of the steam venting from the foil when it is first opened to emphasize the heat and juiciness.
- Get a shot of the condensation on the kitchen window to visually represent the humid Orlando afternoon outside.
- Do a slow, macro tracking shot of the smoke ring on a sliced piece of pork to highlight the success of the smoking phase.
- 0:00 — Upbeat, acoustic indie-folk intro music starts softly.
- 1:15 — Transition to a low, rhythmic acoustic guitar pluck as prep begins.
- 3:10 — Tension-building, light percussion track as the smoking skillet goes into the oven.
- 5:30 — Warm, sunny, slow-tempo acoustic melody as the pork braises over several hours.
- 7:45 — High-energy, jazzy acoustic groove as the temperature is cranked to 425 and the skin crisps.
- 9:15 — Celebratory, bright, warm acoustic folk resolution music as the tacos are assembled and tasted.
- Keep the pacing relaxed and conversational, letting the natural kitchen sounds breathe between Tara's voiceover segments.
- Use subtle on-screen text overlays for ingredient amounts and oven temperatures to keep the visual clean and uncluttered.
- Apply a warm, slightly golden color grade to reflect the Florida setting and the rich, comforting tones of the pork.
- Ensure the audio level of the pork skin 'crackle test' is boosted slightly to deliver a highly satisfying sensory moment.
| Call | Provider | Model | Input Tokens | Output Tokens | Compute / Credits |
|---|---|---|---|---|---|
| Script | abacus.ai | gemini-3.5-flash | 1,247 | 4,101 | — |
| Image 2 — Tara's Kitchen Pivot | abacus.ai | nano_banana2 | — | — | 6,754.075 |
| Image 3 — The Crackle Test | abacus.ai | nano_banana2 | — | — | 13,569.2 |
I Tried Making Classic Cuban Mojo Pork in a Slow Cooker (And Made a Huge Mess First)
I wanted to see if my slow cooker could actually deliver that crispy, citrusy mojo pork I love getting at our local Orlando spots, but a massive kitchen spill almost ruined Sunday dinner before it even started.
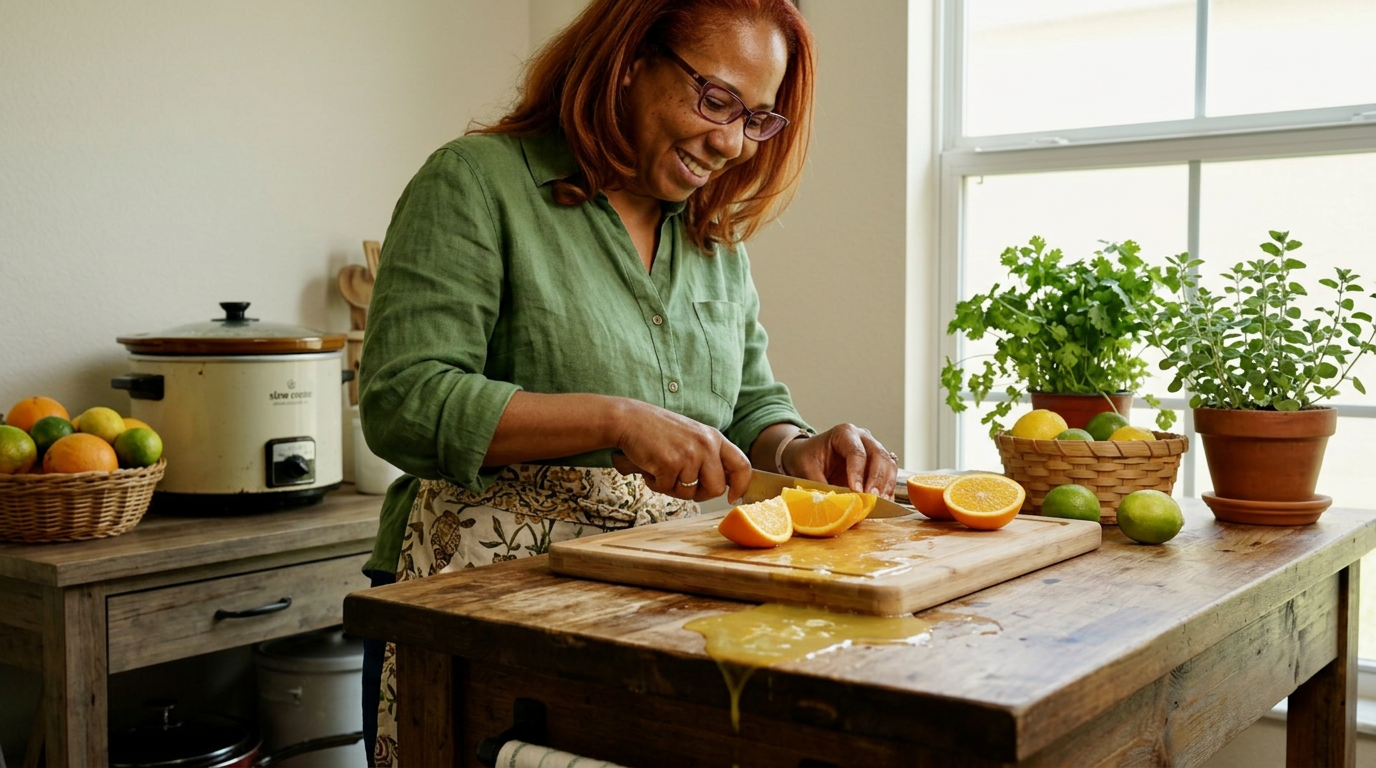
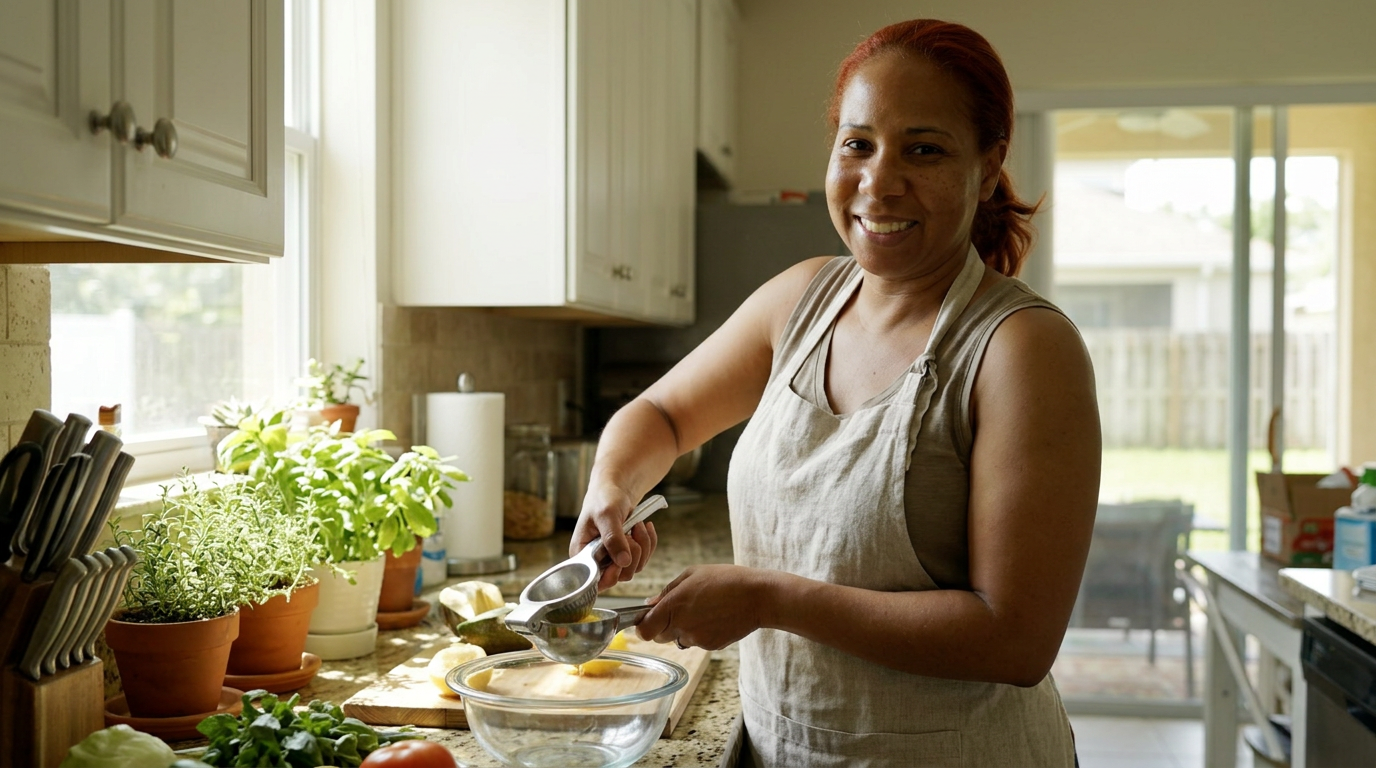
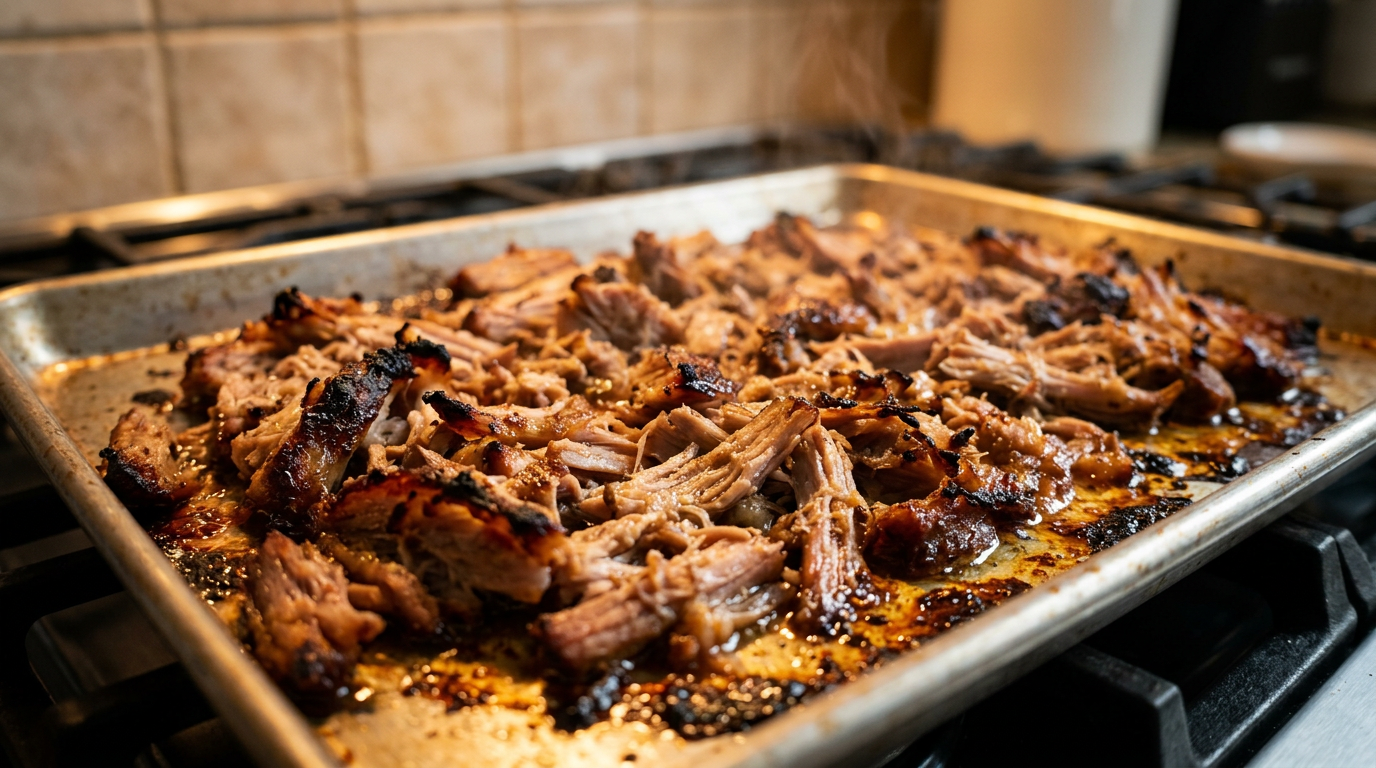
They say you shouldn't cry over spilled milk, but nobody ever said anything about spilled sour orange juice. Today, we are testing if a slow cooker can actually replicate the crispy, garlicky magic of traditional Cuban mojo pork.
Tight close-up of Tara's hands wiping down a sticky, juice-drenched countertop with a yellow sponge, then panning up to her looking at the camera with an 'I can't believe I just did that' laugh.
It was one of those typical Sunday afternoons in Orlando where the humidity is sitting at about ninety percent, and the sky is threatening a massive thunderstorm. Tony and I were craving the kind of mojo pork you get from the local walk-up windows in Little Vietnam or down on Orange Avenue—crispy on the edges, deeply garlicky, and dripping with citrus. Traditional lechón asado takes hours of roasting on a spit or in a heavy oven, which is the last thing I wanted to turn on today. I wanted to see if my trusty, slightly dented slow cooker could get us ninety percent of the way there.
The plan seemed simple enough. I bought a gorgeous seven-pound bone-in pork shoulder from the Publix down the street, intending to marinate it in a home-brewed mojo sauce. A classic mojo needs sour orange juice, garlic, cumin, oregano, and a touch of lime. Since sour oranges can be tricky to find out of season even here in Central Florida, my plan was to blend fresh orange juice with fresh lime juice to mimic that sharp, bitter bite. I cleared off the counter, set up the camera, and felt incredibly prepared.
But here is the honest truth about cooking vlogs: the minute you think you have everything under control, reality laughs at you. I had just finished squeezing about ten limes and four oranges into a giant glass measuring cup. I reached over to grab the garlic press, my elbow caught the edge of the cup, and in slow motion, two cups of sticky, highly acidic citrus juice cascaded across my cutting board, down the cabinets, and directly into the silverware drawer. It was an absolute disaster, and for a second, I thought about just calling Tony and ordering takeout.
After a solid twenty minutes of wiping down cabinet doors and drying out forks, I had to start the mojo from scratch. This time, I kept the measuring cup safely in the center of the island. I peeled an entire head of garlic—yes, twelve whole cloves—and smashed them flat with the side of my chef's knife. There is something incredibly therapeutic about smashing garlic, especially when you are still slightly annoyed about a juice spill. I tossed the garlic into my second batch of orange and lime juice, along with two tablespoons of dried oregano, a tablespoon of toasted cumin, salt, black pepper, and a generous splash of olive oil.
For the pork itself, I decided to leave the fat cap on. When you are slow-cooking a pork shoulder, that fat is your insurance policy against dryness. I made deep slits all over the meat and stuffed them with extra slices of garlic, then rubbed the whole shoulder with kosher salt. I nestled the pork into the slow cooker insert, poured our hard-won mojo marinade over the top, and flipped the machine to low. The goal was an eight-hour slow braise to let the collagen break down completely.
By hour four, the kitchen smelled absolutely ridiculous. If you have ever lived in Florida, you know that smell of roasting pork, garlic, and citrus that wafts through neighborhoods on Sunday afternoons. It is the ultimate comfort scent. But around hour six, I hit my second obstacle. I peered through the glass lid and realized the pork was practically swimming in liquid. Because the slow cooker trap steam, the meat was boiling rather than braising, and the beautiful bark I wanted was nowhere to be seen.
This is where the experiment part of the day kicked in. If I left it in there, we would end up with bland, boiled meat. I needed a pivot. I decided that once the pork was fork-tender, I would shred it, spread it out on a large baking sheet, ladle some of that concentrated cooking liquid back over it, and blast it under the oven broiler at 500 degrees Fahrenheit to get those coveted crispy, caramelized edges.
At the seven-hour mark, I checked the internal temperature with my meat thermometer. It registered 202 degrees—perfect for pulling apart. I carefully lifted the shoulder out of the slow cooker using two large tongs, but it was so tender it literally fell apart back into the pot, splashing hot mojo fat onto my apron. Note to self: always wear an apron you do not mind getting greasy.
I shredded the pork directly on a rimmed baking sheet, discarding the bone and any large chunks of unrendered fat. The meat was incredibly juicy, but tasting a piece right then, it lacked that punchy, vibrant kick. The citrus notes had mellowed out too much during the long cook. To fix this, I skimmed the fat off the remaining liquid in the slow cooker, mixed in a fresh squeeze of lime juice and a pinch of raw garlic, and poured about a cup of this 'quick-fix' mojo right over the shredded meat before sliding it under the broiler.
I stood by the oven door, watching through the glass. Under the intense heat of the broiler, the pork fat began to sizzle and spit. Within five minutes, the tips of the shredded pork turned a deep, dark mahogany brown, almost black in some spots. It looked exactly like the carnitas and lechón you get at a high-end food truck.
A montage of peeling garlic, squeezing citrus, wiping up the spill, rubbing down the raw pork shoulder, pouring the marinade, checking the slow cooker lid with steam rising, shredding the meat with two forks on a metal sheet pan, and the dramatic sizzle of the meat under the bright red broiler element.
I pulled the baking sheet out, and the sound of that sizzling pork fat was like music. I toasted some quick Cuban bread on a dry cast-iron skillet, smeared it with a tiny bit of mayonnaise, piled the crispy mojo pork high, and topped it with thin slices of raw white onion that had been soaking in ice water to take the bite off. Tony walked into the kitchen right as I was cutting the sandwich in half, his eyes wide.
We took our first bites standing right there over the cutting board, which is always the sign of a good meal. The crunch of the bread followed by the crispy, caramelized edges of the pork was flawless. The quick-fix mojo we poured over at the end completely saved the flavor, bringing back that bright, zesty citrus punch that the slow cooker had dulled. Tony declared it the best sandwich I have made all summer, which made the great juice spill of 2026 entirely worth it.
If I did this again, I would definitely reduce the liquid in the slow cooker prior to broiling, or maybe even sear the whole pork shoulder in a hot Dutch oven before slow cooking to lock in some extra flavor depth. But as a low-effort, high-reward Sunday dinner, this slow cooker mojo pork is a absolute keeper. Just keep your elbows clear of the juice.
Tara and Tony standing together in the sunlit kitchen, taking a massive bite of the crispy pork sandwich, juice dripping slightly, laughing and nodding in approval as the camera slowly pulls back to show the messy but happy kitchen.
Shot List
| Type | Description | Audio | Duration |
|---|---|---|---|
| Close-up | Tara's hands aggressively wiping sticky orange juice off a white kitchen cabinet door with a sponge. | [Tara VO] They say you shouldn't cry over spilled milk, but nobody ever said anything about spilled sour orange juice. | 5s |
| Medium | Tara standing behind her kitchen island in Orlando, holding up a giant bone-in pork shoulder. | [Tara] Today, we are testing if a slow cooker can actually replicate the crispy, garlicky magic of traditional Cuban mojo pork. | 7s |
| B-roll | Slow pan across a sunny backyard window showing rainy Orlando weather outside, then panning back to the kitchen counter. | [Tara VO] It was one of those typical Sunday afternoons in Orlando where the humidity is sitting at about ninety percent, and the sky is threatening a massive storm. | 8s |
| Detail | Squeezing fresh limes using a hand-press squeezer, juice dripping into a glass measuring cup. | [Tara VO] A classic mojo needs sour orange juice, garlic, cumin, oregano, and a touch of lime. Since sour oranges can be tricky to find, I'm mixing fresh orange and lime. | 6s |
| Overhead | The moment of the spill recreated or showing the sticky aftermath, juice dripping into an open drawer of silverware. | [Tara VO] And then, my elbow caught the edge of the cup, and in slow motion, two cups of sticky citrus juice cascaded directly into the silverware drawer. | 8s |
| Close-up | A flat chef's knife smashing peeled garlic cloves on a clean wooden cutting board. | [Tara VO] After cleaning up, I started the mojo from scratch. There is something incredibly therapeutic about smashing garlic when you are still slightly annoyed. | 6s |
| Overhead | Pouring the vibrant yellow-green mojo marinade over the raw pork shoulder inside the slow cooker crock. | [Tara VO] I nestled the pork into the slow cooker, poured our hard-won mojo marinade over the top, and flipped the machine to low. | 7s |
| Timelapse | The slow cooker lid fogging up and bubbling slowly as the pork cooks. | [Tara VO] By hour four, the kitchen smelled absolutely ridiculous. But around hour six, I realized the pork was practically swimming in liquid. | 8s |
| Medium | Tara looking directly at the camera, explaining her pivot strategy with a baking sheet in hand. | [Tara] If I leave it in there, we get boiled meat. So we are going to shred it, put it on a sheet pan, and blast it under the broiler. | 10s |
| Close-up | Two forks shredding the steaming, tender pork shoulder on a metal baking sheet, steam rising heavily into the camera lens. | [Tara VO] The meat was incredibly juicy, but it lacked that punchy, vibrant kick after cooking so long. So I added fresh lime to the pan juices and poured it back over. | 8s |
| Detail | The pork sizzling violently under the glowing red coils of the oven broiler, edges turning dark brown and crispy. | [Music swells] [Sound of loud sizzling and popping fat] | 6s |
| Close-up | A serrated knife cutting through a hot, crusty Cuban sandwich filled with the crispy pork and raw onions. | [Sound of loud crunch from the bread] [Tara VO] I toasted some quick Cuban bread, piled the crispy mojo pork high, and topped it with thin white onions. | 6s |
| Medium | Tara hands a half of the sandwich to Tony, and they both take a huge, happy bite in front of the messy kitchen island. | [Tony] Oh my gosh, Tara. This is incredible. [Tara] Right? The crispy edges are everything! | 10s |
- Capture extreme close-ups of the garlic skins being peeled and the flat side of the knife smashing the cloves.
- Film a slow-motion shot of the mojo marinade being poured over the meat to show the spices suspended in the juice.
- Get a close-up of the steam escaping the slow cooker lid when it is first opened after 7 hours.
- Record the cracking sound of cutting into the toasted Cuban bread with a highly sensitive microphone.
- 0:00 — Upbeat, slightly quirky acoustic guitar and percussion to match the messy opening and cleanup.
- 1:15 — Warm, sunny, and relaxed acoustic folk music as Tara begins prepping the ingredients and talking about Orlando.
- 3:00 — Mellow, rhythmic Latin-inspired acoustic guitar strumming as the mojo marinade is prepared and poured.
- 5:30 — Slightly tense but lighthearted percussion as the boiled pork problem is discovered and the broiler pivot is planned.
- 7:45 — High-energy, celebratory acoustic track as the pork sizzles under the broiler and is shredded.
- 9:00 — Warm, satisfying, jazzy acoustic guitar as Tara and Tony taste the sandwich and wrap up the video.
- Keep the pacing fast and funny during the opening cleanup scene to establish a highly relatable, non-perfect kitchen vibe.
- Use a subtle 'whoosh' sound transition when pivoting from the slow cooker disappointment to the broiler solution.
- Add a warm, slightly vintage color grade to the video to emphasize the sunny, cozy Florida home atmosphere.
- Overlay simple, clean handwritten-style text on screen for the ingredient amounts as they are added to the bowl.
| Call | Provider | Model | Input Tokens | Output Tokens | Compute / Credits |
|---|---|---|---|---|---|
| Script | abacus.ai | gemini-3.5-flash | 1,247 | 4,181 | — |
| Image 1 — The Citrus Spill Disaster | abacus.ai | nano_banana2 | — | — | 6,753.9 |
| Image 2 — Tara Squeezing Limes | abacus.ai | nano_banana2 | — | — | 6,753.925 |
| Image 3 — The Broiler Sizzle | abacus.ai | nano_banana2 | — | — | 6,753.725 |
I Tried Making 30-Minute Orlando-Style Mojo Pork Ribs (Without a Smoker!)
I wanted that deep, citrusy, dynamic Cuban-American mojo flavor on tender pork ribs, but I only had thirty minutes on a rainy Monday afternoon to make it happen.
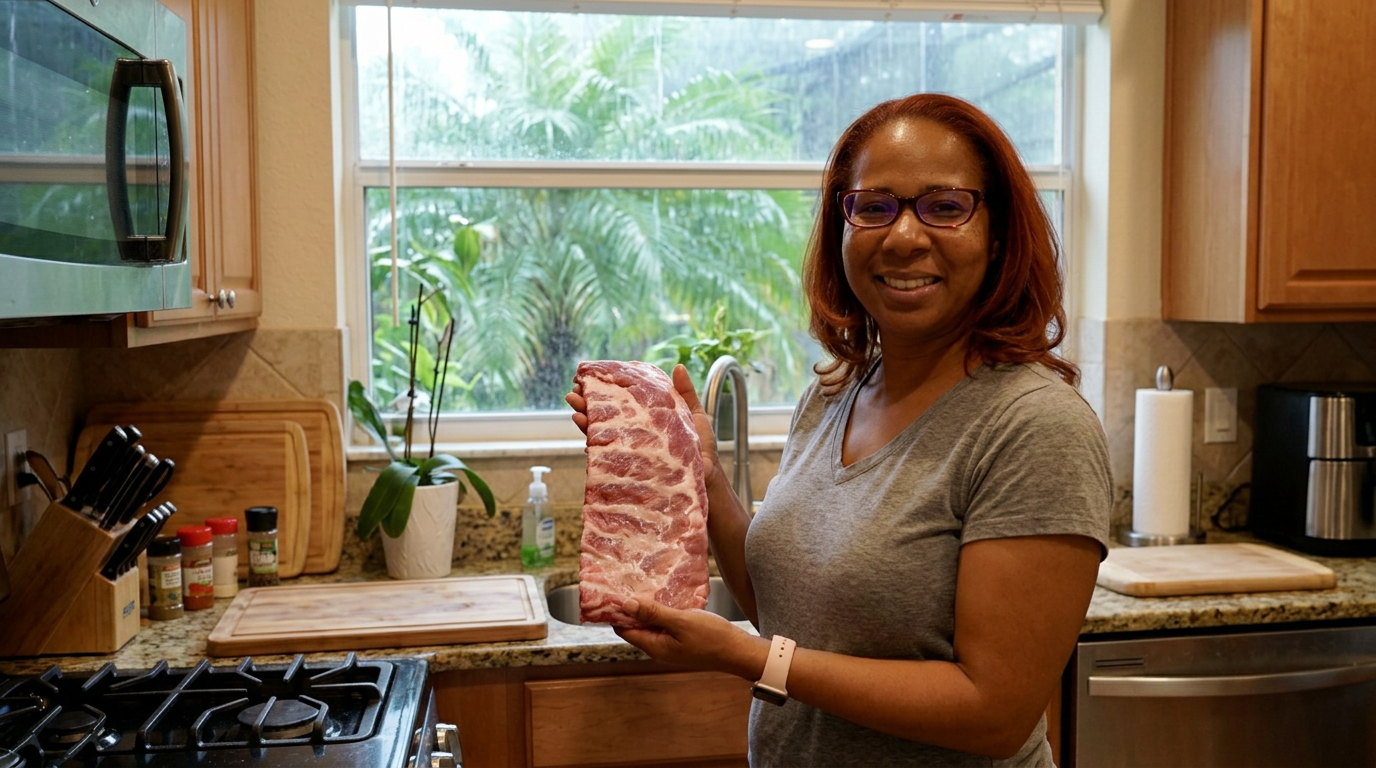
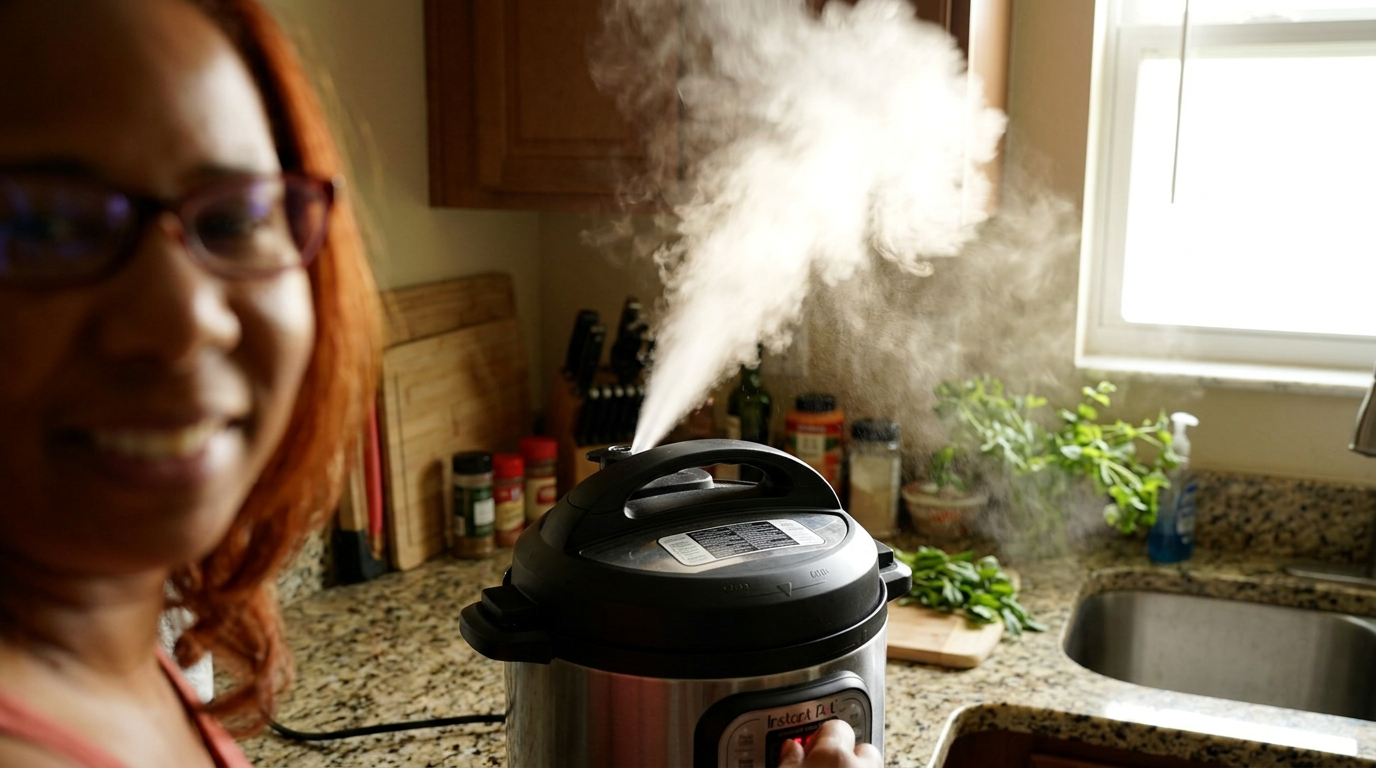
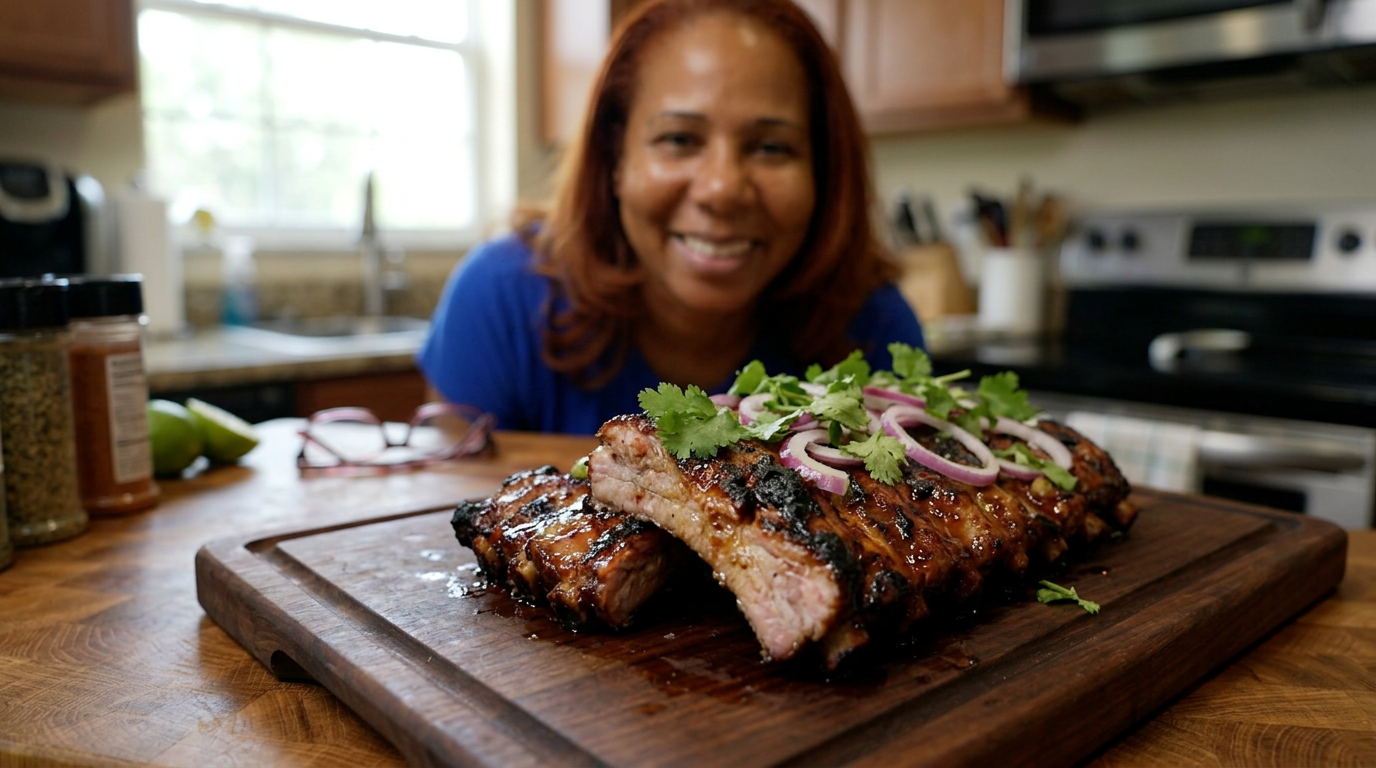
You're told that real, fall-off-the-bone ribs require four hours of low-and-slow wood smoke. But it's four o'clock on a rainy Monday in Orlando, Tony is starving, and I have exactly thirty minutes to prove the rulebook wrong.
Tight close-up of a knife slicing through a bright green lime on a wooden cutting board, juice splashing onto the camera lens, followed by a quick pan to a sizzling pressure cooker releasing a massive cloud of aromatic steam.
It was one of those typical late August afternoons in Orlando where the sky turns the color of a bruised plum and suddenly unleashes a warm, tropical downpour. The humidity was sitting at about ninety percent, and the thought of standing outside by a hot smoker or heating up our kitchen with a four-hour oven roast made me want to order takeout. But I had a rack of baby back ribs sitting in the fridge that needed to be used, and more importantly, I had a craving for that bright, garlicky, citrusy Mojo flavor that defines our local food scene here.
Tony looked at me like I had lost my mind when I told him my plan at 4:30 PM. 'Ribs? Tonight? Tara, we have to leave for the community board meeting at 5:30,' he reminded me, clutching his keys. He was right to be skeptical. Traditional ribs are a weekend commitment. They demand patience, wood chips, and hours of hovering over coals. My plan was risky: I was going to use our high-pressure electric cooker to force the flavor deep into the meat in just twenty minutes, then finish them under a blazing oven broiler for five minutes to get those caramelized, sticky, charred edges.
The stakes were simple: if this worked, I'd unlock a weeknight game-changer—a way to get authentic-tasting, tender Cuban-style mojo ribs on the table in the time it takes to watch a sitcom. If it failed, we'd be chewing on rubbery, grey, boiled-looking pork while rushing out the door hungry. I grabbed my apron, cleared the messy weekend mail off the counter, and decided to document every single step, mess and all.
I started by tackling the membrane on the back of the ribs. If you leave that silver skin on, your marinade won't penetrate, and the ribs turn out chewy. I grabbed a sheet of paper towel to get a good grip—a trick my grandmother taught me—and peeled it off in one satisfying, tearing motion. Next, I sliced the rack into four-rib portions so they would actually fit inside the pressure cooker pot. Already, my hands were sticky, and I had to nudge the cabinet door closed with my elbow.
For the mojo, I could have used a bottled marinade, but where's the fun in that? True Florida mojo needs fresh sour orange juice. Since sour oranges are hard to find out of season, I made my own quick blend: the juice of two sweet Valencia oranges, three plump limes, and a splash of white vinegar for that sharp, tongue-tingling acidity. I minced eight cloves of fresh garlic—yes, eight, because mojo is not for the faint of heart—and tossed them in with dried oregano, cumin, salt, and black pepper.
This is where the first real obstacle hit. I realized my pressure cooker's sealing ring still smelled faintly of the spicy chicken curry I made last Tuesday. If I cooked the ribs with that ring, our citrusy mojo ribs would taste like garam masala. I had to stop the clock, tear the lid apart, wash the silicone ring with hot soapy water and baking soda, and dry it hurriedly with a dish towel. Five minutes wasted, and Tony was already checking his watch from the living room.
Once the ring was clean, I nestled the rib portions vertically inside the pot, bone-side facing inward, forming a little crown. I poured the citrus-garlic mixture right over them, making sure every nook and cranny got coated. I locked the lid into place, set the valve to 'sealing,' and programmed it for twenty minutes on high pressure. As the machine began to hiss and build up pressure, the kitchen filled with this incredibly bright, garlicky, citrus steam. It smelled like a local street festival.
While the timer ticked down, I prepared the glaze. A traditional mojo is runny, but for ribs, you need something that clings to the meat. I took a cup of the fresh mojo marinade I had set aside, mixed it with a quarter cup of brown sugar and a tablespoon of yellow mustard, and simmered it in a small saucepan on the stove until it reduced into a thick, syrupy glaze. The bubbling sugar smelled like caramelized citrus heaven.
Beep. Beep. Beep. The twenty minutes were up. Now came the moment of truth: the quick release. I used a long wooden spoon to knock the valve open. A geyser of garlicky steam shot up toward our kitchen ceiling, condensing instantly in the humid air. I held my breath, unlocked the lid, and looked inside. The meat had pulled back from the bones beautifully—always a good sign—but they looked pale and wet. They looked, frankly, unappetizing.
I carefully lifted the slippery rack segments out using tongs—they were so tender they almost broke apart in mid-air—and laid them bone-side down on a foil-lined baking sheet. I brushed them generously with the sticky brown sugar mojo reduction I'd made on the stove. I cranked our oven broiler to high and slid the tray onto the very top rack, right under the heating element. Now, it was a game of seconds. Under a broiler, the line between perfect caramelization and burnt carbon is incredibly thin.
Documentary-style, handheld footage capturing the steam rising from the pressure cooker, close-ups of the bubbling glaze in the saucepan, and the rapid browning of the rib meat under the glowing red coils of the broiler.
At exactly 5:18 PM, with twelve minutes to spare, I pulled the sheet pan out. The transformation was unbelievable. The pale, wet pork had turned into a deeply browned, bubbling, charred masterpiece. The sugar in the glaze had caramelized around the edges of the meat, locking in the juices. I scattered some freshly chopped cilantro and thin slices of raw red onion over the top for that classic Cuban counterpoint of freshness and crunch.
Tony wandered into the kitchen, drawn by the smell. I sliced off a rib and handed it to him on a paper plate. He took a bite, his eyes widened, and the meat pulled away cleanly from the bone with just a gentle tug. 'Tara,' he mumbled through a mouthful of pork, 'this tastes like it's been cooking since this morning.' The acidity of the orange and lime cut right through the rich pork fat, and the garlic gave it this incredible savory depth.
What did I learn from this experiment? You don't always need a half-day and a pile of hickory wood to get incredible ribs. By using the pressure cooker to tenderize and infuse, and the broiler to mimic that crispy, charred bark, we got ninety percent of the way to barbecue perfection in a fraction of the time. Next time, I think I'll add a drop of liquid smoke to the cooking liquid to get that outdoor aroma, but for a rainy Monday night in Orlando? This was an absolute win. We cleared the plates, wiped our sticky fingers, and made it to our meeting with five minutes to spare.
A gorgeous, slow-motion close-up of Tara pulling a single rib away from the rack, showing the juicy, tender interior of the meat, followed by Tony smiling and nodding in approval as he eats.
Shot List
| Type | Description | Audio | Duration |
|---|---|---|---|
| Close-up | Rain hitting a windowpane with a blurry green Florida backyard in the background. | Sound of heavy rain falling. Tara (VO): 'It was one of those typical late August afternoons in Orlando...' | 4s |
| Medium | Tara standing in her kitchen, holding a rack of baby back ribs and looking directly at the camera. | Tara: 'Tony thought I was crazy when I said I was making ribs at 4:30 PM. But we are going to pull this off.' | 7s |
| Detail | Tara's hands using a paper towel to grip and peel the membrane off the back of the ribs. | Sound of the wet tearing of the membrane. Tara (VO): 'First step, get rid of this chewy silver skin.' | 5s |
| Overhead | Slicing oranges and limes, squeezing them into a glass measuring cup. | Squeezing sounds. Tara (VO): 'For our quick mojo, we want real, vibrant citrus. Out-of-season sour oranges are hard to find, so we blend sweet orange and lime.' | 8s |
| Close-up | Garlic cloves being smashed and minced rapidly on a chopping board. | Rhythmic chopping sound. Tara (VO): 'Eight cloves of garlic. Don't skimp here, mojo needs to be loud.' | 6s |
| B-roll | Tara sniffing the silicone sealing ring of her pressure cooker and making a funny, disappointed face. | Tara: 'Oh no. It smells like last week's curry. This is a disaster in the making.' | 5s |
| Medium | Tara washing the silicone ring in a sink full of soapy water, scrubbing furiously. | Water running. Tara (VO): 'A quick scrub with baking soda saved us. Five minutes lost, but crisis averted.' | 6s |
| Overhead | Slipping the rib portions into the pressure cooker pot, forming a circular crown, then pouring the marinade over them. | Splashing liquid. Tara (VO): 'In they go, bones facing in, drowned in that beautiful citrus garlic juice.' | 8s |
| Detail | Close-up of the electric cooker's control panel as Tara presses the buttons, setting it to 20 minutes. | Beeping sounds. Tara (VO): 'Twenty minutes on high pressure. Let's see if science can beat time.' | 4s |
| B-roll | The glaze bubbling away and darkening in a small silver saucepan on the stove. | Bubbling sound. Tara (VO): 'While it cooks, we reduce some reserved marinade with brown sugar to make a sticky glaze.' | 6s |
| Close-up | The steam release valve being opened with a wooden spoon, shooting a massive jet of white steam up. | Loud, dramatic hissing of steam. Tara: 'Smells incredible!' | 6s |
| Medium | Tara lifting the pale, tender ribs out of the pot with tongs and placing them on a baking sheet. | Wet, heavy clatter. Tara (VO): 'They look a bit pale now, but they are incredibly tender. Time for the magic.' | 7s |
| Detail | A pastry brush slathering the dark, thick glaze over the ribs, coating every crevice. | Squishing brush sounds. Tara (VO): 'Paint them generously. This sugar is going to caramelize under the broiler.' | 6s |
| Timelapse | Looking through the oven door window as the broiler heat browns and bubbles the glazed rib surface. | Upbeat, jazzy acoustic music swells. Tara (VO): 'Under the broiler, watch them like a hawk.' | 8s |
| Close-up | The finished ribs being cut on a board, showing steam rising from the juicy meat, garnished with red onions and cilantro. | Crisp slicing sound. Tara (VO): 'Look at that char. Sticky, fast, and absolutely packed with Florida flavor.' | 8s |
- Capture extreme close-ups of the citrus juicing to show the fresh droplets and pulp flying off the fruit.
- Show the physical condensation forming on the kitchen windows due to the humidity and cooking steam.
- Record a macro shot of the glaze bubbling and popping in the saucepan to emphasize its thick texture.
- Film Tony's genuine first-bite reaction in a single, un-cut medium shot to capture his real expression.
- 0:00 — Soft, acoustic guitar with a light tropical rhythm to set the warm, rainy-day mood.
- 1:30 — Upbeat, quirky percussion as Tara discovers the smelly sealing ring and scrambles to clean it.
- 3:15 — Warm, jazzy bossa nova track playing softly in the background while the pressure cooker builds hiss.
- 5:45 — Fast-paced acoustic picking to build tension during the rapid steam release and broiler countdown.
- 7:30 — Bright, celebratory Latin-inspired acoustic guitar as the finished ribs are pulled from the oven.
- 9:15 — Gentle, rolling acoustic outro music as Tara wraps up her thoughts on the experiment.
- Keep the pacing fast and rhythmic during the prep phase to mirror the 30-minute time constraint.
- Use a subtle 'whoosh' sound effect transition when switching to the rapid pressure cooker countdown timer.
- Overlay a clean, minimalist countdown clock graphic in the top corner of the screen during the cooking segment.
- Enhance the natural sizzling and bubbling sounds in the audio mix to make the broiler sequence feel incredibly satisfying.
| Call | Provider | Model | Input Tokens | Output Tokens | Compute / Credits |
|---|---|---|---|---|---|
| Script | abacus.ai | gemini-3.5-flash | 1,247 | 4,333 | — |
| Image 1 — The Rainy Afternoon Dilemma | abacus.ai | nano_banana2 | — | — | 6,753.825 |
| Image 2 — The Steam Release | abacus.ai | nano_banana2 | — | — | 6,753.7 |
| Image 3 — The Caramelized Board | abacus.ai | nano_banana2 | — | — | 6,753.95 |
I Tried Making Traditional Cuban Guava Pastelitos from Scratch (And Almost Ruined Them)
I wanted to surprise Tony with the flaky, warm bakery pastries he grew up eating here in Florida, but my kitchen got incredibly messy along the way.
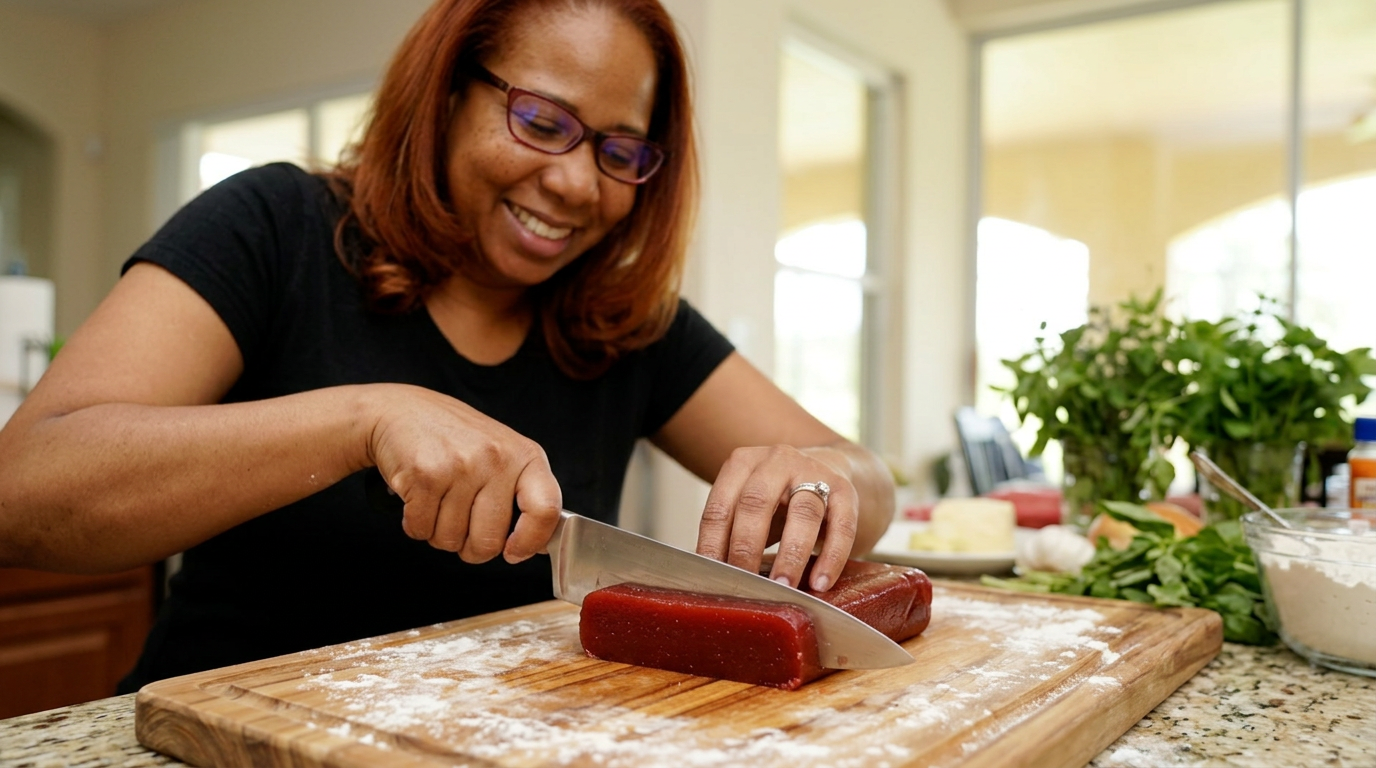
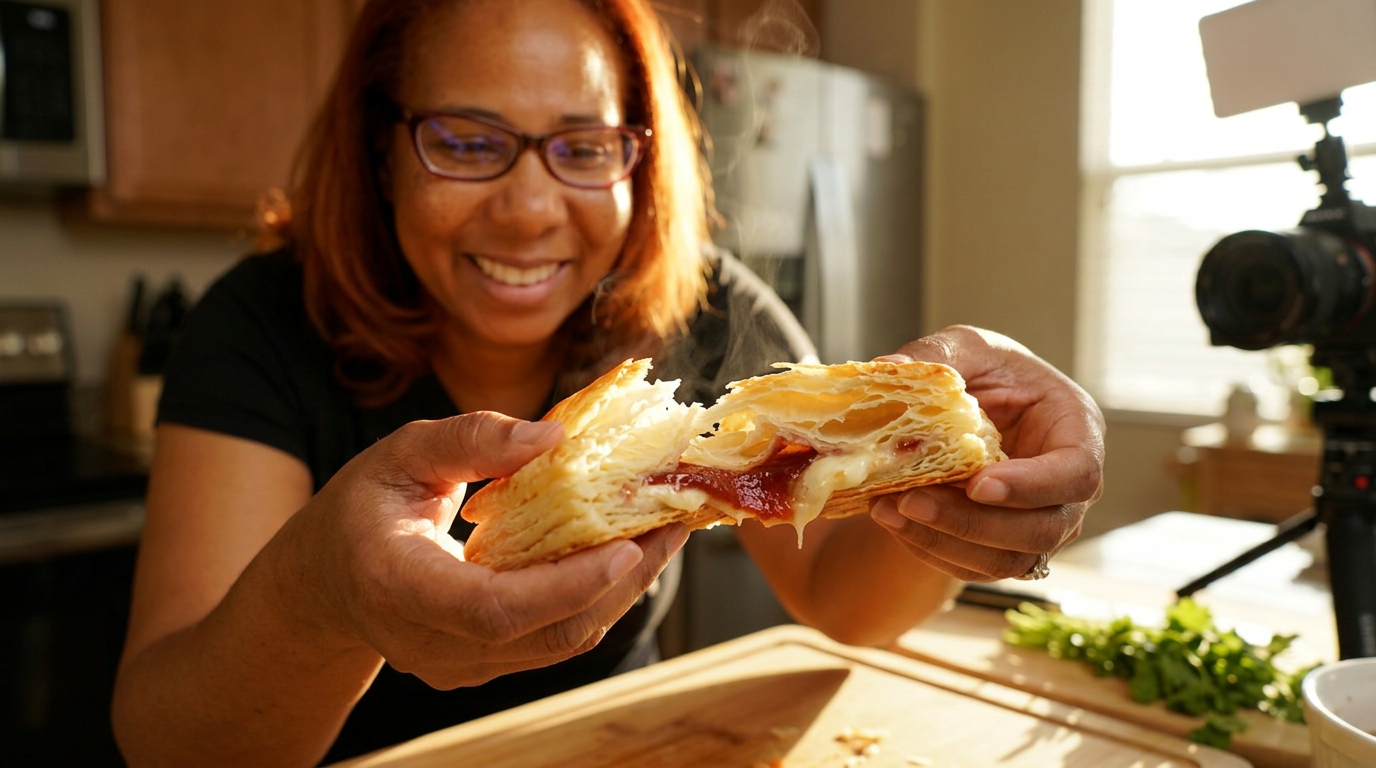
They say you shouldn't mess with a classic, especially when it comes to the flaky, sweet pastries Tony grew up eating at Miami and Orlando bakeries. But today, I'm attempting to make authentic Cuban pastelitos de guayaba from scratch—and my kitchen is already covered in flour.
Close-up of Tara's hands covered in flour, attempting to roll out a stubborn block of homemade puff pastry, looking directly at the camera with a nervous laugh.
It was a humid Tuesday afternoon here in Orlando, the kind of day where the air is so thick you can feel it the second you step outside onto the patio. Tony had been working a long shift, and I wanted to surprise him with something that tasted like his childhood. When he was growing up, his grandfather would buy a box of warm guava and cream cheese pastelitos every Saturday morning from a local bakery on Trail. The smell of that sweet, caramelized guava and the shatteringly crisp pastry is one of his favorite memories, and I wanted to see if I could recreate that magic right here in our kitchen.
Now, the easy way to do this is to buy a box of frozen puff pastry from Publix, thaw it out, slap some guava paste in the middle, and call it a day. And honestly, there is absolutely no shame in that game. But today was an experiment. I wanted to see if making a rough puff pastry from scratch—laminating the butter, doing the folds, and chilling it in our fridge—would make a difference you could actually taste. I wanted that deep, buttery flavor and those visible, delicate layers that shatter into a million crumbs when you take a bite.
The stakes were surprisingly high. I had never attempted a laminated dough in this Florida humidity before. Our kitchen AC works hard, but when it's ninety-five degrees outside, the counters get warm fast. If the butter melted into the flour instead of staying in distinct, cold sheets, I wouldn't get layers; I would just get a heavy, greasy biscuit. Armed with a block of high-fat European butter, a brick of sweet Cuban guava paste, and a prayer, I cleared off my island and got to work. I had exactly four hours before Tony's truck pulled into the driveway.
The process started with the butter. Traditional puff pastry requires wrapping a solid block of cold butter in dough and rolling it out, but I opted for a 'rough puff' method to save some time. I cut two sticks of unsalted butter into small cubes and tossed them into my flour with a pinch of salt. The trick here is to keep the butter pieces large—about the size of walnut halves. I splashed in some ice-cold water and used my hands to bring it together into a shaggy, messy mound. It didn't look like dough at all; it looked like a disaster.
I dumped the mess onto my counter, and that's when the panic set in. The dough was cracking, dry flour was flying everywhere, and the heat in the kitchen was rising. I realized my hands were warming up the butter too quickly. I had to pivot. I grabbed a rolling pin, forced the dough into a rough rectangle, and folded it like a business letter. This was fold number one. I wrapped it tightly in plastic wrap and shoved it into the freezer for fifteen minutes to stop the butter from melting. The counter was a disaster zone, covered in white dust and sticky butter smudges.
While the dough chilled, I prepared the star of the show: the filling. I used a traditional block of tropical guava paste—the kind that comes in a flat box. It's incredibly dense, almost like a solid jelly. I sliced it into thin rectangles and paired it with blocks of standard cream cheese. The contrast between the tart, tropical sweetness of the guava and the rich, tangy cream cheese is what makes these pastries so addictive. I set the slices aside on some parchment paper, wiping down my sticky cutting board.
By round three of rolling and folding the dough, I started to see the magic happen. Those messy chunks of butter had flattened out into long, visible ribbons running through the dough. This is what creates steam in the oven, pushing the layers of dough apart to create that airy crunch. I rolled the dough out one final time into two large, thin sheets. I cut them into even squares, placed a slice of cream cheese and a slice of guava in the center of each, and lightly brushed the edges with water to help them seal.
This is where I made my first real mistake. I got greedy. I stuffed a few of them with way too much guava paste, thinking more sweetness would be better. When I pressed the top sheet of pastry down and crimped the edges with a fork, I could already see the filling oozing out of the sides. I tried to patch them up, but I knew once they hit the hot oven, that sugar was going to liquefy. I brushed the tops with a simple egg wash to give them a golden sheen and slashed three little vents in the top of each to let steam escape.
I slid the baking sheet into a preheated oven at four hundred degrees. The recipe card said twenty-five minutes, but every oven is different, especially when you're dealing with homemade laminations. At the ten-minute mark, the kitchen started smelling like heaven—that caramelized, fruity scent mingled with rich, toasted butter. But when I peeked through the oven glass, my heart sank. Two of the overstuffed pastelitos had completely ruptured. A river of molten red guava paste was bubbling out onto the parchment paper, sizzling and turning black on the hot pan.
I had to make a quick decision. Do I pull them out early to save them from burning, or let the pastry finish baking so it isn't raw in the middle? I chose to let them ride. I carefully opened the oven door and used a metal spatula to scrape the escaping guava away from the pastries so it wouldn't burn the bottoms of the good ones. The smell of slightly scorched sugar filled the air, but the pastry itself was puffing up beautifully, rising into dozens of distinct, golden layers that looked incredibly flaky.
Mid-shot of Tara rolling dough, close-up of butter laminations, inserting guava paste, sliding tray into oven, and reaction to the bubbling spill.
While they cooled, I brushed the tops with a simple sugar syrup—a little trick I learned from a Cuban bakery owner that gives them that sticky, glossy finish. As the hot pastries cooled down, the syrup dried into a shiny, crackly glaze. Despite the blowout on those two overstuffed ones, the rest of the batch looked absolutely stunning. They were towering, golden-brown pillows of flaky pastry, and you could actually see the layers on the sides. The messy kitchen was entirely worth it.
Just as I was plating them up, I heard Tony's truck pull into the driveway. He walked through the door, sniffed the air, and his face instantly lit up. 'Did you make pastelitos?' he asked. I handed him one that was still warm. He took a bite, and the sound of the pastry shattering was music to my ears. Flakes of dough rained down onto his shirt. He closed his eyes and smiled, telling me it tasted exactly like the ones his grandfather used to buy him, only with a much richer, buttery crunch from the homemade dough.
If I make these again—and I definitely will—I'll be much more careful with the filling amounts. One slice of guava and one slice of cream cheese is more than enough; restraint is key here. I'd also make sure to chill the assembled pastries in the fridge for ten minutes before baking to help them hold their shape even better. But as an experiment, this was a massive success. It proved that even when things get messy and boil over in the kitchen, you can still end up with something absolutely beautiful.
Close-up of Tony taking a crunchy bite, crumbs falling, followed by a beautiful hero shot of the plated pastelitos resting on the kitchen island in the warm afternoon light.
Shot List
| Type | Description | Audio | Duration |
|---|---|---|---|
| Close-up | Flour throwing onto the kitchen counter in slow motion, backlit by warm afternoon Florida sun. | Ambient kitchen sounds, birds chirping outside. | 4s |
| Medium | Tara talking directly to the camera, explaining the surprise for Tony and the challenge of laminating dough in high humidity. | Tara: 'So today, we are tackling Tony's absolute favorite childhood memory...' | 12s |
| Overhead | Mixing the flour and large cubes of cold butter in a large glass bowl. | Spatula scraping the bowl, Tara explaining the rough puff method. | 8s |
| Close-up | Hands rolling out the cold, shaggy dough, showing the visible streaks of butter. | Soft rolling pin thuds against the wooden counter. | 6s |
| Detail | Slicing the dense, ruby-red guava paste brick and the block of cream cheese on a wooden cutting board. | Knife slicing cleanly through the thick paste. | 5s |
| Timelapse | Tara rolling, folding, wrapping, and placing dough in the freezer, showing the messy kitchen counter building up. | Upbeat, light acoustic guitar background music swells. | 10s |
| Close-up | Assembling the pastries: placing cream cheese and guava onto a dough square, then crimping the edges with a fork. | Tara: 'You want to seal these really well, or the guava will escape...' | 8s |
| B-roll | Brushing the egg wash onto the tops of the pastries and slicing three small vents in each with a sharp paring knife. | Subtle kitchen hum, knife slicing through pastry. | 5s |
| Medium | Tara opening the oven and sliding the baking sheet inside, looking hopeful. | Oven door squeak and heavy metal rack sliding into place. | 6s |
| Close-up | Inside the oven: the pastries puffing up beautifully, but one corner shows a bubbling red leak of guava paste sizzling on the pan. | Sizzling sounds of hot sugar on a metal pan. | 7s |
| Detail | Tara brushing the hot, freshly baked pastelitos with shiny simple syrup, making them glisten under the lights. | Sizzling hiss of syrup hitting the hot pastry surface. | 5s |
| Wide | Tony walking into the kitchen from the garage, smiling widely as he smells the air. | Tony: 'Oh my gosh, does it smell like bakery pastelitos in here?' | 6s |
| Close-up | Tony taking a big bite of a pastelito, creating a loud, satisfying crunching sound as pastry flakes fall. | Loud crunch of pastries. Tony: 'Wow. This is incredible, Tara.' | 8s |
| Detail | Hero shot of the complete batch of golden-brown, glistening pastelitos stacked beautifully on a ceramic plate. | Tara: 'Sometimes, the messiest experiments turn out to be the best ones.' | 6s |
- Capture a slow-motion shot of pastry flakes falling onto the counter when the pastry is cut or bitten into.
- Show the messy reality of the kitchen counter: flour handprints on the fridge handle, dirty bowls, and sticky guava paste spots.
- Get a direct close-up of the oven window as the pastry layers physically rise and separate during baking.
- Film the condensation on a glass of iced sweet tea sitting on the counter to emphasize the hot, humid Florida setting.
- 0:00 — Warm, acoustic indie-folk guitar intro, light and welcoming.
- 1:30 — Playful, slightly upbeat acoustic track as the flour and dough-rolling process begins.
- 3:45 — Slightly tense, quirky percussion-heavy music when the dough starts getting sticky and warm.
- 5:15 — Warm, jazzy Latin-inspired guitar track as the guava and cream cheese are sliced and assembled.
- 7:00 — Upbeat, cheerful kitchen background music as the pastries bake and rise in the oven.
- 8:30 — Soft, emotional acoustic guitar melody as Tony arrives and tastes the pastry, emphasizing home and memory.
- Keep the pacing fast and engaging during the dough rolling, using jump cuts to emphasize the repetitive motion.
- Use a subtle, satisfying 'crunch' sound effect enhancement when Tony bites into the pastry to highlight the flakiness.
- Display minimal, modern text overlays for the ingredient amounts as they are introduced, avoiding cluttered graphics.
- Color grade with warm, golden tones to reflect the sunny Orlando setting and the cozy, homey vibe of the channel.
| Call | Provider | Model | Input Tokens | Output Tokens | Compute / Credits |
|---|---|---|---|---|---|
| Script | abacus.ai | gemini-3.5-flash | 1,247 | 4,262 | — |
| Image 1 — The Humidity Challenge | abacus.ai | nano_banana2 | — | — | 6,754.025 |
| Image 2 — The Guava Slice Close-up | abacus.ai | nano_banana2 | — | — | 6,753.775 |
| Image 3 — The Perfect Crunch | abacus.ai | nano_banana2 | — | — | 6,753.7 |
I Tried Making Traditional Cuban Mojo Pork in a Slow Cooker (And Actually Made It Crispy)
I wanted that legendary, citrusy Cuban mojo pork flavor on a sticky Orlando Thursday, but without turning on my oven for four hours—so I put my slow cooker to the ultimate crispy-skin test.
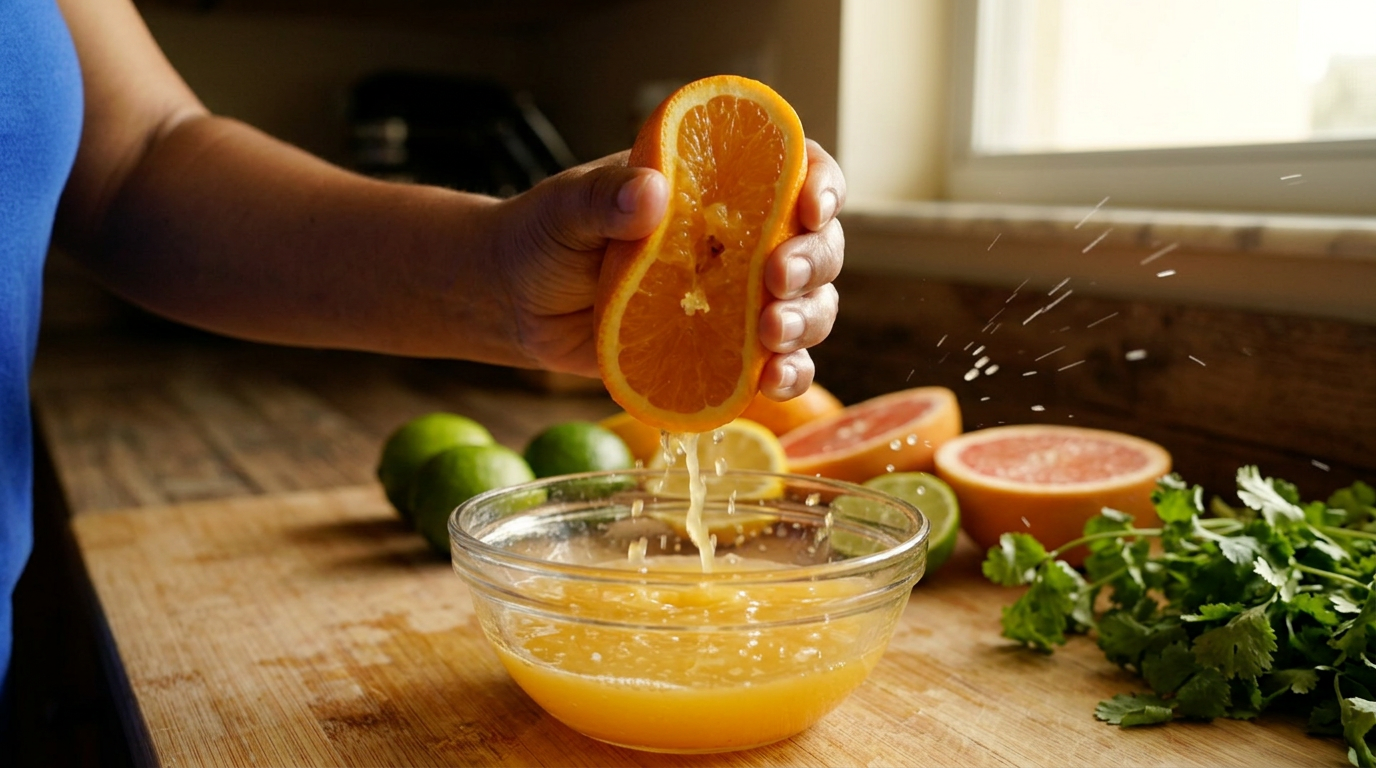
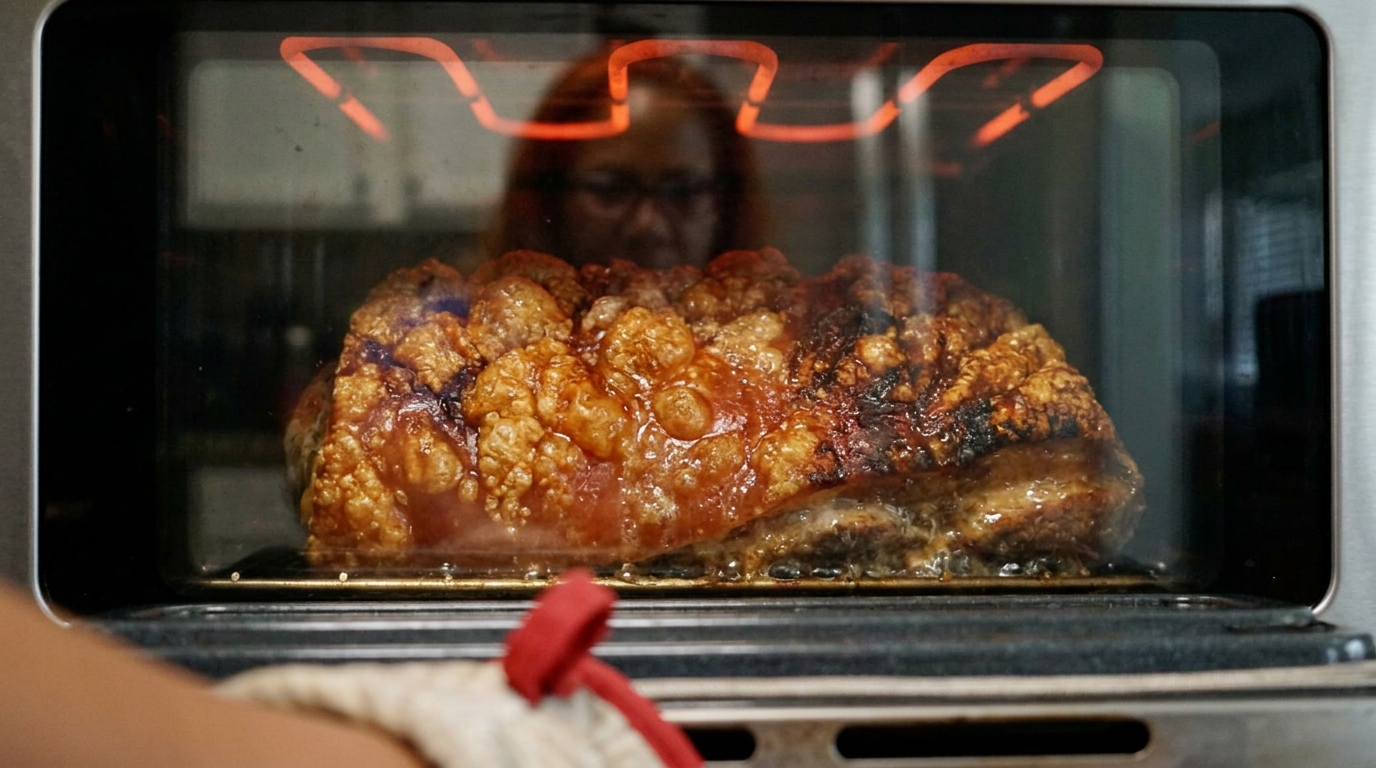
They say you can't get real, crispy, caramelized Cuban mojo pork out of a slow cooker. Today, I'm risking a beautiful eight-pound pork shoulder to prove them wrong.
Close-up of Tara's hands using two forks to shred steaming, ultra-tender pork on a large wooden cutting board, steam rising into the camera lens.
It was one of those August afternoons in Orlando where the humidity clings to your skin the second you step outside, and the sky looks like it’s bruised and ready to pour. Tony and I had been running errands all morning, and by the time we pulled into our driveway, the last thing I wanted to do was preheat our oven to four hundred degrees for a long, slow roast. But we had a serious craving for the bright, garlicky, citrus-heavy punch of a proper Cuban mojo pork.
Normally, my friend's abuela makes this by marinating a pork shoulder overnight in bitter orange juice and a mountain of garlic, then roasting it low and slow for six hours until the house smells like heaven and the skin shatters like glass. I had a beautiful, bone-in pork shoulder sitting in the fridge, but I also had a packed afternoon of editing and zoom calls. I needed a miracle, or at least a highly efficient countertop appliance.
So, I decided to run an experiment. Could I mimic that deep, slow-roasted flavor profile using my trusty, beat-up crockpot, and more importantly, could I find a way to get those coveted, crispy, caramelized edges without drying the meat out? Tony looked at me like I was slightly losing my mind when I pulled the slow cooker out of the pantry, but he also volunteered to peel the garlic, so I knew he was secretly on board.
The plan was simple but risky: make a high-intensity mojo marinade from scratch using fresh citrus, drown the pork in it for a high-heat crockpot bath, and then use a broiler-flip technique at the very end to mimic the roasted crust. If it worked, we’d have weeknight mojo pork tacos and bowls that tasted like they took two days of prep. If it failed, we’d have mushy, boiled-tasting pork and a very disappointed household.
I started by tackling the mojo marinade, which is the absolute heart and soul of this dish. Traditionally, you use sour oranges (naranjas agrias), but they can be incredibly hard to find at the local grocery store unless you catch them at a specialty market. My workaround—and it’s a trick I learned from a local food truck owner—is a mix of fresh orange juice, fresh lime juice, and a splash of grapefruit juice to mimic that distinct, bitter, floral tang. I squeezed four large oranges and three limes directly into a glass measuring cup, letting the bright, zesty aroma cut through the heavy kitchen air.
Next came the garlic. When I say garlic, I don't mean two or three cloves. I mean an entire head. Tony and I sat at the kitchen island, smashing cloves with the flat edge of my chef's knife, peeling away the paper skins until we had a mountain of cloves. I threw them into my food processor along with a heavy hand of dried oregano, ground cumin, a touch of onion powder, plenty of kosher salt, black pepper, and half a cup of good olive oil. I pulsed it until it formed a thick, fragrant paste that smelled so intensely garlicky it practically cleared my sinuses.
I grabbed the pork shoulder—about seven pounds of beautiful bone-in meat. To make sure the marinade actually penetrated the thick layers of fat, I took a small paring knife and stabbed deep pockets all over the roast. I stuffed some of that garlic-herb paste directly into the slits, then rubbed the rest of the paste all over the exterior, massaging it into every nook and cranny. I placed the pork fat-cap-side-up into the slow cooker insert, poured the citrus juice mixture around the base so it wouldn't wash off the rub, and tossed in a couple of bay leaves for good measure.
I popped the lid on, set the slow cooker to 'Low' for eight hours, and walked away. By hour four, the magic started happening. The sharp, raw scent of garlic and citrus began to mellow out, transforming into this rich, savory, mouth-watering aroma that drifted from the kitchen into my home office. Tony poked his head in around 3:00 PM just to say, 'Whatever is happening in there, it’s working.'
But at hour seven, the real test began. I lifted the lid, and while the meat was incredibly tender—practically falling off the bone—it looked, well, pale and wet. This is the classic slow cooker pitfall. It lacked that gorgeous, dark, caramelized crust that makes roasted pork so addictive. If I served it like this, it would just taste like shredded boiled meat in citrus soup. I had to pivot.
I carefully lifted the giant, tender pork shoulder out of the slow cooker using two large webbed spatulas. It was so tender it almost broke apart mid-air, but I managed to transfer it onto a foil-lined baking sheet. I set the remaining liquid in the slow cooker pot to simmer in a saucepan on the stove over medium-high heat, letting it reduce down into a concentrated, glossy, garlic-citrus glaze.
I took a pastry brush and painted a generous layer of that reduced pan dripping glaze all over the top fat cap of the pork. Then, I turned my oven's broiler on high. This was the make-or-break moment. I slid the baking sheet onto the top rack, directly under the glowing red heating elements. I didn't dare walk away; under a broiler, you have about a thirty-second window between perfect caramelization and a charred, smoky disaster.
I watched through the oven glass, my heart beating a little fast as the fat began to sizzle and spit. After about four minutes, the edges started to blacken beautifully, and the pork skin bubbled up into crispy, golden-brown pockets. The smell of caramelizing citrus sugar and toasted garlic was absolutely unbelievable. I pulled it out, and the crackle it made when I tapped it with a spoon was pure music.
Montage of squeezing citrus, smashing garlic, massaging the pork, placing it in the slow cooker, checking it hours later, transferring to a baking sheet, basting with reduced juices, and watching it brown under the broiler.
I let the pork rest for about fifteen minutes—an essential step to keep all those hard-earned juices inside the meat—before taking two forks to shred it. The meat literally fell away from the bone with zero resistance. It was incredibly juicy on the inside, dripping with that tangy, garlic-herb mojo, but every third bite had this amazing, crispy, caramelized crunch from the broiler finish. It was the absolute best of both worlds.
Tony and I piled the crispy shredded pork onto warm corn tortillas, topped them with a quick red onion pickle I had whipped up, some fresh cilantro, and a squeeze of lime. Tony took his first bite, closed his eyes, and just shook his head. 'Tara,' he said, 'if you told me this roasted in an oven all day, I would have believed you.' The citrus balance was spot on—sweet, sour, and deeply savory with that intense garlic backbone.
What started as a lazy-day experiment turned out to be one of the most rewarding recipes I’ve made all summer. It proved to me that you don't have to sweat over a hot stove or roast your house out in the Florida heat to get authentic, deep flavor. Next time, the only thing I'd change is making a double batch of the reduced glaze to jar up and keep in the fridge—it's that good. If you've got a slow cooker gathering dust in your pantry, this is your sign to dust it off and make some magic.
Medium shot of Tara and Tony sitting at their kitchen island, laughing, eating tacos, with a close-up of the perfectly plated crispy pork dish in the foreground.
Shot List
| Type | Description | Audio | Duration |
|---|---|---|---|
| Close-up | Shredding steaming pork shoulder on a rustic wooden board. | Ambient kitchen sizzle and the sound of tearing meat. | 5s |
| Medium | Tara standing in her Orlando kitchen, introducing the slow cooker experiment. | Tara: 'Today we are turning this giant pork shoulder into crispy Cuban mojo pork using a slow cooker.' | 12s |
| B-roll | Squeezing fresh oranges and limes into a glass measuring cup, juice splashing. | Upbeat, warm acoustic guitar music fades in. | 8s |
| Overhead | Tony and Tara smashing garlic cloves at the kitchen counter. | Tara: 'Tony's on garlic duty, which means we are using the whole head.' | 10s |
| Close-up | Blending the garlic, olive oil, and spices in a food processor into a thick paste. | Whirring of the food processor. | 6s |
| Detail | Tara's hands massaging the garlic paste into the slashed pork shoulder. | Tara: 'Make sure you get it deep into those pockets for maximum flavor.' | 12s |
| Medium | Lowering the heavy pork shoulder into the slow cooker insert. | Heavy thud and splash of citrus juice. | 8s |
| Timelapse | The slow cooker lid fogging up as the cooking process begins. | Soft, relaxing background transition music. | 6s |
| B-roll | Reducing the pan juices in a small saucepan on the stove, bubbling vigorously. | Loud bubbling and boiling sounds. | 8s |
| Close-up | Pork shoulder under the hot broiler, fat bubbling and turning dark brown. | Intense sizzling and crackling sound of the broiler. | 10s |
| Detail | Tapping the crispy, caramelized pork skin with a metal spoon. | Distinct, crunchy 'clack clack' sound of crisp skin. | 5s |
| Medium | Tara assembling a taco with shredded pork, pickled red onions, and cilantro. | Tara: 'Look at that contrast between the juicy meat and the crispy edges.' | 12s |
| Close-up | Tony taking a big bite of the taco, nodding aggressively in approval. | Tony: 'Oh my gosh, Tara. You actually did it.' | 10s |
| Wide | Tara and Tony sitting together at the counter, smiling and enjoying their meal. | Music swells to a warm, satisfying finish. | 10s |
- Capturing the exact crunch sound of the spoon hitting the broiled pork skin is crucial; use a shotgun mic close to the baking sheet.
- Show the physical condensation on the kitchen windows to emphasize the humid, rainy Orlando afternoon context.
- Do a slow, close gliding shot of the citrus juices mixing with the garlic paste in the measuring cup before pouring.
- Get a shot of the messy counter at the end—empty citrus skins, garlic papers, used knives—to keep the 'real kitchen' vibe alive.
- 0:00 — Warm, acoustic indie-folk acoustic guitar intro to establish the cozy home vibe.
- 1:15 — Bright, mid-tempo latin-jazz acoustic rhythm begins as citrus prep starts.
- 3:30 — Slower, relaxing ambient track as the slow cooker does its long 8-hour work.
- 5:45 — Slightly tense, upbeat percussion-driven track during the broiler section to build anticipation.
- 7:15 — Satisfying, joyful acoustic melody peaks as the crispy pork is revealed and tapped with a spoon.
- 9:00 — Warm, uplifting acoustic resolution music plays during the tasting and wrap-up.
- Keep the pacing brisk during the prep work, but slow down significantly during the sensory moments (shredding, crunching, tasting).
- Use clean, minimalist lower-third text overlays for the ingredient measurements as they are added to the bowl.
- Do not over-filter the audio; let the natural sounds of bubbling fat, chopping knives, and rain outside the window blend with the music.
- Add a subtle, playful sound effect (like a soft bell or pop) when 'The Crispy Test' succeeds on screen.
| Call | Provider | Model | Input Tokens | Output Tokens | Compute / Credits |
|---|---|---|---|---|---|
| Script | abacus.ai | gemini-3.5-flash | 1,247 | 4,072 | — |
| Image 1 — The Squeeze | abacus.ai | nano_banana2 | — | — | 6,786.9 |
| Image 3 — The Broiler Bubble | abacus.ai | nano_banana2 | — | — | 6,786.7 |
The Crispiest Air Fryer Chicken Thighs (No Oven, No Smoke!) | Cooking With Tara
I wanted shatter-crisp skin on a Tuesday without turning on the oven or heating up my humid Orlando kitchen.
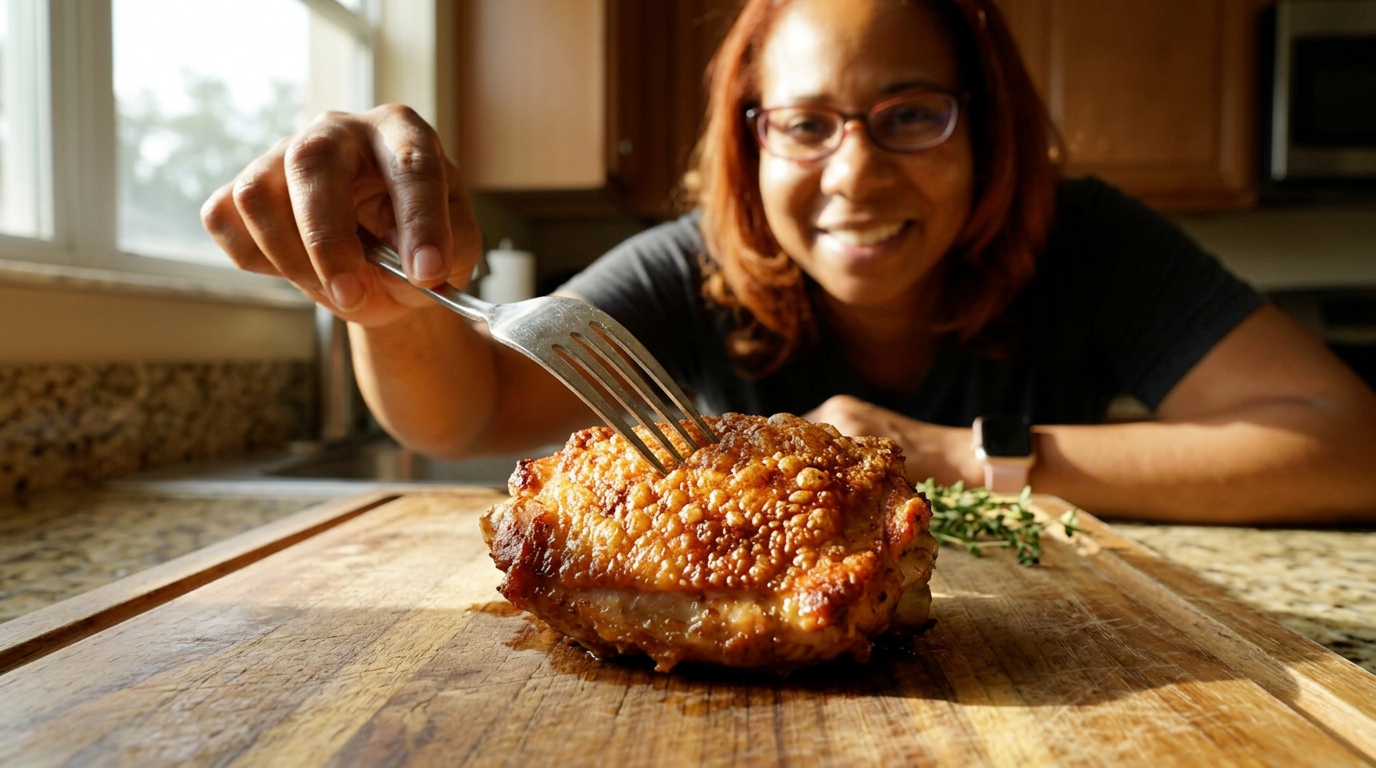
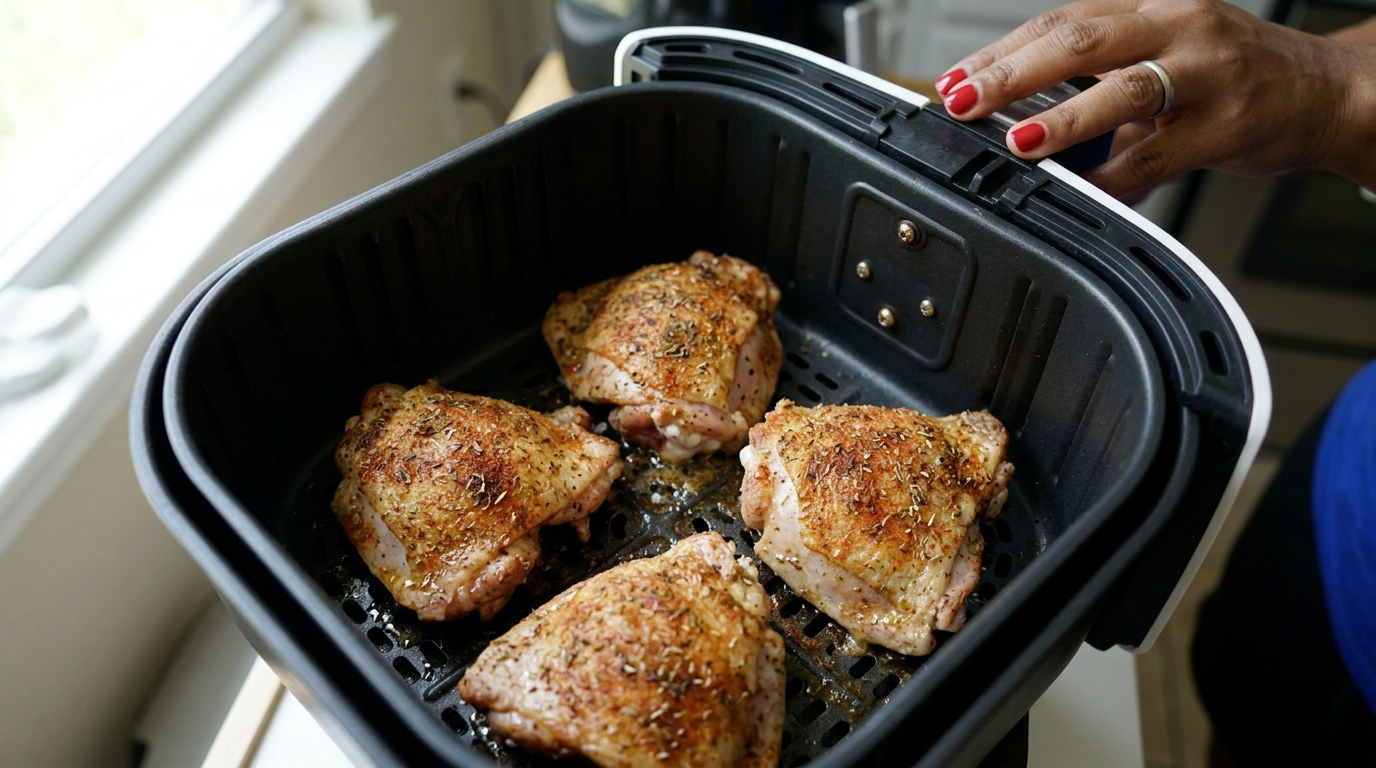
If you think you need a screaming hot cast-iron skillet and a house full of smoke to get perfectly crispy chicken thighs, I have some incredibly good news for you.
Extreme close-up of Tara tapping the crust of a golden-brown chicken thigh with a metal fork, producing a loud, distinct scraping sound of pure crispiness.
It was one of those typical Tuesday afternoons in Orlando where the humidity was sitting at about ninety percent, and the thought of preheating my big oven to four hundred and fifty degrees made me want to cry. Tony and I both wanted that deep, savory comfort of roasted chicken, but I wasn't about to turn our kitchen into a sauna. I needed a shortcut that didn't taste like one, which brought me straight to my countertop air fryer.
The stakes are surprisingly high with chicken thighs. If you cook them too fast, the skin stays rubbery and pale. If you cook them too slow, the meat dries out before the fat has a chance to render. I wanted that shatter-crust skin—the kind that makes a loud crunch when you bite into it—but I also wanted the meat underneath to stay incredibly juicy and tender. That meant figuring out the perfect balance of dry brining, fat rendering, and air circulation.
My plan was simple but precise. I started with four bone-in, skin-on chicken thighs. I knew the key to crispiness wasn't just heat; it was getting rid of moisture. So, I decided to do a quick fifteen-minute dry brine with kosher salt and a blend of spices right on the counter while the air fryer preheated. I also planned to use a secret weapon: a tiny dusting of baking powder. It reacts with the chicken's natural juices to create microscopic bubbles on the skin, which crisp up beautifully in the hot air flow.
I started by grabbing the chicken from the fridge and patting it dry with paper towels. When I say pat dry, I mean I went through about four paper towels until the skin felt completely matte. Any surface moisture is the absolute enemy of crispiness because it creates steam, and steam leads to soggy skin. I placed them on a wire rack over a baking sheet to let the air get all around them.
Next, I mixed up my spice rub. I kept it simple but punchy: kosher salt, freshly cracked black pepper, garlic powder, onion powder, smoked paprika for a hint of backyard grill flavor, and that crucial half-teaspoon of baking powder. I made sure not to use active baking soda by mistake—that would leave a terrible metallic taste. I sprinkled the rub evenly over both sides of the thighs, making sure to get under the skin folds where moisture likes to hide.
I let the seasoned chicken sit on the counter for about fifteen minutes. This is a crucial step because it allows the salt to draw out internal moisture, dissolve, and then get reabsorbed into the meat, seasoning it all the way to the bone. While that was happening, I plugged in the air fryer and preheated it to three hundred and eighty degrees. Preheating is non-negotiable here; you want that basket hot the second the chicken hits the grate.
Now came the moment of truth: placing the chicken in the basket. In a home kitchen, it's so tempting to crowd the pan, but I knew that if these thighs touched, the sides would steam instead of crisping. I arranged them skin-side down first. It felt counterintuitive, but starting skin-side down allows the fat to start rendering directly onto the hot grate, preventing sticking and laying the foundation for that crispy exterior.
I set the timer for twelve minutes. Around the eight-minute mark, the kitchen started smelling incredible—like a roadside chicken shack. I pulled the basket out to check them. They were sizzling beautifully, but the skin underneath was still a pale yellow. I slid them back in and let the timer run out.
At twelve minutes, it was time for the flip. I used silicone-tipped tongs to gently turn each thigh over. The skin was already starting to firm up, but it wasn't golden yet. Now, skin-side up, they went back in for another ten minutes at three hundred and eighty degrees. This is where the magic happens; the fat renders down, basting the meat, while the fan circulates the dry, hot air over the baking powder mixture.
With about three minutes left on the clock, I decided to bump the temperature up to four hundred degrees. This quick blast of high heat is my favorite trick to really puff up that skin and get it deeply browned. I watched through the air fryer window as tiny bubbles formed on the surface of the skin, popping and crisping up in real time.
When the timer finally beeped, I pulled the basket out. The sizzling sound was deafening. To make absolutely sure they were safe and perfect, I poked my instant-read digital thermometer into the thickest part of the largest thigh, making sure not to hit the bone. It registered one hundred and eighty-five degrees. While chicken breast dries out at that temp, dark meat thighs actually get more tender as the connective tissue melts, and this temperature guarantees the meat pulls away cleanly from the bone.
Overhead shots of the dry-brining process, close-ups of the spice rub being massaged into the skin, the satisfying sizzle as the chicken is placed in the preheated air fryer basket, and a timelapse of the skin browning through the air fryer window.
I transferred the chicken thighs to a clean cutting board and let them rest for a full five minutes. Resting is so hard when you're hungry, but it lets the juices redistribute back into the meat instead of rushing out onto the board the second you cut into it. I took my fork and ran the tines across the skin. It made this beautiful, dry, hollow scraping sound that told me we had achieved absolute crispy perfection.
Tony walked into the kitchen right as I was plating them up with a simple green salad and some sliced lemon. I cut a piece off for him, and the crunch was so loud he actually laughed. The meat inside was glistening and incredibly juicy, completely contrasting with the shatter-crisp exterior. There was no smoke in the house, my air conditioner wasn't struggling, and the cleanup was just washing one air fryer basket.
Next time, I might experiment with adding a little cayenne pepper to the rub for some heat, or maybe brushing on a quick honey-mustard glaze in the last two minutes of cooking. But honestly, this basic recipe is going straight into our weekly rotation. It’s proof that you don't need a massive mess or a hot kitchen to get restaurant-quality crispy chicken right at home.
Medium shot of Tara and Tony in their sunlit Orlando kitchen, sharing a bite of the chicken, smiling, with the beautifully plated dish in the foreground.
Shot List
| Type | Description | Audio | Duration |
|---|---|---|---|
| Close-up | A fork scrapes across the golden, bubbled skin of an air-fried chicken thigh, creating a loud scratch sound. | SFX: Loud, dry scraping crunch. | 4s |
| Medium | Tara stands in her bright Orlando kitchen, smiling warmly at the camera, holding a plate of raw chicken thighs. | Tara: 'Hey everyone, welcome back to the kitchen. Today, we are getting the ultimate crispy chicken without melting in this Florida heat.' | 8s |
| Overhead | Tara's hands drying the chicken thighs aggressively with plenty of paper towels. | Tara: 'Step one is non-negotiable: we have to get rid of every single drop of moisture on this skin.' | 10s |
| Detail | Spices and baking powder being mixed together in a small ceramic bowl. | Tara: 'This is my secret blend, featuring a tiny bit of baking powder. Trust me on this, it's chemistry.' | 7s |
| Close-up | Tara sprinkling the red-hued spice rub over the chicken thighs and rubbing it into the crevices. | Tara: 'Make sure you get it everywhere, especially under those little skin folds where steam likes to trap itself.' | 12s |
| B-roll | Tara pressing the buttons on her digital air fryer to preheat to 380 degrees. | Tara: 'We want this basket screaming hot before the chicken even touches it.' | 6s |
| Close-up | Tongs placing the chicken thighs skin-side down into the sizzling hot air fryer basket. | SFX: Immediate sharp sizzling sound as the chicken hits the metal. | 8s |
| Timelapse | Through the glass window of the air fryer, the chicken skin slowly changes from pale yellow to bubbling brown. | Music: Upbeat, warm acoustic guitar building up. | 12s |
| Close-up | The basket is pulled out at 12 minutes, and Tara flips the thighs over, exposing the partially rendered skin. | Tara: 'Looking good, but we need that skin facing up now to catch all that direct circulating heat.' | 10s |
| Close-up | An instant-read thermometer is inserted into the thickest part of the chicken, showing 185 degrees. | Tara: 'Perfect. One eighty-five. That means the meat is butter-tender, and the skin is finished.' | 8s |
| Medium | Tara transferring the hot chicken to a wooden cutting board to rest, steam gently rising. | Tara: 'Now comes the hardest part of the entire recipe: waiting five minutes for it to rest.' | 7s |
| Close-up | Tara cuts a slice of the chicken. The knife makes a loud crunch, and clear juices run out onto the board. | SFX: Clean, loud crunch of the crust breaking. | 6s |
| Medium | Tony steps into the frame, takes a bite from a fork held by Tara, closes his eyes, and nods enthusiastically. | Tony: 'Wow. That is incredibly crispy. It tastes like it was deep-fried!' | 10s |
| Wide | Tara plates the chicken next to a fresh salad, waving goodbye to the camera with a big smile. | Tara: 'No smoke, no heat, just perfect Tuesday chicken. See you next week!' | 8s |
- Capture the condensation on a cold glass of sweet tea on the counter to emphasize the Florida humidity.
- Get an extreme close-up of the baking powder being whisked into the red spices; show the texture difference.
- Record the audio of the air fryer fan running to create a sense of action and real-time cooking environment.
- Show the quick cleanup process—wiping down the simple air fryer basket—to emphasize the 'weeknight practical' angle.
- 0:00 — Upbeat, warm acoustic folk guitar starts, setting a cozy, inviting home-vlog tone.
- 2:15 — Music fades down slightly to a gentle, rhythmic background beat while Tara explains the baking powder science.
- 4:30 — A playful, lighthearted acoustic track kicks in as the chicken goes into the air fryer and the timer starts.
- 6:45 — Music transitions to a slightly faster tempo as the flip happens, building anticipation for the final result.
- 8:10 — Music stops completely for 3 seconds of pure, crisp sound design: the fork scrape and the knife cutting the skin.
- 8:15 — Warm, celebratory acoustic resolution track plays through the tasting with Tony and the final wrap-up.
- Keep the pacing brisk during the prep work, but slow down and let the camera linger on the sizzling sounds and textures.
- Use a clean, minimalist text overlay in the corner showing the temperature and timer countdowns (e.g., '380°F - 12 MINS').
- Boost the high frequencies in the audio track specifically during the 'crunch test' and cutting scenes to make the crispiness pop.
- Maintain a warm, slightly golden color grade to reflect the sunny, cozy Florida home atmosphere.
| Call | Provider | Model | Input Tokens | Output Tokens | Compute / Credits |
|---|---|---|---|---|---|
| Script | abacus.ai | gemini-3.5-flash | 1,239 | 4,023 | — |
| Image 1 — The Crunch Test | abacus.ai | nano_banana2 | — | — | 6,787.8 |
| Image 3 — The Sizzling Air Fryer Basket | abacus.ai | nano_banana2 | — | — | 6,787.55 |
The Lacy Edge Secret: Cast Iron Smash Burgers at Home
I pressed them thin, let the crust form, and refused to touch them until the edges went lacy.
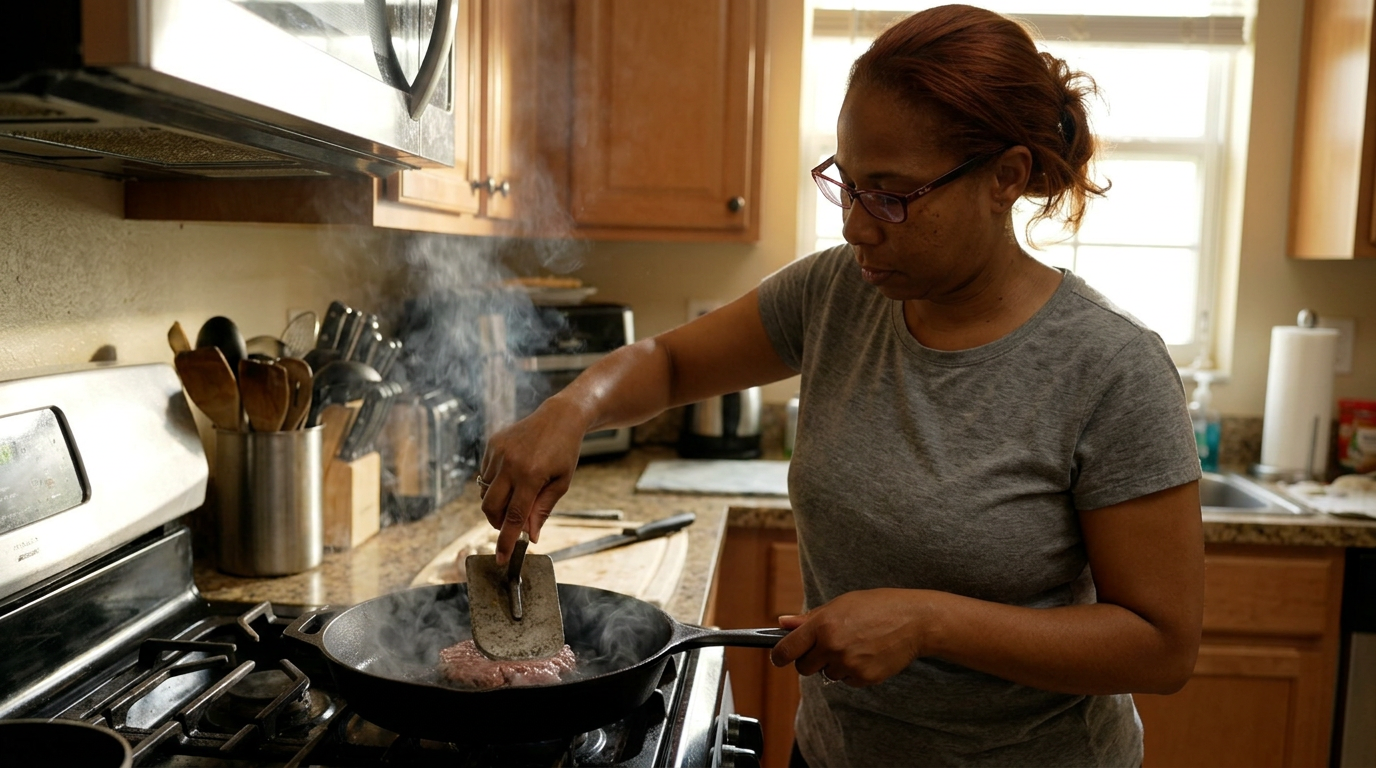
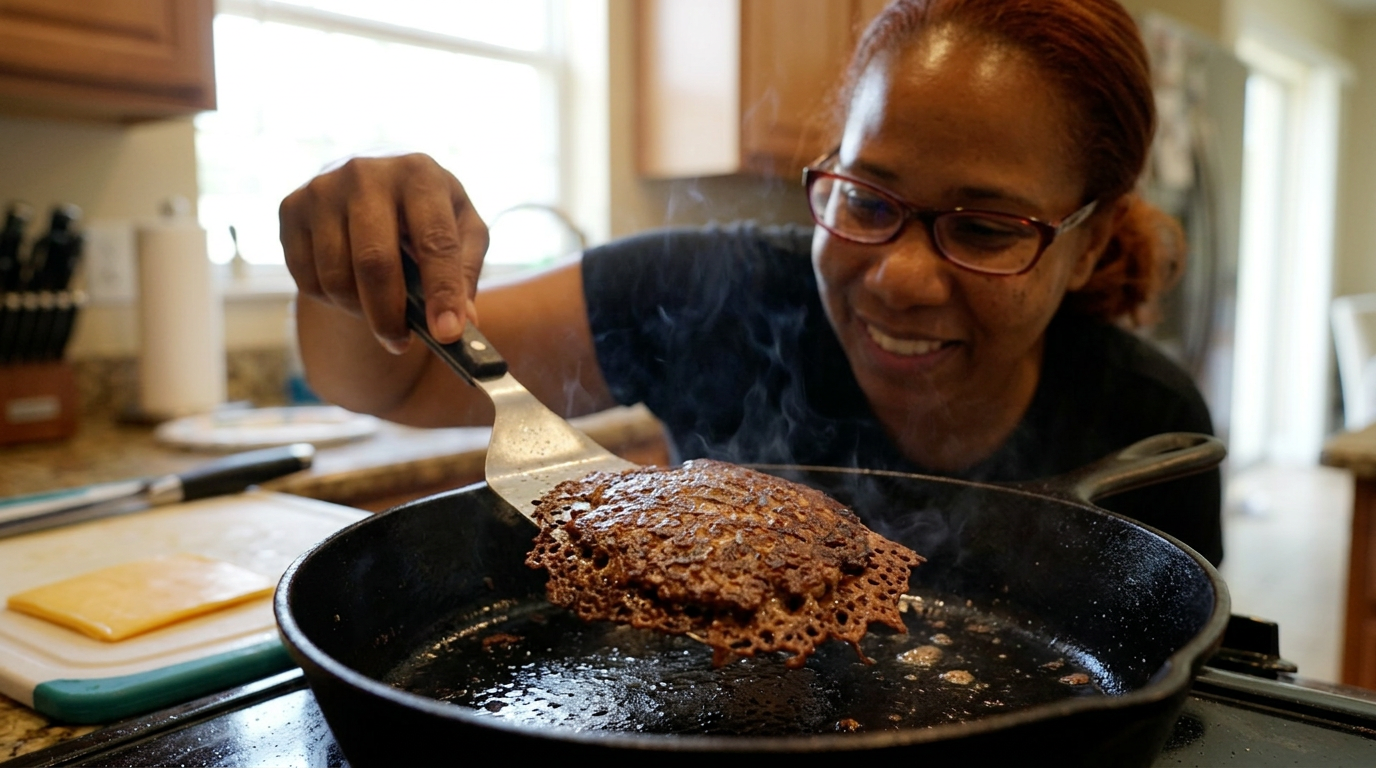
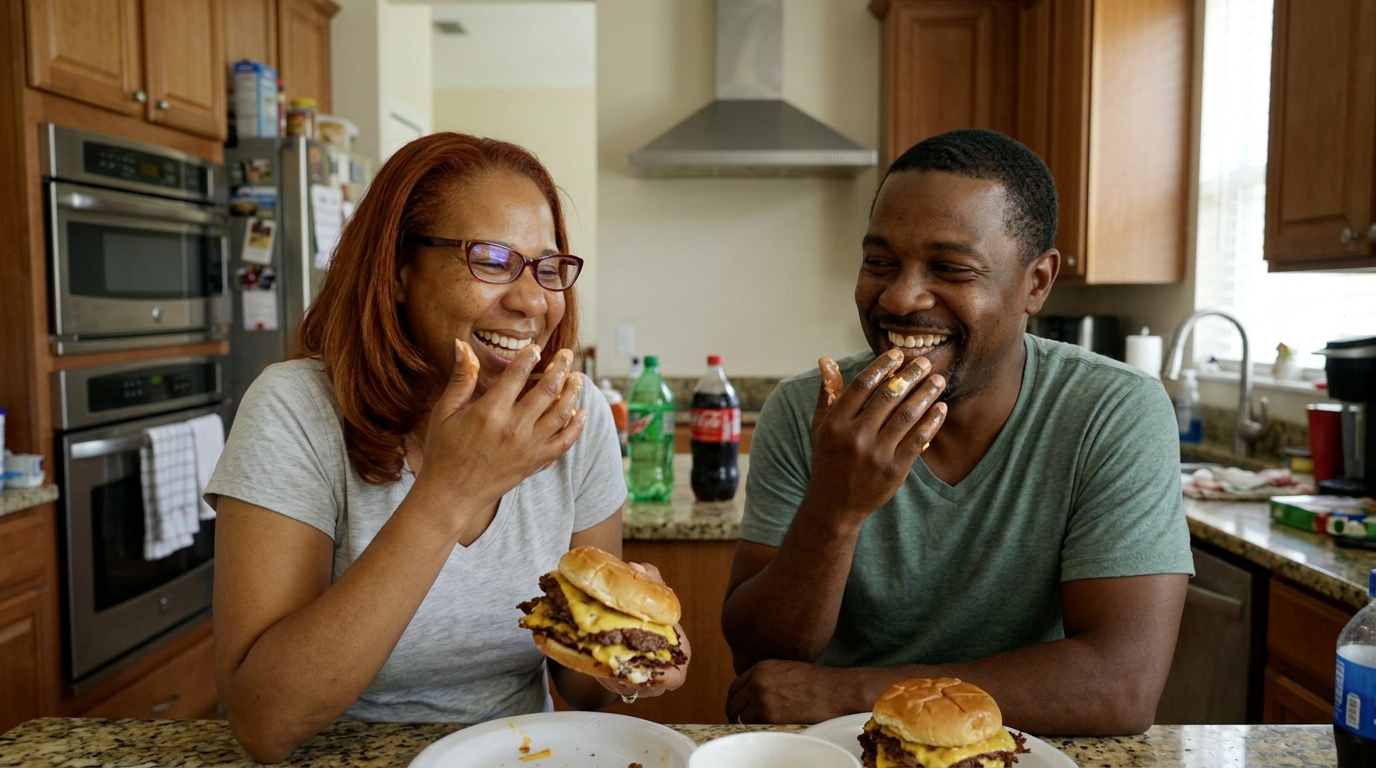
If you aren't scraping your burger off the cast iron with a paint scraper, you aren't doing it right. Today, we are chasing those crispy, lacy edges that make a smash burger legendary.
Extreme close-up of a metal spatula scraping under a sizzling, deeply caramelized beef patty with cheese melting over the sides. Steam billows up toward the lens.
It was one of those intensely humid Orlando afternoons where the air feels like a warm, wet blanket, and the thought of standing outside in front of a blazing propane grill made me want to hide in the pantry. Tony and I both had a craving for a greasy, salty, drive-thru style burger, but without the sad, soggy buns and the lukewarm fries. I wanted that specific diner magic: a patty so thin it's almost transparent in the middle, but with a deeply seasoned, shattered-crisp edge that snaps when you bite into it. I decided today was the day to bring the flat-top energy inside, right onto my heavy, well-seasoned lodge cast iron skillet.
The stakes were surprisingly high for such a simple meal. If you don't get the pan hot enough, the meat just boils in its own juices and turns a depressing shade of gray. If you don't press them hard enough, you just get a thick, regular burger that misses the entire point of a 'smash'. I only had one pound of ground beef in the fridge—a standard 80/20 chuck blend from Publix—which meant I only had four chances to get this right. No pressure, just my entire dinner plans hanging in the balance while Tony watched hungrily from the kitchen island.
My plan was survivalist-simple: high heat, zero oil in the pan (we want dry friction to create that crust), and a heavy-duty plaster trowel wrapped in foil because my regular kitchen spatula just doesn't have the leverage to smash a cold ball of beef into submission. I also needed to prep the buns and sauce beforehand because once the meat hits the metal, the whole game is over in less than four minutes. It is a high-speed culinary sprint, and there is absolutely no room for hesitation.
I started by shaping the beef. The secret here is not to work the meat at all. If you pack it into tight balls, it gets tough. I gently portioned the cold 80/20 chuck into four loose, three-ounce mounds. They looked more like rough snowballs than burger patties. I popped them back into the fridge to keep the fat solid; if that fat melts before it hits the hot iron, you lose all the moisture and the burger dry-fires. While those chilled, I turned my attention to the sauce. I whipped up a quick diner spread: mayonnaise, a spoonful of yellow mustard, sweet relish, a splash of pickle juice, garlic powder, and a pinch of smoked paprika. It’s tangy, sweet, and cuts right through the beef fat.
Next up was bun preparation, which is a non-negotiable step. You cannot put a hot, juicy smash burger on a cold, dry bun. I sliced some soft potato rolls, smeared them generously with room-temperature butter, and toasted them in a separate pan until they were golden brown and structurally sound. A toasted bun acts like an umbrella, keeping the juices from rendering the bread into mush. With the buns prepped and the sauce waiting, the kitchen was quiet. It was the calm before the smoke storm.
I turned my stove burner to medium-high and let my 12-inch cast iron skillet heat up dry for a full ten minutes. I knew it was ready when a single drop of water flicked onto the surface didn't just sizzle—it instantly vanished into steam. My heart rate went up a beat. I cracked open the kitchen window to handle the inevitable smoke and warned Tony to ignore the smoke detector if it started singing.
I placed two beef balls into the dry skillet. The sizzle was immediate and angry. Taking my foil-wrapped plaster trowel, I placed it directly over the first ball. Using both hands, I pressed down with everything I had. I leaned my entire upper body weight into it, holding the press for a full ten seconds. You have to commit. If you don't hold it down, the meat recoils and thickens back up. I repeated this with the second ball, flattening them until they were wider than the buns and incredibly thin.
This was the hardest part: the wait. I sprinkled them generously with coarse kosher salt and black pepper, and then I forced myself to put my hands in my pockets. The urge to check them, to lift them, to poke them is overwhelming, but you have to refuse to touch them. You need to let those juices rise to the top and watch the outer edges turn gray and start to curl up like delicate, lacy ruffles. This took about two minutes of intense, smoky waiting.
When I saw the edges turning a deep, dark brown and looking almost like lace trim, I knew it was time. I took my stiff metal spatula, kept it completely flat against the skillet, and scraped hard. You want to get under that crust, not slice through it. With a quick, confident flick, I flipped them over. The crust was beautiful—a solid, mahogany-colored mosaic of caramelized beef.
Immediately after the flip, I slapped a slice of American cheese onto each patty. American cheese is the only correct choice here because of how beautifully it melts into a glossy, velvety blanket. I threw a tablespoon of water into the corner of the skillet and popped a metal dome lid over the burgers. The steam trapped inside melted the cheese instantly, wrapping around the lacy edges in less than thirty seconds.
I lifted the dome, and the sight was beautiful. The cheese had draped perfectly over the crispy, dark brown edges of the meat. I stacked one patty on top of the other, forming a double decker of pure diner joy, and lifted them out of the pan. The bottom of the skillet was layered with browned bits, but the burgers held together beautifully. I repeated the process with the remaining two patties, feeling much more confident now that the first run was a success.
Handheld shots following the action: close-up of hands pressing the trowel, the steam rising, the scraping sound, and the cheese melting under the dome.
I assembled the burgers on the toasted potato rolls, spreading a generous amount of the special sauce on both the top and bottom buns, followed by a few crisp pickle chips. I carried the plate over to the kitchen island where Tony was already waiting with two cold sodas. The first bite was incredibly loud; you could actually hear the crunch of those lacy edges over the soft cushion of the potato bun. The contrast of the crispy, salty crust with the gooey cheese and tangy sauce was absolutely perfect.
Looking back, the key to the whole operation was patience and pressure. If I hadn't pressed them thin enough, or if I had panicked and flipped them too early, we would have ended up with basic, greasy diner burgers instead of these crispy masterpieces. Next time, I think I'll try adding some paper-thin shaved onions directly onto the raw side of the beef before smashing them down, letting the onions caramelize right into the meat.
This meal proved that you don't need an outdoor griddle or a fancy setup to make a world-class burger. All it takes is a hot piece of cast iron, a little bit of leverage, and the discipline to let the heat do its job. It was messy, our kitchen smelled like a diner for the next three hours, and it was worth every single bite.
Medium shot of Tara and Tony sitting at the kitchen island, laughing, taking huge messy bites of their burgers, with juice running down their fingers.
Shot List
| Type | Description | Audio | Duration |
|---|---|---|---|
| Close-up | A close-up of Tara's hands shaping cold ground beef into loose, rustic balls on a clean wooden cutting board. | Tara (VO): 'It all starts with the prep. Loose, cold, three-ounce portions of 80/20 ground chuck.' | 5s |
| Medium | Tara in her home kitchen, speaking directly to the camera, gesturing to her prep station. | Tara: 'Today we are making smash burgers, but not just any burgers—we are going for those ultra-crispy, diner-style lacy edges.' | 8s |
| Overhead | Overhead shot of Tara mixing mayonnaise, mustard, relish, and spices in a small ceramic bowl. | Tara (VO): 'Before the heat is on, we build our sauce. Mayonnaise, mustard, relish, and a little pickle juice.' | 6s |
| Close-up | Spreading softened butter onto potato buns and placing them face down in a skillet. | Tara (VO): 'And don't skip the buns. A generous swipe of butter and a quick toast prepares them for the main event.' | 7s |
| Detail | The toasted potato buns being lifted out of the pan, showing a perfectly even golden-brown surface. | Tara (VO): 'Look at that beautiful toasted color. That creates our barrier against the juices.' | 5s |
| Medium | Tara checking her cast iron skillet, waving her hand slightly above the surface to feel the heat. | Tara: 'My cast iron has been heating dry for ten minutes. It’s hot, empty, and ready to transform this beef.' | 6s |
| Close-up | Two cold beef balls dropped onto the smoking cast iron skillet, instantly sizzling. | Tara (VO): 'No oil in the pan. The cold meat hits the dry, screaming hot iron.' | 4s |
| Detail | Tara using a metal trowel to smash a beef ball completely flat. She uses her body weight to press hard. | Tara (VO): 'And now, we smash. Press firm, hold it for ten seconds, and don't let it shrink back.' | 8s |
| Close-up | Kosher salt and black pepper raining down onto the flattened, cooking beef patties. | Tara (VO): 'A heavy hand of salt and pepper. This is our only chance to season the meat.' | 5s |
| Timelapse | The outer edges of the beef patties turning brown, bubbling, and forming delicate, lacy structures. | Tara (VO): 'We wait. Watch the edges; they curl, darken, and turn into crisp lace. Do not touch them yet.' | 10s |
| Close-up | Tara scraping underneath a patty with a metal spatula and flipping it over to reveal a deeply caramelized crust. | Tara (VO): 'Scrape hard, flip fast. That crust is absolute perfection.' | 6s |
| Detail | American cheese slices placed on top of the flipped patties, with water squirted nearby and a dome lid covering them. | Tara (VO): 'Cheese on, a splash of water, and cover. We want that instant melt.' | 6s |
| Close-up | Lifting the dome to reveal fully melted, glossy cheese dripping over the lacy edges of the stacked patties. | Tara (VO): 'That is exactly what we were chasing. Stack them up, and let's assemble.' | 7s |
| B-roll | The burger being constructed on a rustic plate: bottom bun, sauce, double patty stack, pickles, sauce, top bun. | Tara (VO): 'Plated up with plenty of sauce and pickles. Simple, classic, and incredibly fast.' | 8s |
| Medium | Tara and Tony sitting together at the kitchen counter, taking big bites of the burgers and smiling. | Tony: 'Wow, the crunch on the edge of this is incredible!' Tara: 'Told you! Cast iron wins every single time.' | 10s |
- Capture the high-speed sizzling audio of the meat hitting the hot dry skillet to use as sound design layers.
- Film the steam release when the metal dome is lifted to add a dramatic visual peak to the cooking process.
- Get close-ups of the butter bubbling on the potato buns to emphasize the texture contrasts of the finished meal.
- Show the physical effort of scraping the cast iron to emphasize the crust release and the importance of a sturdy spatula.
- 0:00 — Upbeat, acoustic indie-pop guitar theme starts, establishing a warm, homey, and energetic kitchen vibe.
- 1:30 — Music transitions to a slightly slower, rhythmic groove during the sauce prep and bun-toasting sequence.
- 3:45 — The beat drops out, leaving a low, tense bass hum as the skillet heats up and the meat is prepared for cooking.
- 4:30 — A driving, fast-paced percussion track enters as the burgers hit the pan and the smashing begins, highlighting the high-energy cook.
- 6:15 — Music shifts back to a light, victorious acoustic melody as the cheese melts and the burgers are stacked.
- 8:00 — Warm, cozy acoustic guitar resumes for the plating, tasting, and casual celebration at the kitchen island.
- Keep the pacing snappy and fast during the actual cooking phase to match the quick, high-heat nature of smash burgers.
- Use a subtle text overlay on screen showing the 'Lacy Edge' criteria: High Heat, Heavy Smash, and No Touching.
- Boost the natural sound effects (the sizzle, the scrape, the crunch of the toasted bun) to create an appetizing ASMR effect.
- Keep color grading warm, natural, and bright to highlight the rich browns of the beef crust and the yellow of the melted cheese.
| Call | Provider | Model | Input Tokens | Output Tokens | Compute / Credits |
|---|---|---|---|---|---|
| Script | abacus.ai | gemini-3.5-flash | 1,238 | 4,423 | — |
| Image 1 — The Ultimate Smash | abacus.ai | nano_banana2 | — | — | 6,789.15 |
| Image 2 — The Lacy Reveal | abacus.ai | nano_banana2 | — | — | 6,787.85 |
| Image 3 — The First Bite | abacus.ai | nano_banana2 | — | — | 6,788.4 |
Why I Turn Off the Stove Way Before You Think: The 90-Second Garlic Butter Shrimp Scampi
The hardest part of making restaurant-quality shrimp scampi at home isn't the garlic or the wine—it's having the courage to turn off the flame after ninety seconds.
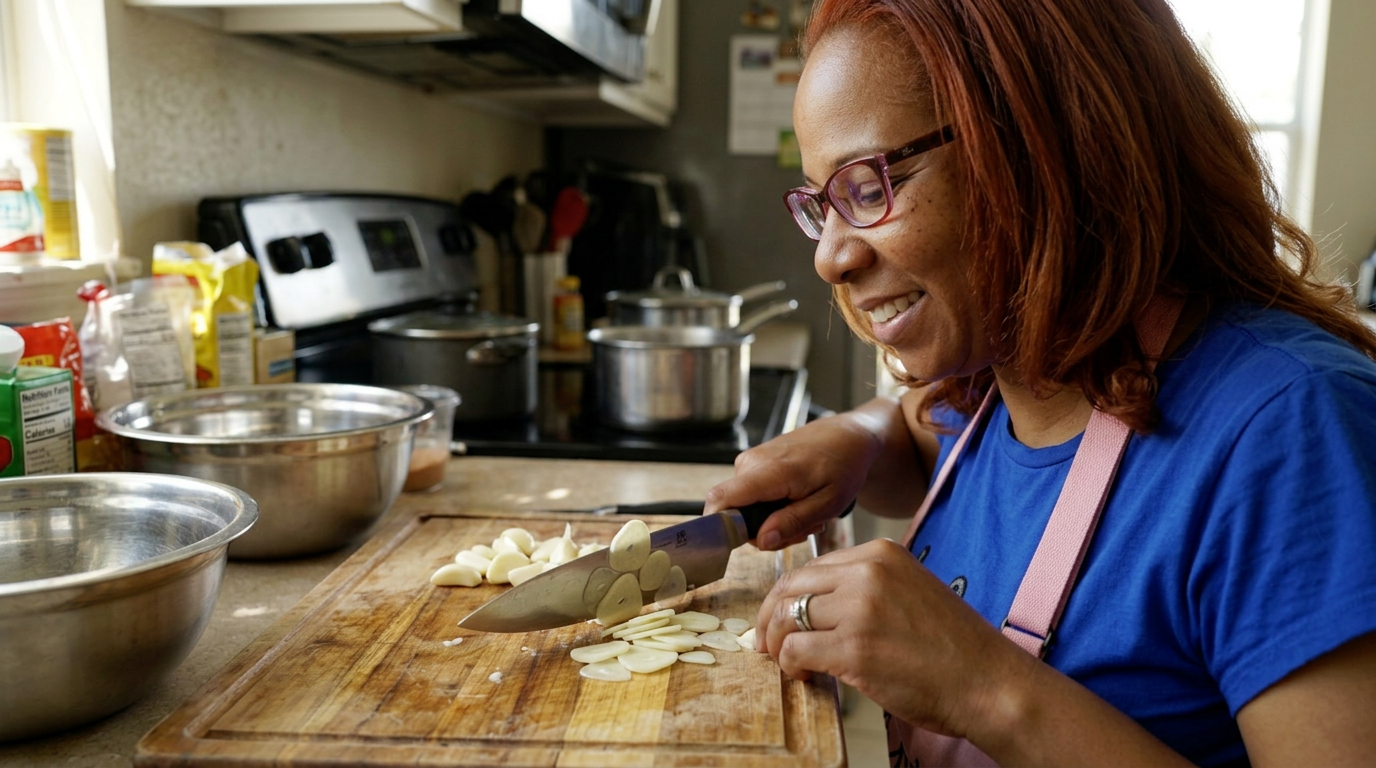
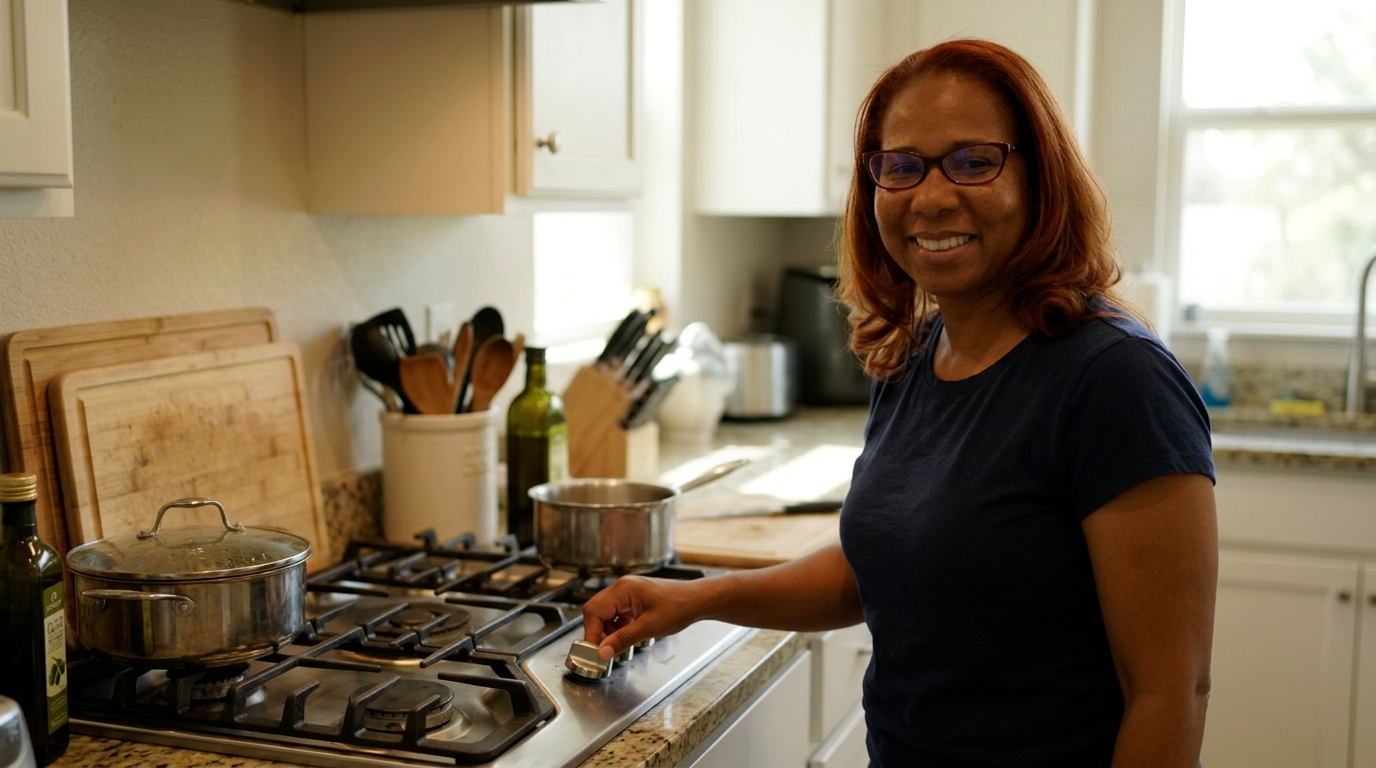
If your shrimp looks like a tight, curled-up letter 'O' when it's done, you've already lost the battle. Today, I'm showing you why ninety seconds is all it takes to get the juiciest grease-slicked garlic butter shrimp of your life.
Extreme close-up of a hot cast-iron skillet. Pink shrimp are instantly sizzling in bubbling, foaming garlic butter, releasing a burst of steam. Tara's hand tosses them once, then immediately shuts off the blue flame of the gas stove.
It was one of those typical Tuesday afternoons in Orlando where the humidity felt like a wet blanket and the sky was threatening its usual 4:00 PM torrential downpour. I had just gotten back from the Publix down the road with a pound of wild-caught Gulf shrimp, and my husband Tony was already working late in his home office, probably surviving on cold coffee. I wanted something fast, but I also wanted that deeply comforting, fancy-restaurant feeling you get when a plate of garlic butter pasta arrives at your table still bubbling.
The trouble with shrimp scampi is that it is incredibly easy to ruin. We have all eaten those rubbery, bouncy little shrimp that taste like eraser heads because they spent five minutes too long in a hot pan. Shrimp cooks at lightning speed, especially down here in the South where we like our seafood tender and sweet. The stakes were high because I was starving, Tony was tired, and I only had one pound of these beautiful, expensive wild shrimp. There was absolutely no room for error.
My plan was simple but required absolute discipline: I was going to prep every single ingredient beforehand—what the French call mise en place—because once the shrimp hit that pan, there would be no time to chop garlic or squeeze lemons. I was going to cook these shrimp for exactly ninety seconds, shut the heat completely off, and let the residual warmth of the heavy pan carry them across the finish line while I tossed in cold butter to create a glossy, emulsified sauce. It sounds easy, but standing over a hot stove and choosing to turn it off when the food still looks slightly underdone goes against every human cooking instinct.
I started by getting my water boiling for a half-pound of linguine. While that heated up, I peeled and deveined the shrimp. I left the tails on because they hold so much sweet flavor and make the final plate look gorgeous, but I patted them completely dry with paper towels. If your shrimp are wet when they hit the pan, they will steam instead of sear, and you will lose that beautiful golden crust. I tossed them in a bowl with a pinch of kosher salt and a tiny pinch of baking soda—a little trick I learned that keeps the shrimp incredibly plump and snappy.
Next came the garlic prep. For scampi, you cannot use a jar of pre-minced garlic; it tastes bitter and metallic. You need the real stuff. I took six plump cloves from a head of fresh garlic and sliced them paper-thin. I wanted garlic slices, not a fine mince, because minced garlic burns in a heartbeat, whereas thin slices brown gently, infusing the olive oil with a sweet, toasted aroma that doesn't turn bitter.
With the pasta bubbling away in its salted water, I heated a large, heavy skillet over medium-high heat. I added two tablespoons of good extra virgin olive oil and a single tablespoon of unsalted butter. The oil raises the smoke point so the butter doesn't burn, but you still get that rich butter flavor right from the start. The moment the butter stopped foaming, I laid the shrimp down in a single, flat layer. They instantly hissed, a beautiful, high-pitched sizzle.
This was the moment of truth. I set a timer on my phone for ninety seconds. I didn't touch them for the first forty-five seconds. I just watched the gray edges turn a delicate, translucent pink, creeping up the sides of each shrimp. At the forty-five-second mark, I flipped them over. They had this gorgeous, light golden-brown crust on the underside. I immediately scattered the sliced garlic and a heavy pinch of red pepper flakes into the gaps between the shrimp.
The kitchen instantly smelled unbelievable—that warm, sweet, sharp aroma of garlic meeting hot fat. With thirty seconds left on the timer, I poured in a quarter-cup of dry white wine. It hissed violently, releasing a cloud of fragrant steam that made my eyes water in the best way possible. I swirled the pan, letting the wine scrape up all those delicious brown bits stuck to the bottom.
Beep, beep, beep. Ninety seconds. The shrimp still looked slightly translucent in the very center. Every fiber of my being wanted to leave the heat on for just one more minute. But I forced myself to reach down and click the burner to off. The pan was still screaming hot, bubbling furiously.
With the heat off, I immediately dropped in three tablespoons of cold, cubed butter and the juice of half a fresh lemon. I began swirling the pan vigorously. This is where the magic happens. Because the heat is off, the cold butter doesn't melt into a greasy puddle; instead, it emulsifies with the wine and shrimp juices, creating a thick, creamy, glossy sauce that clings to everything.
I dragged the linguine straight from the pot into the skillet using tongs, bringing a little bit of that starchy pasta water along with it. I tossed everything together with a massive handful of chopped fresh flat-leaf parsley from my backyard garden. The residual heat cooked the shrimp to absolute perfection in those extra thirty seconds of tossing, turning them a perfect, gentle 'C' shape—never an 'O'.
Handheld, dynamic shots tracking the fast action. Close-ups of the garlic being sliced, the vigorous swirling of the skillet, the steam rising as the white wine hits the pan, and the glossy sauce coats the pasta.
I swirled the pasta into two wide bowls, nesting the plump, glossy shrimp right on top and drizzling every last drop of that golden garlic butter sauce over the noodles. Tony walked out of his office right as I was setting the bowls down, drawn in by the smell of toasted garlic and lemon that had drifted down the hallway. He took one bite of a shrimp, closed his eyes, and said, 'Tara, this is better than the coast.'
He was right. The shrimp were so incredibly juicy—they practically popped when you bit into them, with none of that dry, stringy texture you get from overcooking. The sauce was bright, velvety, and carried just enough heat from the red pepper flakes to keep things interesting. It was proof that sometimes, the best thing you can do for a dish is to step back and let the physics of a hot pan do the work for you.
Next time, I might add a few fresh cherry tomatoes from the garden right at the end to burst into the sauce, but honestly, this classic version is hard to beat. It's a reminder that cooking isn't about fussing over a flame for hours; it's about timing, prep, and having the confidence to trust your ingredients. Now, if you'll excuse us, we have some crusty bread to dip into this leftover garlic butter before the storm starts.
Medium shot of Tara and Tony sitting at their dining table, laughing and eating. Camera zooms in slowly on a fork twisting pasta dripping with glossy butter sauce, ending on a clean, empty bowl with bread wiping up the last drop.
Shot List
| Type | Description | Audio | Duration |
|---|---|---|---|
| Close-up | A close-up of Tara's hands patting raw shrimp dry with a paper towel on a wooden cutting board. | TARA: 'The secret to a great sear is dry shrimp. If they are wet, they steam.' | 5s |
| Detail | Measuring out a tiny pinch of baking soda and sprinkling it over the shrimp bowl. | TARA: 'A tiny pinch of baking soda keeps them incredibly plump and snappy.' | 4s |
| Medium | Tara slicing garlic cloves paper-thin with a sharp chef's knife, smiling at the camera. | TARA: 'Do not use jarred garlic. Slice it thin so it sweetens without burning.' | 6s |
| B-roll | Steam rising from a pot of boiling pasta, with the camera catching the humid Florida afternoon light outside the kitchen window. | TARA: 'Linguine is my go-to, but angel hair or spaghetti works beautifully too.' | 5s |
| Overhead | Olive oil and a pat of butter melting and bubbling in a preheated cast-iron skillet. | TARA: 'Wait for the butter foam to subside. That is your cue to drop the shrimp.' | 5s |
| Close-up | Shrimp hitting the hot skillet, sizzle sound effect peaks, turning pink at the edges. | [Loud sizzling sound of shrimp searing in hot fat] | 5s |
| Detail | A digital timer on Tara's phone ticking down from 1 minute 30 seconds. | TARA: 'Ninety seconds. That is all the heat they get. Trust the process.' | 4s |
| B-roll | White wine splashing into the hot pan, creating a massive cloud of steam. | TARA: 'Deglaze with a dry white wine. If you do not cook with wine, chicken stock works.' | 6s |
| Medium | Tara turning off the burner dial with a decisive click, looking directly at the camera with a playful grin. | TARA: 'Heat is off. This is where your cooking instincts will try to lie to you.' | 5s |
| Close-up | Dropping cold, cubed butter into the hot, off-the-heat pan and swirling it into a creamy sauce. | TARA: 'Cold butter emulsifies with the wine to make a velvety restaurant sauce.' | 7s |
| Overhead | Tongs dragging hot pasta directly from the boiling pot into the shrimp skillet, tossing with parsley. | TARA: 'Bring some of that starchy pasta water along to bind the sauce.' | 6s |
| Detail | Tossing chopped green parsley over the hot pasta, colors popping against the golden butter. | TARA: 'Fresh parsley from the backyard adds that clean, bright finish.' | 4s |
| Close-up | Plating the pasta into a wide ceramic bowl, piling the perfectly curled shrimp on top. | TARA: 'Look at that glaze. Not greasy, just pure garlic-butter heaven.' | 6s |
| Medium | Tony taking a bite, nodding enthusiastically as Tara watches expectantly from across the table. | TONY: 'Oh wow, Tara. They are so juicy. You absolutely nailed the cook on these.' | 8s |
- Capture the dramatic 'hiss' sound of the white wine hitting the hot pan by placing the microphone close to the stove (safely shielded from splatters).
- Film a slow-motion shot of the cold butter cubes melting and swirling into the pan to visually explain the emulsification process.
- Show the reality of home cooking by capturing the steam fogging up the camera lens slightly when draining the pasta.
- Get close-ups of the shrimp's texture before and after cooking to show the transition from translucent gray to opaque pink.
- 0:00 — Upbeat, acoustic indie-folk music starts, setting a warm, cozy afternoon home-vlog tone.
- 1:30 — Music transitions to a slightly faster, playful acoustic guitar rhythm as the prep work begins.
- 4:15 — Music drops to a low, rhythmic bass beat to build light tension as the 90-second cooking timer starts.
- 5:45 — Music swells with a warm, triumphant acoustic melody as the wine is added and the heat is shut off.
- 7:30 — Soft, relaxing jazz-pop acoustic guitar plays during the plating and final presentation of the dish.
- 9:15 — Warm, fading acoustic strums play as Tara and Tony eat, tapering off gently to the end screen.
- Maintain a fast, snappy editing pace during the 90-second cook sequence to match the urgency of the timing.
- Use a subtle on-screen graphic timer in the corner of the screen during the cooking phase to emphasize the strict 90-second rule.
- Apply warm, sunny color grading to reflect the cozy, tropical kitchen atmosphere of an Orlando afternoon.
- Amplify the natural ASMR cooking sounds (crunch of garlic, sizzle of shrimp, splash of wine) over the background music.
| Call | Provider | Model | Input Tokens | Output Tokens | Compute / Credits |
|---|---|---|---|---|---|
| Script | abacus.ai | gemini-3.5-flash | 1,232 | 4,336 | — |
| Image 2 — The Garlic Prep | abacus.ai | nano_banana2 | — | — | 6,787.45 |
| Image 3 — The Moment of Trust | abacus.ai | nano_banana2 | — | — | 6,787.8 |
I Ruined Cacio e Pepe 3 Times So You Don't Have To | The Clump-Free Method
After three sticky, clumpy, heartbreaking failures, I finally mastered the science of a perfectly glossy, emulsion-rich cacio e pepe in my own kitchen.
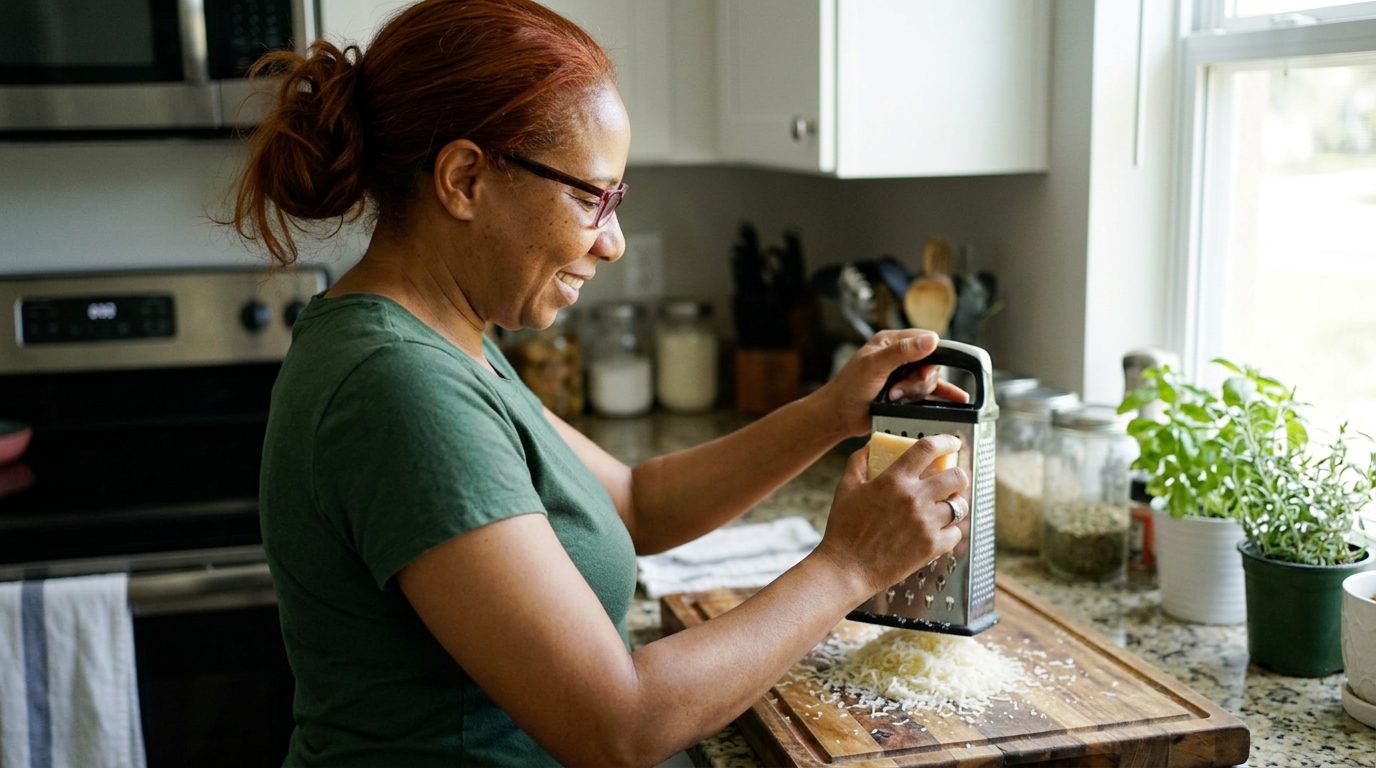
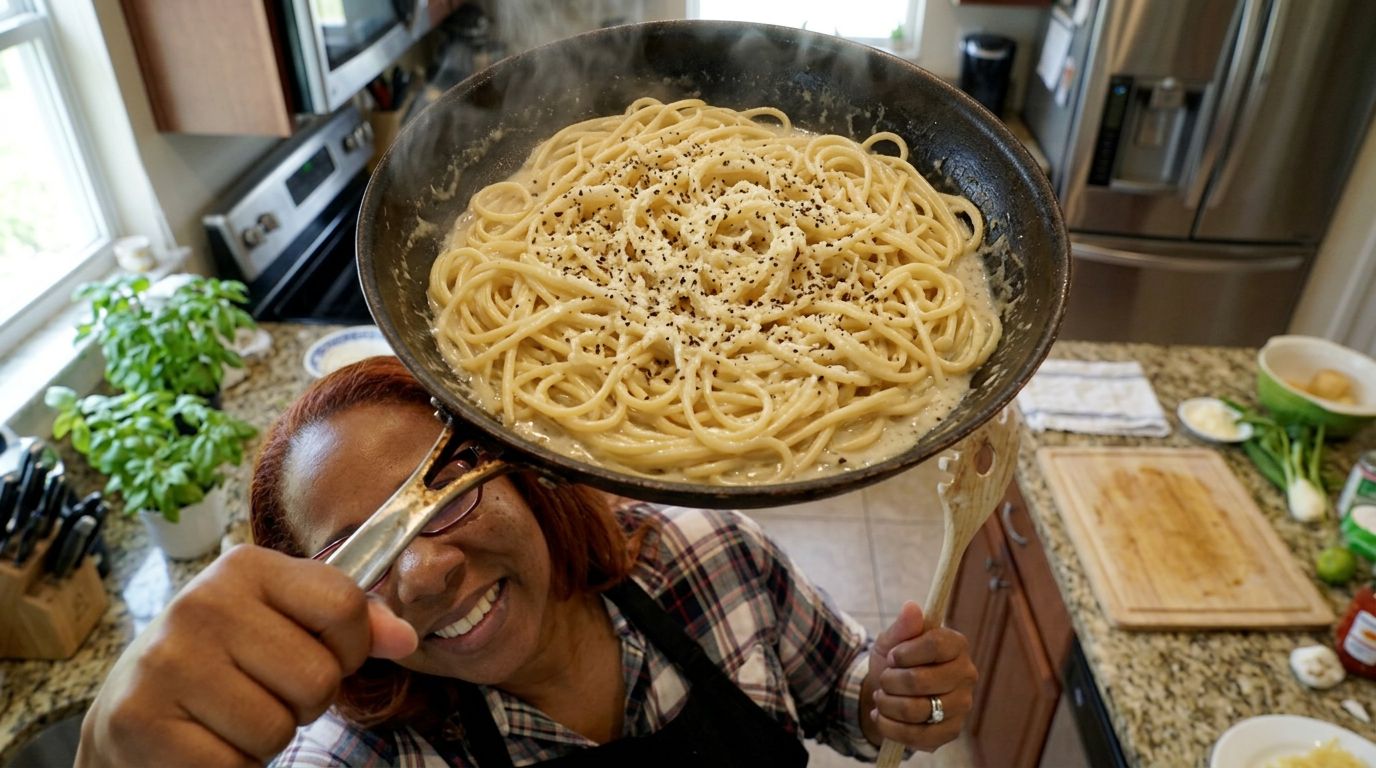
This is not a video about a perfect, effortless pasta. This is a video about the three times I turned expensive Pecorino Romano into a rubbery ball of gum, and the one simple trick that finally gave me the glossiest, creamiest cacio e pepe of my life.
Extreme close-up of a rubbery, clumped-up ball of cheese sticking to a wooden spoon, followed by a smash cut to a perfectly glossy, velvety strand of spaghetti being lifted from a pan.
It was Tuesday night in Orlando, the kind of humid, rain-soaked evening where you just want a bowl of warm, peppery comfort. I told Tony I was making cacio e pepe—four simple ingredients: pasta, black pepper, Pecorino Romano, and water. It sounds so easy on paper, almost dangerously so. But if you’ve ever tried to make it at home, you know the absolute terror of watching your beautiful, expensive cheese instantly curdle into a stringy, rubbery clump, leaving you with a bowl of grey, peppery water and a sad mass of dairy glue.
I used to think it was just bad luck, but after my third consecutive failure last month—which ended with Tony politely chewing through what tasted like black-pepper-flavored mozzarella sticks melted over spaghetti—I realized I had to treat this like a science experiment. The stakes were high tonight because I had promised myself I wouldn't upload another recipe until I could guarantee a foolproof, clump-free method for anyone cooking in a standard home kitchen without a culinary degree.
So, I bought three different blocks of cheese, two brands of pasta, and decided to systematically break down every single variable. Was it the water temperature? The starch level? The grating size? Tonight, I was going to find out. I set up my heavy skillet, cracked open a fresh bag of high-quality bronze-die spaghetti, and got to work. My goal was simple: a velvety, emulsified sauce that coats every single strand of pasta like liquid silk, without a single clump in sight.
I started by analyzing my previous mistakes, and the first revelation came down to the cheese itself. To get a perfect melt, you cannot use pre-shredded cheese—it has anti-caking agents that ruin the emulsion. But even with a block of Pecorino Romano, my microplane was creating fluffy shavings that clumped too fast. I switched to the smallest, prickly side of a classic box grater, grating 100 grams of the cheese into a fine, sandy powder. This sandy texture, I realized, melts much more slowly and evenly than fluffy ribbons.
Next was the pepper. I used to just shake in pre-ground black pepper, but that is a crime against flavor. I took a tablespoon of whole black peppercorns and crushed them coarsely in my mortar and pestle. You want different sizes—some dusty bits for heat, and bigger cracked pieces for that floral, crunchy pop. I toasted this cracked pepper dry in my wide skillet over medium heat for about two minutes. The moment the kitchen filled with that warm, toasted, almost citrusy aroma, I knew we were on the right track.
Now, let's talk about the pasta water, which is the real magic of this dish. In my failed attempts, I boiled the pasta in a massive pot of water. That was mistake number two. Too much water dilutes the starch. Tonight, I used a wide, shallow pan with just enough water to cover the spaghetti. As the pasta boiled, the water turned cloudy and thick with starch—this starch acts as a natural emulsifier, keeping the fat from the cheese and the water from separating.
I pulled the spaghetti out two minutes before al dente. It was still stiff, but that was intentional; it needed to finish cooking in the pepper water. I ladled about half a cup of that cloudy, starchy pasta water directly into the skillet with the toasted pepper, letting it bubble rapidly, then tossed the pasta straight in. I swirled the pan constantly, letting the pasta release even more starch into the liquid.
Here is where the critical science happens, and where I failed three times before. If you add cheese to a hot pan on the stove, the proteins in the cheese will seize up and clump at 135 degrees Fahrenheit. To prevent this, I pulled the pan completely off the heat. I let it cool for a full sixty seconds, shaking it to let the steam escape, bringing the temperature down to a safe melting zone.
While the pan cooled, I created my secret weapon: a cheese paste. Instead of throwing dry cheese into the pan, I whisked a splash of warm pasta water into my grated Pecorino in a separate bowl, stirring until it formed a thick, smooth paste. This pre-hydrates the cheese proteins, making clumping practically impossible.
I scraped the cheese paste into the cooled pan with the pasta and began to toss aggressively. At first, it looked like a watery mess. But as I kept swirling and tossing, the starch, water, and cheese fat began to marry. Slowly, magically, the liquid transformed into a thick, creamy, glossy sauce that clung beautifully to the noodles. I added one more splash of starchy water to loosen it up, and the emulsion held perfectly—no clumps, no stringiness, just pure, velvet luxury.
Handheld shots focusing on the steam rising from the skillet, the aggressive tossing motion of the pasta, close-ups of the creamy sauce forming, and the contrast of cracked black pepper against the pale cheese paste.
I plated the spaghetti immediately, twirling it into a tight nest in a warm bowl. I topped it with a final dusting of Pecorino Romano and a pinch of the coarser cracked pepper. I called Tony into the kitchen, holding my breath as he took his first bite. The silence lasted for three agonizing seconds before he looked up, smiled, and said, 'Tara, you did it. It’s completely smooth.'
I took a bite myself, and he was right. The texture was absolutely flawless—velvety, rich, and sharp with the salty bite of the sheep’s milk cheese, balanced by the floral, warming heat of the toasted pepper. There wasn't a single grain or rubbery bit at the bottom of the bowl. By controlling the heat and pre-hydrating the cheese, we had completely conquered the dreaded clump.
Looking back, those three ruined dinners were worth it to finally understand the mechanics of this dish. Next time, I might experiment with a mix of Parmigiano-Reggiano and Pecorino to soften the sharp edge, but for tonight, this traditional Roman classic was absolute perfection. If you've been intimidated by this dish, grab your box grater, turn off the heat, and try this method. Your pasta nights will never be the same.
A slow, satisfying zoom out as Tara and Tony sit at the kitchen island, eating directly from the bowls, laughing and chatting as the evening light fades outside the window.
Shot List
| Type | Description | Audio | Duration |
|---|---|---|---|
| Close-up | A clump of rubbery cheese stuck to a wooden spoon being scraped off into a sink. | Tara (VO): 'This is not a video about a perfect, effortless pasta...' | 3s |
| B-roll | A beautiful, glossy nest of spaghetti being swirled onto a plate, shining under warm kitchen lights. | Tara (VO): '...this is the story of how I finally mastered the science of clump-free cacio e pepe.' | 4s |
| Medium | Tara stands in her kitchen, holding a block of Pecorino Romano and looking directly at the camera with a self-deprecating smile. | Tara: 'It was Tuesday night here in misty Orlando, and I had just promised Tony a romantic dinner...' | 8s |
| Detail | Handheld shot of Tara grating cheese on a box grater, showing the fine, sandy texture falling onto a cutting board. | Tara: 'Step one: forget the microplane. We want a sandy grind, not fluffy ribbons.' | 6s |
| Close-up | Whole black peppercorns being crushed in a granite mortar and pestle, releasing visible oils. | Tara (VO): 'Then came the pepper. We crush it fresh—never pre-ground.' | 5s |
| B-roll | Cracked pepper dancing in a hot dry skillet, steam rising slightly. | Tara: 'Toasting it activates those dormant oils, filling the kitchen with an incredible floral spice.' | 5s |
| Overhead | Spaghetti boiling in a shallow, wide pan, the water visibly cloudy and bubbling violently. | Tara (VO): 'Lesson two: less water equals more starch. This cloudy liquid is our liquid gold.' | 6s |
| B-roll | Pasta being transferred with tongs from the water directly into the pepper skillet. | Tara: 'We pull it early so it finishes cooking in the starch bath.' | 5s |
| Close-up | Whisking a splash of hot pasta water into the grated cheese in a small bowl until it turns into a smooth, thick paste. | Tara (VO): 'Behold: the cheese paste. This pre-hydrates the proteins so they melt instead of seizing.' | 7s |
| Detail | Tara slides the skillet off the hot stove burner onto a wooden trivet on the counter. | Tara: 'Off the heat. Let it cool for a minute. If it's too hot, you get cheese bubblegum. We don't want that.' | 6s |
| Timelapse | An overhead view of the pasta being tossed repeatedly, showing the liquid slowly binding into a glossy sauce. | Tara (VO): 'Just watch. Toss, swirl, toss... and suddenly, the water and cheese become one.' | 8s |
| Close-up | The glossy sauce coating a strand of spaghetti perfectly as it is lifted from the pan. | Tara: 'Look at that shine. No cream, no butter, just pure emulsion.' | 5s |
| Medium | Tony takes a bite of the pasta, closes his eyes, and nods enthusiastically. | Tony: 'Wow, babe. This is incredible. Totally smooth.' | 5s |
| Close-up | A final shot of the completed dish with fresh pepper on top, steam gently rising. | Tara (VO): 'No more clumps. Just perfect, creamy Roman comfort right at home.' | 6s |
- Capture the difference between microplane-shaved cheese (fluffy) and box-grated cheese (sandy) side-by-side.
- Get a slow-motion shot of the cracked black pepper hitting the dry, hot skillet to emphasize the sensory experience of toasting.
- Show the physical temperature drop by filming the steam dissipating when the skillet is moved off the heat source.
- Film the bottom of the empty bowls at the end to prove there are no leftover rubbery cheese clumps left behind.
- 0:00 — Playful, light acoustic guitar with a slightly comedic, chaotic undertone during the failure montage.
- 0:45 — Transition to a warm, steady, upbeat lo-fi track as Tara introduces the science experiment plan.
- 2:15 — Soft jazz with a rhythmic beat during the cheese grating and pepper crushing process.
- 4:30 — Slightly tense, focused synth-pad elements as the pasta water boils and the critical temperature window approaches.
- 6:00 — Smooth, triumphant chillhop beat as the pasta is tossed and the emulsion successfully forms.
- 8:15 — Warm, acoustic folk melody during the plating, tasting, and final cozy chat with Tony.
- Use a fast-paced 'smash cut' sound effect (like a vinyl scratch or a soft thud) when transitioning from the failed clumped pasta to the beautiful finished dish in the cold open.
- Overlay a subtle, clean digital thermometer graphic on-screen showing '135°F / Danger Zone' when explaining the cheese protein clumping science.
- Keep the grading warm, cozy, and natural to match the comforting aesthetic of a home kitchen in Orlando.
- Sync the rapid tossing of the pasta in the skillet with the rhythm of the background music to build satisfying momentum before the final reveal.
| Call | Provider | Model | Input Tokens | Output Tokens | Compute / Credits |
|---|---|---|---|---|---|
| Script | abacus.ai | gemini-3.5-flash | 1,231 | 4,043 | — |
| Image 2 — The Sandy Grate | abacus.ai | nano_banana2 | — | — | 6,787.6 |
| Image 3 — The Perfect Emulsion | abacus.ai | nano_banana2 | — | — | 6,787.3 |
I Failed Pad Thai Twice. Here's How I Finally Got the Tamarind Right.
After two watery, overly sweet attempts, I finally unlocked the secret to the perfect, tangy-sweet Pad Thai sauce in my own Orlando kitchen.
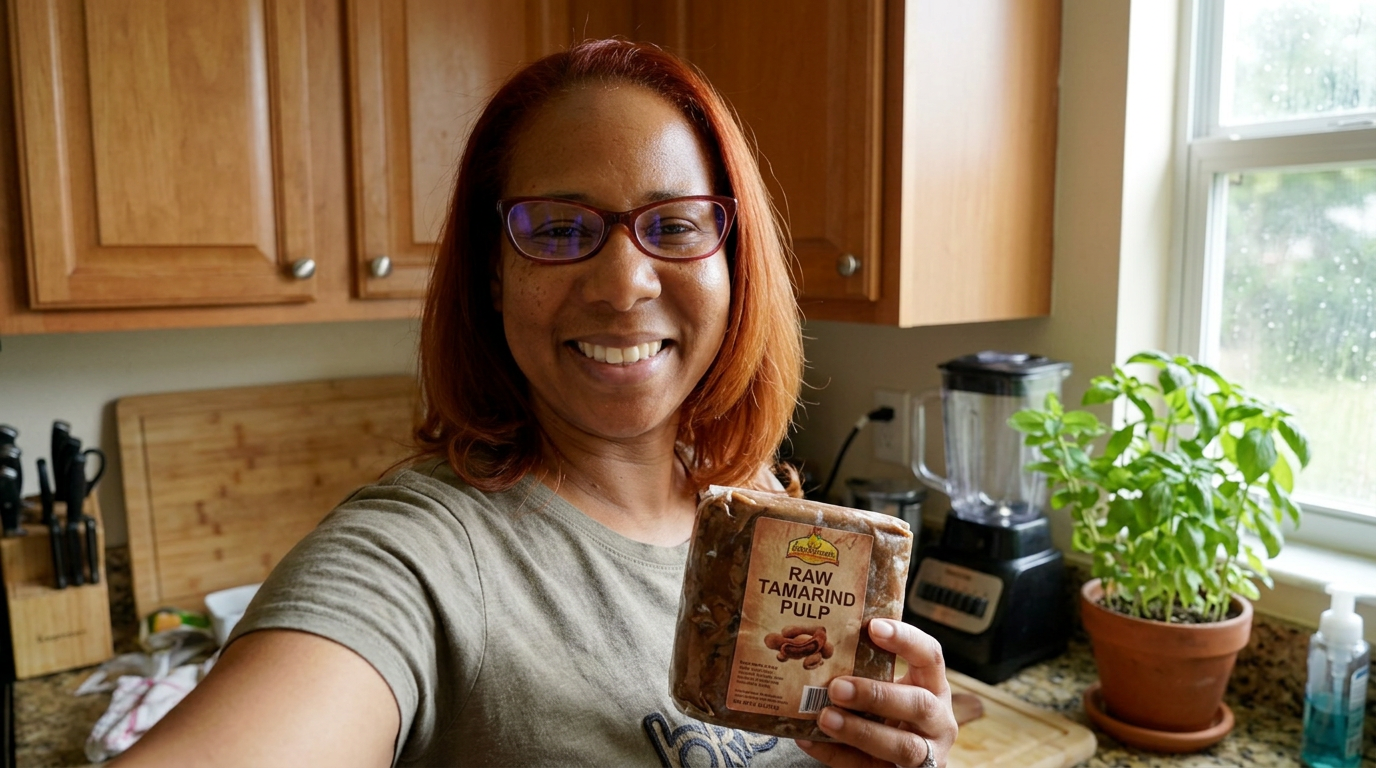
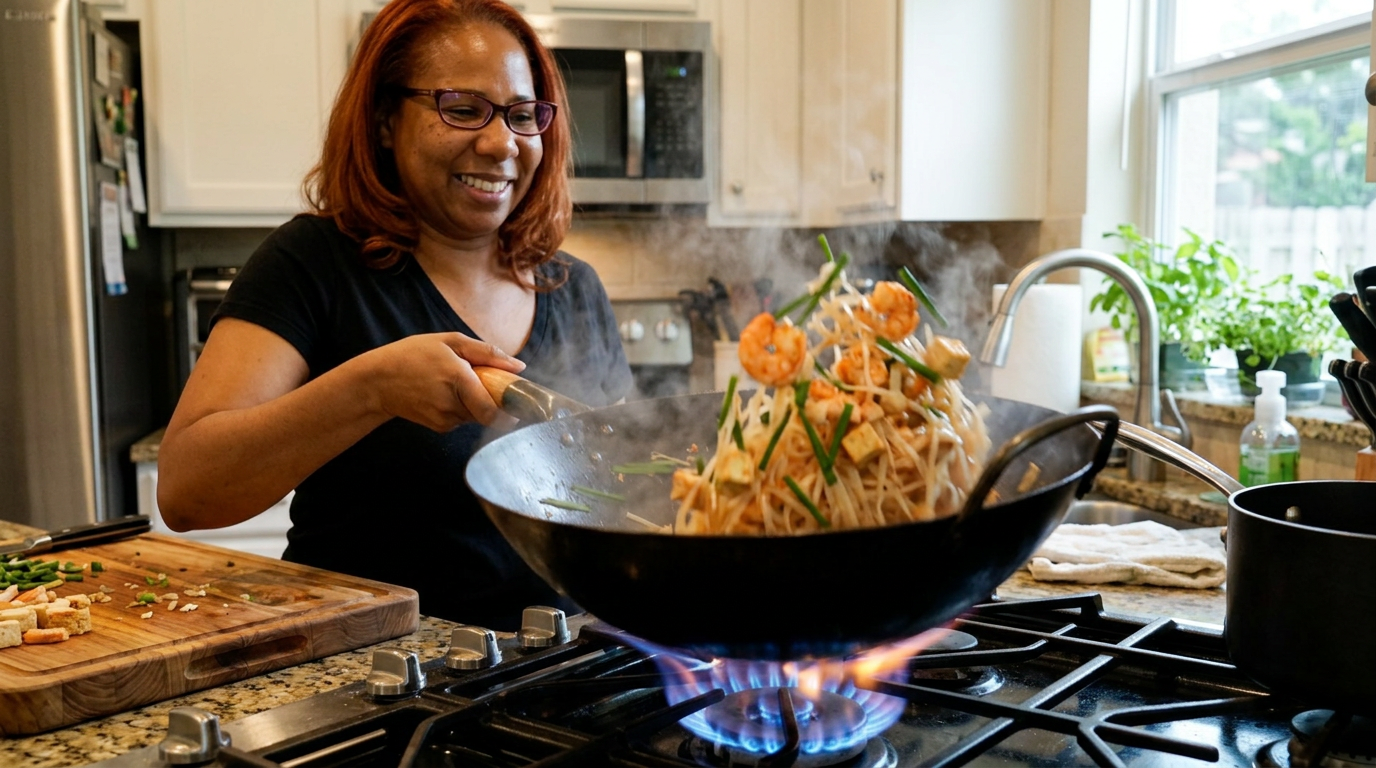
If your home-cooked Pad Thai has ever tasted like sweet ketchup noodles, I have been there, and I feel your pain. Today, we are finally fixing that.
Close-up of Tara squeezing a glossy, dark brown tamarind pulp through a fine-mesh strainer, the thick concentrate slowly dripping into a glass bowl.
It was 92 degrees in Orlando last Tuesday, the kind of humid afternoon where your air conditioner is running a marathon and the last thing you want to do is cook anything heavy. Tony and I were craving that specific, high-heat, tangy-sweet snap of real street-style Pad Thai. But if I'm being completely honest with you guys, my last two attempts at making this at home were total disasters. The first time, I used a cheap, pre-made bottled sauce that tasted like pure corn syrup and food coloring. The second time, I tried to shortcut it with lime juice and brown sugar, and the noodles turned into a soggy, sour clump that we ended up throwing out.
That second failure really bruised my kitchen ego. Pad Thai isn't supposed to be an elite, untouchable mystery; it is a quick, vibrant street food. I realized the missing link wasn't my wok technique or the type of noodles—it was the tamarind. I had been treating tamarind like an optional background flavor when it is actually the entire structural foundation of the dish. It provides that deep, fruity, sour backbone that cuts through the palm sugar and fish sauce.
So, yesterday morning, I drove down to the local Asian market on Colonial Drive. I bypassed the aisle with the ready-made sauces and went straight for the block of raw wet tamarind pulp. My plan today is to make my own concentrate from scratch, balance it with authentic palm sugar and premium fish sauce, and see if I can finally replicate that perfect smoky, tangy balance right here on my standard home stove. Tony is officiating as the official taste-tester today, and the stakes are high because we didn't buy a backup dinner.
We started with the tamarind prep, which is honestly a bit of a messy, tactile process. I broke off about a four-ounce chunk from the sticky, fibrous block of raw tamarind pulp, placed it in a heatproof bowl, and poured a cup of boiling water right over it. I let it sit for about twenty minutes to soften. Once it was cool enough to handle, I got my hands right in there, squishing and mashing the pulp to separate the thick, tangy fruit from the tough fibers and seeds. It felt a bit like playing with mud, but the smell rising up was incredible—sour, deep, and slightly plum-like.
Next, I pushed all that mashed pulp through a fine-mesh strainer using the back of a ladle. What collected in the bowl underneath was this gorgeous, velvety, dark brown paste. This was the real deal. No preservatives, no added sugar, just pure, bright acidity. I tasted a tiny bit on my finger, and my jaw instantly clenched. It was intensely sour, but with a beautiful, complex fruitiness that you just can't get from lime juice or vinegar.
Now came the balancing act: the sauce. In a small saucepan over low heat, I combined four tablespoons of this fresh tamarind paste, four tablespoons of crushed palm sugar, and four tablespoons of fish sauce. This is the golden one-to-one-to-one ratio I read about, but I was skeptical. As the palm sugar melted, the kitchen filled with this incredibly rich, savory, and sweet aroma. I took a spoon, dipped it in, let it cool for a second, and tasted it. It was close, but it was still screamingly sour. The tamarind was incredibly strong.
This was the turning point. I had to make a decision: do I add more sugar and risk making it cloying, or do I water it down? I decided to trust my instincts. I added just one extra tablespoon of crushed palm sugar and a splash of water, letting it simmer for another minute. When I tasted it again, my eyes went wide. It was perfect. The sharp sourness of the tamarind was still there, but it was rounded out by the caramel notes of the palm sugar and the deep, salty umami of the fish sauce.
With the sauce perfected, the clock was ticking. Pad Thai is a fast, high-heat dance, so my mise en place had to be absolutely ready. I soaked my thin, flat rice noodles in lukewarm water for about forty minutes until they were pliable but still had a firm, leathery bend. If you soak them in hot water or boil them, they will turn into mush in the wok. I also prepped my proteins: extra-firm tofu cubed up small, a handful of dried shrimp for that authentic earthy funk, and some sweet, fresh shrimp that I peeled and deveined.
I fired up my gas burner to its absolute maximum setting. I don't have a commercial wok burner, so I used my heaviest carbon steel wok to hold as much heat as possible. I swirled in some neutral oil and seared the fresh shrimp first, pulling them out just as they turned pink so they wouldn't overcook. In went the tofu and the dried shrimp, sizzling violently and turning a beautiful golden brown. The smell of the dried shrimp hitting the hot oil was intense, but that is where the deep, authentic flavor lives.
I threw in some finely chopped shallots and sweet preserved radish, stirring frantically to keep them from burning in the intense heat. Then, I tossed in the drained rice noodles and splashed in about five tablespoons of my custom tamarind sauce. The steam that exploded out of the pan was unbelievable. I used two wooden spatulas to quickly fold and toss the noodles, watching them absorb that beautiful, amber-colored sauce. They softened up almost instantly, turning glossy and coated.
For the final squeeze, I pushed the noodles to one side of the wok, leaving an empty spot on the hot metal. I cracked in two eggs, letting the whites set for just a few seconds before scrambling them gently. I folded the noodles back over the eggs, tossed back in the cooked shrimp, and threw in a massive handful of fresh garlic chives and crisp mung bean sprouts. One final, aggressive toss to wilt the greens, and I shut off the heat. The noodles looked plump, glossy, and perfectly separated—not a soggy clump in sight.
Dynamic, fast-paced kitchen B-roll: close-ups of the sizzling wok, steam rising, wooden spoons tossing noodles, and Tara's focused, fast-moving hand movements.
I piled the steaming noodles onto a wide plate, dusting one side with crushed roasted peanuts, a sprinkle of dried chili flakes, and a fresh lime wedge. It looked exactly like the plates we used to get at our favorite spot in town, but the real test was yet to come. I called Tony into the kitchen. He took a fork, twisted a massive clump of noodles, got a bit of everything—shrimp, tofu, peanut—and took a bite. He stopped chewing, looked at me, and said, 'Tara, this is it. You cracked the code.'
I took a bite myself, and I honestly wanted to cry tears of joy. The noodles had the perfect chewy bounce. But the sauce—oh my gosh, the sauce. It wasn't flat or sugary. It had this bright, vibrant, fruity tang that hit the sides of your tongue first, followed by the savory depth of the fish sauce and the smoky char of the wok. Getting the tamarind right changed everything. It made the entire dish taste alive and balanced.
If I were to do this again, I might prep a double batch of that tamarind concentrate and freeze it in ice cube trays so I don't have to do the messy squeezing process every single time. But honestly, the effort was worth every second. Making Pad Thai at home isn't about having a commercial kitchen; it's about respecting the balance of sweet, sour, and salty. If you've been struggling with soggy, sweet noodles, grab a block of real tamarind and give this a try. Your kitchen will thank you.
Medium shot of Tara and Tony sitting at their kitchen island, sharing the plate of Pad Thai, laughing and eating with chopsticks under warm, natural afternoon light.
Shot List
| Type | Description | Audio | Duration |
|---|---|---|---|
| Close-up | Thick, dark tamarind concentrate dripping slowly from a fine-mesh strainer into a clear glass bowl. | TARA: If your home-cooked Pad Thai has ever tasted like sweet ketchup noodles, I have been there, and I feel your pain. | 4s |
| Medium | Tara stands at her kitchen counter, smiling and gesturing warmly to the camera with a block of raw tamarind in one hand. | TARA: Welcome back to the kitchen, guys! Today, we are finally tackling the legendary Pad Thai, and we are doing it from scratch. | 8s |
| Overhead | Boiling water being poured over a dark brown block of raw tamarind pulp in a ceramic mixing bowl. | TARA: It all starts right here with this raw tamarind pulp. My last two attempts at this dish were flat, sugary disasters because I tried to shortcut the sour element. | 7s |
| Detail | Tara's hands squeezing and mashing the softened tamarind pulp in the warm water, releasing the thick brown paste. | TARA: Once it softens in the hot water for about twenty minutes, you have to get your hands dirty. We are mashing this to separate the rich fruit from the tough seeds and fiber. | 8s |
| Close-up | The back of a metal ladle scraping against a mesh strainer, pushing thick brown paste into a clean bowl. | TARA: Pressing it through a strainer gives us this smooth, intensely sour concentrate. It smells incredibly bright and deeply fruity. | 6s |
| Medium | Tara stirring the tamarind paste, palm sugar, and fish sauce in a small, bubbling saucepan over low heat. | TARA: Now, the golden ratio. Equal parts tamarind, crushed palm sugar, and premium fish sauce. Let's melt this down and see if we can find that perfect balance. | 8s |
| Close-up | Tara dipping a small spoon into the bubbling amber sauce, blowing on it, and taking a careful taste. | TARA: (Tastes, winces slightly) Woo! That is sharp. The tamarind is incredibly potent. I'm adding just one more tablespoon of palm sugar and a splash of water to round it out. | 9s |
| Detail | A hand lifting a handful of soaked rice noodles out of a bowl, showing their flexible, leathery texture as water drips off. | TARA: For the noodles, soak them in lukewarm water for 40 minutes. They should be pliable but still have a firm, leathery bend. Never boil them! | 7s |
| B-roll | Shrimp sizzling violently in a screaming-hot carbon steel wok, turning bright pink against the dark metal. | TARA: My carbon steel wok is on absolute maximum heat. We sear the fresh shrimp first, then pull them out so they stay tender. | 6s |
| Timelapse | Fast-paced assembly: tofu, shallots, and dried shrimp tossed in the wok, followed by noodles and a pour of the dark amber sauce. | TARA: In go the aromatics, the firm tofu, and then the soaked noodles. Look at that steam! We splash in our custom sauce and toss frantically. | 8s |
| Close-up | Two eggs cracked into the cleared center of the wok, bubbling rapidly before being folded into the glossy noodles. | TARA: Push the noodles aside, crack in the eggs, let them set slightly, and then fold everything back together with a big handful of sprouts and chives. | 7s |
| Overhead | The finished Pad Thai being slid from the hot wok onto a wide serving plate, steaming hot and perfectly glossy. | TARA: No clumps, no soggy mess. Just beautiful, glossy, amber-coated noodles holding their shape perfectly. | 5s |
| Medium | Tony takes a bite of the Pad Thai from a fork, chews, smiles broadly, and gives a thumbs-up to Tara off-camera. | TONY: Babe, this is seriously incredible. It has that exact restaurant tang. TARA: (Laughs) We did it! The tamarind balance actually worked! | 8s |
| Close-up | A lime wedge being squeezed over the plated Pad Thai, glistening droplets catching the natural kitchen light. | TARA: If you've been struggling with sweet, heavy home-cooked noodles, grab some real tamarind pulp. It changes the entire game. See you next time! | 7s |
- Capture the unique texture of the soaked rice noodles by lifting them and letting them drape over your fingers to show they are flexible but not soggy.
- Get a slow, dramatic macro shot of the palm sugar melting and bubbling into the dark tamarind and fish sauce mixture.
- Film the sizzling sound of the dried shrimp hitting the hot oil from a very close angle to emphasize the sensory experience.
- Show the real, messy countertop post-cooking: empty bowls, tamarind fibers, and peanut shells to keep the vlog feeling authentic.
- 0:00 — Warm, acoustic indie-folk guitar starts softly, establishing a cozy, home-cooked vibe.
- 1:15 — Music transitions to a slightly playful, light percussion track as Tara starts squishing the raw tamarind.
- 3:30 — Beat slows down and quietens as Tara tastes the sauce and makes her critical adjustment decision.
- 5:45 — Upbeat, energetic acoustic rhythm kicks in as the high-heat wok cooking sequence begins.
- 8:00 — Music swells warmly as the finished dish is plated and garnished in beautiful slow motion.
- 9:15 — Gentle, happy acoustic guitar fades back in during the tasting with Tony, wrapping up the video on a cozy note.
- Maintain a snappy, rhythmic pace during the stir-fry section to mimic the fast-paced nature of high-heat cooking.
- Use a subtle, warm-toned color grade to enhance the rich amber colors of the Pad Thai sauce and the natural kitchen light.
- Add clean, minimalist text overlays for the golden 1:1:1 ratio (Tamarind, Sugar, Fish Sauce) to make the recipe easy to follow.
- Keep the natural cooking sound design high in the mix: the squishing of pulp, the sizzle of shrimp, and the scraping of the wok spatula.
| Call | Provider | Model | Input Tokens | Output Tokens | Compute / Credits |
|---|---|---|---|---|---|
| Script | abacus.ai | gemini-3.5-flash | 1,227 | 4,777 | — |
| Image 2 — Welcome to Tara's Kitchen | abacus.ai | nano_banana2 | — | — | 6,787.75 |
| Image 3 — Wok on Fire | abacus.ai | nano_banana2 | — | — | 6,787.45 |
I Braised Beef for 4 Hours to Make the Ultimate Consomé Birria Tacos
I spent a rainy Saturday braising beef shank and chuck roast in a rich, spiced chili broth, then dipped every single corn tortilla in that beautiful red fat before searing them on my cast-iron griddle.
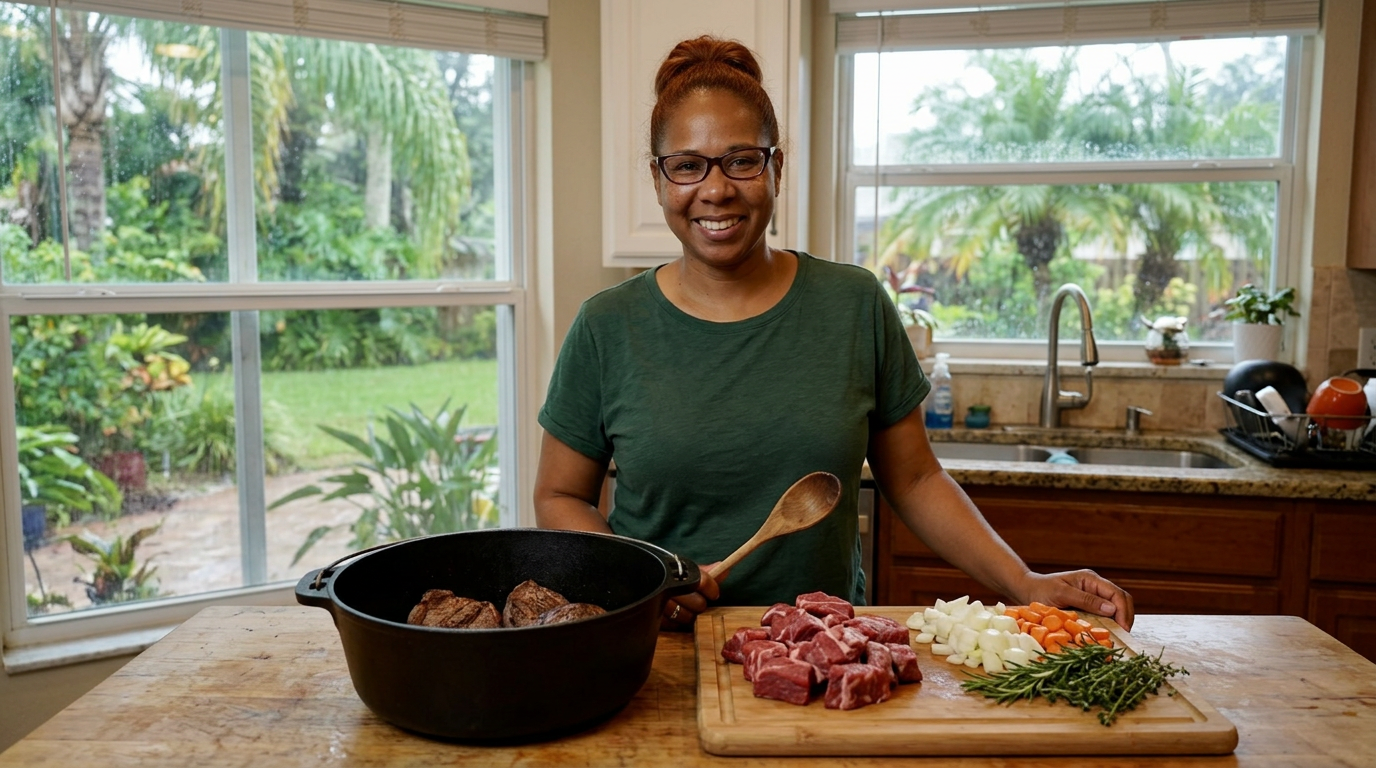
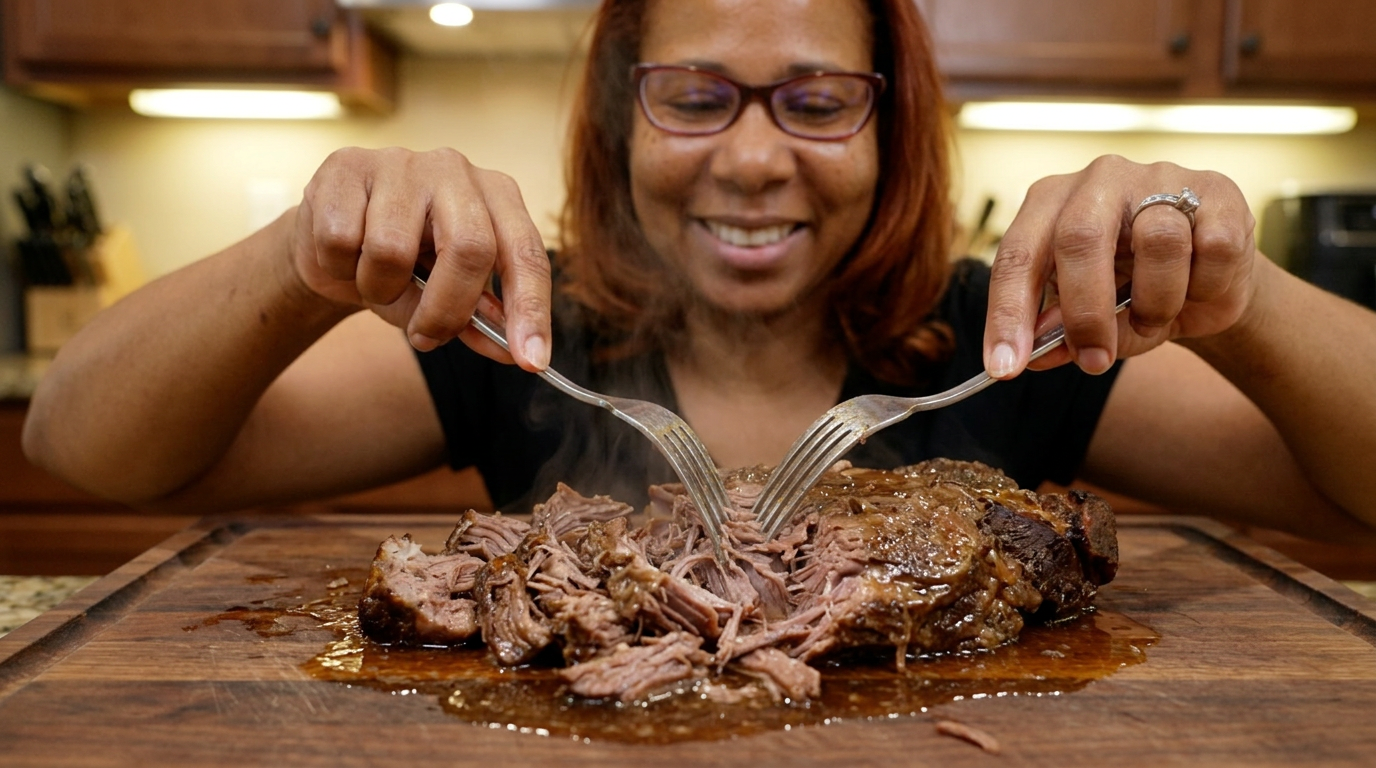
If you are not dipping your tortillas in the rendered beef fat before they hit the griddle, are you even making birria? Today, we are turning a tough cut of beef into the juiciest, most comforting tacos you have ever seen.
Close-up of a corn tortilla, dripping with bright red chili oil, landing on a screaming hot cast-iron griddle with an intense sizzle. Steam rises as Tara's hand presses it down with a spatula.
It was one of those humid, stormy Saturday afternoons in Orlando where the rain just dumps down for hours, making it absolutely impossible to do anything outside. Tony and I had planned to clean out the garage, but the weather gave us the perfect excuse to stay in the kitchen. I had a massive craving for something rich, deeply spiced, and messy. That meant only one thing: Quesabirria tacos with a bowl of warm, savory consomé for dipping.
Now, traditional birria from Jalisco is made with goat, but here in my kitchen, I'm using a combination of beef chuck roast and bone-in beef shank. The shank is my secret weapon; those bones are packed with marrow and collagen, which is exactly what gives the dipping broth that velvety, lip-smacking body. My goal today was to coax every drop of flavor out of these tough cuts, which meant a low-and-slow braise that would fill the entire house with the scent of toasted chilies, cinnamon, and garlic.
The stakes were actually pretty high because Tony's brother was coming over for dinner, and he claims to have eaten the best birria of his life at a food truck in LA last year. I love a friendly food competition, so I was determined to make a version that would blow those food truck tacos right out of the water. My plan was simple but required patience: toast the dried chilies, sear the beef to get a deep crust, simmer everything for four hours, and then assemble the tacos with plenty of Oaxaca cheese, cilantro, and white onion.
I started by prepping the chili base, which is the absolute heart of the dish. I used a mix of dried Guajillo chilies for their sweet, mild heat, Ancho chilies for a deep, smoky flavor, and a couple of Chiles de Árbol for a kick of spice. I snipped the stems off, shook out the seeds, and tossed them into a dry, hot pan. Within thirty seconds, the kitchen smelled incredible—like toasted earth and dried fruit. You have to watch them like a hawk, though; if you burn dried chilies, they turn bitter, and your whole broth is ruined. Once they softened, I submerged them in boiling water to rehydrate.
While the chilies were soaking, I turned my attention to the beef. I cut the chuck roast into large chunks, leaving the bone-in shanks whole. I seasoned them generously with kosher salt and black pepper. I warmed up my large Dutch oven with a splash of oil and seared the meat in batches. I didn't rush this part. I wanted a dark, caramelized crust on every single piece. That brown residue left at the bottom of the pot—the fond—is pure gold for the broth later.
Next came the blending phase. I transferred the softened chilies to my high-speed blender along with a whole head of peeled garlic, a charred white onion, Mexican oregano, cumin, black peppercorns, a pinch of cloves, a splash of apple cider vinegar, and one small stick of Mexican cinnamon. I blended it on high until it was completely smooth. It looked like a thick, vibrant red paste. I poured this mixture directly over the seared beef in the Dutch oven, then added beef stock until the meat was fully submerged.
I brought the pot to a boil, then immediately dropped the heat to low, popped the lid on, and let the stove do its magic. By hour two, the humidity outside was matching the steam inside, and the aroma of cinnamon, garlic, and chilies was drifting all the way to the living room. Tony walked into the kitchen twice just to lift the lid and peek, which I had to ban him from doing because we needed to keep all that beautiful moisture inside the pot.
At the three-hour mark, I pulled a piece of beef out to test it. It was tender, but not quite melting. I knew it needed that extra hour to let the connective tissue in the shanks fully dissolve. Patience is the hardest ingredient in this recipe, but it payed off. By hour four, the meat literally slipped off the bones. I carefully fished out the beef chunks and shredded them on a big cutting board, removing any excess gristle. It was so tender I could have shredded it with a butter knife.
Now for the most important step: the consomé. I strained the remaining liquid in the pot through a fine-mesh sieve to remove any leftover chili pulp, leaving behind a smooth, rich, dark red broth. On top of this broth floated a thick, beautiful layer of bright red beef fat. This fat is called the 'gold' of birria. I carefully ladled that fat off the top into a shallow bowl. This is what we would use to fry the tortillas.
I set up my seasoned cast-iron griddle and got it screaming hot. I took a fresh corn tortilla, dipped it completely into the red beef fat, and laid it flat onto the griddle. The sound was deafening—a loud, crackling sizzle. I immediately sprinkled a handful of shredded Oaxaca cheese over the tortilla, followed by a generous portion of the shredded beef, and a spoonful of the hot consomé to keep the meat incredibly juicy.
Using my spatula, I folded the tortilla in half, pressing it down so the cheese could melt and fuse the whole thing together. The fat on the outside of the tortilla fried it to a perfect, crispy, lacquered crunch, while the inside stayed soft, cheesy, and tender. I repeated this for a dozen tacos, keeping them warm in a low oven while I prepped the garnishes.
B-roll sequence of Tara searing the beef, blending the rich red chili paste, pouring it over the meat, skimming the red fat into a bowl, dipping the tortilla, and pressing the taco on the griddle with cheese oozing out.
I plated the tacos on a large wooden board, garnished them with finely diced white onion and fresh cilantro, and served them alongside bowls of the piping-hot, strained consomé with big wedges of lime. Tony and his brother were already waiting at the table, smelling the air like hungry wolves. I handed them their bowls of broth, and we all grabbed our first tacos.
The first bite was pure heaven. You get that loud crunch from the fried corn tortilla, followed immediately by the creamy, melted Oaxaca cheese and the deeply savory, spiced beef. But the real magic happens when you dip the taco into the warm consomé. The taco acts like a sponge, soaking up the spiced broth, making every bite ridiculously juicy and flavorful. Tony's brother took one bite, closed his eyes, and said, 'Okay Tara, the food truck has officially been defeated.'
Looking back, the only thing I would change next time is making a double batch of the broth to freeze for quick noodle bowls later. This recipe takes time, but there is something so incredibly satisfying about turning simple, tough ingredients into a meal that brings everyone together around the table, wiping grease off their chins and smiling. If you have a rainy afternoon to spare, trust me—make these tacos.
Slow motion close-up of a crispy, cheese-crusted taco being dunked deep into a bowl of dark red consomé, wiping a drop of broth from the side of the bowl, followed by Tara taking a big, happy bite directly to camera.
Shot List
| Type | Description | Audio | Duration |
|---|---|---|---|
| Close-up | Crispy quesabirria taco dipping into a dark red consomé bowl, beef fat glistening on the surface. | TARA (VO): If you're not dipping your tortillas in the rendered beef fat before they hit the griddle, are you even making birria? | 5s |
| Medium | Tara in her warm kitchen, smiling to the camera with a chopping board in front of her. | TARA: Hey guys, welcome back to the kitchen. Today, we are braising beef for four hours to make the ultimate comfort food. | 10s |
| Detail | Rain pouring down outside a window, looking out over a green Orlando backyard. | TARA (VO): It was a rainy Saturday here in Florida, the perfect excuse to ignore our chores and cook something low and slow. | 6s |
| Overhead | Beef chuck roast and bone-in beef shanks laid out on a wooden cutting board being seasoned with kosher salt. | TARA (VO): I'm using beef chuck roast combined with bone-in beef shanks. Those bones will give our dipping broth an amazing body. | 8s |
| Close-up | Dried Guajillo and Ancho chilies sizzling in a dry stainless steel pan, puffing up slightly. | TARA (VO): First up, we toast our dried chilies. This wakes up their oils, but don't let them burn or they'll get bitter. | 7s |
| B-roll | Chilies being pressed down into a bowl of steaming hot water with a spoon to rehydrate. | TARA (VO): A quick fifteen-minute bath in boiling water to soften them up before they go into the blender. | 6s |
| Timelapse | Beef searing in a hot Dutch oven, steam rising as a deep brown crust develops on the meat. | TARA (VO): Meanwhile, we sear the beef. We want a serious crust here. That caramelization is where our flavor base starts. | 10s |
| B-roll | Pouring the vibrant red chili paste from the blender over the beef in the Dutch oven, followed by beef stock. | TARA (VO): I blended the chilies with garlic, charred onion, and spices like cinnamon and cumin. Now we pour this liquid gold over the meat. | 9s |
| Medium | Tara lifting the lid of the Dutch oven, steam rolling out, she smiles and fans the aroma toward her face. | TARA: Oh my gosh, the cinnamon and oregano... our whole house smells incredible right now. Tony already came in twice to spy. | 8s |
| Close-up | Two forks shredding the incredibly tender beef on a cutting board, steam rising from the meat. | TARA (VO): Four hours later, and the meat literally falls off the bone. I shredded it up while it was still hot and juicy. | 8s |
| Detail | Ladle skimming the bright orange-red fat off the top of the strained broth into a shallow white bowl. | TARA (VO): This is the magic step. Skim that beautiful red beef fat off the top. This is what makes our taco shells legendary. | 7s |
| Close-up | Hands dipping a yellow corn tortilla into the red fat, then dropping it onto a hot cast-iron griddle with a loud sizzle. | TARA (VO): Dip the tortilla, lay it down, and listen to that sizzle. This is pure taco therapy. | 8s |
| Overhead | Adding shredded Oaxaca cheese and beef to the cooking tortilla, then folding it over with a spatula. | TARA (VO): Cheese goes down, then the shredded beef. Fold it over and let that cheese melt into a crispy, lacquered crust. | 9s |
| Medium | Tara sitting at the dining table with Tony, raising a taco, dipping it deep into the consomé, and taking a huge bite. | TARA: (Laughs) Oh my word. The crunch, the cheese, the rich spiced broth. You guys have to make this at home. See you next week! | 12s |
- Capture a slow-motion shot of the dried chilies plumping up in the boiling water as they rehydrate.
- Get a close-up of the spatula pressing down on the taco, showing melted Oaxaca cheese oozing out and caramelizing on the griddle.
- Record the sound of the Dutch oven lid being lifted to capture the heavy hiss of escaping steam.
- Film a top-down shot of the final plated tacos with fresh green cilantro and white onions being sprinkled over them.
- 0:00 — Upbeat, warm acoustic guitar intro to set a cozy, inviting home-cooking vibe.
- 1:15 — Subtle, rhythmic Spanish-guitar and soft percussion as the chili prepping and toasting begins.
- 3:30 — Low, steady ambient drone while the beef is searing and simmering to emphasize the slow-cooking process.
- 5:45 — Light, playful acoustic track returns as Tara lifts the lid to reveal the fully cooked beef.
- 7:15 — High-energy, rhythmic Latin acoustic beat during the fast-paced tortilla dipping and griddle sizzling sequence.
- 9:00 — Warm, celebratory acoustic resolution music during the final plating, tasting, and sign-off.
- Keep the pacing relaxed during the braising process, but speed up the editing cuts during the taco assembly and griddling phase to match the high energy of the sizzle.
- Add a subtle, warm color grade to the footage to emphasize the cozy, rainy-day feeling and make the red tones of the chili broth pop.
- Use clean, minimalist text overlays for the ingredient amounts when they are first introduced on screen.
- Enhance the ASMR elements of the audio: the crisp toast of the dried chilies, the heavy sear of the beef, and especially the loud crackle of the dipped tortilla hitting the hot griddle.
| Call | Provider | Model | Input Tokens | Output Tokens | Compute / Credits |
|---|---|---|---|---|---|
| Script | abacus.ai | gemini-3.5-flash | 1,232 | 4,689 | — |
| Image 2 — Tara's Rainy Day Prep | abacus.ai | nano_banana2 | — | — | 6,788.8 |
| Image 3 — The Ultimate Shred | abacus.ai | nano_banana2 | — | — | 6,787.75 |
How I Finally Mastered Mile-High Buttermilk Biscuits (Step-by-Step)
I kept the butter cold and my hands fast, and the oven did the rest.
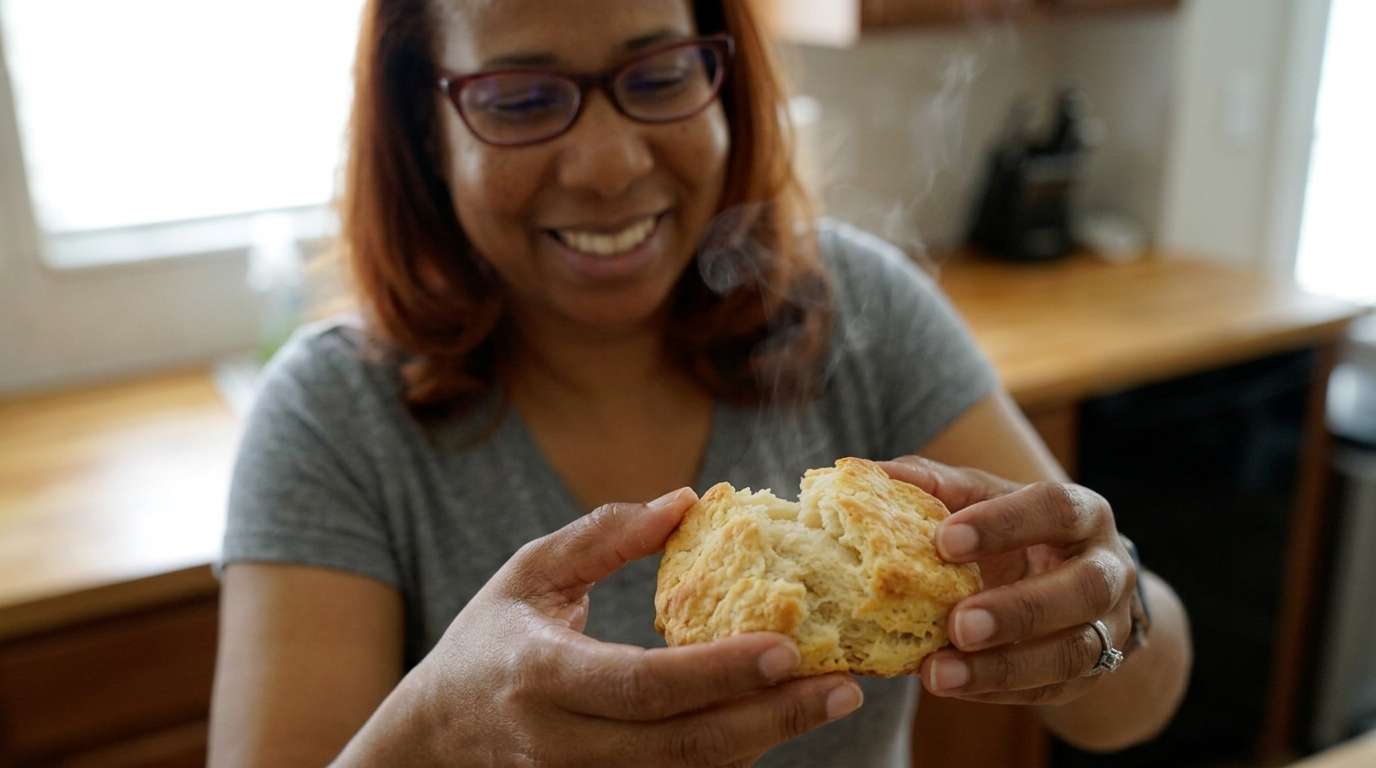
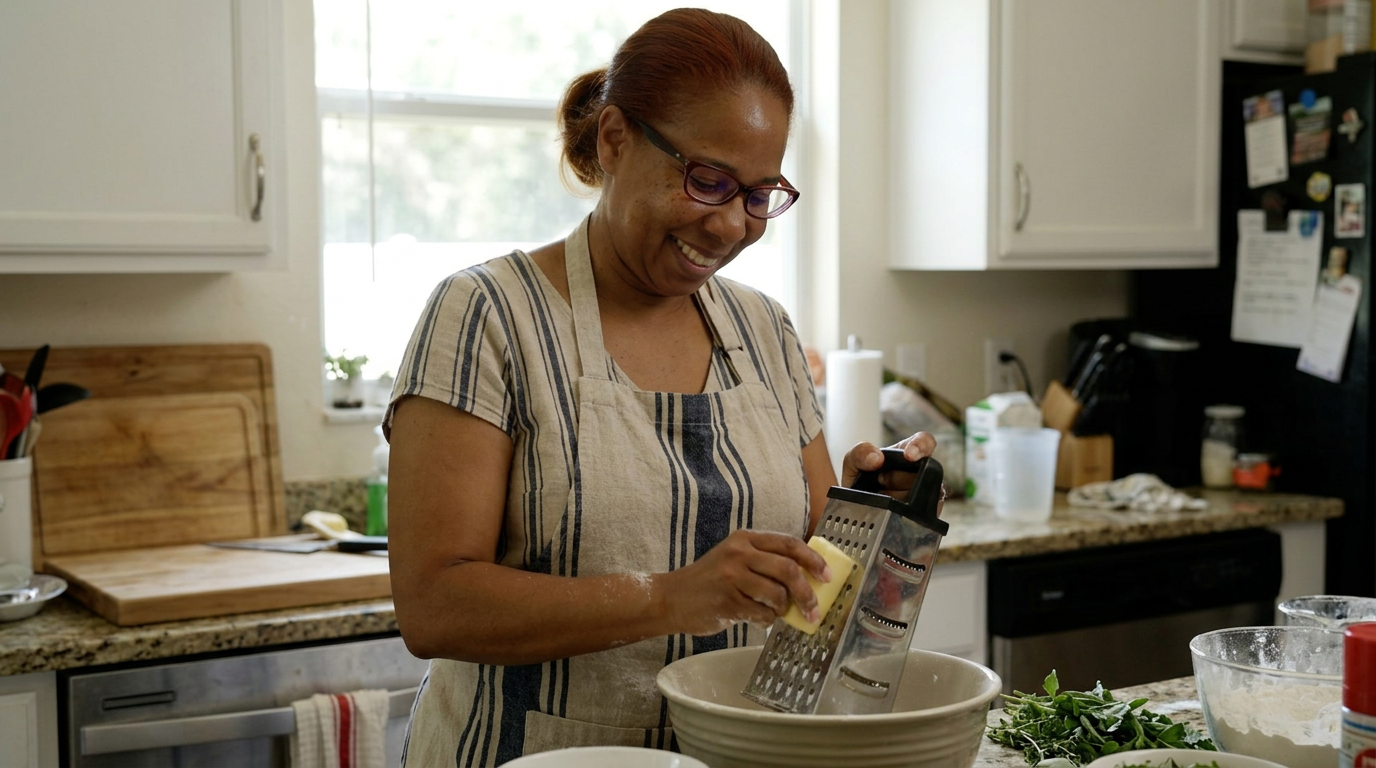
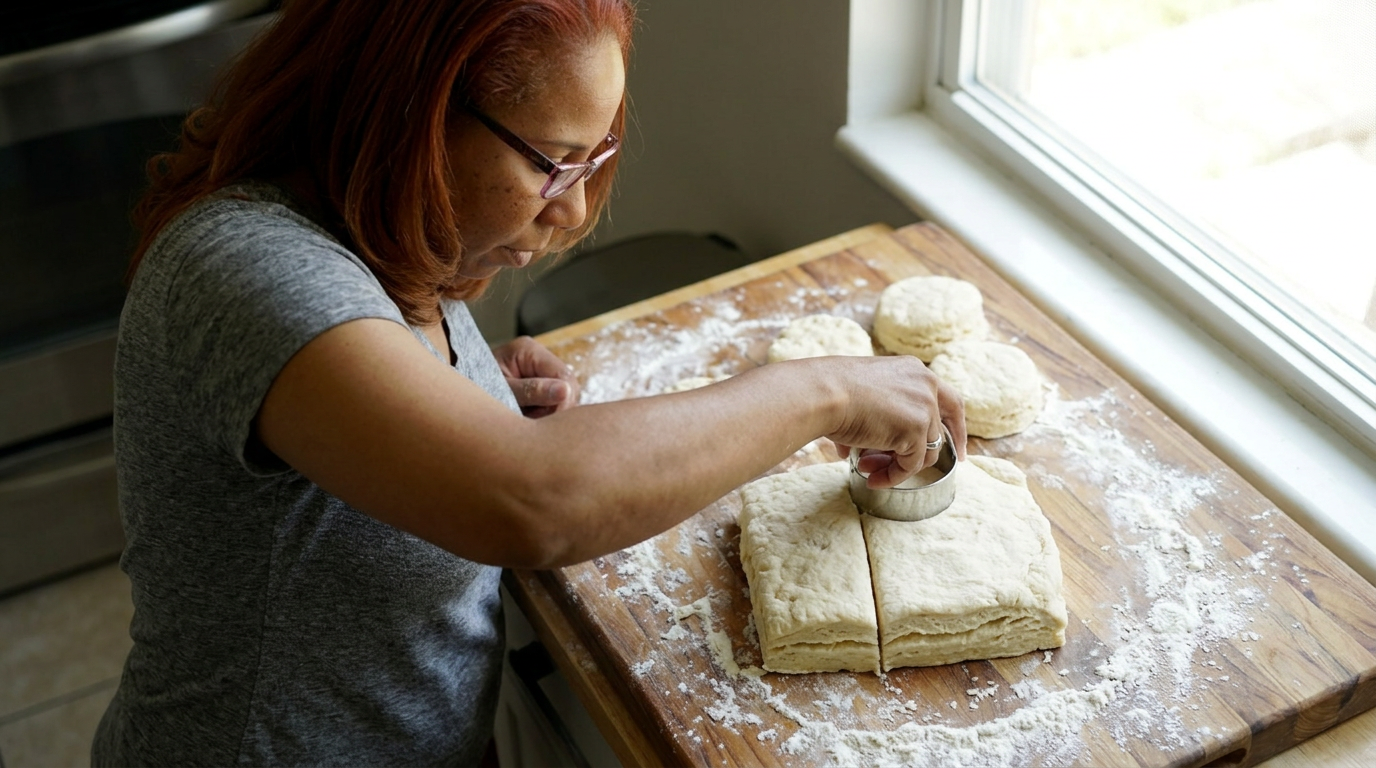
If your homemade biscuits always turn out like dense, heavy hockey pucks, I promise you it is not your fault. It is just your butter getting too warm, and today, we are going to fix that forever.
Extreme close-up of a golden-brown biscuit being gently pulled apart in slow motion, steam rising as the thin, flaky layers separate beautifully, revealing a fluffy interior.
It was one of those typical, ridiculously humid Saturday mornings here in Orlando where the AC is already fighting for its life by 8:00 AM. Tony woke up, sniffed the air, and asked if there was any chance we were having biscuits. Now, usually, that question makes me sweat a little. For years, my biscuits were flat, dry, or so tough you could skip them across our backyard pool. I used to think I just didn’t have that magic Southern grandmother touch, but then I realized it’s not about magic at all—it’s just simple kitchen physics.
The secret to those sky-high, flaky layers we all crave isn't a secret ingredient or a family heirloom cutter. It is 100% about temperature control and moisture. When cold butter hits a hot oven, the water trapped inside the butter suddenly evaporates, creating pockets of steam. That steam is what pushes the dough up, creating hundreds of delicate, flaky layers. But if your butter melts into the flour before it even touches the oven, you end up with a heavy, greasy disk. Today, the stakes were high because Tony’s parents were driving down from Jacksonville, and I wanted a warm basket of these ready the second they walked through our door.
My game plan was simple but strict: keep everything freezing cold, work as fast as humanly possible, and use a laminating technique that folds the dough over itself like a puff pastry. I cleared off our kitchen island, ran my hands under freezing cold water to lower my skin temperature, and pulled my butter straight from the back of the freezer. I was determined to prove that even in ninety-degree Florida humidity, you can bake a bakery-quality biscuit if you respect the butter.
I started by whisking together four cups of all-purpose flour, two tablespoons of baking powder, a teaspoon of baking soda, and a tablespoon of kosher salt in a large, chilled metal bowl. I put the bowl in the fridge while I prepped the butter. Instead of using a pastry cutter, which can take forever and warm the fat up, I grabbed my trusty box grater. I took two sticks of unsalted butter, straight from the freezer, and grated them directly onto a sheet of parchment paper. Grating creates perfect, uniform little shreds of butter that distribute evenly without getting overworked. I popped the grated butter back into the freezer for five minutes just to make sure it stayed rock-solid.
Once the butter was chilled again, I tossed it into the dry ingredients. I used my fingertips, very gently, to coat the butter shreds in the flour. You don't want to mash them; you want them to feel like loose cornflakes covered in snow. Next came the wet ingredient: one and a half cups of ice-cold whole buttermilk. I poured it in all at once and used a rubber spatula to fold it just until a shaggy, messy dough started to form. It looked dry and hopelessly crumbly, but I resisted the urge to add more liquid. Trust the process.
I dumped that messy pile onto my lightly floured counter. Now, here is where the real magic happens: the lamination. Instead of kneading the dough, which develops gluten and makes the biscuits tough, I patted the shaggy mess into a rough rectangle about an inch thick. Then, using a bench scraper, I folded the dough in half, top to bottom. I turned it ninety degrees, patted it out again, and folded it in half again. I did this exactly five times. With each fold, you are literally stacking layers of butter and flour on top of each other. By the fifth fold, the dough suddenly transformed from a crumbly mess into a smooth, cohesive block.
Next, I patted it down to about an inch and a quarter thickness. You want your biscuits tall before they even bake. When it came to cutting them, I used a sharp, three-inch metal biscuit cutter. The most crucial rule here is: never twist the cutter. If you twist, you seal the edges of the dough together, and the biscuit won't rise. You have to press straight down and pull straight up. I cut out six beautiful rounds, then gently gathered the scraps to pat out two more. Those scrap biscuits are never quite as pretty, but they taste just as good—I call those the chef’s tax.
I placed the biscuits on a parchment-lined baking sheet, placing them so their edges were just barely touching. This is another pro-tip: when they bake close together, they support each other and climb upward instead of spreading outward. Before they went into the oven, I brushed the tops with a little extra buttermilk for color, and then popped the whole tray into a screaming hot oven at 425 degrees Fahrenheit. Now, we wait.
About eight minutes in, the kitchen started smelling incredible—that rich, yeasty, buttery aroma that brings everyone wandering into the kitchen. I peeked through the oven glass and watched them puffing up like little clouds, their layers visibly separating. But then I noticed one side of the tray was browning much faster than the other. Our oven has a notorious hot spot in the back left corner. If I left them, half would be burnt and the other half pale. I had to act fast, but opening the oven door lets out all that precious hot air. I opened the door, quickly spun the tray 180 degrees, and shut it in under three seconds. Disaster averted.
Vibrant, fast-paced kitchen B-roll showing flour dusted in the air, the grating of frozen butter, fast folding motions on a wooden counter, and a close-up of the clean vertical cut of the biscuit cutter.
At exactly fifteen minutes, I pulled the tray out. They were absolutely magnificent. They had easily tripled in height, with deep, flaky crevices along the sides showing off every single layer we folded in. I immediately brushed the tops with warm, melted saltwater honey butter, which soaked into the golden-brown crusts and made them glisten. Tony walked into the kitchen right on cue, carrying the coffee pot, his eyes wide.
We didn't even wait for his parents to arrive before we split one open. It tore apart effortlessly along a natural seam, releasing a cloud of buttery steam. I slathered it with a spoonful of homemade blackberry jam. The exterior was incredibly crispy and light, while the interior was pillowy, tender, and intensely buttery with that perfect tangy bite from the buttermilk. Tony took one bite, closed his eyes, and just shook his head. That’s when I knew we had nailed it.
Looking back, the only thing I would change next time is making a double batch. Eight biscuits disappear in the blink of an eye when they are this good. If you have been intimidated by biscuits, just remember: freeze your butter, touch the dough as little as possible, and never twist that cutter. Your oven will do the rest of the work for you.
Medium shot of Tara and Tony in the sunlit kitchen, laughing as they share a warm biscuit, followed by a final beautiful macro shot of the biscuit basket next to a jar of jam.
Shot List
| Type | Description | Audio | Duration |
|---|---|---|---|
| Close-up | A steaming-hot biscuit being pulled apart, revealing flaky interior layers. | Tara (V.O.): If your homemade biscuits always turn out like dense, heavy hockey pucks... | 4s |
| Wide | Tara standing in her sunny Orlando kitchen, smiling warmly at the camera. | Tara: Hey guys, welcome back to the kitchen! It is a beautiful, humid Saturday morning... | 8s |
| Overhead | Whisking the flour, baking powder, baking soda, and salt in a large metal bowl. | Tara: We are starting with our dry base. Getting these proportions right is key for a tender crumb. | 6s |
| Close-up | Grating frozen sticks of butter on a box grater, shreds falling like snow. | Tara: Now for the secret weapon: frozen butter. Grating it keeps it incredibly cold and perfectly sized. | 10s |
| Detail | Tara's hands gently tossing the grated butter into the chilled flour mixture. | Tara: Use your fingertips here, fast and light. We don't want the warmth of our hands melting anything. | 7s |
| Close-up | Pouring pale, thick buttermilk into the flour and folding it with a blue spatula. | Tara: In goes our cold buttermilk. It's going to look dry, but don't panic and don't overmix it. | 9s |
| B-roll | The shaggy dough being dumped onto a floured wooden countertop. | Tara (V.O.): This is where the magic happens. We dump this messy pile straight out. | 5s |
| Timelapse | Tara folding the dough, patting it down, turning it, and folding it again five times. | Tara (V.O.): We fold, pat, turn, and fold again. Five times total. This builds our layers. | 12s |
| Close-up | The metal biscuit cutter pressing straight down into the thick dough without twisting. | Tara: Press straight down, pull straight up. No twisting, or we seal those edges shut! | 8s |
| Medium | Tara placing the biscuits on a tray, making sure they touch, then brushing with buttermilk. | Tara: We group them close together so they help each other rise high in the oven. | 7s |
| Detail | The biscuits rising and browning beautifully inside the hot oven. | Tara (V.O.): Watch them climb! That steam is doing all the heavy lifting right now. | 8s |
| Close-up | Golden-brown biscuits fresh out of the oven being brushed with melted honey butter. | Tara: Oh my goodness, look at those peaks. A little honey butter right on top while they are hot. | 6s |
| Medium | Tony walks in, grabs a hot biscuit, takes a bite, and smiles happily. | Tony: Oh wow, Tara. These are easily the best ones you've ever made. Absolutely incredible. | 10s |
| Close-up | A beautiful final shot of a biscuit with jam sitting next to a mug of coffee in morning light. | Tara: Keep your butter cold and your hands fast, and the oven will do the rest. See you next week! | 8s |
- Capture the satisfying 'thud' sound of the cold block of dough hitting the wooden countertop.
- Get extreme close-ups of the raw, laminated layers of dough before they go into the oven to show the contrast later.
- Film the steam venting from the oven door in slow motion when rotating the baking sheet midway through.
- Slow-motion pour of the rich, dark blackberry jam dripping off a silver spoon onto the fluffy interior of a split biscuit.
- 0:00 — Upbeat, warm acoustic guitar and light percussion starting soft during the cold open.
- 0:30 — Transition to a jazzy, mid-tempo kitchen groove as ingredients are gathered.
- 2:15 — Music slows down and quietens as Tara explains the chemistry of cold butter.
- 4:45 — Rhythmic, high-energy acoustic picking during the fast-paced dough lamination sequence.
- 7:10 — Soft, suspenseful strings as the biscuits bake and Tara rotates the tray to avoid hot spots.
- 8:30 — Warm, triumphant, and joyful acoustic folk swell as the golden biscuits emerge from the oven.
- 9:45 — Soft, fading acoustic guitar chords as Tara wraps up and says goodbye.
- Keep the pacing quick and snappy during the folding process, using jump cuts synced to the folding action to show progression without dragging.
- Use clean, warm-toned text overlays in the bottom corner showing the measurements as Tara adds ingredients to the bowl.
- Amplify the natural kitchen sounds: the whisk scraping the bowl, the crunch of the biscuit crust, the sizzle of the butter brush.
- Maintain a warm, slightly warm-saturated color grade to match the sunny Florida morning vibe and enhance the golden color of the baked biscuits.
| Call | Provider | Model | Input Tokens | Output Tokens | Compute / Credits |
|---|---|---|---|---|---|
| Script | abacus.ai | gemini-3.5-flash | 1,234 | 4,009 | — |
| Image 1 — Opening Layer Reveal | abacus.ai | nano_banana2 | — | — | 6,786.95 |
| Image 2 — The Frozen Grater | abacus.ai | nano_banana2 | — | — | 6,787.1 |
| Image 3 — The Straight-Down Cut | abacus.ai | nano_banana2 | — | — | 6,786.5 |
I Finally Stopped Rushing This One Step (and the Tofu Actually Got Crispy)
I used to think crispy tofu at home was a myth, but it turns out I was just too impatient to press it properly—until today.
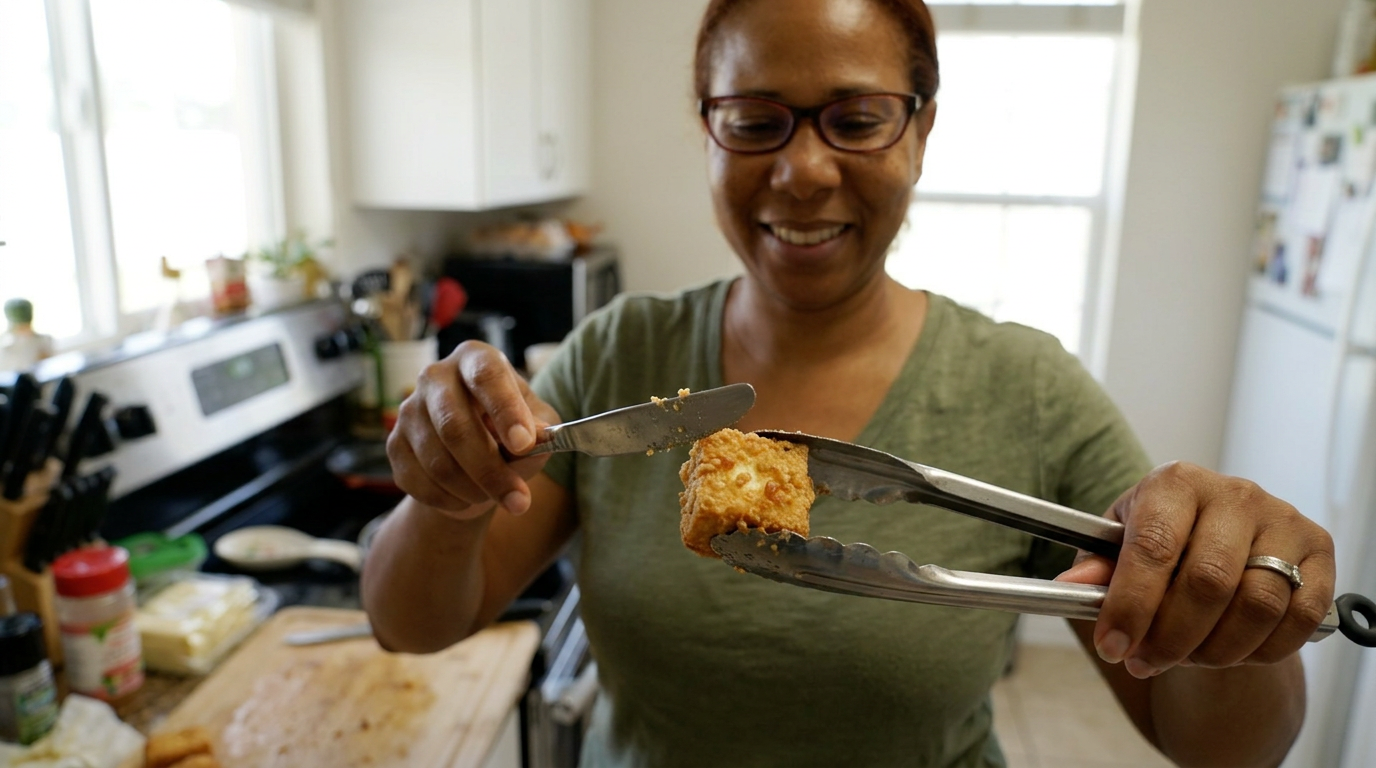
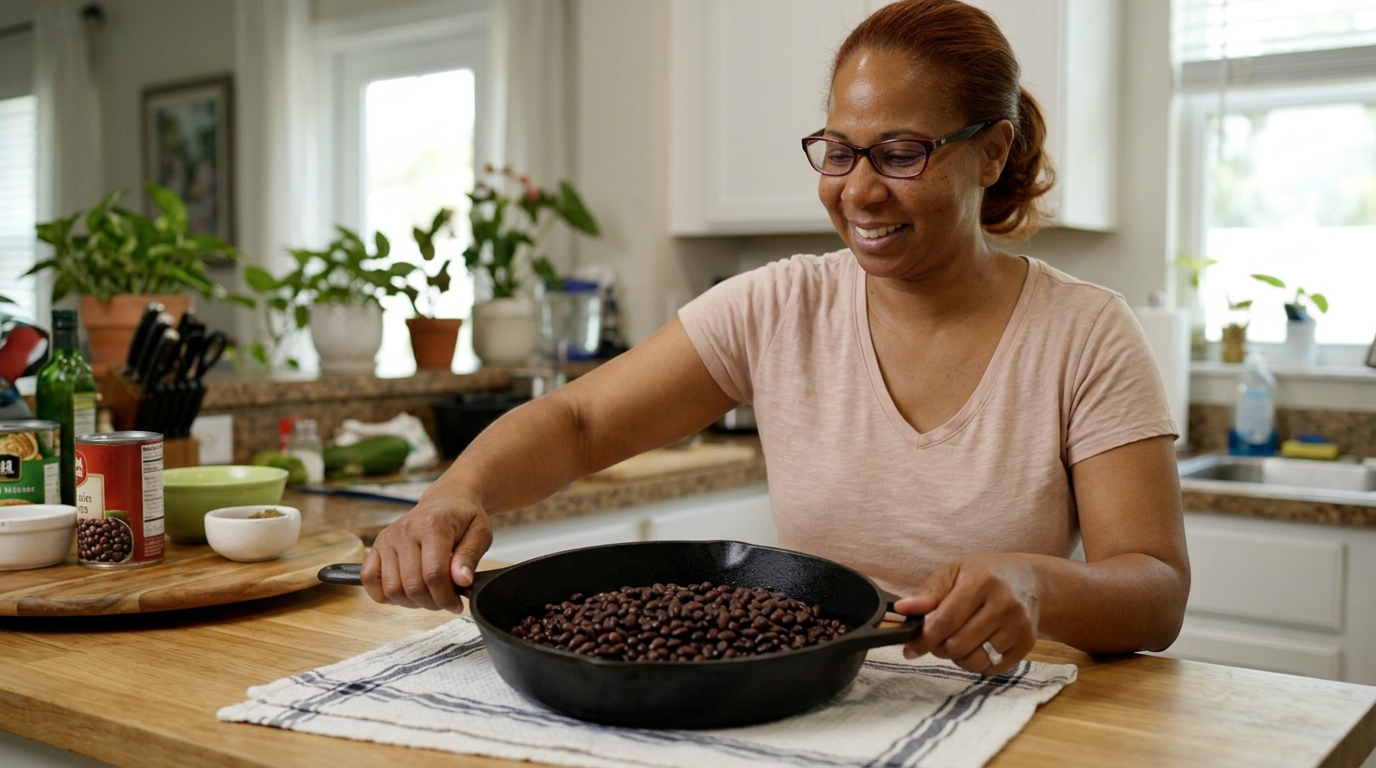
Listen to that sound. That is not the soggy, sad tofu we've all tolerated for years. This is actual, shatteringly crisp tofu, and it only took one tiny shift in my patience level to get here.
Extreme close-up of a golden-brown cube of tofu being tapped with the edge of a metal knife, producing a distinct, hollow, crispy scraping sound. Steam rises gently from it.
It was Tuesday, and the Orlando humidity was sitting outside like a heavy wet blanket. Tony and I wanted something that felt clean and light, but we still wanted that deep, satisfying crunch of take-out. We had a block of extra-firm tofu sitting in the back of the fridge, right behind the orange juice, and I knew exactly what I wanted to do with it. I wanted to make that rich, spicy, dynamic peanut sauce that clings to every single edge of a crispy cube.
But let’s be completely honest with each other: home-cooked tofu is usually a massive disappointment. We buy the extra-firm package, we half-heartedly squeeze it with a single paper towel for thirty seconds because we're hungry, we toss it in a skillet, and we wonder why it turns into a mushy, steamed mess that slides around the pan. I have been guilty of this crime at least fifty times in this very kitchen.
Today, I decided to do things differently. I promised myself I wouldn't rush. The plan was simple: a proper, disciplined press to get every drop of excess moisture out, a light coating of cornstarch, a shallow fry in a hot cast-iron skillet, and a quick whisk of a peanut sauce that hits every note—sweet, salty, lime-sour, and spicy. The stakes were incredibly low, but my pride as a home cook was completely on the line. I wanted Tony to bite into this and actually hear the crunch from across the living room.
I started by slicing the block of extra-firm tofu into thick slabs, about an inch wide. Then, I set up my makeshift pressing station on the cutting board. I laid down a clean, folded kitchen towel, arranged the slabs in a single layer, and placed another towel on top. For the weight, I grabbed my heavy cast-iron skillet and nested a couple of heavy cans of black beans inside it. I looked at the kitchen clock: it was 5:15 PM. I forced myself to walk away and leave it alone for a full thirty minutes. I didn't touch it. I didn't peek.
While the tofu was undergoing its slow-motion transformation under the weight of the black bean cans, I moved on to the peanut sauce. This is the kind of sauce you want to double just so you have it in a jar for later. I spooned a half-cup of creamy peanut butter into a glass bowl, added a splash of warm water to loosen it up, and then started layering the flavors. I grated a hefty thumb of fresh ginger and two cloves of garlic directly into the bowl. Then came two tablespoons of soy sauce, a tablespoon of maple syrup for sweetness, a squeeze of fresh lime juice, and a generous squeeze of sriracha.
I grabbed my whisk and started mixing. At first, peanut butter always does this weird thing where it seizes up and looks like broken cement. Don't panic when this happens to you. I just kept whisking, adding one more splash of warm water, and suddenly it emulsified into this gorgeous, velvety, pourable satin. I took a taste off the spoon—it was rich and nutty, but that lime juice punched right through the fat, and the ginger left a warm hum at the back of my throat. Perfect.
At 5:45 PM, I went back to the tofu. When I lifted the heavy skillet and peeled back the top towel, the difference was immediately visible. The towels were completely soaked, and the tofu slabs looked matte, dense, and slightly shrunken. Touch-testing them, they felt sturdy, almost like a soft cheese rather than a watery sponge. I sliced them into bite-sized cubes, about three-quarters of an inch square.
I tossed the cubes into a large bowl and sprinkled them with a tablespoon of soy sauce for flavor, shaking the bowl gently so they all got coated. Then came the secret weapon: two tablespoons of cornstarch. I tossed them again until every single cube was wearing a dusty, white coat. The cornstarch clings to the remaining micro-moisture on the surface, creating a dry barrier that turns into a glass-like crust when it hits hot oil.
I heated my cast-iron skillet over medium-high heat and poured in about three tablespoons of neutral avocado oil. You don't need to deep fry these, but you do need enough oil to coat the bottom of the pan completely. To test if the oil was ready, I dropped a tiny speck of cornstarch in—it sizzled instantly and vanished. That was my cue.
I added the tofu cubes to the pan one by one, making sure they weren't crowding each other. If they touch, they steam instead of fry, which defeats the entire purpose of the thirty-minute press. The sizzle was loud and incredibly satisfying. I let them cook undisturbed for about four minutes on the first side. This is where patience pays off again—if you try to flip them too early, the crust will stick to the pan and rip right off. You have to let them develop that golden crust so they release naturally.
B-roll sequence of the tofu pressing process, the whisking of the peanut batter, the cubing of the dense tofu, and the slow-motion sizzle of the cubes hitting the hot oil in the cast-iron skillet.
Using my tongs, I flipped each cube. They were a beautiful, metallic golden brown. I let them cook for another three to four minutes on the other sides, rotating them until every single face of the cubes was crisp and rigid. I transferred them to a paper-towel-lined plate to drain, and they actually made a light clinking sound as they piled up on each other. I couldn't resist—I picked one up with my fingers, blew on it, and took a bite. The crunch was absolutely incredible. It was light, airy, and shattered in my mouth, but the inside was still tender and creamy.
I plated the crispy cubes over a bed of warm jasmine rice, drizzled the thick, savory peanut sauce generously over the top, and finished the dish with a shower of chopped green onions, crushed roasted peanuts, and a few fresh cilantro leaves from our little patio herb pot. I carried the plate over to the dining table where Tony was waiting.
Tony took his first bite, stopped chewing for a second, and just looked at me. 'Did you actually fry these, or is this magic?' he asked. That was all the validation I needed. This meal proved to me that shortcuts in the kitchen are rarely worth it. Taking that extra thirty minutes to press the moisture out didn't just improve the dish; it completely transformed it from a sad weeknight compromise into a meal we genuinely couldn't stop eating. Next time, I might even double the batch, because these leftovers—if there are any—are going to be amazing.
For kitchen safety, remember that tofu carries a lot of water, so ensure it is thoroughly pressed to avoid hot oil splattering when frying. If you have peanut allergies in your home, this recipe works beautifully with sunflower seed butter or almond butter as a direct swap!
Medium shot of Tara and Tony sitting at their dining table, laughing and enjoying the meal, followed by a final, lingering close-up of the plated tofu with sauce dripping down the side of a crispy cube.
Shot List
| Type | Description | Audio | Duration |
|---|---|---|---|
| Close-up | A golden, crispy tofu cube is tapped with a knife, producing a distinct crunch sound. | Sound of crisp scraping. Tara (VO): 'Listen to that sound. That is not the soggy tofu we are used to.' | 5s |
| Medium | Tara stands in her sunny Orlando kitchen, holding a package of extra-firm tofu. | Tara: 'Hey everyone, welcome back to the kitchen. Today, we are tackling a massive kitchen lie: that home-cooked tofu can't be crispy.' | 15s |
| Overhead | Tara slicing the tofu block into clean, even slabs on a wooden cutting board. | Tara (VO): 'It all starts with slicing. I used to just crumble it, but clean slabs are the way to go for even pressing.' | 10s |
| Detail | Tara placing a cast-iron skillet filled with heavy cans of beans on top of the towel-wrapped tofu. | Tara: 'And now, we wait. Thirty minutes. No cheating, no lifting the lid. Let the weight do the heavy lifting.' | 12s |
| Close-up | Whisking peanut butter, ginger, garlic, soy sauce, and lime juice in a glass bowl. | Tara (VO): 'While that presses, we build our peanut sauce. It starts messy and thick, but keep whisking and it turns beautifully smooth.' | 15s |
| B-roll | A stream of sriracha spirals into the peanut mixture, followed by a splash of fresh lime juice. | Music swells slightly as the sauce emulsifies into a creamy, glossy glaze. | 8s |
| Close-up | Peeling back the wet kitchen towel to reveal the dry, matte, compressed tofu slabs. | Tara: 'Look at that. The towel is soaked, and the tofu actually looks solid. This is exactly what we want.' | 10s |
| Overhead | Tossing the cubed tofu in a metal bowl with soy sauce and then dusting with cornstarch. | Tara (VO): 'A splash of soy sauce for deep seasoning flavor, and then the magic dust: cornstarch. Toss it until it's chalky.' | 12s |
| Detail | Tofu cubes sliding into sizzling hot oil in a dark cast-iron skillet. | Loud, satisfying sizzle. Tara (VO): 'Hear that? Make sure your oil is hot, and don't crowd the pan.' | 10s |
| Timelapse | Tofu cubes browning and being flipped one by one to reveal deep golden sides. | Upbeat, light acoustic music playing over the cooking action. | 15s |
| Close-up | Tofu cubes being piled onto a plate, making a dry, crispy sound as they land. | Clinking sounds. Tara: 'Oh yes. That is the sound of success right there.' | 8s |
| Medium | Tara plates the jasmine rice, piles the crispy tofu on top, and slowly drizzles the thick peanut sauce. | Tara (VO): 'Now we assemble. Hot rice, crispy protein, and that rich, savory peanut sauce pooling in the crevices.' | 15s |
| Close-up | Garnishing the dish with crushed peanuts, bright green scallions, and fresh cilantro leaves. | Tara (VO): 'A little crunch on crunch with roasted peanuts, and some fresh herbs to cut through the rich sauce.' | 10s |
| Medium | Tony takes a bite, smiles, and nods enthusiastically at Tara behind the camera. | Tony: 'Wow, this actually has a real crunch. It's awesome.' Tara: 'Told you! Patience pays off.' | 12s |
| Close-up | A final beautiful shot of the steaming dish with a recipe card overlay. | Tara: 'Give this a try tonight, don't rush the press, and let me know how it goes. I'll see you next week!' | 15s |
- Capture the macro texture of the raw tofu before and after pressing to visually emphasize the moisture loss.
- Get a slow-motion shot of the cornstarch being dusted over the tofu cubes in a metal bowl.
- Record high-quality natural kitchen audio of the tofu frying sizzle and the clink of the crispy cubes hitting the plate.
- Ensure close-ups of the herbs being chopped show off the freshness of the green scallions and cilantro.
- 0:00 — Warm, light acoustic guitar introduction starts softly.
- 1:15 — Music transitions to a slightly upbeat, rhythmic kitchen-prep track as the pressing begins.
- 3:30 — A smooth, jazz-inspired chillhop beat enters as the peanut sauce is whisked.
- 6:00 — Music drops in volume to highlight the sizzle sound of the frying tofu.
- 7:45 — Upbeat, cheerful acoustic tune returns as the dish is plated and assembled.
- 9:15 — Warm, relaxing acoustic outro music fades in during the tasting and farewell.
- Use clean, minimalist text overlays for ingredient measurements during the sauce prep.
- Emphasize natural sound design—boost the volume of the tofu crunch and the pan sizzle to make the video satisfying to watch.
- Keep the pacing relaxed during the setup but quicken the cuts during the frying stage to build excitement.
- Maintain a warm, slightly warm-toned color grade to enhance the cozy, home-cooked Florida kitchen aesthetic.
| Call | Provider | Model | Input Tokens | Output Tokens | Compute / Credits |
|---|---|---|---|---|---|
| Script | abacus.ai | gemini-3.5-flash | 1,231 | 4,323 | — |
| Image 1 — The Golden Crunch Test | abacus.ai | nano_banana2 | — | — | 6,787.8 |
| Image 2 — The Heavy Press Setup | abacus.ai | nano_banana2 | — | — | 6,788.4 |
Slow Cooker White Chicken Chili: The 5 PM Rescue
I dumped everything in at 7 AM, but it took a last-minute kitchen intervention at 5 PM to turn this from a bland soup into the creamiest chili we’ve ever had.
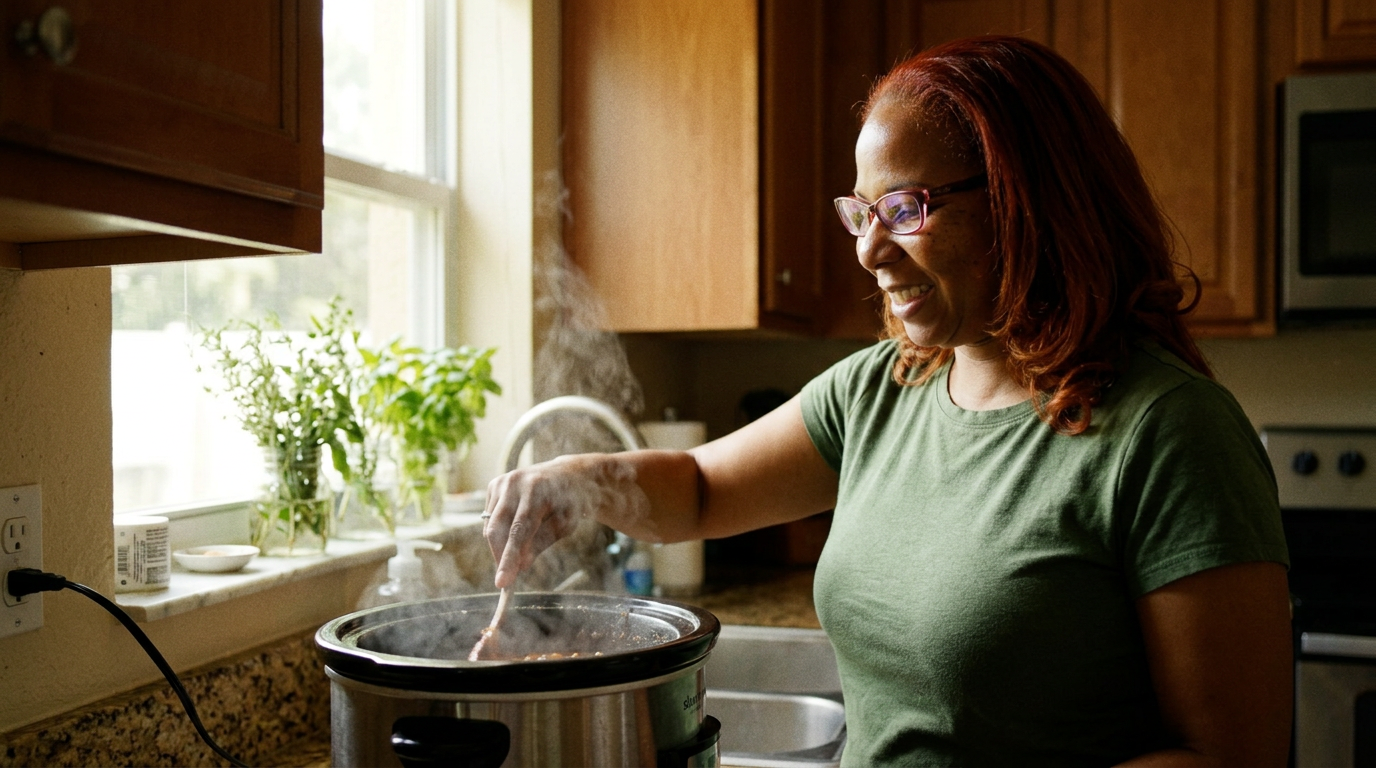
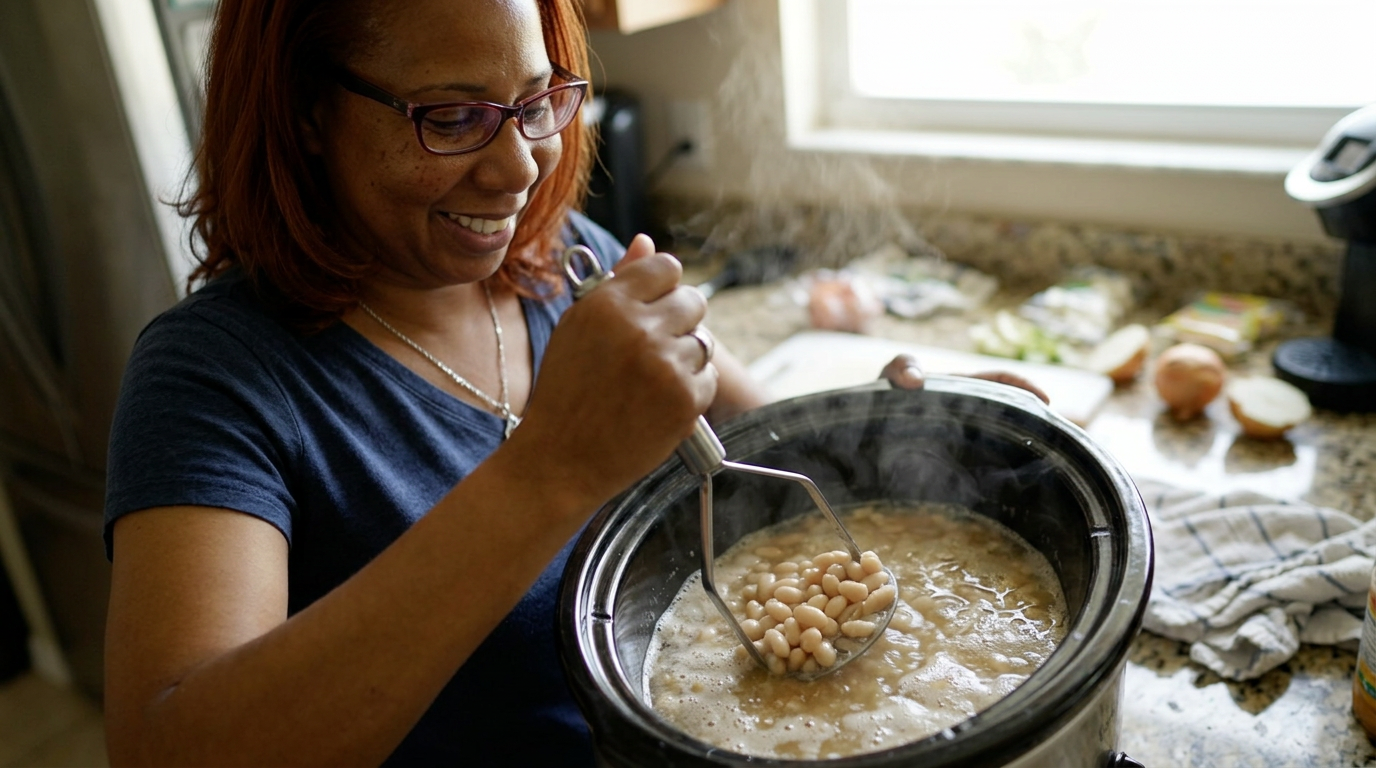
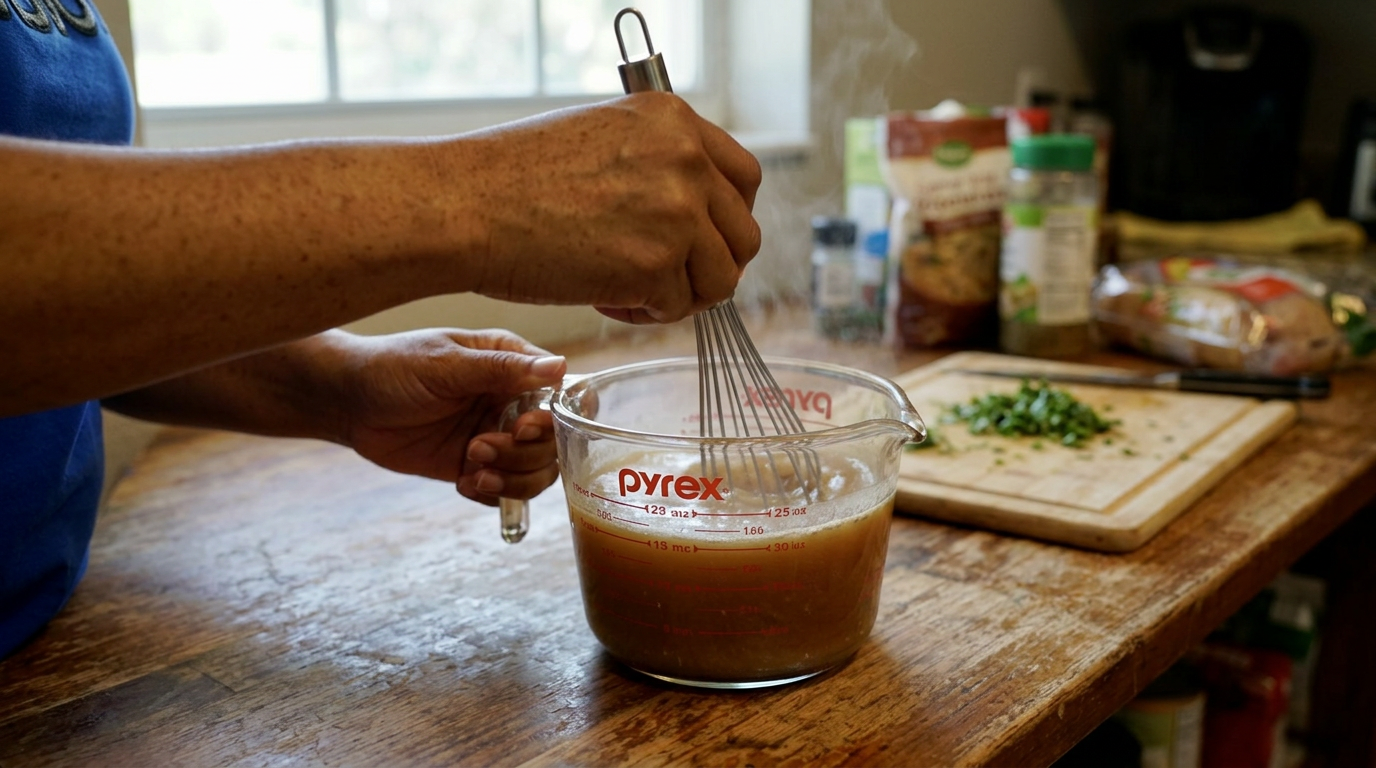
We’ve all been there: you set the slow cooker in the morning, walk away, and come home to a kitchen that smells amazing—but a dish that tastes completely flat. Today, we're fixing that.
Close-up of Tara’s hand lifting the heavy slow cooker lid in a burst of steam, revealing a bubbling but somewhat pale, watery chicken broth, then cutting to her direct-to-camera face looking slightly concerned.
It was one of those swampy, unpredictable Tuesday mornings in Orlando where the humidity is already at eighty percent by 7:00 AM, and you just know you won't have the energy to stand over a hot stove at the end of the day. Tony had a late shift at the shop, I had a mountain of edit work, and a slow cooker meal felt like the ultimate life raft. I wanted something cozy but not too heavy, so I decided on a creamy white chicken chili.
My plan was beautifully simple. I grabbed three massive chicken breasts from Publix, a few cans of Great Northern beans, some chopped green chiles, and a blend of cumin, coriander, and oregano. I threw it all into the pot with a carton of chicken stock, set it to low for eight hours, and walked out the door feeling like a domestic genius. I even bragged to Tony on my way out about how dinner was already done.
But here’s the thing about slow cookers: they are fantastic for tenderizing meat, but they are notorious flavor thieves. Because the lid stays sealed, nothing evaporates. There’s no reduction, no concentration of flavors, and absolutely no browning. When I unlocked the front door at 5:00 PM, the house smelled incredible, but one look under that lid told me I was in trouble. The chicken was cooked, but it was floating in a pale, thin, uninspired puddle. It was soup, not chili, and it lacked any sort of depth.
I stood there in my kitchen with my keys still on the counter, staring at this pot of beige sadness. Tony was going to be home in an hour, and he expects chili to have some body to it. I grabbed a pair of tongs, pulled the chicken breasts out onto a cutting board, and shredded them. They were incredibly tender, falling apart under my forks, which was the one saving grace. But when I tasted the broth? It was like warm water with a whisper of cumin. I needed to pivot, and fast.
The first problem was the texture. It was completely watery. I remembered a trick my grandmother used for her potato soups: starch loading. I took a potato masher directly into the slow cooker and mashed about a third of the whole white beans right against the side of the stoneware. Instantly, the starch from the beans released into the broth, clouding it up and giving it an immediate, natural thickness. It was a good start, but it wasn't enough.
Next, I needed to address the creaminess. A lot of recipes call for tossing blocks of cream cheese straight into the pot, but if you do that when the liquid is too hot, it curdles into tiny, unpleasant white specks. To prevent this, I scooped out two ladles of the hot broth into a glass measuring cup, dropped in eight ounces of cubed, room-temperature cream cheese, and whisked it like crazy on the counter. This tempered the cheese, turning it into a silky, smooth paste before it ever touched the main pot.
I poured that velvety mixture back into the slow cooker, and the color instantly transformed from a sad gray-translucent to a beautiful, rich ivory. I stirred the shredded chicken back in, but a quick spoonful revealed another issue—it was utterly flat. Heat and acid were missing. The green chiles from the morning had lost their punch over the eight-hour simmer.
To solve the flavor crisis, I raided the fridge. I found a lime that was slightly wrinkled but still juicy, and a jar of pickled jalapeños. I squeezed the juice of the entire lime straight into the pot to cut through the heavy cream cheese, and then splashed in two tablespoons of the pickled jalapeño brine. That brine is a secret weapon; it has vinegar, salt, and garlic flavor all concentrated in one splash.
For spice, I realized the ground cumin I used in the morning had lost its aromatics. I toasted a fresh teaspoon of cumin seeds in a dry skillet on the stovetop for just sixty seconds until they were fragrant and smoking, crushed them with the back of a spoon, and threw them in. The difference was immediate. The kitchen suddenly smelled like a real southwestern kitchen, not just a warm appliance.
Finally, I folded in a cup of frozen sweet corn for a pop of color and sweetness, and a big handful of freshly chopped cilantro. I turned the slow cooker up to high just to let all these frantic, last-minute adjustments get to know each other for about fifteen minutes. As the chili bubbled, the starch from the mashed beans and the tempered cream cheese bound together, creating this thick, luxurious gravy that coated the back of my spoon perfectly.
Handheld shots of mashing the beans, whisking cream cheese in a separate cup, squeezing lime, and stirring the vibrant green cilantro and yellow corn into the creamy base.
Just as the timer ticked to 5:45 PM, Tony walked through the back door, kicked off his boots, and immediately sniffed the air. I ladled the thick, velvety chili into two wide bowls. I topped mine with sliced radishes for crunch, extra cilantro, a scoop of sour cream, and a handful of crushed tortilla chips. It looked like a restaurant-quality meal, a far cry from the watery disaster I was staring at forty-five minutes prior.
We sat down at the table, and Tony took his first bite. He closed his eyes, nodded, and said, 'Tara, this is the best one yet. It’s so rich, but it doesn't feel heavy.' I tasted it myself and couldn't believe it. The lime juice and jalapeño brine completely woke up the chicken, while the mashed beans gave it that slow-simmered, all-day thickness without having to use a flour roux.
What I learned today is that slow cookers are great tools for hands-off cooking, but they aren't magic. Sometimes you have to step in at the end to bring the brightness, the texture, and the fresh aromatics back to life. Next time, I think I'll add some smoked paprika to the spice blend, but for now, this recovered white chicken chili is officially going into our permanent winter rotation.
Slow motion close-up of a spoon lifting a perfect bite of creamy chili with melting cheese and a tortilla chip, panning up to show Tara smiling and eating across the table from Tony.
Shot List
| Type | Description | Audio | Duration |
|---|---|---|---|
| Close-up | Steam rising as the slow cooker lid is lifted, revealing pale liquid. | [Sizzling steam sound] Tara (VO): I set it in the morning, walked away... | 4s |
| Wide | Tara in her Orlando kitchen, looking at the slow cooker under bright afternoon window light. | Tara: ...but at 5 PM, we had a major flavor emergency. | 5s |
| Overhead | Shredding juicy cooked chicken breasts on a wooden cutting board with two forks. | Tara (VO): The chicken itself was incredibly tender, but the broth was completely flat. | 6s |
| Close-up | Potato masher pressing beans against the side of the stoneware insert. | [Squishing sounds] Tara (VO): So, step one of the rescue: mashing the beans for instant thickness. | 7s |
| Medium | Tara ladling hot broth into a glass measuring cup with cubed cream cheese. | Tara: Do not throw cold cream cheese straight into hot soup, or it will curdle. We have to temper it. | 8s |
| Detail | Whisking cream cheese and hot broth into a perfectly smooth white paste. | [Clinking whisk sounds] Tara (VO): See how it turns into this beautiful, velvety sauce? | 6s |
| Close-up | Pouring the white cream cheese mixture back into the slow cooker and stirring. | Tara (VO): Now we're getting that gorgeous, creamy white chili color. | 5s |
| B-roll | Squeezing a fresh lime directly over the bubbling chili. | Tara (VO): We need acid. A whole lime, right in. | 4s |
| Close-up | Pouring a splash of clear pickled jalapeño juice from the jar into the pot. | Tara: And my secret weapon—a splash of pickled jalapeño brine. | 5s |
| Timelapse | Toasting cumin seeds in a small dry cast-iron skillet on the stove. | Tara (VO): Toasting fresh cumin to bring back those lost morning aromatics. | 6s |
| Detail | Stirring in yellow corn and bright green cilantro into the thick white chili. | [Bubbling sounds] Tara (VO): Look at that color contrast. It looks alive now. | 5s |
| Medium | Tony walking into the kitchen, smelling the air, and smiling. | Tony: Oh wow, honey, that smells amazing. Did you cook all day? | 4s |
| Overhead | Ladling thick chili into a white bowl and topping with radish slices, avocado, and chips. | Tara (VO): Ladled up, topped with crunch, and ready for the ultimate test. | 7s |
| Close-up | A deep spoon dip into the chili, pulling up melted cheese and chicken. | Tara (VO): Creamy, bright, and completely rescued. | 5s |
- Capture the steam rising from the slow cooker in slow motion (60fps) to emphasize the opening of the pot.
- Do a macro close-up of the lime being squeezed, capturing the tiny oil droplets spraying from the rind.
- Make sure to record the actual satisfying sound of the corn and cilantro being stirred into the thick, creamy base.
- Get a shot of the messy countertop with the prep bowls, lime halves, and empty cans to show the real-life cooking process.
- 0:00 — Upbeat, acoustic indie-folk guitar to set a warm, homey morning tone.
- 1:15 — Slightly playful, quirky acoustic plucking as Tara discovers the watery chili.
- 3:30 — Inspiring, driving rhythm as she begins her rapid-fire kitchen adjustments.
- 6:15 — Warm, jazzy lo-fi beat as the chili thickens and the kitchen smells come together.
- 8:00 — Soft, satisfying acoustic guitar melody as Tony arrives and dinner is served.
- 9:30 — Cheerful, upbeat outro music fading out as Tara signs off.
- Keep the pacing brisk during the recovery phase (Act II) with quick cuts to match the feeling of a race against the clock.
- Use a soft, hand-written font overlay to show the '5:00 PM Emergency' timestamp on screen.
- Amplify the natural kitchen sounds (the whisking, the potato masher, the lime squeeze) for an ASMR-lite sensory effect.
- Ensure color grading emphasizes the transition from the dull, grayish 'before' broth to the vibrant, warm ivory 'after' chili.
| Call | Provider | Model | Input Tokens | Output Tokens | Compute / Credits |
|---|---|---|---|---|---|
| Script | abacus.ai | gemini-3.5-flash | 1,230 | 3,981 | — |
| Image 1 — The 5 PM Inspection | abacus.ai | nano_banana2 | — | — | 6,787.2 |
| Image 2 — The Starch-Release Trick | abacus.ai | nano_banana2 | — | — | 6,786.85 |
| Image 3 — Tempering the Cream Cheese | abacus.ai | nano_banana2 | — | — | 6,786.65 |
I Stopped Overmixing My Pancakes (And They Finally Blew Up)
I always wondered why my pancakes turned out flat and chewy, until I finally stopped overmixing the batter and let the lumps do the work.
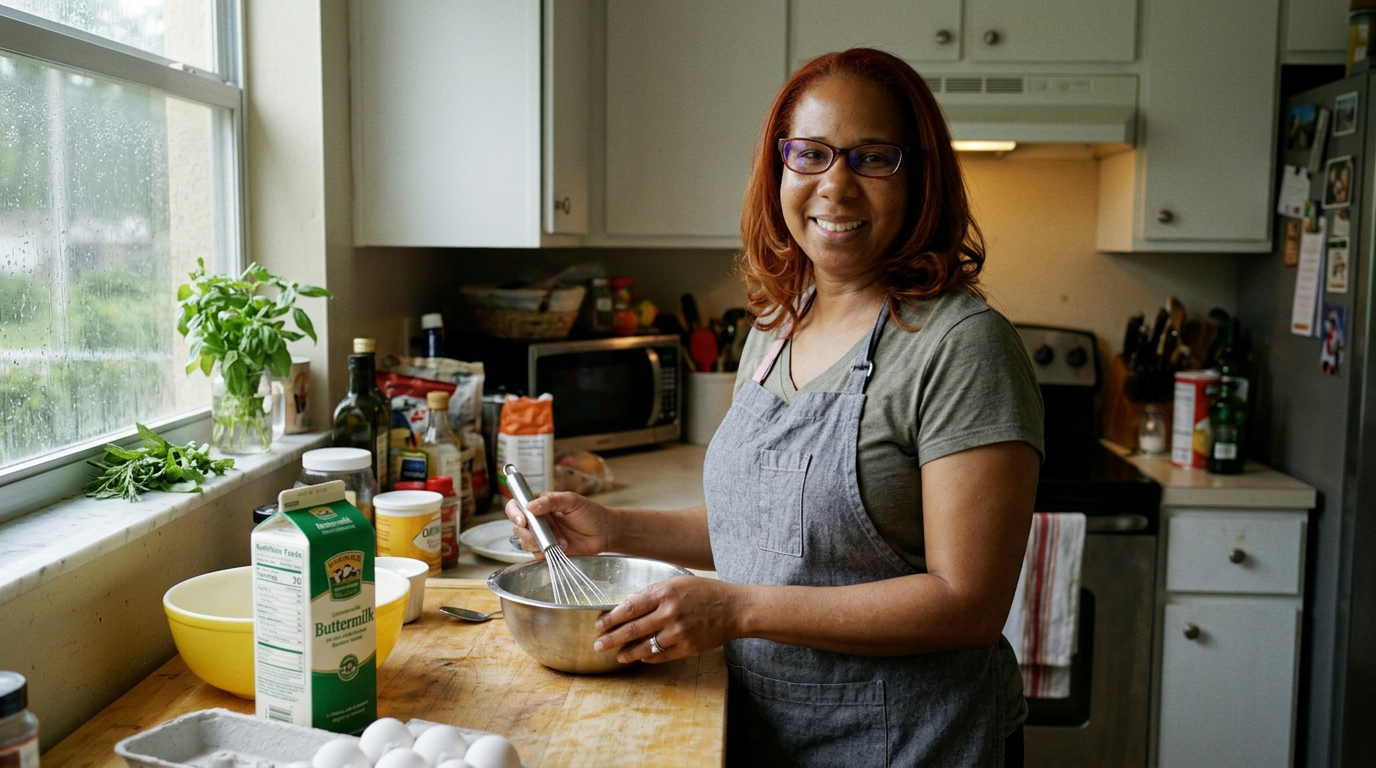
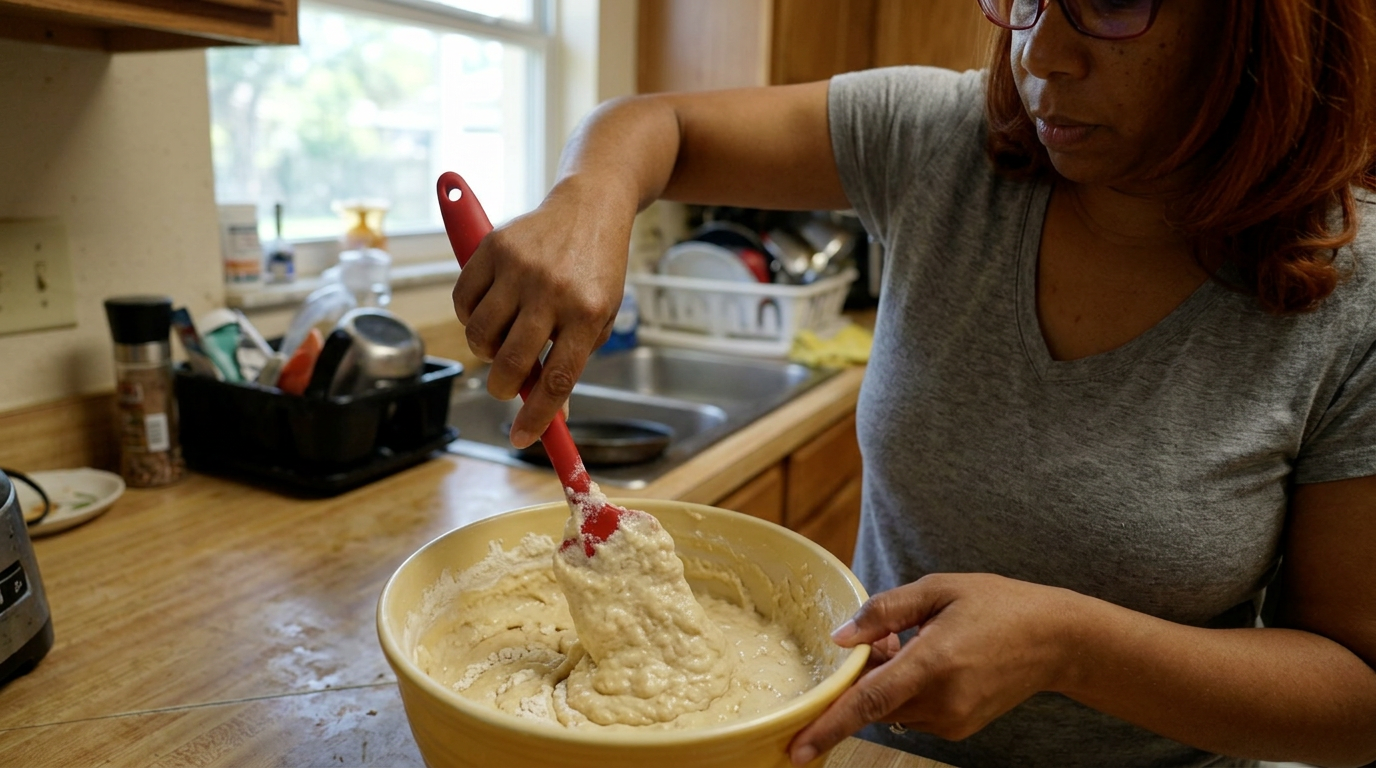
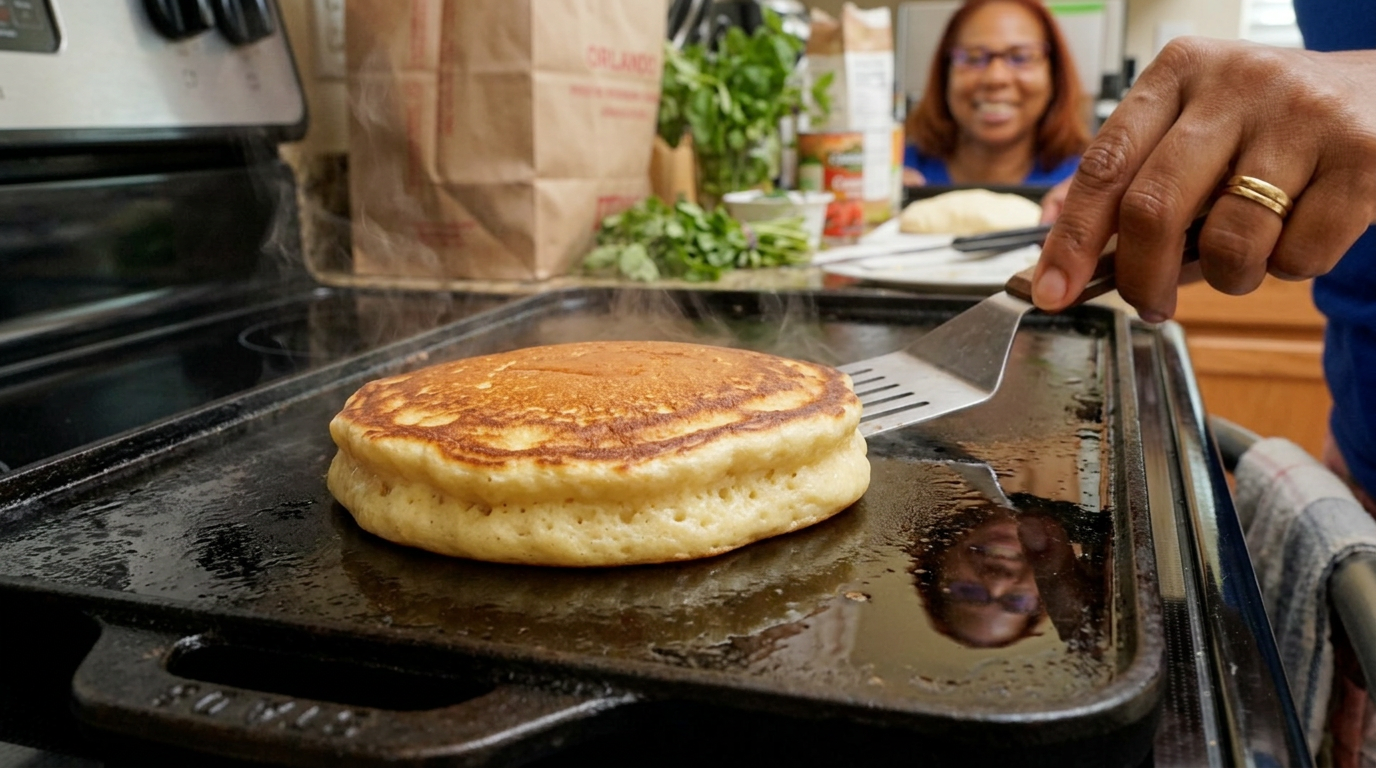
If you are still beating your pancake batter until it is perfectly smooth, I need you to put the whisk down. This is the story of how I finally stopped overmixing my buttermilk pancakes, and how a lumpy, messy batter gave us the tallest, fluffiest stack we have ever had in our Orlando kitchen.
Close-up of a fork cutting through a impossibly thick, steaming pancake, butter melting down the sides in slow motion, revealing a light, cloud-like interior texture.
It was a humid, rainy Tuesday morning here in Orlando, the kind of day where the sky is a heavy slate gray and the air feels thick enough to drink. Tony woke up early with that specific, rainy-day craving for a stack of classic buttermilk pancakes. Usually, when I make pancakes, they taste fine—they are sweet, they are buttery—but they always turn out a bit flat, almost like thick crepes. I used to think the secret to a great pancake was a perfectly smooth, silky batter, so I would stand over my mixing bowl and whisk until every single tiny pocket of flour was completely gone. I was so wrong.
That morning, I decided to do a deep dive into the science of gluten. I realized that every single pass of my whisk was developing gluten, turning my light breakfast into a chewy, tough bread. I wanted to test a theory: what would happen if I barely mixed the batter at all? What if I left it looking lumpy, dry, and frankly, a bit unappealing? I had a carton of buttermilk in the fridge that was reaching its expiration date, some fresh eggs, and a brand-new container of baking powder. The stage was set for a low-stakes kitchen experiment.
My goal was simple but daunting: I wanted to make a stack of pancakes that looked like they belonged in a vintage diner, at least an inch thick, with a crisp, golden-brown edge and a middle that felt like a羽毛 pillow. Tony was skeptical when I told him I was going to leave giant pockets of dry flour in the bowl, but he agreed to be the official taste tester. I pulled out my trusty cast-iron griddle, cleared the cluttered counter, and got to work.
I started by whisking my dry ingredients together in a large yellow bowl: two cups of all-purpose flour, a quarter cup of sugar, a teaspoon of baking powder, half a teaspoon of baking soda, and a generous pinch of kosher salt. I made sure to sift them slightly with a hand whisk just to get the lumps out of the flour itself before the wet ingredients entered the picture. In a separate measuring jug, I measured out two cups of cold buttermilk, melted four tablespoons of unsalted butter, and cracked in two large eggs.
Here was my first fork in the road: the temperature of the butter. If I poured hot, melted butter directly into cold buttermilk and eggs, the butter would immediately seize up into tiny, hard wax-like pebbles. To prevent this, I let the melted butter cool down for about five minutes on the counter while I watched the rain beat against our kitchen window. When it was lukewarm, I slowly drizzled it into the buttermilk while whisking the eggs. It emulsified beautifully, creating a rich, pale yellow liquid.
Then came the moment of truth. I poured the wet ingredients into the dry bowl. In the past, this is where I would have gone to town with a heavy wire whisk, beating it for a solid two minutes until it looked like cake batter. This time, I put the whisk away. I grabbed a wide, flexible silicone spatula instead. I promised myself I would only fold the mixture fifteen times. No more, no less.
One, two, three... with each fold, the flour began to disappear, but the batter looked incredibly thick and uneven. By fold twelve, there were still visible streaks of dry flour and massive, golf-ball-sized lumps of batter. It looked wrong. It looked like a mistake. My hand desperately wanted to do five more folds to smooth it out, but I forced myself to stop at exactly fifteen. I set the spatula down, covered the bowl with a clean kitchen towel, and let it rest on the counter for ten minutes.
While the batter rested, I heated my seasoned cast-iron griddle over medium-low heat. Cast iron is amazing for heat retention, but it can get hot spots, so I let it warm up slowly for about six minutes. I tested the surface with a few drops of water; they danced and sizzled away instantly. I lightly greased the griddle with a tiny bit of unsalted butter on a paper towel, just enough to create a thin sheen without leaving a puddle of grease that would make the pancakes fry instead of griddle.
I uncovered the batter, and my jaw dropped. In just ten minutes, the chemical reaction between the acidic buttermilk, the baking soda, and the baking powder had transformed the mixture. It was no longer flat and lumpy; it had puffed up into a thick, aerated, almost mousse-like foam. The giant lumps were still there, but they were suspended in a cloud of carbon dioxide bubbles. The dry flour streaks had miraculously absorbed the moisture on their own during the rest.
Using a dry measuring cup, I scooped up a portion of the batter. It was so thick it slid out of the cup in one glorious, fluffy dollop onto the hot griddle. I didn't spread it out with the spoon; I just let it sit there. Within two minutes, the kitchen smelled like sweet butter and toasted flour. I watched the edges closely. Tiny bubbles began to form on the surface, but because the batter was so thick, they didn't pop and leave permanent holes like they do in thin batter. They just puffed the pancake up even higher.
I slid a thin spatula underneath. The bottom was a perfect, uniform mahogany brown. I flipped it with a quick flick of my wrist. The moment the uncooked side hit the cast iron, the pancake ballooned upward, nearly doubling in thickness right before my eyes. It was working. I cooked the second side for another ninety seconds, then transferred it to a warm wire rack inside a low oven to keep it crisp. I repeated the process with the remaining batter, resisting the urge to stir the batter in between scoops to keep from deflating those precious air bubbles.
A montage of hands gently folding thick batter with a red spatula, close-ups of bubbles forming on a hot griddle, a satisfying golden-brown flip, and steam rising as pancakes are stacked.
I stacked four of the finished pancakes on a warm plate, topped them with a generous pat of salted butter, and poured warm maple syrup over the top. The syrup cascaded down the sides, catching in the nooks and crannies of the textured edges. I carried the plate over to the dining table where Tony was waiting with two mugs of hot coffee.
We cut into the stack together. The knife sank through the layers with absolutely zero resistance. Inside, the texture was unbelievably airy, filled with thousands of tiny pockets of steam. There wasn't a single speck of raw, dry flour left—the heat of the pan and the steam had cooked those lumps perfectly. Tony took a bite, closed his eyes, and just nodded. It was light, melt-in-your-mouth tender, with a subtle tang from the buttermilk that balanced the sweet syrup perfectly.
This simple change completely revolutionized breakfast in our house. I realized that sometimes, the best thing you can do in the kitchen is to just step back and let chemistry do the heavy lifting. Next time, I think I will try folding in some fresh Florida blueberries right at the very end, but for now, this simple, lumpy, perfect recipe is our new weekend standard. No more overmixing, no more flat pancakes—just pure, fluffy joy.
Tara and Tony smiling at the table, taking bites of the pancakes, with the rainy window and cozy kitchen in the background.
Shot List
| Type | Description | Audio | Duration |
|---|---|---|---|
| Close-up | Syrup dripping slowly down a high stack of golden-brown pancakes. | Rain pattering gently against a window pane in the background. | 5s |
| Medium | Tara standing in her cozy Orlando kitchen, smiling and holding a mixing bowl. | Tara: 'If you are still beating your pancake batter until it is perfectly smooth, put the whisk down.' | 8s |
| Overhead | Whisking flour, sugar, baking powder, baking soda, and salt in a yellow bowl. | Tara: 'We start with our dry base, sifting it lightly just to get the packing out of the flour.' | 10s |
| Detail | Drizzling melted butter into a jug of cold buttermilk and eggs while whisking gently. | Tara: 'Make sure your melted butter is lukewarm, or it will clump up in the cold buttermilk.' | 12s |
| Close-up | Pouring the wet ingredients into the dry bowl in a single, smooth stream. | Tara: 'Now, this is the exact moment where things usually go wrong.' | 7s |
| Overhead | Tara using a red spatula to fold the batter, counting out loud. | Tara: 'One, two, three... we are stopping at exactly fifteen folds. No more.' | 15s |
| Close-up | The extremely lumpy, thick batter sitting in the bowl with visible flour streaks. | Tara: 'It looks terrible, I know. But we are going to let it rest for ten minutes.' | 10s |
| Timelapse | The pancake batter rising and bubbling under a thin kitchen towel. | Soft acoustic guitar music swells slightly. | 8s |
| B-roll | Rubbing a cold stick of butter onto a hot cast-iron griddle, watching it sizzle. | Sizzling sound of melting butter on hot iron. | 6s |
| Close-up | Scooping a thick mound of bubbly batter onto the griddle; it holds its high shape. | Tara: 'Look at how thick that is. It doesn't even want to run.' | 10s |
| Close-up | Slipping a spatula under the pancake and flipping it to reveal a gorgeous golden crust. | Spatula scraping cast iron, followed by a soft sizzle. | 8s |
| Detail | Pancakes being stacked high on a ceramic plate, steaming hot. | Tara: 'Look at the height on these! They are easily an inch thick.' | 8s |
| Medium | Tony taking a bite at the table, smiling and nodding his approval to Tara off-camera. | Tony: 'Oh wow, Tara. These are so airy. Best ones yet.' | 12s |
| Close-up | A fork pressing into a pancake section, showing the sponge-like crumb inside. | Tara: 'Trust the lumps, let the batter rest, and enjoy your breakfast.' | 10s |
- Capture the condensation on the kitchen window to emphasize the humid, rainy morning atmosphere.
- Get macro shots of the batter bubbles popping slowly during the 10-minute rest phase.
- Record the distinct scraping sound of the spatula sliding under the pancake on cast iron.
- Show a messy kitchen counter shot with flour dust and eggshells to keep the video feeling authentic and unpolished.
- 0:00 — Gentle, acoustic guitar and soft piano intro, setting a cozy, rainy morning mood.
- 1:45 — Mid-tempo, upbeat acoustic indie folk as Tara starts measuring and sifting dry ingredients.
- 3:50 — Music drops to a minimal, warm ambient hum during the crucial 15-fold count to build focus.
- 5:15 — Light, playful acoustic melody resumes as the batter rests and bubbles up.
- 7:00 — Slightly energetic acoustic track with a warm bassline during the griddling and flipping montage.
- 8:45 — Soft, emotional acoustic guitar resolves into a warm finish as Tara and Tony sit down to eat.
- Keep the grading warm and slightly golden to contrast the gray, rainy window scenery.
- Use a subtle on-screen counter graphic (1 to 15) during the folding process to emphasize the strict limit.
- Enhance the low-frequency sounds of the butter sizzling and the spatula scraping the griddle for satisfying ASMR moments.
- Ensure the transition between the raw, ugly batter and the puffed-up rested batter feels dramatic and visually distinct.
| Call | Provider | Model | Input Tokens | Output Tokens | Compute / Credits |
|---|---|---|---|---|---|
| Script | abacus.ai | gemini-3.5-flash | 1,225 | 4,029 | — |
| Image 1 — The Rainy Morning Hook | abacus.ai | nano_banana2 | — | — | 6,786.95 |
| Image 2 — The Fold Count | abacus.ai | nano_banana2 | — | — | 6,787.1 |
| Image 3 — The Rise of the Pancake | abacus.ai | nano_banana2 | — | — | 6,786.9 |
I Let Time Do the Work: My Foolproof No-Knead Dutch Oven Bread
I stopped fighting with sticky yeast doughs, let time do all the heavy lifting, and finally baked a bakery-quality loaf that actually crackles when it cools.
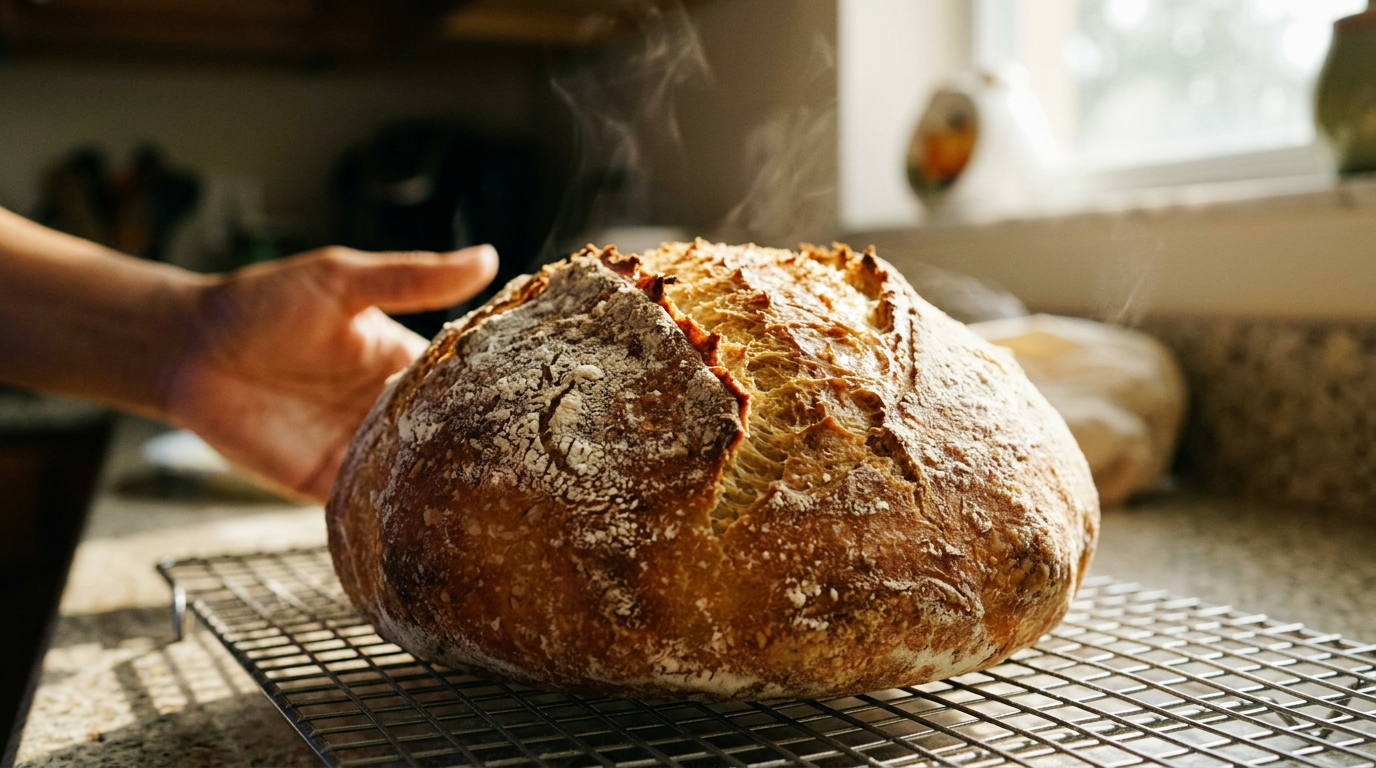
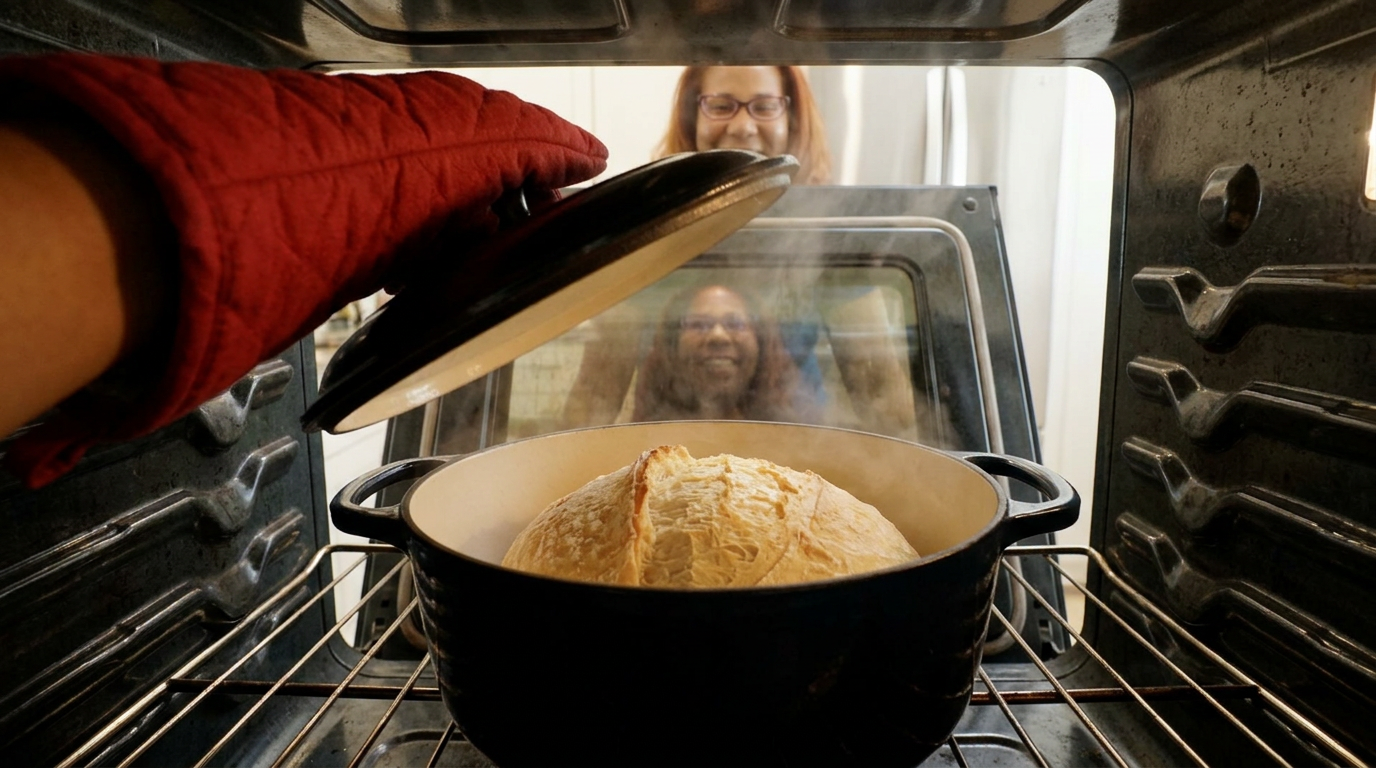
Listen to that. That micro-crackle is the sound of a perfectly baked crust cooling down on a humid Orlando afternoon. And the best part? I didn't spend a single second kneading this dough.
Extreme close-up of a golden-brown, rustic loaf of bread on a wooden cutting board. A hand gently presses the crust, eliciting a loud, satisfying crackling sound. Steam rises slightly into the warm kitchen light.
It was a Tuesday afternoon, the kind where the Central Florida humidity hangs so thick you can practically feel it on your skin, and the sky was doing that pre-storm darkening thing it loves to do around three o'clock. Tony was working at his desk down the hall, and I was craving comfort. Not just any comfort, but the smell of real, yeast-risen bread baking in the oven. The problem is, I used to dread making bread. I used to think you needed the upper body strength of an Olympic rower and a culinary school degree to get those beautiful, airy pockets and that shatteringly crisp crust.
For years, my bread attempts were closer to dense doorstops than artisanal boules. I’d get impatient with the kneading, or I’d add too much flour because the dough felt sticky, or our kitchen temperature would fluctuate and throw off the rise. But then I discovered the absolute magic of the no-knead method. It felt like a cheat code. You don't need a stand mixer, you don't need to work your forearms into a lather, and you don't even need to worry about the kitchen humidity ruining your structure. You just need four basic ingredients, a heavy Dutch oven, and the hardest ingredient of all: patience.
The plan for today was simple, yet slightly risky. I was going to mix up a high-hydration dough using just flour, yeast, salt, and water, let it ferment on the counter for eighteen long hours, and then bake it inside my heavy cast-iron pot at a scorching five hundred degrees. The goal was to prove that time can do a better job developing gluten than any human hands can. If this worked, Tony and I would have warm, crusty slices slathered in salted butter for dinner. If it failed, we'd be eating flat, gummy crackers. The stakes were low on paper, but high for my afternoon carb cravings.
I started the process yesterday evening around eight. I grabbed my favorite large ceramic mixing bowl and weighed out exactly four hundred grams of unbleached bread flour. You can use all-purpose, but bread flour has that higher protein content which gives the loaf its chewy, artisanal structure. To that, I added eight grams of fine sea salt and a mere two grams of active dry yeast. That tiny pinch of yeast always looks wrong when you see it in the bowl—it’s barely half a teaspoon—but because we are letting this rise for so long, a little goes a massive way.
I whisked the dry ingredients together, then poured in three hundred grams of cool, filtered water. Now, with a normal bread recipe, this is where the hard labor begins. But for this one, I just took the handle of a wooden spoon and stirred it until it formed a shaggy, wet, ugly mess. It looked like something you'd want to throw away—no smooth surface, no elasticity, just a sticky gloop. I scraped the sides of the bowl, covered it tightly with plastic wrap to lock in the moisture, and walked away. I left it on the kitchen counter overnight, letting the yeast slowly wake up and do its thing in our air-conditioned kitchen.
By two o'clock today, eighteen hours had passed. When I peeled back the plastic wrap, the transformation was incredible. The ugly, dry clump had turned into a bubbly, wet, fermented sea of dough. It smelled sweet, yeasty, and slightly boozy, like a mild sourdough. This is where gluten develops naturally. The water molecules hydrate the proteins, and the carbon dioxide bubbles from the slow yeast fermentation gently stretch those protein strands over hours and hours. It’s chemistry doing the kneading for us.
I heavily floured my wooden cutting board because this dough is sticky—about seventy-five percent hydration, which is quite wet. I gently tipped the bowl upside down, letting the dough drape onto the board. I didn't want to pop those precious air bubbles, so instead of kneading, I just folded the dough over on itself a couple of times, like folding a letter to go into an envelope. I shaped it into a rough round boule, placed it onto a sheet of parchment paper, and covered it with a clean kitchen towel for its second rise of about forty-five minutes.
While the dough was resting, I turned my oven up to four hundred and fifty degrees Fahrenheit and placed my empty, six-quart enameled cast-iron Dutch oven inside on the middle rack. This is the secret weapon. Baking the bread inside a preheated, covered pot mimics a professional steam-injected bakery oven. The moisture evaporating from the wet dough gets trapped inside the heavy pot, keeping the crust soft during the first half of the bake so the bread can rise to its maximum height—what bakers call 'oven spring.'
After forty-five minutes, the dough had puffed up beautifully, looking soft and delicate. The oven was roaring hot, radiating heat into the kitchen. I carefully pulled the screaming-hot Dutch oven out using heavy-duty oven mitts, set it on the stove, and lifted the lid. The blast of dry heat was intense. Working quickly but carefully to avoid a nasty burn, I grabbed the corners of the parchment paper and lowered the dough, paper and all, right into the center of the smoking-hot pot.
Before putting the lid back on, I took a sharp paring knife and made a quick, shallow slash across the top of the dough. This gives the steam an escape hatch so the bread doesn't burst open at the seams awkwardly. I popped the heavy lid back on, slid the pot back into the oven, and set a timer for thirty minutes. This is the covered bake, where the steam works its magic.
When the timer buzzed, it was time for the reveal. I pulled the oven rack out, removed the lid, and was greeted by a pale, puffed loaf that had expanded beautifully. But it wasn't done yet. I left the lid off and pushed the pot back in for another fifteen minutes to let the crust brown. Watching through the oven glass as the pale dough slowly deepened into a rich mahogany brown was mesmerizing. The smell of baking bread filled the entire house, and Tony actually came out of his office, sniffing the air with a hopeful look on his face.
Quick, energetic cuts of measuring flour, the wet shaggy mixture, the overnight yeast bubbles, folding the wet dough on the board, preheating the heavy Dutch oven, and carefully lowering the dough into the pot.
I pulled the Dutch oven out of the stove and lifted the loaf out by the parchment edges, placing it onto a wire cooling rack. And that's when it happened. As the cool kitchen air hit the hot crust, I heard it: a distinct, delicate crackling sound. It’s the sound of the crust shrinking and splitting slightly as it cools, a sign of a perfectly baked, thin, crispy exterior. The loaf was a gorgeous deep amber color, rustic and dusty with flour, with a beautiful ear where I had slashed it.
The hardest part of this entire process is waiting. You absolutely cannot cut into hot bread, as tempting as it is. If you slice it immediately, the trapped steam escapes too fast, and the interior turns gummy and wet. I forced Tony and myself to wait a full hour. When I finally ran my serrated bread knife through it, the crust shattered, revealing a soft, custody interior filled with beautiful irregular air pockets. It had the perfect chew and a rich, complex flavor that tasted like it took days of hard labor to create.
We ate the first slices warm, with a thick smear of salted butter that melted instantly into the warm pockets. It was absolute heaven—crisp, chewy, sour, and rich. Next time, I think I’ll throw in some chopped rosemary and roasted garlic during the folding stage, or maybe some sharp cheddar. But for today, this simple four-ingredient loaf was a reminder that sometimes, the best thing you can do in the kitchen is just step back, be patient, and let time do the work for you.
A slow, beautiful close-up of the bread being sliced with a serrated knife, showing the airy interior crumb. Tara and Tony take bites, smiling and nodding in satisfaction as the afternoon sun streams through the window.
Shot List
| Type | Description | Audio | Duration |
|---|---|---|---|
| Close-up | Crucial first shot of the cooling bread on a wire rack, listening to the delicate crackling sounds of the crust. | Listen to that. That micro-crackle is the sound of a perfectly baked crust... | 6s |
| Medium | Tara standing in her cozy Orlando kitchen, direct to camera, holding a mixing bowl and smiling. | It was a Tuesday afternoon, the kind where the Central Florida humidity hangs so thick... | 12s |
| B-roll | A quick shot of the stormy sky outside the kitchen window, palm trees swaying slightly in the wind. | ...and the sky was doing that pre-storm darkening thing it loves to do. | 5s |
| Overhead | Tara weighing the bread flour on a digital kitchen scale, then adding salt and yeast. | I grabbed my favorite large ceramic mixing bowl and weighed out exactly four hundred grams... | 10s |
| Close-up | The wooden spoon mixing the water and flour into a rustic, wet, shaggy mass. | ...stirred it until it formed a shaggy, wet, ugly mess. It looked like something you'd want to throw away. | 8s |
| Timelapse | The bowl sitting on the kitchen counter as night falls, the dough slowly rising and bubbling under plastic wrap. | I left it on the kitchen counter overnight, letting the yeast slowly wake up... | 7s |
| Detail | Tara peeling off the plastic wrap to reveal a highly bubbly, wet, fermented dough surface. | When I peeled back the plastic wrap, the transformation was incredible. It smelled sweet and yeasty... | 10s |
| Medium | Tara flouring her cutting board and tipping the sticky dough out, gently folding it over itself. | I gently tipped the bowl upside down... I folded the dough over on itself a couple of times, like a letter. | 14s |
| Close-up | Tara lifting the lid off the glowing, hot Dutch oven inside the hot stove, steam rising. | I carefully pulled the screaming-hot Dutch oven out... The blast of dry heat was intense. | 9s |
| B-roll | Hands dropping the paper and dough into the hot pot, slashing the top with a paring knife. | I grabbed the corners of the parchment paper and lowered the dough... taking a sharp paring knife to slash the top. | 11s |
| Detail | The lid being lifted after 30 minutes, revealing the puffed, pale gold bread inside the pot. | When the timer buzzed, it was time for the reveal. I pulled the rack out and removed the lid... | 8s |
| Medium | Tara lifting the finished, dark golden-brown bread out of the Dutch oven with parchment paper. | I pulled the Dutch oven out of the stove and lifted the loaf out... placing it on a wire cooling rack. | 10s |
| Close-up | A serrated knife slicing through the crispy loaf, releasing a crisp crunch sound and showing the airy crumb. | When I finally ran my serrated bread knife through it, the crust shattered, revealing a soft, custardy interior. | 11s |
| Close-up | Butter melting on a warm slice of bread as Tony's hand grabs a piece from the board. | We ate the first slices warm, with a thick smear of salted butter that melted instantly. | 9s |
| Medium | Tara taking a bite of the buttered bread, looking happy and content as she talks to the camera. | But for today, this simple four-ingredient loaf was a reminder that sometimes, the best thing to do is just let time do the work. | 12s |
- Capture crisp, rich audio of the bread cooling sound by placing a shotgun mic very close to the loaf immediately after taking it out of the oven.
- Film a close-up of the digital scale as the flour is poured, showing the precision of weighing ingredients in grams.
- Get a beautiful slow-motion shot of the bread knife cutting through the crust, making sure to capture the crumbs flying and the steam rising.
- Show the reality of the sticky flour mess on the counter and Tara wiping it up with a damp cloth at the end.
- 0:00 — Warm, acoustic folk guitar starts gently, building a cozy and welcoming home kitchen vibe.
- 1:30 — Music transitions to a slightly playful, upbeat tempo as Tara starts measuring ingredients and mixing.
- 3:45 — Subtle, ambient calm music during the overnight timelapse transition to show the passage of time.
- 5:15 — The tempo builds with light percussion as the oven preheats and the dough is shaped on the board.
- 7:00 — Tension-building, soft acoustic music as the hot Dutch oven is handled and the lid is removed.
- 8:30 — Joyful, celebratory classical guitar melody as the golden loaf is pulled out and starts to cool.
- 9:45 — Soft, relaxing acoustic outro music as Tara and Tony enjoy their warm bread slices.
- Keep the pacing slow and meditative during the opening, letting the natural sounds of the kitchen (cracking crust, rain outside) breathe.
- Use clean, minimal white text overlays in the bottom-left corner when showing ingredient weights (e.g., '400g Bread Flour') so viewers can follow easily.
- Boost the mid-range frequencies in the audio track when the bread is sliced to maximize the satisfying crunch sound.
- Keep the color grade warm, soft, and natural, avoiding overly saturated tones to maintain the cozy, honest vlogger aesthetic.
| Call | Provider | Model | Input Tokens | Output Tokens | Compute / Credits |
|---|---|---|---|---|---|
| Script | abacus.ai | gemini-3.5-flash | 1,235 | 4,622 | — |
| Image 1 — The Golden Crackle | abacus.ai | nano_banana2 | — | — | 6,788 |
| Image 3 — The Dutch Oven Reveal | abacus.ai | nano_banana2 | — | — | 6,788.1 |
Are 72-Hour Brown Butter Chocolate Chip Cookies Actually Worth the Wait?
I browned the butter, chilled the dough for three agonizing days, and tested whether the internet's favorite cookie secret is actually worth your time.
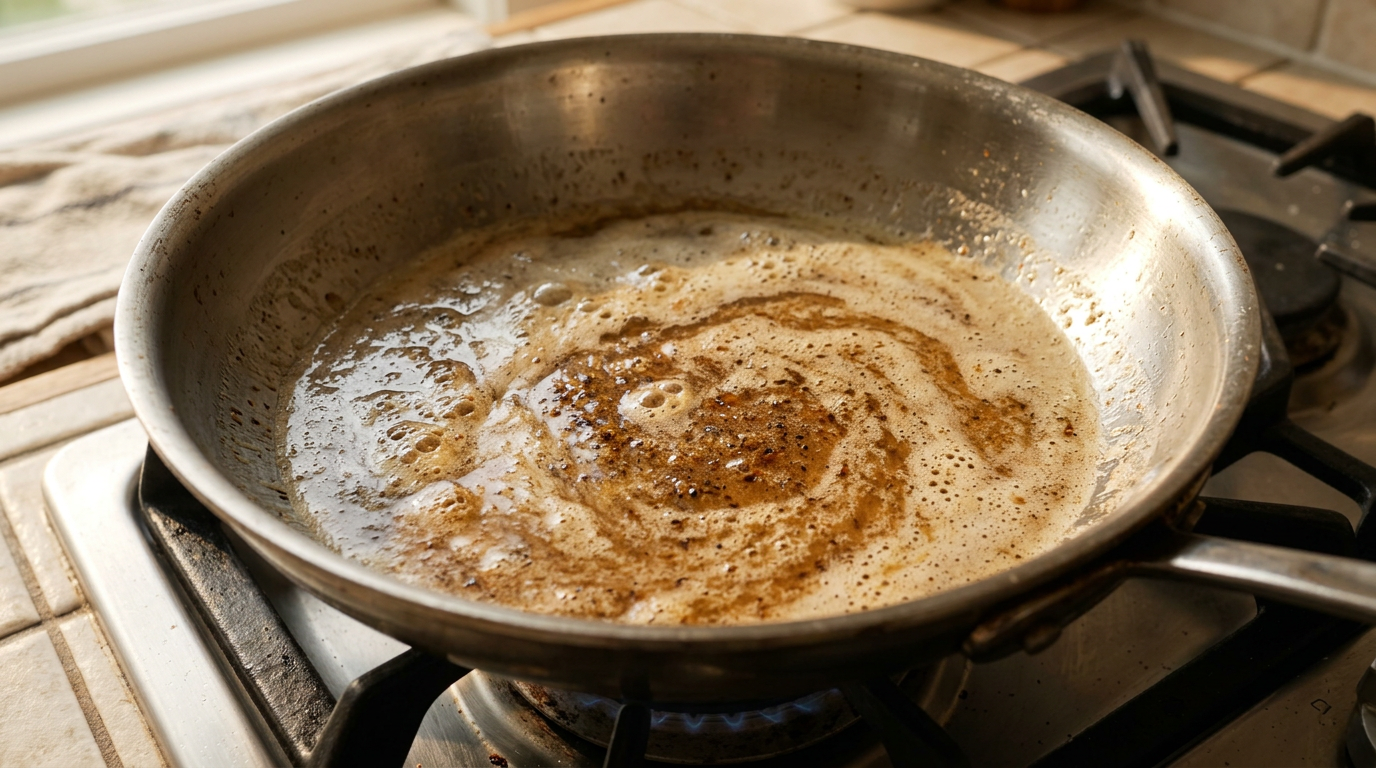
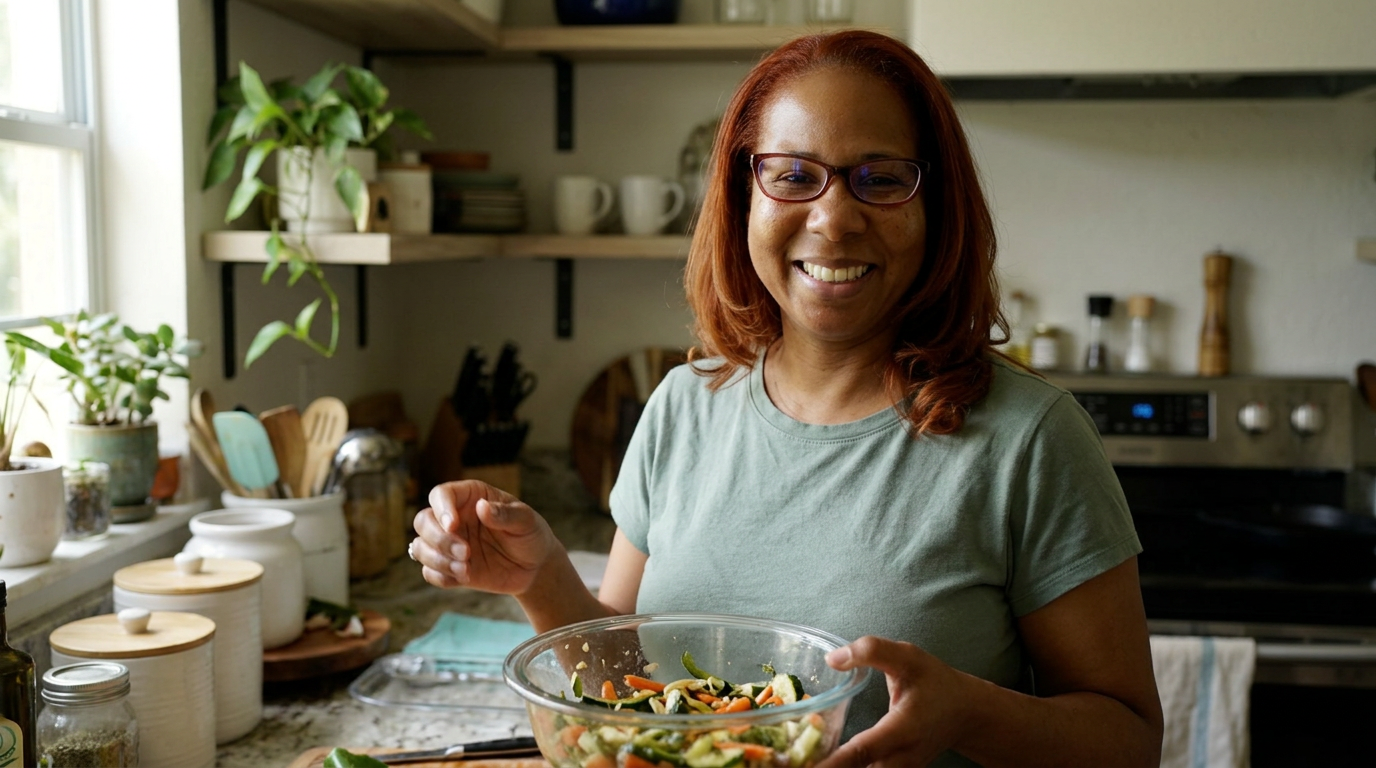
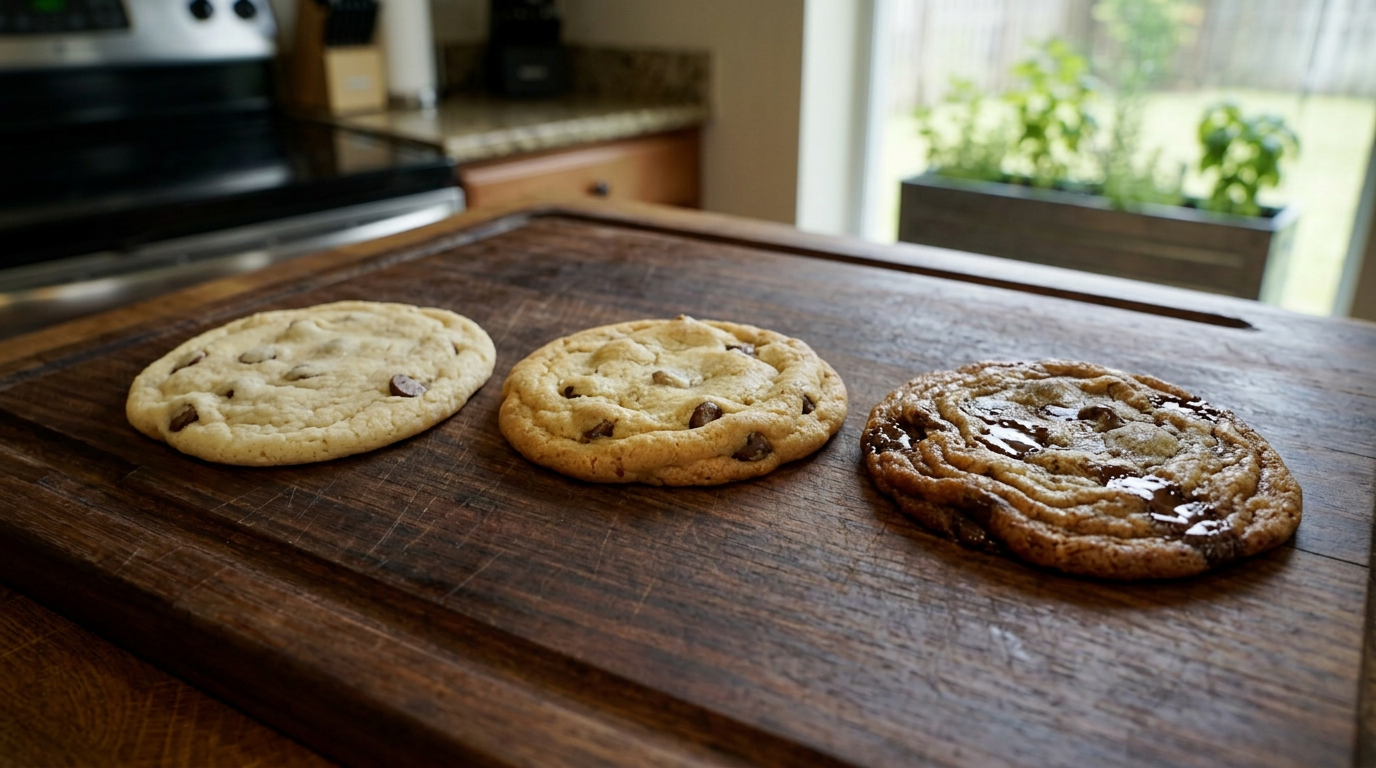
They say patience is a virtue, but when it comes to warm, gooey chocolate chip cookies, patience feels more like a punishment. Today, we are putting the ultimate baking theory to the test to see if a long, cold sleep in the fridge actually makes the perfect cookie.
Close-up of Tara's hand pulling a tray of deeply golden, wrinkled, chocolate-puddled cookies out of a textured home oven, steam rising gently as the camera focus shifts.
It was a Tuesday afternoon here in Orlando, the kind where the humidity hangs so thick you can practically feel it resting on your shoulders, and Tony was already rummaging through the pantry looking for something sweet. I had a sudden, overwhelming craving for a chocolate chip cookie—but not just any cookie. I wanted that mythical beast: the deeply caramelized, chewy-centered, crispy-edged cookie with puddles of dark chocolate and that unmistakable nutty undertone of brown butter. The catch? The recipe I wanted to use insisted on a mandatory twenty-four to seventy-two hour chill time in the fridge. I looked at Tony, looked at my empty mixing bowl, and decided right then we were going to make this a true kitchen experiment.
The plan was simple but required a ridiculous amount of self-control. I was going to bake one batch of cookies immediately after mixing the dough, another batch after a twenty-four-hour rest, and a final batch after a full seventy-two hours of cold fermentation in the refrigerator. I wanted to see if the flour actually hydrates enough to change the texture, if the sugars concentrate to create a richer caramel flavor, or if we've all just been victims of a massive internet baking conspiracy. Tony was incredibly skeptical about the wait, arguing that a cookie today is always mathematically superior to a cookie three days from now.
To make this test fair, the foundation had to be absolutely flawless. We weren't going to use standard melted butter. We were starting with brown butter—liquid gold that smells like toasted hazelnuts and toasted milk solids. I grabbed two sticks of unsalted butter from the fridge, a bag of high-quality dark chocolate feves to get those gorgeous laminated layers of chocolate instead of standard chips, and two types of sugar. The stakes were remarkably high for a Tuesday; if the seventy-two-hour cookie tasted exactly the same as the quick one, I would have wasted three days of anticipation for absolutely nothing.
I started by tossing the butter into my trusty light-colored stainless steel skillet. This is a crucial detail because if you use a dark non-stick pan, you can't actually see the milk solids changing color, and you'll go from beautiful brown butter to burnt, bitter charcoal in a matter of seconds. I swirled the pan over medium heat on our gas stove, watching the butter melt, then foam, and then begin to crackle as the water evaporated. The kitchen immediately filled with this insanely rich, warm, nutty aroma that brought Tony wandering back into the kitchen, sniffing the air like a hound dog.
Just as the crackling quieted down and those beautiful little brown specks started settling at the bottom of the pan, I took it off the heat and poured it into a heatproof bowl. Now, here is where a lot of people mess up: brown butter loses moisture as it cooks. If you don't add that moisture back, your cookies will end up dry and cakey. I weighed the brown butter and added exactly one tablespoon of cold water to bring it back to its original volume, then let it cool down to room temperature. Mixing hot butter with sugar and eggs will cook the eggs and melt your chocolate chips prematurely, turning your dough into a muddy, scrambled mess.
Once the butter was cool but still liquid, I whisked it together with dark brown sugar and white granulated sugar. I opted for a higher ratio of dark brown sugar because the molasses in it guarantees that chewy, fudgy center we all crave. Next went in the cold eggs, one at a time, followed by a generous splash of pure vanilla extract. I beat the mixture vigorously with my hand mixer for about three full minutes until it turned pale, thick, and ribbon-like. This step incorporates air, which helps create that desirable crinkly, shiny top on the baked cookies.
I folded in the dry ingredients—all-purpose flour, a touch of baking soda for spread, and a generous teaspoon of kosher salt to balance out the intense sweetness. Then came the star of the show: the chocolate. Instead of standard semi-sweet chips, which contain stabilizers that prevent them from melting completely, I hand-chopped a block of seventy-percent dark chocolate. This creates a mix of large chunks, thin shards, and tiny chocolate dust that permeates the entire dough. When you bite into the finished cookie, you get these continuous, overlapping rivers of melted dark chocolate.
With the dough fully assembled, it was time for the first test. I scooped out three large portions of the fresh, warm dough using my ice cream scoop and Placed them straight onto a parchment-lined baking sheet. I popped them into the oven at three hundred and fifty degrees Fahrenheit. As they baked, they spread out rapidly. The smell was undeniably amazing, but when they came out ten minutes later, they were quite flat, with somewhat greasy edges and a very pale golden center. Tony and I split one immediately. It was good—soft and sweet—but it lacked structure, and the flour taste was still slightly raw and separate from the butter.
The rest of the dough was wrapped tightly in plastic wrap and tucked away into the depths of our refrigerator. This is where the real science happens. During the chill time, the starch in the flour breaks down into simple sugars, and the flour fully hydrates, absorbing the liquid from the eggs and butter. It's essentially a dry-brining process for cookie dough. By Wednesday afternoon, twenty-four hours later, I pulled the dough out for phase two. The dough had completely changed color from a pale beige to a deep, warm mahogany, and it was hard as a rock. I had to let it sit on the counter for twenty minutes just to get a scoop through it.
I baked the twenty-four-hour batch under the exact same conditions: thirty-seven-five degrees for eleven minutes. The difference was visible within minutes through the oven glass. These cookies didn't spread nearly as flat. They held their shape beautifully, developing thick, wrinkled ridges around the perimeter and a soft, puffed center. When we broke one open, the crumb was noticeably tighter, chewier, and the flavor had developed a distinct caramel, почти toffee-like note that completely masked any raw flour taste. Tony admitted they were significantly better, but he still insisted the wait was torture.
Finally, Friday arrived. Seventy-two hours. Three whole days of looking at that plastic-wrapped bowl every time I opened the fridge to grab milk or leftovers. The dough now smelled incredibly complex—almost like an aged sweet dough or a light sourdough starter, sweet and deeply aromatic with vanilla and caramelized dairy. I scooped the final three portions, sprinkled them with flaky sea salt right before they went into the oven, and watched them rise, spread, and wrinkle into absolute perfection. The chocolate feves had created massive, glossy pools on top that caught the kitchen light.
B-roll sequence tracking the transformation of the dough over three days: from pale and wet, to dense and tan at 24 hours, to dark caramel and firm at 72 hours, cut with close-ups of bubbling butter and chopping chocolate block.
We lined up the three distinct cookies on our wooden cutting board for the ultimate taste test: Day Zero, Day One, and Day Three. Looking at them side-by-side, the visual difference was staggering. Day Zero was thin, wide, and pale. Day One had nice height and a golden hue. Day Three was a masterpiece—deeply bronzed, with gorgeous, concentric ring ripples, a thick, gooey center, and chocolate pools that looked like liquid obsidian. I broke the seventy-two-hour cookie in half, and the chew was so intense it actually bent before it broke.
Tony took a bite of the seventy-two-hour cookie and his eyes went wide. He didn't even say anything at first; he just pointed at the cookie and nodded aggressively. The flavor was unbelievably deep. It tasted like butterscotch, toasted pecans, and dark caramel, with a perfectly balanced saltiness that cut through the richness. The texture was the real triumph: it had a crisp, shattering edge that gave way to a dense, fudgy, almost brownie-like center. Comparing it to the Day Zero cookie was like comparing a gourmet bakery dessert to a quick slice-and-bake roll from the grocery store.
So, is the wait actually real? Absolutely, yes. While the jump from twenty-four to seventy-two hours is a subtle refinement in caramel flavor, the jump from zero to twenty-four hours is an absolute necessity. If you want a cookie that people will talk about for weeks, you have to let that dough rest. My plan going forward is to make a double batch of this dough, scoop it all into balls, freeze them after a twenty-four-hour chill, and then bake them straight from the freezer whenever the craving strikes. That way, you do the waiting once, and you harvest perfect, brown-butter bakery-style cookies on demand.
Slow-motion macro shot of Tara breaking the 72-hour cookie in half in front of the camera, showing the fudgy, chocolate-layered interior stretch and pull apart.
Shot List
| Type | Description | Audio | Duration |
|---|---|---|---|
| Close-up | Hot brown butter being poured from a stainless steel pan into a glass bowl, focusing on the dark brown caramelized specks swirling at the bottom. | Sizzling and pouring sound of liquid butter, natural kitchen hum. | 5s |
| Medium | Tara standing in her sunny Orlando kitchen, addressing the camera directly while holding a glass bowl of fresh cookie dough. | Tara: 'Today we're testing the internet's favorite baking rule: does chilling cookie dough actually make it taste better?' | 8s |
| Overhead | Hand chopping a thick block of dark chocolate with a chef's knife on a wooden cutting board, sending shards flying. | Rhythmic, crisp chopping sounds of a sharp knife hitting wood. | 6s |
| Detail | Whisking sugars and brown butter together. The mixture transforms from grainy and dark to pale, thick, and ribbon-like as eggs are added. | Whirring sound of a hand mixer, rising in pitch. | 8s |
| Close-up | Scooping fresh, wet dough immediately after mixing and placing it onto a baking sheet. | Tara: 'This is Day Zero. Straight from the mixing bowl into the hot oven.' | 5s |
| Timelapse | The Day Zero cookies melting and spreading rapidly in the oven, edges bubbling and browning quickly. | Low humming of the oven fan, warm acoustic guitar music fades in softly. | 7s |
| Medium | Tara and Tony standing by the counter, sharing the warm Day Zero cookie. Tony shrugs and nods with a mouth full of cookie. | Tony: 'I mean, it's a cookie Tara. It's good. Why wait three days for this?' | 10s |
| Close-up | Tara wrapping the remaining dough tightly in plastic wrap and placing it in a well-organized refrigerator. | Plastic wrap crinkling, refrigerator door clicking shut. | 4s |
| Detail | The dough being taken out at 24 hours. The camera shows the deep tan color change compared to the fresh dough. | Tara: 'Day one. It's solid, cold, and the sugar has completely dissolved into the flour.' | 6s |
| Wide | Tara scooping the cold, dense 24-hour dough using her body weight to press the scoop down. | Grunting slightly, laughing. Tara: 'This is a workout, but look at that texture.' | 7s |
| Close-up | Flaky sea salt falling in slow motion onto freshly baked 72-hour cookies as they sit hot on the baking sheet. | Soft crackle of salt crystals hitting the hot, bubbly chocolate surface. | 5s |
| Overhead | The three comparison cookies lying in a neat row on a rustic cutting board: flat/pale, golden/medium, and deep mahogany/puckered. | Tara: 'The visual proof is right here. Look at the difference in spread and structure.' | 8s |
| Close-up | Tara splitting the 72-hour cookie. The center is dense, chewy, and gooey with pools of chocolate stretching between the halves. | Soft tearing sound of the cookie crumb, followed by Tara's satisfied sigh. | 8s |
| Medium | Tony taking a large bite of the 72-hour cookie, closing his eyes, and pointing at the cookie in silent appreciation. | Tony: 'Okay... yeah. Shut up. You were right. This is incredible.' | 8s |
| Close-up | A final hero shot of the remaining 72-hour cookies stacked on a plate next to a glass of cold milk in the soft afternoon light. | Warm, upbeat acoustic music swells to a finish. | 6s |
- Capture the condensation forming on the mixing bowl when it first comes out of the refrigerator after 24 hours to show the humidity and cold contrast.
- Get a macro shot of the knife chopping through the chocolate block, showing the difference between dust, shards, and large chunks.
- Film the steam rising off the fresh cookies immediately as they are pulled from the oven, using backlighting from a kitchen window if possible.
- Show the physical resistance of the cookie scoop trying to cut into the 72-hour chilled dough to visually communicate how dense and hydrated it has become.
- 0:00 — Upbeat, acoustic indie-folk guitar starts, setting a warm, experimental kitchen tone.
- 1:15 — Music drops to a minimal, rhythmic percussion beat during the butter-browning explanation to emphasize the sizzling sounds.
- 3:40 — Light, playful acoustic melody enters as Tara mixes the wet ingredients and chops the chocolate block.
- 5:10 — Soft, curious synth pad plays during the 24-hour check-in, highlighting the science and passage of time.
- 7:30 — Warm acoustic guitar returns with a faster tempo as the final 72-hour cookies go into the oven.
- 8:50 — Music swells to a rich, satisfying crescendo during the final taste-test and cookie-breaking reveal.
- Use clean, minimalist lower-third text overlays showing the time elapsed: '0 HOURS (FRESH)', '24 HOURS CHILLED', and '72 HOURS CHILLED' to keep the experiment structured.
- Enhance the low-frequency sound of the cookie breaking in half to make the chewiness of the dough physically audible to the viewer.
- Keep color grading warm, golden, and natural—avoid over-saturating the yellow tones in the butter but emphasize the deep amber of the caramelized cookies.
- Ensure quick, snappy cuts during the chopping and mixing phases to keep the pacing brisk, but slow down for longer, uninterrupted shots during the tasting and reaction scenes.
| Call | Provider | Model | Input Tokens | Output Tokens | Compute / Credits |
|---|---|---|---|---|---|
| Script | abacus.ai | gemini-3.5-flash | 1,233 | 4,741 | — |
| Image 1 — The Golden Skillet | abacus.ai | nano_banana2 | — | — | 6,787.1 |
| Image 2 — Tara's Kitchen Dilemma | abacus.ai | nano_banana2 | — | — | 6,787 |
| Image 3 — The Three-Day Lineup | abacus.ai | nano_banana2 | — | — | 6,787.25 |
I Grilled a Whole Snapper on the Coals (And It Didn't Stick!)
I took a deep breath, fired up the charcoal, and faced my absolute biggest kitchen fear: grilling a whole local red snapper without losing half the skin to the grates.
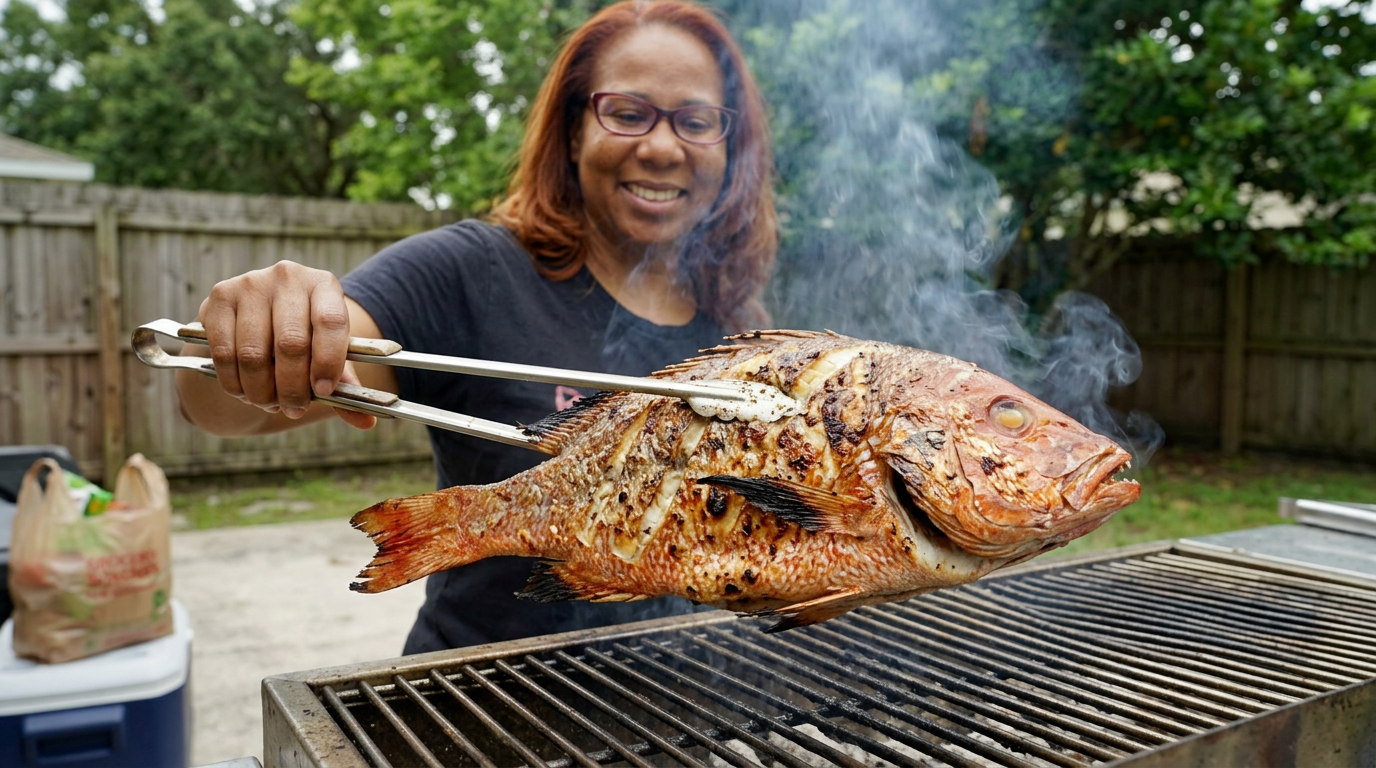
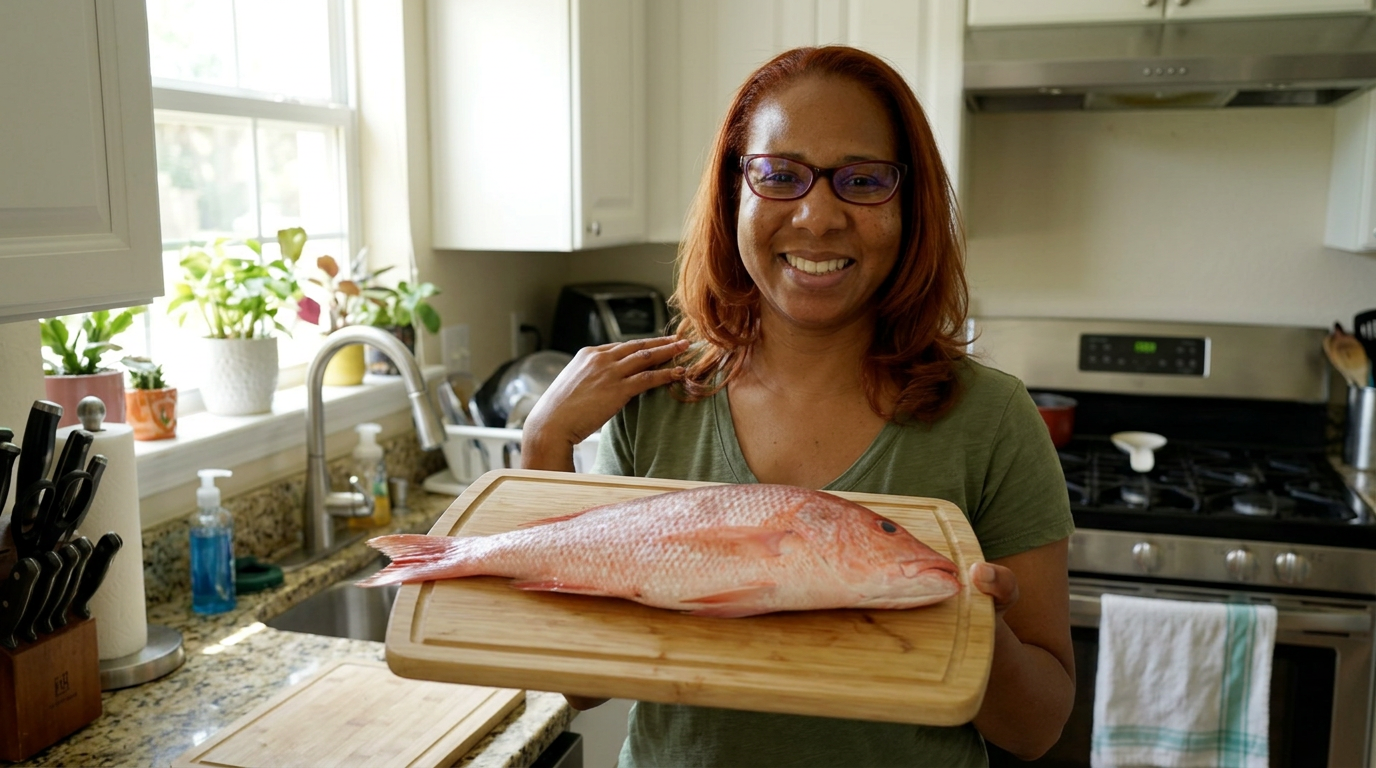
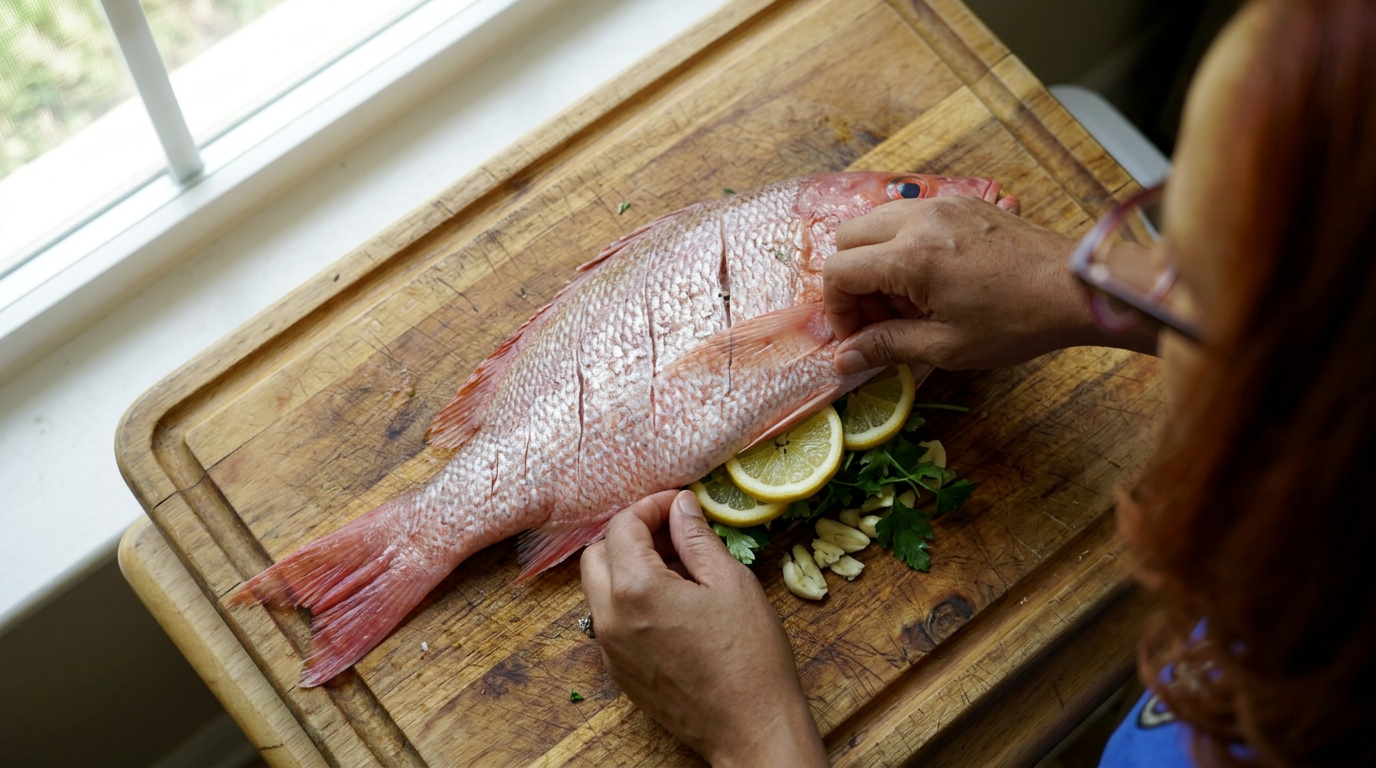
There is nothing more terrifying in the culinary world than the sound of fish skin tearing on a hot grill grate. Today, I am going to show you exactly how I conquered my fear and got a gorgeous, crispy, whole local snapper off the coals in one perfect piece.
Extreme close-up of Tara’s hands using long metal tongs to gently lift a sizzling, charred whole red snapper off a smoky charcoal grill. The skin is blistered, golden, and completely intact. Steam rises as she transfers it to a wooden board.
It was one of those classic, thick Orlando afternoons where the humidity wraps around you like a warm blanket, and the sky looks like it might open up with a sudden thunderstorm at any second. Tony and I had driven over to our favorite local seafood market earlier in the morning, and they had these stunning, incredibly fresh whole red snappers sitting on the ice. I haven't grilled a whole fish in almost two years, mostly because the last time I tried, half of the beautiful seasoned skin stuck to the grates, and we ended up eating what looked like a shark attack victim for dinner. But today felt like the perfect day for a little backyard redemption.
The plan was simple but high-stakes. I wanted to stuff the cavity of this three-pound snapper with fresh citrus from our backyard tree, lots of garlic, and fresh herbs, then cook it directly over hot charcoal. Cooking fish on the bone keeps the meat incredibly juicy, but the execution is all about heat management and patience. If the grill isn't hot enough, it sticks. If you move it too soon, it tears. If you don't prep the fish skin correctly, it's game over before you even start.
So, before the Florida skies decided to dump rain on my parade, I cleared off the outdoor prep table, got my charcoal chimney started with some lump hardwood charcoal, and laid out my ingredients. I had this beautiful snapper, a handful of fresh oregano and parsley from our patio pots, a lime, a lemon, and a head of garlic. Tony was already sitting on the patio with a cold drink, looking slightly skeptical but mostly excited about the prospect of fresh fish. The pressure was on to make this work.
The first step actually started in the kitchen, and it’s the most important secret to non-stick fish: moisture is the absolute enemy of crispy skin. I took a stack of paper towels and patted that snapper down inside and out until it was bone dry. If there's any surface moisture when the fish hits the hot metal, it essentially steams instead of searing, which causes the skin to bond to the grill grates like superglue. Once it was dry, I took a sharp chef’s knife and made three shallow diagonal slashes on each side of the fish, cutting down to the bone. This helps it cook evenly and gives us a pocket to stuff with seasoning.
For the inside, I sliced up half of our backyard lemon and a lime, smashed about four cloves of garlic, and stuffed them deep into the cavity along with the fresh oregano and parsley. I also rubbed a tiny bit of kosher salt and freshly cracked black pepper inside. For the outside of the fish, I didn't use a drop of marinade or wet sauce. Instead, I brushed it very lightly with high-smoke-point avocado oil and gave it a generous sprinkle of coarse sea salt. That’s it. Simple, clean, and dry.
By now, the charcoal chimney was absolutely roaring. I dumped the glowing red coals into one side of our kettle grill, creating a classic two-zone fire. This is my safety net. If the fish starts flaring up or cooking too fast on the outside before the thickest part near the spine is done, I can easily slide it over to the cool, indirect side of the grill and put the lid on to let it finish baking.
Now came the crucial grate preparation. I let the grill grates heat up for a full ten minutes until they were screaming hot. Then, I took a wadded-up paper towel dipped in avocado oil, gripped it with my long tongs, and carefully rubbed it over the hot grates about five times. It literally seasoned the metal like an old cast-iron skillet, creating a slick, non-stick barrier.
My heart was beating a little fast as I picked up the fish by the tail and laid it diagonally across the grates. *Sizzle.* That sound was pure music. I immediately resisted the urge to touch it. This is where most people fail. You have to let the heat do its job. For the first four minutes, I didn't move it, didn't poke it, didn't even look at it too closely. I just watched the smoke rise and enjoyed the smell of the wood and the citrus heating up inside the cavity.
At about the six-minute mark, it was time for the moment of truth: the flip. I slipped my thin, flexible metal fish spatula under the belly of the snapper. If you feel resistance, it’s the fish telling you it’s not ready to let go yet. I gave it another thirty seconds, tried again, and felt it slide right under. With a quick, confident roll, I flipped the snapper over. It worked! The skin was a gorgeous, blistered golden-brown with perfect grill marks, completely intact.
I let it go for another five minutes on the second side. To make sure it was cooked perfectly to the bone without drying out, I slid my digital meat thermometer into the thickest part behind the gills. It read 140 degrees Fahrenheit. Perfect. The carryover heat would bring it right up to the safe, flaky sweet spot of 145 degrees while it rested.
Getting it off the grill was just as nerve-wracking as flipping it. I used the spatula under the middle and the tongs supporting the tail, gently lifting the whole three-pound beauty onto a large wooden serving platter. Not a single tear. No lost skin. I let out a breath I didn't realize I was holding, and Tony actually clapped from his lawn chair.
A montage of hands-on cooking: patting the fish dry with paper towels, stuffing the cavity with bright yellow citrus slices and green herbs, oiling the roaring hot grill grates with smoky sizzling sounds, flipping the fish smoothly with a metal spatula, and checking the internal temperature with a digital probe.
I brought the platter inside just as the first heavy raindrops started splattering against the kitchen window. I squeezed the remaining fresh lime juice over the top, scattered some fresh cilantro leaves, and drizzled a tiny bit of extra virgin olive oil to make it shine. The skin looked incredibly crispy, and the aroma of charred citrus, garlic, and clean sea breeze filled the entire kitchen.
Tony and I sat down at the table with some simple yellow rice and a quick avocado salad. I used two forks to gently pull the flaky white meat away from the spine. It was incredibly juicy, tender, and infused with that subtle, smoky wood flavor and the bright pop of the backyard citrus. Cooking it on the bone really does make all the difference; it tasted like something you'd pay fifty dollars for at a beachside restaurant, but we made it right in our humid little backyard.
Looking back, the keys to this victory were so simple: drying the skin completely, getting those grates screaming hot and well-oiled, and having the patience to let the fish sear before trying to move it. Next time, I think I'll try stuffing it with some ginger and scallions for a different flavor profile, but this classic Florida citrus version is going straight into our permanent summer rotation. If you've been scared of grilling whole fish, take this as your sign to just buy the snapper and trust the process. You've got this!
Medium shot of Tara and Tony at the dining table. Tara pulls a perfect, steaming forkful of white fish from the bone, dips it in the juices on the plate, and takes a bite with a huge, satisfied smile. Tony is seen in the background happily eating.
Shot List
| Type | Description | Audio | Duration |
|---|---|---|---|
| Close-up | A close-up of a perfectly grilled, whole red snapper being lifted from the grill grate. The skin is blistered and golden-brown. | TARA (VO): There is nothing more terrifying than the sound of fish skin tearing on a hot grill. | 5s |
| Medium | Tara stands in her sunny Orlando kitchen, smiling at the camera with a fresh whole red snapper on a cutting board in front of her. | TARA: Hey everyone, welcome back to the kitchen. Today, we are facing my ultimate cooking fear: grilling a whole fish over live charcoal. | 12s |
| Detail | Close-up of the fresh snapper showing bright, clear eyes and shiny red scales, sitting on a wooden board. | TARA: Tony and I picked up this gorgeous red snapper this morning. Look at how clear those eyes are—that's how you know it's incredibly fresh. | 8s |
| Overhead | Tara uses paper towels to thoroughly dry the surface and cavity of the fish. | TARA: Rule number one, and the most important step: moisture is the absolute enemy of crispy skin. We need this fish bone-dry. | 10s |
| Close-up | Tara's hands using a sharp chef's knife to slice three diagonal gashes into the side of the fish. | TARA: I'm scoring the skin down to the bone. This helps it cook evenly and gives us pockets for our simple seasonings. | 8s |
| Detail | Tara stuffs garlic cloves, lemon slices, lime slices, and fresh green herbs into the cavity of the snapper. | TARA: We're keeping it classic with garlic, fresh oregano and parsley from the patio, and some slices of backyard citrus. | 12s |
| B-roll | A metal charcoal chimney starter sitting in a kettle grill, shooting bright orange flames and grey smoke into the humid air. | TARA (VO): Outside, I got a chimney of hardwood lump charcoal roaring. We want a really hot, two-zone fire. | 7s |
| Close-up | Tara uses tongs and a wadded paper towel dipped in oil to vigorously wipe down the hot, smoking grill grates. | TARA: I'm oiling the grates about five times. We want to create a slick, seasoned, non-stick barrier before the fish even touches it. | 10s |
| Medium | Tara carefully lays the whole fish onto the hot grill grate. A loud, satisfying sizzle erupts. | TARA: Here goes nothing. Once it hits the grate, do not touch it! Let the heat do its job. | 10s |
| Timelapse | The fish cooking on the grill over direct coals as smoke gently rolls out of the kettle grill. | TARA (VO): We let it sear for about six minutes. I didn't touch it, didn't poke it, just let that skin crisp up. | 8s |
| Close-up | Tara slides a thin metal spatula under the fish and confidently flips it over, revealing perfect, unbroken charred skin. | TARA: Oh my gosh, look at that! It flipped perfectly! No sticking, beautiful grill marks. | 12s |
| Detail | An instant-read digital thermometer is inserted into the thickest part of the fish, showing 140 degrees. | TARA: We are looking for 140 degrees near the bone. It'll carry over to a safe 145 while resting. | 6s |
| Medium | Tara carries the beautiful plated snapper into her kitchen as rain begins to fall outside the window behind her. | TARA: Just in time! The Florida afternoon rain is starting, but we have a perfectly cooked fish ready for dinner. | 8s |
| Close-up | Tara uses two forks to gently pull apart the crispy skin, revealing steaming, juicy, flaky white snapper meat. | TARA: Look at how juicy that is. It's perfectly flaky, smoky, and smells absolutely incredible. | 10s |
| Medium | Tara takes a bite of the fish, closes her eyes, and smiles happily. | TARA: Wow. That is backyard perfection. Don't be afraid of whole fish, guys. You can absolutely do this. See you next time! | 12s |
- Capture a slow-motion shot of the fish hitting the oiled grates with smoke rising and a loud sizzle.
- Get a close-up of the digital thermometer screen slowly climbing from 130 to 140 degrees inside the thickest part of the fish.
- Show the contrast of the dark, blistered, smoky grill skin against the pearly-white, steaming, delicate meat inside when pulled apart with forks.
- Film a quick cut of the rain suddenly hitting the patio concrete, showing the quick transition of bringing the food indoors.
- 0:00 — Warm, acoustic indie-folk guitar intro—welcoming and light.
- 1:15 — Upbeat, light percussion joins in as prep work starts in the kitchen.
- 3:45 — Music drops to a low, rhythmic hum to build gentle tension as the charcoal chimney sparks up.
- 5:30 — Tension-filled, soft acoustic plucking as the fish is placed on the hot grill grates.
- 6:45 — Bright, celebratory swell of acoustic guitar as the fish is successfully flipped without sticking.
- 8:15 — Smooth, relaxed jazz-infused acoustic vibe as the fish rests and plating begins.
- 9:30 — Warm, uplifting folk outro music fades in during the final tasting and sign-off.
- Keep the editing pace relaxed and conversational during the kitchen prep, but tighten the cuts once the fish hits the grill to build excitement.
- Use a subtle 'sizzle' sound effect enhancement during the grill-placement shot to make the audio pop.
- Apply a warm, golden-hour color grade to the outdoor grilling footage to emphasize the Florida afternoon atmosphere.
- Add clean, minimalist text overlays for the temperature check (140°F / 145°F) and the three key rules of non-stick fish: Dry, Hot, and Patient.
| Call | Provider | Model | Input Tokens | Output Tokens | Compute / Credits |
|---|---|---|---|---|---|
| Script | abacus.ai | gemini-3.5-flash | 1,231 | 4,598 | — |
| Image 1 — The Golden Snapper Lift | abacus.ai | nano_banana2 | — | — | 6,787.5 |
| Image 2 — Welcome to Tara's Kitchen | abacus.ai | nano_banana2 | — | — | 6,787.8 |
| Image 3 — Sultry Florida Prep | abacus.ai | nano_banana2 | — | — | 6,787.3 |
I limited myself to 5 ingredients (and became a better cook)
I stripped away the kitchen clutter, limited myself to just five ingredients, and discovered the secret to making weeknight dinners taste like a restaurant.
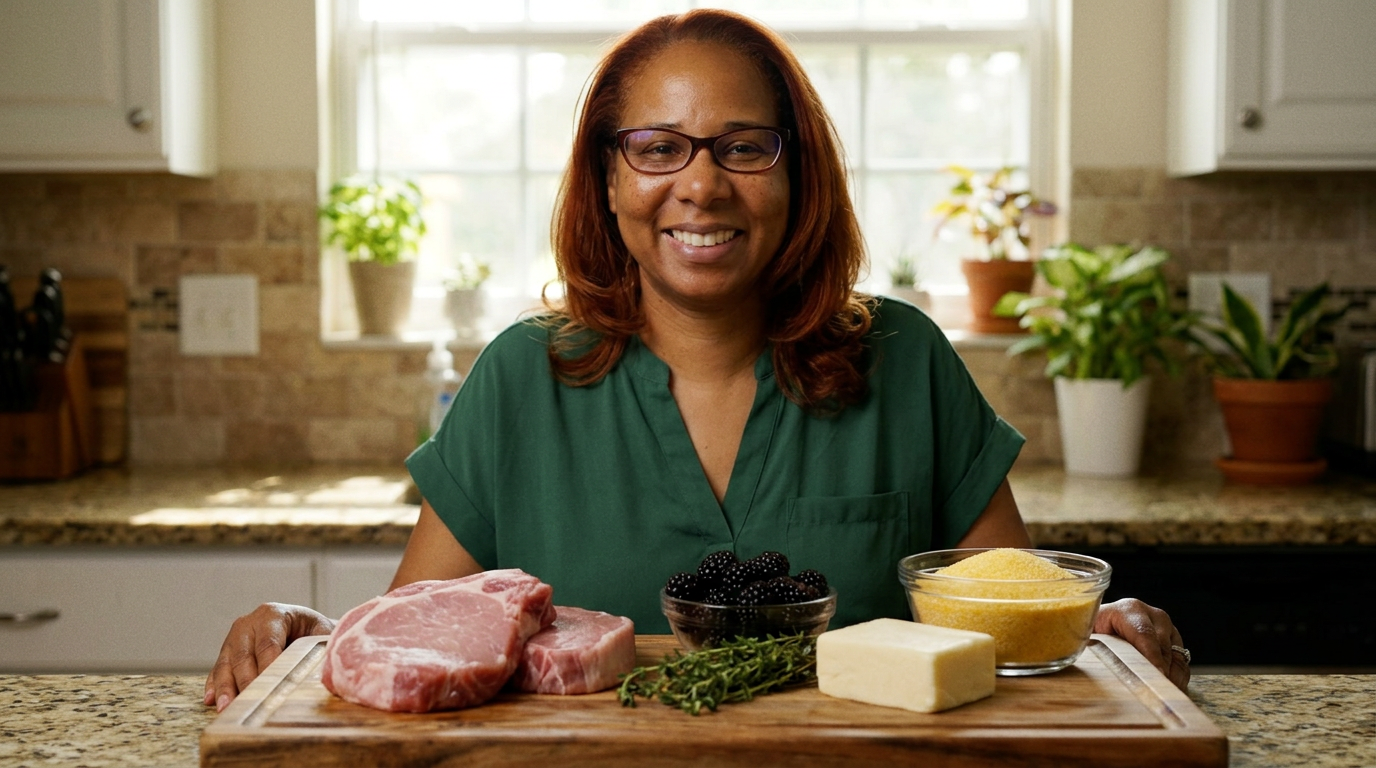
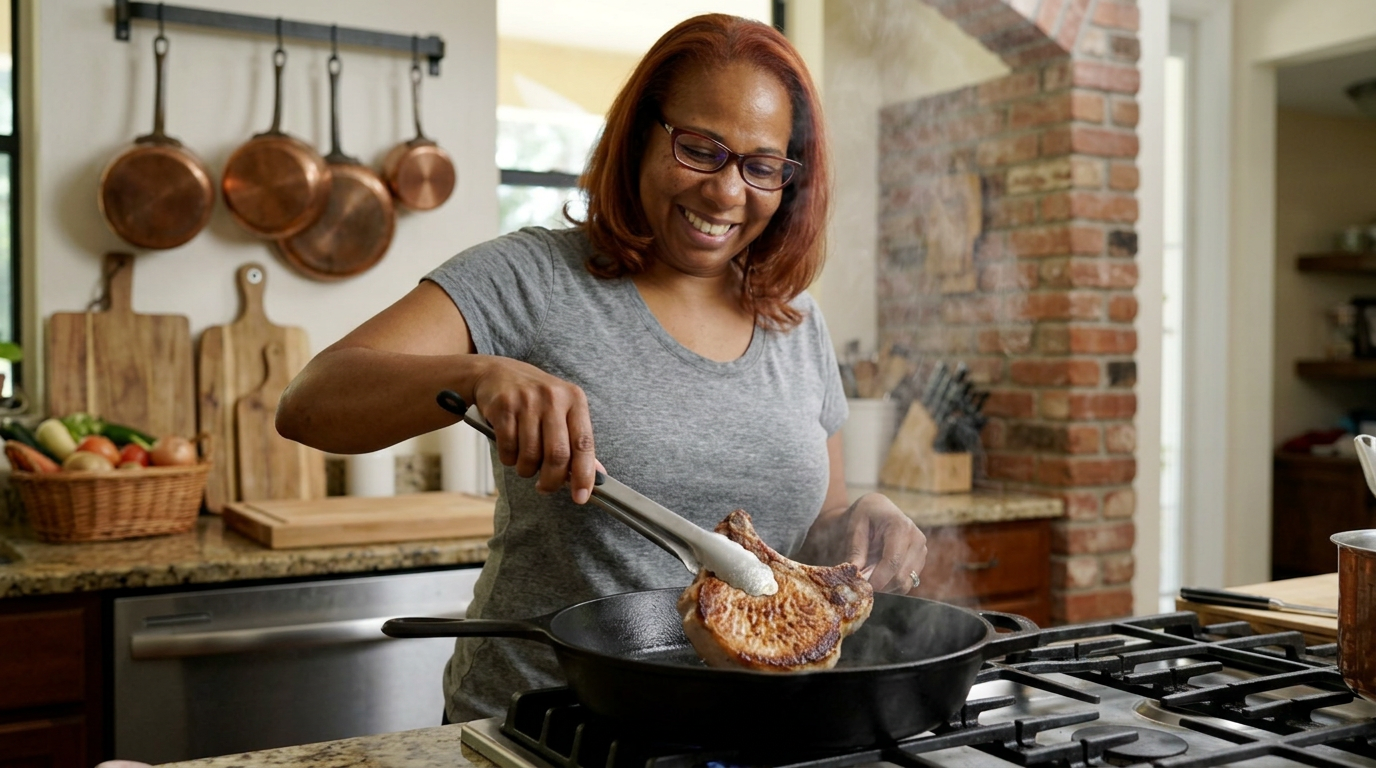
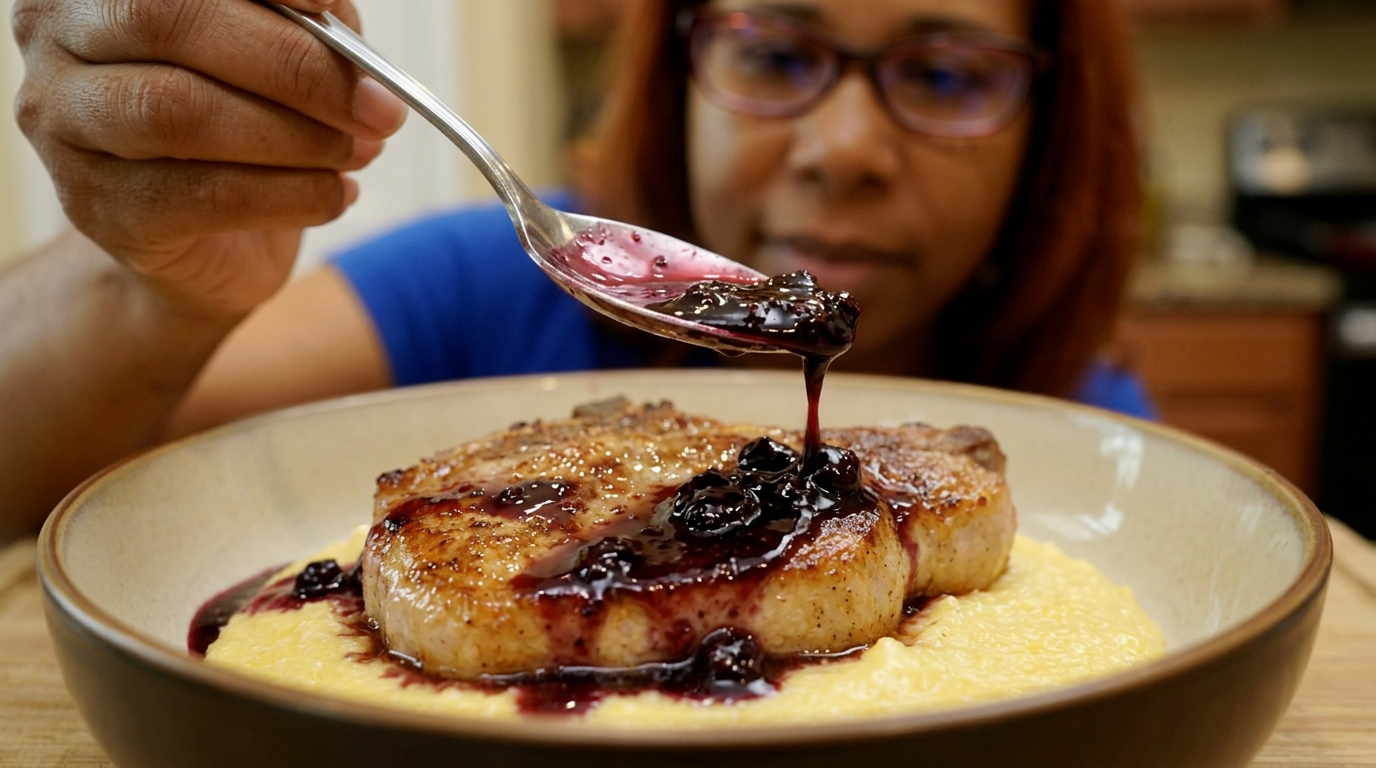
We’ve all been there: staring at a recipe with twenty ingredients, half of which we'll use once and let rot in the crisper drawer. So this week, I set a rule: five ingredients, one pan, and no cutting corners.
Close-up of Tara's hand holding a single, vibrant lemon, rolling it on a wooden cutting board, then cutting it in half with a satisfying crunch as juice droplets spray toward the lens.
It was a sticky Tuesday afternoon here in Orlando, the kind of day where the humidity just hangs in the air and the thought of standing over a boiling pot of pasta water for forty minutes makes you want to order takeout. I sat at our kitchen island, staring at a grocery list that was spiraling out of control. Tony had a late meeting at the office, my energy was bottoming out, and I realized I had fallen into the trap of thinking complexity equals flavor. I decided right then to trim the noise.
My challenge was simple but strict: five ingredients total, excluding salt, pepper, and cooking oil. No sneaky sixth ingredients, no pre-made jarred sauces that secretly contain twenty preservatives. I wanted to see if I could make a dinner that felt elegant, deeply comforting, and took less than thirty minutes from cutting board to plate.
I decided on pan-seared pork chops with a quick, jammy blackberry and fresh thyme reduction. Pork chops are notoriously easy to ruin—they dry out if you look at them wrong—and blackberry is a bold fruit that needs balance. With only five elements on the field, every single one had to pull double duty. The stakes? Either a dry, sweet-and-sour disaster that Tony and I would politely choke down, or a new weeknight staple that proved less really is more.
I started by heading to the local Publix. For my five ingredients, I grabbed four thick-cut, bone-in pork chops, a pint of fresh, plump blackberries, a bunch of fresh thyme, a block of sharp white cheddar, and some quick-cooking polenta. That was it. Walking past the spice aisle felt like cheating, but I kept my eyes on the basket and headed straight home.
Back in the kitchen, the first obstacle was the pork chops. To get that beautiful, deep golden crust without overcooking the center, they needed to be bone-dry. I patted them down with paper towels like my life depended on it, then seasoned them generously with kosher salt and cracked black pepper. While my heavy cast-iron skillet was preheating on the stove until it was smoking hot, I grated about a cup of the sharp cheddar.
I swirled a tablespoon of avocado oil in the hot skillet and laid the chops down. That sizzle is music to my ears, but immediately, the humidity in the kitchen spiked. The smell of searing pork filled the room, rich and savory. I let them cook undisturbed for exactly four minutes on the first side. When I flipped them, they had this gorgeous, mahogany crust that made me audibly gasp.
Once the pork reached an internal temperature of 140 degrees Fahrenheit, I pulled them out to rest on a warm plate. Now came the make-or-break moment: the pan sauce. The skillet was full of beautiful, dark pork drippings—what French chefs call 'fond'. I threw in the whole blackberries directly into that hot grease. They immediately sizzled, puffed up, and began to burst.
This is where the magic of five ingredients happened. Because I didn't have chicken stock or wine to deglaze, I used a splash of water and used my wooden spoon to scrape up all those caramelized pork bits from the bottom of the pan. I tossed in three sprigs of fresh thyme. As the berries broke down, their natural sugars combined with the savory pork fat and the herbal aroma of the thyme, creating this glossy, deep-purple reduction that smelled incredible.
While the sauce simmered down to a jammy syrup, I quickly boiled two cups of salted water in a small saucepan. I rained in the polenta, whisking vigorously to avoid any lumps. Polenta can go from silky to concrete in a matter of seconds, so I kept my eye on the heat, turning it down to a low simmer.
Just as the polenta absorbed the water and became velvety, I folded in the grated white cheddar. The cheese melted instantly, stretching into beautiful, creamy ribbons. I tasted it—it was sharp, salty, and decadent. It was the perfect, rich base to balance the sweet-and-tart blackberry sauce.
Handheld B-roll of the pork chops sizzling in the cast-iron skillet, transitioning to the blackberries bursting and releasing their deep red juices, interspersed with shots of Tara checking the internal temperature with a digital thermometer.
I ladled a generous spoonful of the cheesy polenta onto a shallow bowl, nestled a rested, juicy pork chop right on top, and spooned the glossy blackberry-thyme sauce over everything. The way the deep purple sauce cascaded down the golden pork and into the creamy white polenta looked like something from a high-end bistro.
Tony walked through the door right as I was plating the second bowl. He took one sniff, dropped his briefcase, and went straight for a fork. The first bite was absolute silence. The pork was incredibly juicy, the cheddar polenta was rich and comforting, and the blackberry sauce cut through all that richness with a bright, herbal pop of flavor. It didn't taste like a shortcut; it tasted intentional.
Limiting myself to five ingredients didn't make the meal simpler; it made me focus on technique. It taught me to trust the fond in the pan, to let ingredients caramelize, and to let natural flavors shine without hiding behind a spice cabinet. This is definitely going into our permanent rotation, and honestly, I don't think I'll ever look at a complex weeknight recipe the same way again.
Medium shot of Tara and Tony sitting at their kitchen island, laughing and eating, followed by a tight close-up of a fork cutting through the tender pork chop and scooping up some cheesy polenta and blackberry sauce.
Shot List
| Type | Description | Audio | Duration |
|---|---|---|---|
| Close-up | A close-up of Tara's hands drying the pork chops with a paper towel on a rustic wooden board. | Tara (VO): 'The secret to a great sear on a weeknight is getting rid of every drop of surface moisture.' | 4s |
| Overhead | Overhead shot of kosher salt raining down onto the thick pork chops. | Tara (VO): 'Don't be shy with the salt here. Without twenty spices, salt is doing the heavy lifting.' | 3s |
| Medium | Tara at the stove, placing a pork chop into a hot, smoking cast-iron skillet. Steam rises. | Sound of a loud, violent sizzle. Tara: 'Oh yeah, that is exactly what we want to hear.' | 5s |
| Detail | Close-up of the digital thermometer reading 140 degrees as it pierces the pork chop. | Tara (VO): 'Pulling them at 140 degrees lets them carryover-cook to a perfect, juicy medium.' | 4s |
| B-roll | Whole blackberries dropping into the hot pork fat in the skillet, immediately bubbling. | Tara (VO): 'Now, we build our entire sauce using nothing but the pan drippings and these berries.' | 4s |
| Close-up | Wooden spoon crushing the blackberries against the bottom of the skillet as the sauce turns deep purple. | Sound of bubbling sauce. Tara: 'Look at that color! It's lifting all those caramelized bits right up.' | 5s |
| Detail | Thyme sprigs being tossed into the bubbling blackberry reduction. | Tara (VO): 'The earthy thyme cuts right through the sweetness of the fruit.' | 3s |
| Timelapse | Quick timelapse of the polenta thickening in the pot as white cheddar is poured in and stirred. | Tara (VO): 'The polenta takes just five minutes, and the cheddar brings the perfect salty bite.' | 6s |
| Close-up | Creamy, cheesy polenta being ladled into a clean white ceramic bowl. | Tara (VO): 'This is our soft, rich bed for that gorgeous pork.' | 4s |
| Medium | Tara placing the pork chop on the polenta and spooning the dark purple blackberry glaze over the top. | Tara: 'Look at that contrast. That is restaurant-quality with five ingredients.' | 5s |
| Close-up | Tony taking his first bite, closing his eyes, and nodding in approval. | Tony: 'Wow. The pork is incredibly tender. That sauce is unbelievable.' | 5s |
| Wide | Tara leaning against the kitchen counter, smiling and talking directly to the camera. | Tara: 'So, challenge accepted and won. Sometimes, the best way to cook is to get out of your own way.' | 6s |
- Capture the sound of the pork chops hitting the hot pan with a directional microphone for crisp audio.
- Film a slow-motion shot of the blackberries bursting under the wooden spoon to emphasize the texture shift.
- Get a close-up of the cheese grater showing the texture of the sharp white cheddar falling onto the cutting board.
- Show the steam rising from the hot polenta pot as it's whisked to convey heat and comfort.
- 0:00 — Acoustic, upbeat guitar starts low, setting a warm, conversational tone for the intro.
- 2:15 — Music shifts to a slightly faster, playful percussion beat as the cooking prep begins.
- 4:30 — Slower, warm jazzy piano chords enter as the pork chops sear, adding a cozy evening feel.
- 6:45 — An upbeat, rhythmic acoustic track kicks in as the sauce starts to thicken and come together.
- 8:15 — Soft, melodic strings blend in as the dish is plated, highlighting the visual beauty.
- 9:30 — Warm, fading acoustic guitar chords play during the final tasting and sign-off.
- Keep the pacing relaxed and conversational, matching Tara's natural kitchen presence.
- Use subtle, clean text overlays to show the ingredient count (1/5, 2/5, etc.) as they are introduced.
- Amplify the natural kitchen sounds (sizzling, scraping, whisking) to create a satisfying ASMR-like layer under the music.
- Apply a warm, golden color grade to match the Florida afternoon sun and the cozy comfort food theme.
| Call | Provider | Model | Input Tokens | Output Tokens | Compute / Credits |
|---|---|---|---|---|---|
| Script | abacus.ai | gemini-3.5-flash | 1,230 | 3,653 | — |
| Image 1 — The 5-Ingredient Lineup | abacus.ai | nano_banana2 | — | — | 6,788.5 |
| Image 2 — Tara Searing the Pork | abacus.ai | nano_banana2 | — | — | 6,788 |
| Image 3 — The Perfect Pour | abacus.ai | nano_banana2 | — | — | 6,787.6 |
I Saved Kitchen Scraps for a Month. This is My Liquid Gold.
I turned a freezer full of frozen chicken bones and vegetable peelings into the richest, most gelatinous stock I have ever made.
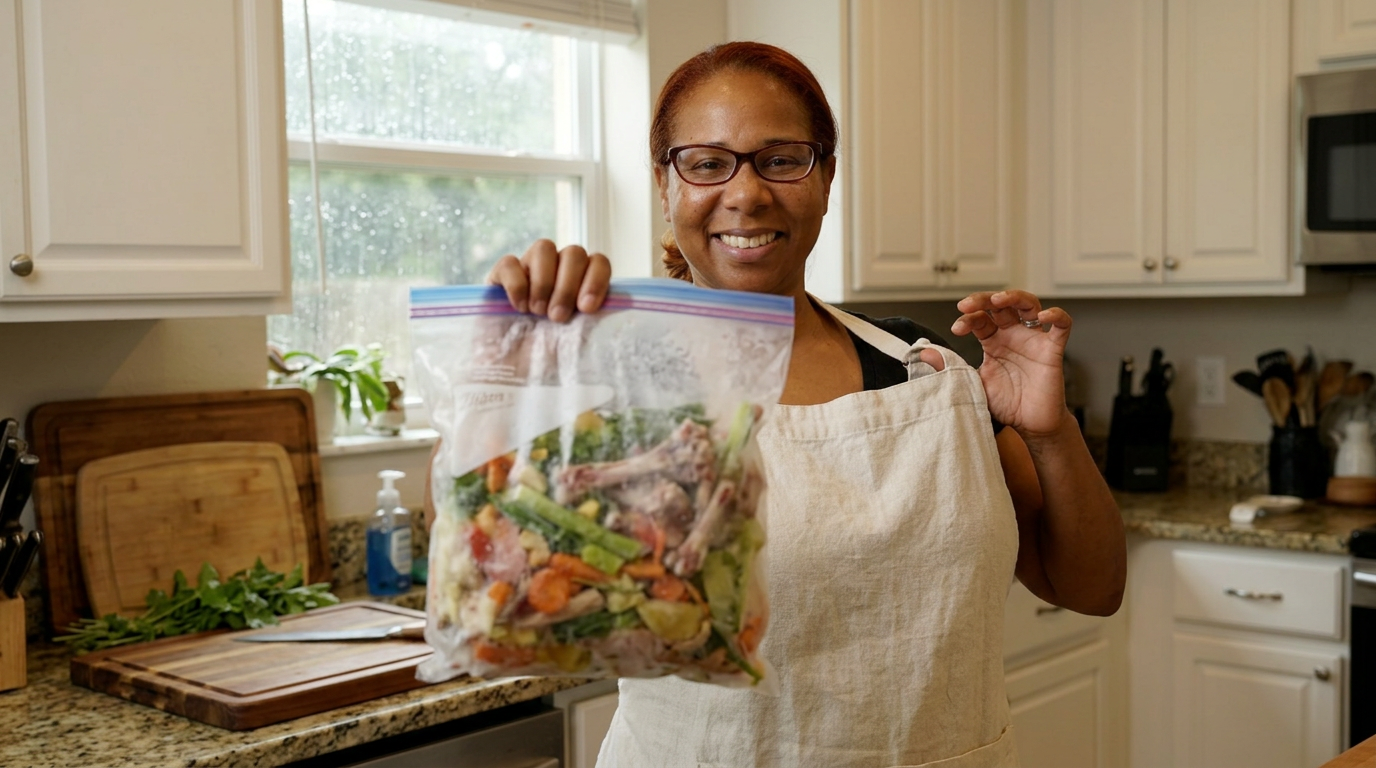
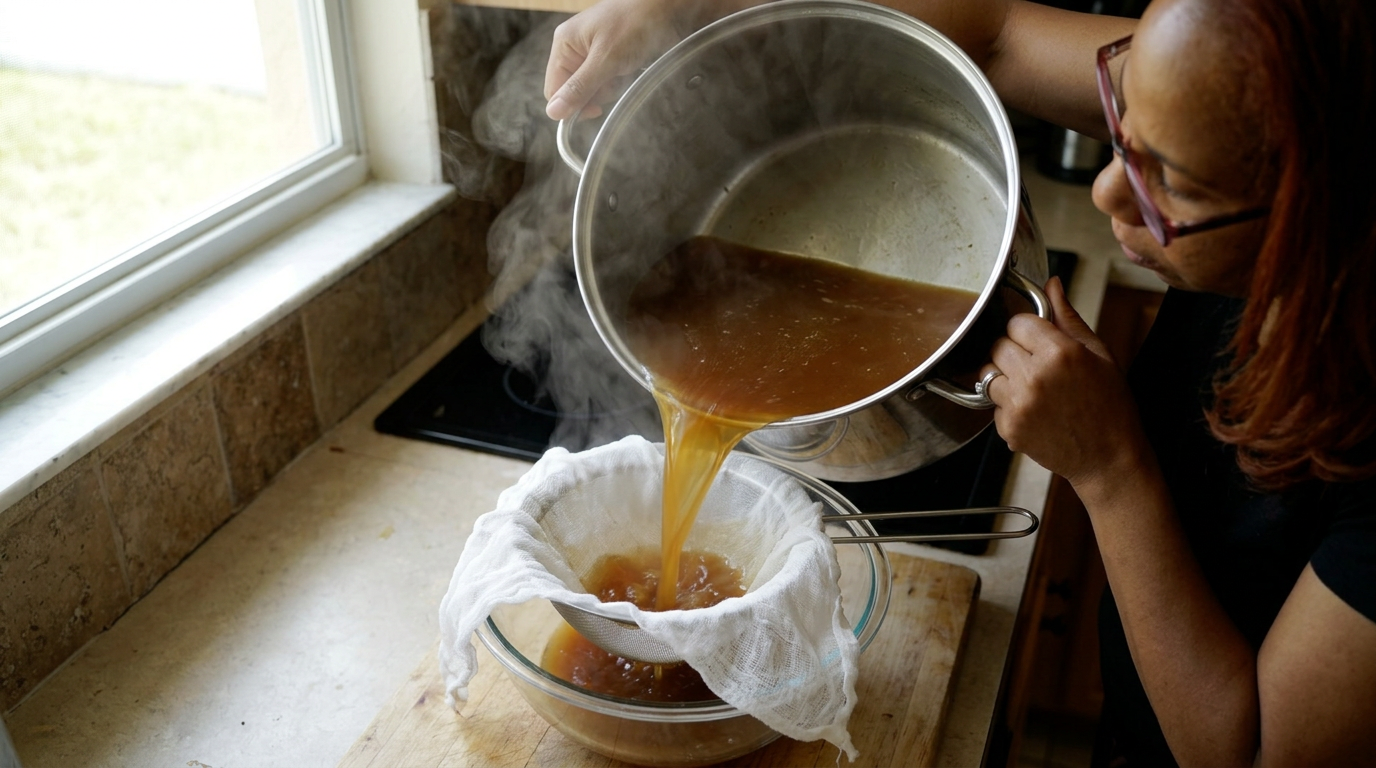
For the last four weeks, my freezer has been held hostage by a giant, frosty gallon bag of garbage. But today, we are turning that trash into absolute kitchen liquid gold.
Close-up of Tara pulling a frosted, bulging Ziploc bag out of a packed freezer, slamming it onto a wooden cutting board with a heavy, satisfying thud.
Every single time I cooked this past month, I did something a little unusual. Every onion butt, the papery skins, garlic ends, the weirdly sweet tops of carrots, and the leafy tops of celery—instead of tossing them in the trash, they went straight into this bag in my freezer. And the real prize? The bones from three separate roasted chickens we had for dinner, plus a handful of raw wingtips I saved from a game-day batch of wings. Today, they are finally going to pay off.
I used to think making chicken stock was this fancy, weekend-long French project that required a trip to a specialty butcher for pristine veal bones. But with Orlando's summer humidity kicking in outside, I wanted to stay in the air conditioning and do some productive, low-waste home economics. My goal today is to see if a bag of literal freezer scraps can actually outperform those salty, pale yellow boxes of store-bought broth we all rely on.
The stakes are surprisingly high for something made of garbage. If I don't extract enough gelatin from these bones, we'll end up with a thin, watery tea that tastes like old onions. But if we do this right—controlling the heat, roasting the bones first, and letting time do the work—we should end up with a stock so rich that it actually jiggles like jello when it cools down in the fridge. Tony is already skeptical; he saw the freezer bag this morning and asked if I was cooking compost. Let's prove him wrong.
The first decision I had to make was whether to go 'white stock' or 'brown stock.' A white stock uses raw bones simmered gently for a clean, delicate flavor. But I want deep, roasty, savory complexity. So, I grabbed my heaviest baking sheet and dumped all the frozen bones onto it. I didn't even thaw them. I just drizzled them with a tiny splash of olive oil and popped them into a screaming hot oven at 425 degrees Fahrenheit for about twenty-five minutes.
While the bones were roasting, the kitchen started smelling incredible—like Sunday dinner. I pulled them out, and they were gorgeous: deep brown, sizzling, with all those caramelized bits stuck to the bottom of the pan. That caramelization is pure flavor, and we aren't leaving any of it behind. I scraped every last bit into my big eight-quart stockpot, then poured a cup of hot water onto the hot baking sheet, scraping up the dark glaze with a wooden spatula. That deglazing liquid went straight into the pot too.
Next came the frozen vegetables. I dumped the entire bag of scraps on top of the roasted bones. It was a colorful, snowy mess of red onion skins, parsley stems, carrot peels, and even some mushroom stems I forgot I saved. Now, here is a crucial rule I learned the hard way: do not add brassicas. No broccoli stems, no Brussels sprouts, no cabbage. They will turn your stock bitter and make your entire house smell like wet socks. Keep it to the classics: onion, carrot, celery, garlic, and herbs.
I covered everything with cold water. Cold water is non-negotiable here. If you start with hot water, the proteins in the bones clump up too quickly, clouding the liquid and trapping the impurities. Cold water allows everything to heat up gradually, releasing the soluble proteins slowly so they can rise to the top as foam. I brought it up to a bare simmer over medium-high heat on my stove.
And here is where the patience comes in. Once it reached a boil, I immediately dialed the heat down to low. You never want a rolling boil. A rolling boil acts like a blender, emulsifying the fat and impurities back into the liquid, leaving you with a greasy, murky soup. We want a gentle, lazy bubble—just one or two bubbles breaking the surface every couple of seconds. I grabbed my fine-mesh skimmer and spent the first fifteen minutes scooping off that grey, foamy scum that floated to the top.
Once the surface was clean, I threw in my aromatics. I didn't salt it yet—that is a classic mistake. Since this stock is going to reduce significantly over the next four hours, salting it now would make it overwhelmingly salty by the end. I did, however, throw in a tablespoon of whole black peppercorns, two bay leaves, and a tiny splash of apple cider vinegar. The acid in the vinegar helps break down the collagen in the bones, drawing out every last bit of gelatin.
By hour three, the humidity outside was rising, but my kitchen smelled like the coziest cabin in the woods. The liquid had reduced by about a third, turning a deep, amber-mahogany color. I took a spoon, dipped it in, and blew on it. It wasn't salted, but the mouthfeel was already incredible—it felt silky and coated the back of my spoon. That meant the collagen was officially doing its job.
At the four-hour mark, it was time for the grand reveal. I set up a giant bowl in the sink with a colander on top. Using my heavy-duty oven mitts, I carefully tilted the massive pot and poured the golden liquid through. The soggy, completely spent vegetables and pale, crumbling bones stayed behind in the strainer. They had given absolutely everything they had to give. For a crystal-clear finish, I ran the liquid through a fine-mesh sieve lined with cheesecloth one last time.
B-roll sequence of bones roasting in the oven, deglazing the baking sheet with sizzling water, scraping caramelized bits, dumping frozen scraps into the pot, skimming grey foam off the surface, and the final dramatic pour through a cheesecloth-lined strainer.
Look at this color. It is a stunning, deep, crystal-clear amber. I poured a small mug of it, added just a tiny pinch of sea salt, and took a sip. It was unbelievably rich, savory, and had this velvety body that you simply cannot buy in a box. It warms you from the inside out, and you can feel the collagen coating your lips. Tony walked into the kitchen, sniffed the air, and immediately asked for a mug of his own. The skeptic has been officially silenced.
But the ultimate test happened the next morning. After letting the jars cool on the counter to room temperature—which is super important for food safety so you don't raise your fridge temp—I tucked them into the refrigerator overnight. This morning, I pulled a jar out, tipped it sideways, and it didn't slosh. It was a solid, jiggly, beautiful gelatin. That is how you know you made a perfect stock. It's packed with protein and rich flavor.
This whole process cost me essentially zero dollars in new ingredients, used up things I would have thrown away, and yielded four quarts of premium cooking liquid. I divided them into wide-mouth mason jars, leaving an inch of headspace at the top so they don't crack when I freeze them. Next time, the only thing I might do differently is add a few more charred ginger slices for an Asian-inspired base. But for now, this is my liquid gold, ready for soups, pan sauces, and risottos all summer long.
Close-up of Tara tapping a refrigerated mason jar of stock with a spoon, showing it jiggling like gelatin, then panning up to her taking a warm, steaming sip from a mug and smiling at the camera.
Shot List
| Type | Description | Audio | Duration |
|---|---|---|---|
| Close-up | A frosted, bulging Ziploc bag of kitchen scraps hits the wooden cutting board with a heavy thud. | Cold open voiceover starts: "For the last four weeks, my freezer has been held hostage..." | 4s |
| Medium | Tara stands in her sunny Orlando kitchen, opening the bag to show the camera frozen onion skins and chicken bones. | Tara: "Every single time I cooked this past month, I did something a little unusual..." | 10s |
| Overhead | Frozen chicken bones are dumped onto a dark baking sheet and drizzled with a thin stream of olive oil. | Tara explains the difference between white and brown stock and why roasting is key. | 8s |
| B-roll | Bones roasting inside a hot oven, fat bubbling and turning deeply golden brown. | Sizzling oven sounds transition into upbeat, warm acoustic music. | 6s |
| Detail | A wooden spatula scraping caramelized brown bits off the baking sheet after hot water is poured on. | Tara: "That caramelization is pure flavor, and we aren't leaving any behind." | 7s |
| Overhead | Frozen vegetable scraps cascading over the roasted bones inside a massive stainless steel stockpot. | Tara warns about avoiding brassicas like broccoli and cabbage. | 9s |
| Close-up | Cold, clear water being poured over the colorful ingredients until they are fully submerged. | Tara explains the science of starting with cold water instead of hot. | 8s |
| Timelapse | The pot coming up to a simmer and a metal skimmer lifting grey foam off the surface. | Tara explains how a rolling boil emulsifies fat, making stock cloudy. | 12s |
| Detail | Whole peppercorns, bay leaves, and a splash of apple cider vinegar dropping into the gently bubbling liquid. | Tara: "The acid in the vinegar helps break down the collagen..." | 6s |
| Medium | Tara dipping a metal spoon into the deep amber liquid, blowing on it, and tasting it directly. | Tara: "It's not salted yet, but the mouthfeel is already so silky." | 10s |
| B-roll | Pouring the hot stock through a colander into a huge metal bowl in the sink, steam rising dramatically. | Satisfying sound of rushing liquid and clattering bones. | 8s |
| Close-up | Straining the stock a second time through a fine-mesh sieve lined with white cheesecloth. | Tara: "For a crystal-clear finish, we do a second pass." | 7s |
| Medium | Tara holding up a jar of chilled, completely solid, gelatinous stock, tapping it to show the jiggle. | Tara: "This morning, I pulled a jar out... it is a solid, jiggly, beautiful gelatin." | 12s |
| Close-up | A ladle pouring steaming, reheated golden stock into a cozy ceramic mug. | Acoustic music swells gently. | 6s |
| Wide | Tara and Tony in the background of the kitchen raising their mugs in a toast and sipping. | Tara: "Next time, I might add some ginger. But for now, this is my liquid gold." | 10s |
- Capture a macro shot of the condensation peeling off the frozen Ziploc bag as it sits on the counter.
- Get a slow-motion shot of the apple cider vinegar splash hitting the water and swirling.
- Film the scraping sound of the wooden spoon deglazing the baking sheet—the audio here is incredibly satisfying.
- Show the physical contrast between the hard, frozen scraps at the start and the mushy, completely spent vegetables at the end.
- 0:00 — No music. Just ambient kitchen sounds and the heavy thud of the frozen bag hitting the cutting board.
- 0:25 — Upbeat, warm, acoustic folk music kicks in gently as Tara introduces the project.
- 2:10 — Music transitions to a slightly faster, playful rhythmic acoustic guitar during the oven roasting and scraping sequence.
- 4:45 — Music softens into a low, cozy, ambient hum during the long 4-hour simmering phase.
- 7:15 — A warm, swelling acoustic melody starts as the stock is strained and the beautiful color is revealed.
- 9:00 — Light, cheerful acoustic music returns for the final tasting and outro.
- Keep the pacing relaxed and homey, letting natural kitchen sounds (sizzling, scraping, pouring) breathe.
- Use a subtle, warm color grade to emphasize the cozy, golden tones of the stock and the sunny Florida kitchen.
- Add a vintage-style text overlay listing the ingredients when the cold water is poured over the scraps.
- Keep the cuts clean and simple—mostly jump cuts and soft dissolves to show the passage of time during the simmer.
| Call | Provider | Model | Input Tokens | Output Tokens | Compute / Credits |
|---|---|---|---|---|---|
| Script | abacus.ai | gemini-3.5-flash | 1,232 | 4,153 | — |
| Image 1 — The Freezer Haul | abacus.ai | nano_banana2 | — | — | 6,787.6 |
| Image 3 — The Sifting of Gold | abacus.ai | nano_banana2 | — | — | 6,786.65 |
I Made 4 Elite Game Day Snacks at the Same Time (Without Anything Going Cold!)
I took on the ultimate hosting challenge: making a multi-dish game day spread where every single bite hits the table piping hot, crisp, and ready for kickoff.
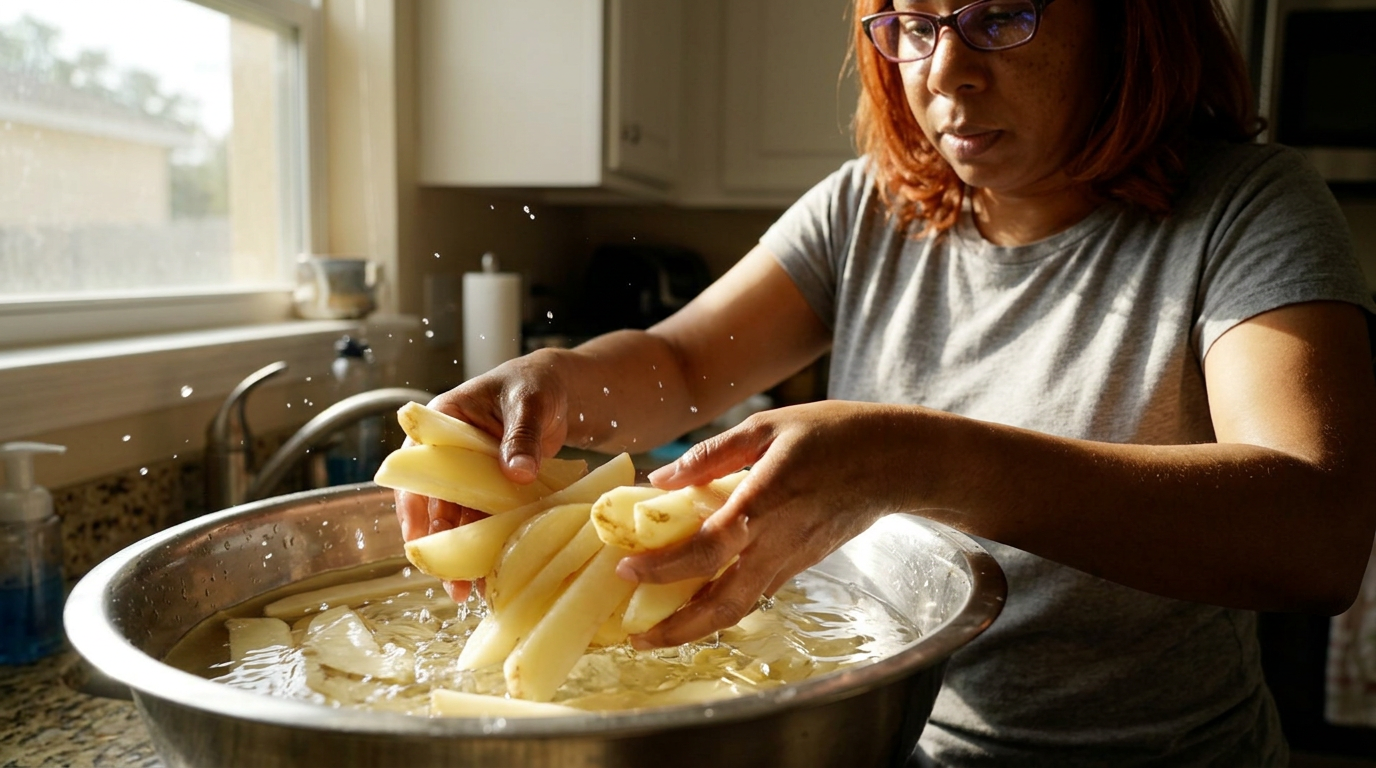
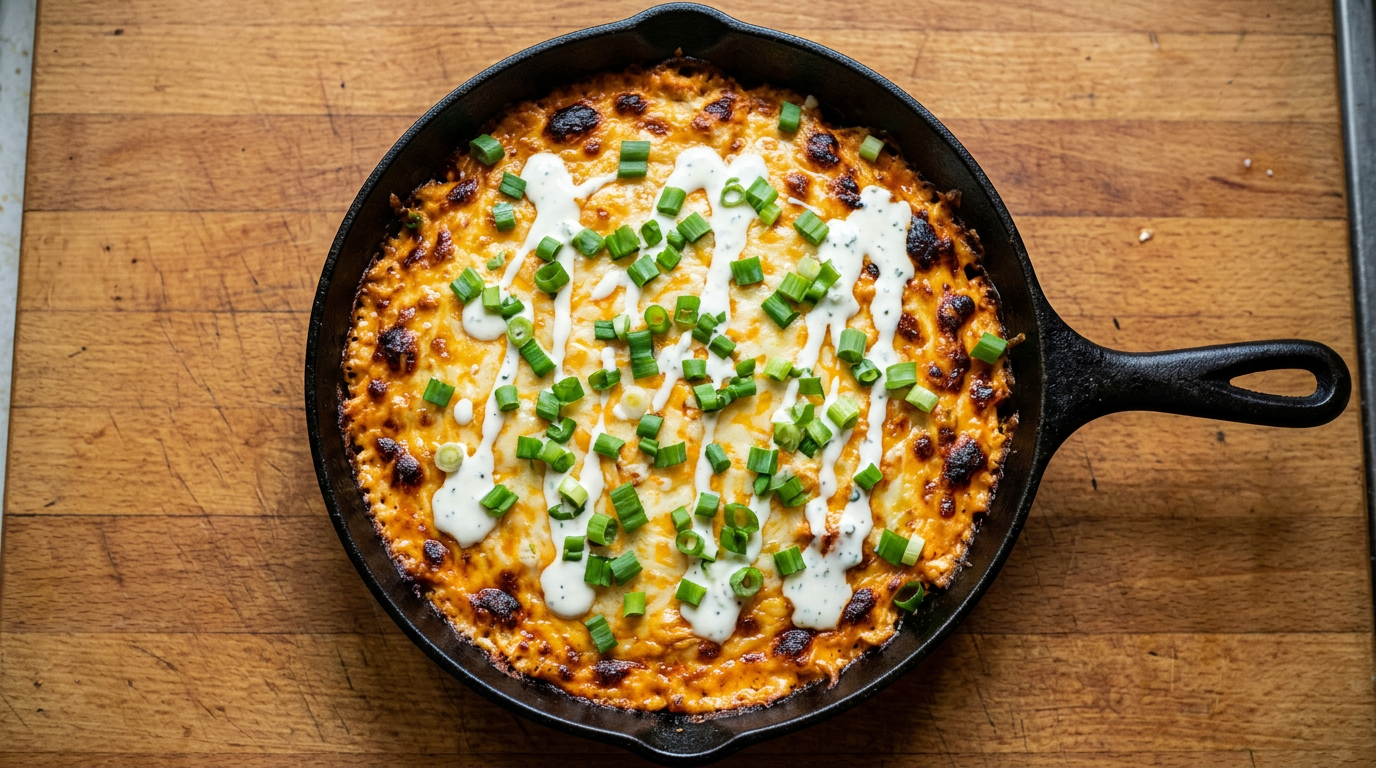
Four different snacks, one tiny kitchen, and a kickoff clock that doesn't care if my cheese isn't melted yet. Today, I'm showing you exactly how I timed a multi-dish game day spread so everything hits the coffee table hot, crisp, and at the exact same time.
Fast-paced montage: steam rising from a skillet of buffalo chicken dip, honey-sriracha chicken wings sliding onto a wire rack with a satisfying crunch, a knife slicing through a warm, cheesy Cuban slider, and Tara looking at the kitchen clock with a spatula in hand.
It was a sticky Sunday afternoon here in Orlando, the kind where the AC is working overtime and the humidity makes you feel like you're swimming to your mailbox. Tony had three of his college buddies coming over for the big game, and they are what I like to call 'high-volume eaters.' Normally, my game day strategy is a giant pot of chili because it's safe, it stays warm in the slow cooker, and I can ignore it. But this week, Tony begged for 'the classics.' He wanted wings, sliders, dip, and something crunchy. He wanted a sports bar in our living room.
I looked at our standard suburban kitchen and realized I had a major logistics problem. A standard oven only has two racks. I have one four-burner stove, a small air fryer, and exactly one of me. If I made the sliders first, they'd be soggy by kickoff. If I fried the wings first, they'd lose their crunch. To pull this off without serving cold grease or spending the entire game trapped in the kitchen missing the commercials, I had to treat my kitchen like a commercial line-assembly. I needed a battle plan, a strict timeline, and a lot of aluminum foil.
The menu was set: gooey Buffalo Chicken Dip, baked sweet-and-savory Cuban Sliders using leftover pork roast, crispy Air Fryer Honey-Sriracha Wings, and quick Garlic-Parmesan Potato Wedges. The secret to this whole operation wasn't the recipes themselves—it was the staging. By grouping ingredients by temperature, pre-chopping every herb, and utilizing the 'holding oven' technique, I was determined to prove you can host a crowd without sacrificing your sanity or serving lukewarm food.
At exactly 1:30 PM, two hours before kickoff, I started with the foundation of the whole spread: the potatoes. Root vegetables take the longest to cook and, handily, hold heat the best. I scrubbed four large russet potatoes, cut them into thick wedges, and tossed them in cold water to get rid of the excess starch. This is a crucial step if you want them crispy instead of limp. After a quick dry, I tossed them with olive oil, garlic powder, onion powder, kosher salt, and smoked paprika. I spread them out on a baking sheet, making sure they weren't crowding each other. Crowded potatoes steam; lonely potatoes get crispy. Into the oven they went at 425 degrees Fahrenheit.
While the oven chugged away on the wedges, I tackled the Buffalo Chicken Dip. I cheated a little bit here—I used a shredded rotisserie chicken I picked up from Publix yesterday morning. It’s a massive timesaver. In a mixing bowl, I combined the chicken with cream cheese, sour cream, a heavy hand of Frank's RedHot, and a blend of sharp cheddar and Monterey Jack. I transferred the mixture into a seasoned cast-iron skillet. The beauty of cast iron is its heat retention. Once this dip gets hot, that heavy iron pan will keep it bubbling on the table for at least thirty minutes. I set the skillet aside on the counter, unbaked, ready to slide into the oven later.
Next up were the Cuban Sliders. Tony and I love a good cubano, and turning them into pull-apart sliders is always a hit. I sliced a pack of sweet Hawaiian rolls in half horizontally. I layered Swiss cheese on the bottom to act as a barrier against sogginess, followed by yellow mustard, leftover mojo pork, deli ham, and plenty of dill pickle chips. I put the top buns back on and brushed them with a mixture of melted butter, dijon, and a pinch of dried minced onion. I wrapped the entire baking dish tightly in foil. This went straight into the fridge. Keeping them cold until the final bake prevents the bread from getting mushy while sitting on the counter.
With one hour until kickoff, the kitchen started smelling like garlic and roasted potatoes. I pulled the wedges out—they were beautifully golden but not quite at peak crispness. That was intentional. I set them aside to cool slightly. Now, it was wing time. I patted two pounds of chicken wings dry with paper towels until they were bone-dry. Moisture is the enemy of crispiness. I tossed them with a tablespoon of baking powder and a pinch of salt. The baking powder alters the pH of the chicken skin, helping it brown and blister in the air fryer to mimic a deep-fry without the messy oil setup.
At 2:45 PM, forty-five minutes to game time, the staging dance truly began. I lowered the oven temperature to 375 degrees Fahrenheit. I slid the cast-iron Buffalo Chicken Dip onto the bottom rack and placed the foil-wrapped Cuban Sliders on the top rack. They both needed about twenty-five minutes. Meanwhile, I loaded the wings into the air fryer basket in a single layer and set it to 400 degrees. While those two appliances did the heavy lifting, I stood at the stove and whisked up a quick honey-sriracha glaze in a small saucepan—just honey, sriracha, a splash of soy sauce, and a squeeze of lime juice until it bubbled into a glossy syrup.
At fifteen minutes to kickoff, the kitchen was a symphony of sizzles and timers. The air fryer beeped. I pulled the wings out—they were incredibly crispy and golden. I dumped them into a large metal bowl, drizzled the warm honey-sriracha glaze over the top, and tossed them until they were completely coated. I transferred them to a wire rack set inside a baking sheet. This keeps air circulating underneath them so they don't get soggy on the bottom while waiting.
With five minutes left on the clock, I pulled the foil off the sliders to let the tops brown for just three minutes. I threw the par-baked potato wedges onto the bottom rack right next to the bubbling dip to re-crisp them in the blasting heat. My hands were moving fast now, parsley flying, tongs clicking. I could hear the TV pre-game show blaring from the living room, and Tony’s friends were laughing as they walked through the front door. The timing was down to the wire, but everything was aligning perfectly.
Various handheld shots focusing on the coordination: Tara checking the oven, tossing wings in a bowl with a loud clank, checking the internal temp of the dip with a probe thermometer (pointing out it needs to hit 165°F for safety), slicing sliders with a serrated knife, and arranging everything on wood boards.
At exactly 3:28 PM, two minutes before kickoff, I brought the spread out. The cast-iron skillet was still audibly sizzling with buffalo dip, topped with fresh green onions and a drizzle of blue cheese dressing. Next to it sat the Cuban sliders, their tops golden-brown and the Swiss cheese pulling in long, dramatic strings as Tony grabbed the first one. The honey-sriracha wings were glowing under the living room lights, piled high and garnished with sesame seeds, while the garlic-parmesan wedges sat piled in a basket, steam rising from them as I dusted them with fresh parmesan.
Tony’s friends practically dived over the coffee table. The wings had that perfect, loud crunch that you usually only get at a bar, and the sweet-spicy glaze was dripping down their fingers. The sliders were warm and savory, the pickles cutting through the rich pork and cheese beautifully. But my personal victory was the temperature. Nothing was cold. Nothing was soggy. By utilizing the cast iron for heat retention, holding the potato wedges for a quick final blast, and keeping the sliders wrapped until the end, everything tasted like it had just been cooked individually.
Next time, the only thing I’d change is doubling the wing recipe—they vanished before the end of the first quarter. If you're planning a big game day or just hosting a hungry family, don't fear the multi-dish spread. Just plan your steps, trust your timers, and never underestimate the power of a hot cast-iron skillet. Now, if you'll excuse me, I have a cold drink with my name on it and a game to actually watch!
Slow, cinematic sweep of the coffee table spread. Hands reaching into the frame to grab sliders and dip chips. Close-up on Tara taking a bite of a crispy wing, smiling, and wiping a bit of glaze from her thumb, looking relaxed and triumphant.
Shot List
| Type | Description | Audio | Duration |
|---|---|---|---|
| Medium | Tara stands in her Orlando kitchen, holding a clipboard with a handwritten schedule, smiling at the camera. | Hey everyone, welcome back to the kitchen! Today we have a classic hosting emergency: a crowd of hungry football fans arriving in two hours, and I'm making four different hot snacks. | 8s |
| Close-up | Tara slicing russet potatoes into thick, even wedges on a wooden cutting board. | We are starting with potato wedges. They take the longest to cook, but they hold heat incredibly well if we stage them right. | 6s |
| Overhead | Potatoes being dumped into a bowl of ice-cold water, starch clouding the water instantly. | Always soak your cut potatoes in cold water first. It pulls out the surface starch so they bake up crispy instead of gummy. | 5s |
| Close-up | Mixing the buffalo chicken dip ingredients in a large glass bowl with a red spatula. | Next, the buffalo chicken dip. I'm using rotisserie chicken because on game day, we do not have time to poach chicken breasts from scratch. | 7s |
| Detail | Spreading the creamy chicken mixture into a black lodge cast-iron skillet and topping with cheddar. | Cast iron is our secret weapon here. It holds heat forever, keeping our dip bubbling long after it leaves the oven. | 6s |
| Close-up | Tara assembling the sweet Hawaiian roll sliders, layering pink ham, shredded pork, yellow mustard, and bright green pickles. | For the Cuban sliders, we're using leftover mojo pork. I'm putting Swiss cheese on the bottom to stop the bread from absorbing moisture. | 8s |
| B-roll | Tara brushing a savory yellow-flecked melted butter mixture over the tops of the slider buns. | This goes into the fridge wrapped in foil. Keeping it cold stops the bread from getting soggy while we wait for the oven space. | 5s |
| Detail | Tossing raw chicken wings with baking powder in a metal bowl; you can hear the dry, powdery rattle. | Now for the wings. Do not skip the baking powder. It sounds weird, but it makes the skin blister and crunch up beautifully in the air fryer. | 6s |
| Timelapse | Wings turning golden brown and sizzling inside the glass window of the air fryer. | While the wings air fry, our sliders and dip go into the oven together. This is where the staging timeline really pays off. | 8s |
| Close-up | Viscous, red honey-sriracha glaze being poured over crispy wings in a large bowl, steam billowing up. | Look at that! Toss them immediately while they are screaming hot so they absorb all that sweet, spicy glaze. | 6s |
| Medium | Tara pulling the hot cast-iron skillet out of the oven using thick oven mitts, cheese bubbling violently around the edges. | Perfect timing! The dip is bubbling, and I'm throwing the potato wedges back in for just three minutes to get their crunch back. | 7s |
| Wide | Tara carrying a massive wooden board loaded with all four snacks to the living room coffee table. | And just like that, kickoff is in two minutes, and we have a complete, restaurant-quality spread that is actually hot. | 8s |
| Close-up | A hand pulling a single slider away from the pile, showing a long, gooey stretch of melted Swiss cheese. | The sliders are warm, the wings are incredibly crispy, and nothing sat on the counter getting cold. | 6s |
| Medium | Tara sitting on the couch next to Tony, both laughing as Tony takes a large bite of a wing and nods in approval. | Tony approves! If you want to host like a pro without the stress, give this staged timeline a try. See you next week! | 8s |
- Capture tight, slow-motion shots of the honey-sriracha glaze dripping off the whisk in the saucepan to emphasize the thickness.
- Film a satisfying, loud audio-focused shot of the knife slicing through the crunchy top bun of the Cuban sliders.
- Show the steam escaping from the oven door when Tara opens it to check on the bubbling dip.
- Get a close-up of the condensation on a cold bottle of soda or beer sitting next to the warm food on the coffee table.
- 0:00 — Upbeat, energetic acoustic guitar track to match the fast-paced cold open and busy setup.
- 1:45 — Transitions to a light, quirky, and rhythmic percussion-driven track during the vegetable prep and division of tasks.
- 4:30 — Tempo increases slightly with a modern, jazzy lo-fi beat as the cooking timeline begins to overlap and feel busy.
- 7:15 — Music drops in volume for a moment of quiet focus as Tara checks the oven temperatures, adding a sense of anticipation.
- 8:30 — Swell of warm, celebratory southern-soul acoustic music as the food is plated and brought out to the living room.
- 9:45 — Upbeat acoustic outro music fades in as Tara says goodbye and the recipe card appears on screen.
- Use a fast-paced 'clock ticking' sound effect and a small digital timer graphic in the top corner of the screen to emphasize the countdown to kickoff.
- Keep color grading warm, cozy, and sunny, reflecting the natural Florida afternoon light.
- Apply quiet sizzling and crunching sound design elements to make the wing toss and slider slicing highly satisfying to hear.
- Include clean, minimalist text overlays for ingredient amounts as they are added to the bowls, keeping the screen clutter-free.
| Call | Provider | Model | Input Tokens | Output Tokens | Compute / Credits |
|---|---|---|---|---|---|
| Script | abacus.ai | gemini-3.5-flash | 1,229 | 4,830 | — |
| Image 2 — The Starch Soak | abacus.ai | nano_banana2 | — | — | 6,787.3 |
| Image 3 — The Cast Iron Sizzle | abacus.ai | nano_banana2 | — | — | 6,787.75 |
I Made Chicken and Dumplings From Scratch (And Learned When to STOP Stirring!)
I'm making a pot of ultimate comfort food, but I'm putting my hand-mixed dumpling dough to the test to find the exact line between fluffy pillows and rubber bouncy balls.
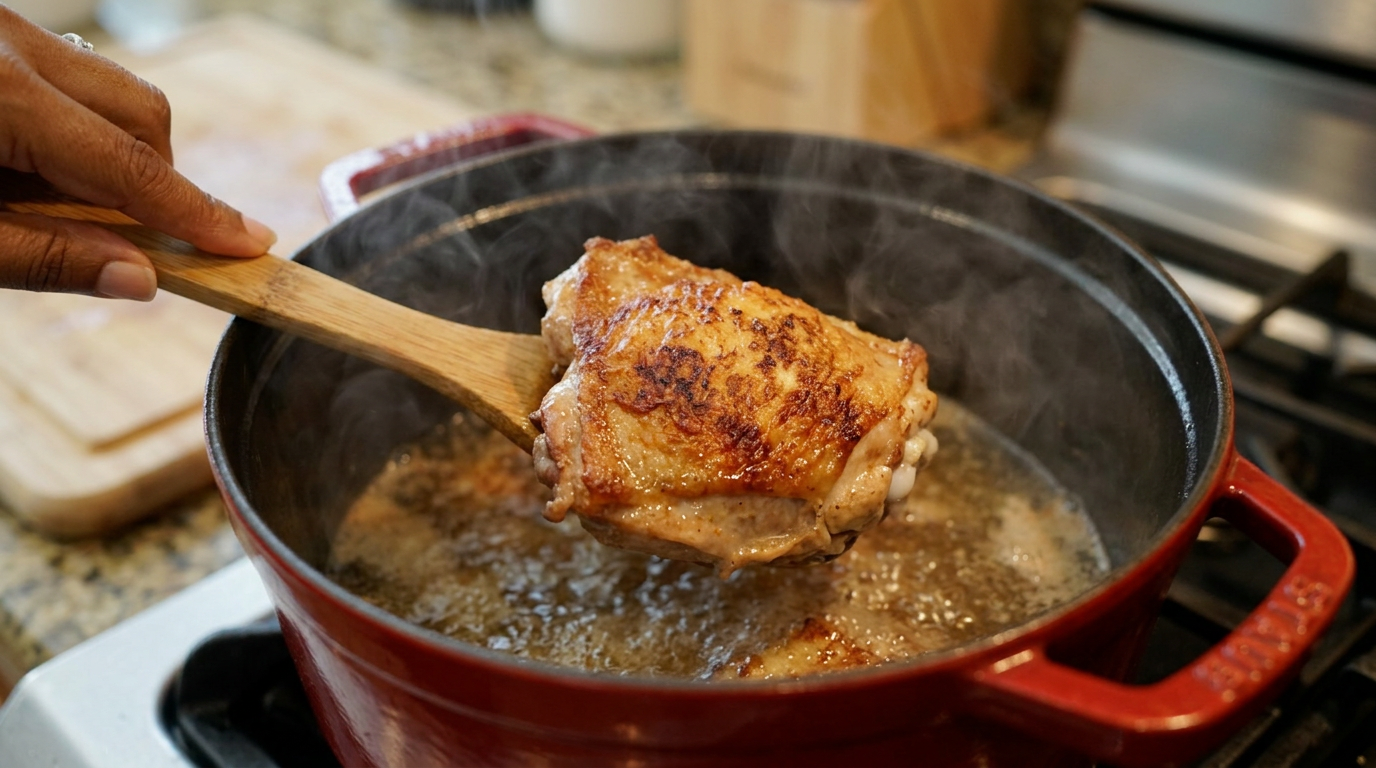
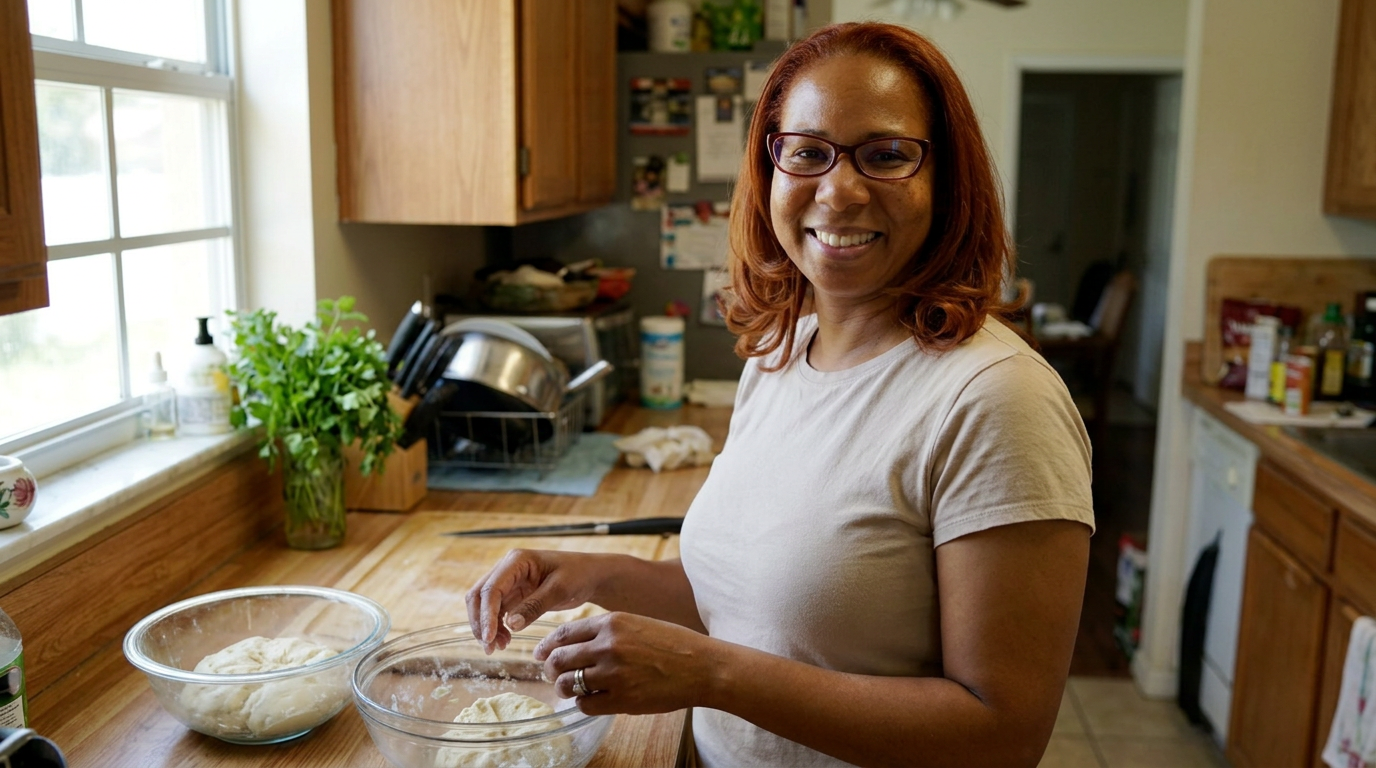
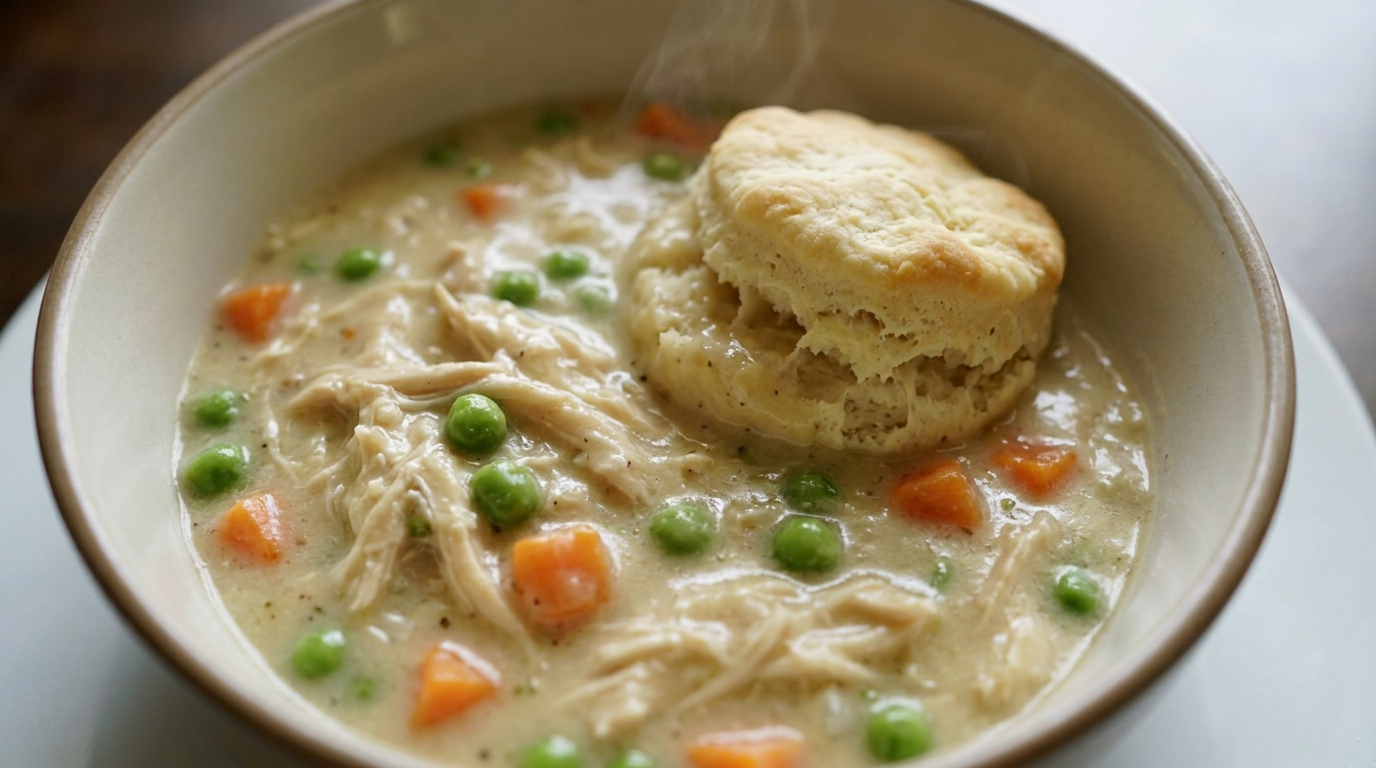
We have all eaten a dumpling that felt like a wet tennis ball. Today, I'm finding the exact moment a beautiful, fluffy dumpling turns into a rubbery mistake—all while making a rich, scratch-made chicken broth that smells like home.
Extreme close-up of a wooden spoon lifting a light, steaming, cloud-like dumpling from a bubbling, golden chicken broth, tearing it open to show the fluffy, cake-like interior.
It was one of those rare, rainy Sunday afternoons here in Orlando where the humidity actually drops, the sky turns a heavy slate gray, and suddenly you aren't sweating through your t-shirt just stepping onto the back porch. Tony was in the living room trying to fix a leaky window seal, and the house just felt like it needed to smell like simmered celery, onions, and chicken. I wanted the kind of comfort food that wraps around you like a heavy blanket, and to me, that is always chicken and dumplings.
But here is the thing about chicken and dumplings: we have all been burned by them. Sometimes you get those flat, slick, noodle-style dumplings which are fine, but today I wanted the big, fluffy, biscuit-style clouds. The problem is, biscuit dumplings are notoriously temperamental. If you work the dough too much, the gluten goes into overdrive, and you end up with dense, rubbery sinkers instead of light, airy floaters. I decided today was the day I would test the limits of over-mixing to find out exactly where that line is.
My plan was simple but required some careful timing. I was going to build a deep, flavorful base using bone-in, skin-on chicken thighs to render out all that beautiful golden chicken fat for a rich roux. While that simmered down into a velvety gravy, I would mix up a classic buttermilk pastry dough. I planned to divide the dough into two batches: one treated with absolute, delicate gentleness, and the other intentionally stirred to death, just to see what would happen when they both hit the hot broth.
Tony looked at me like I was a mad scientist when I set out two identical glass mixing bowls on the counter. But that's the beauty of home cooking—sometimes you have to break the rules to understand why they exist in the first place. Plus, even if half our dinner turned out to be edible rubber, we'd still have a pot of incredibly rich, savory chicken stew to show for it.
I started by getting a heavy-bottomed Dutch oven screaming hot on the stove with just a splash of neutral oil. I laid four massive bone-in, skin-on chicken thighs in skin-side down. The sizzle was immediate and loud, filling the kitchen with that deep, savory aroma of rendering fat. I didn't touch them for a full seven minutes. When I finally flipped them, the skin was a gorgeous, shattered-glass golden brown. That skin is where all the deep, roasted chicken flavor lives, and rendering that fat is the secret to a rich gravy later on.
Once the thighs were browned on both sides, I pulled them out, leaving all that beautiful liquid gold behind. In went the holy trinity of Southern cooking: diced carrots, celery, and a yellow onion. I scraped up all those dark, caramelized bits of chicken fond from the bottom of the pot. The humidity of the vegetables immediately deglazed the pan, turning the onions a translucent amber. I threw in three smashed cloves of garlic and a few sprigs of fresh thyme from my backyard herb garden, letting them bloom in the hot fat for just sixty seconds until the kitchen smelled absolutely intoxicating.
Next came the thickener. I sprinkled a quarter-cup of all-purpose flour directly over the glistening vegetables, stirring constantly for two minutes to cook out that raw, pasty flour taste. This is where you build the body of your stew. Slowly, I whisked in four cups of low-sodium chicken stock, watching it instantly bubble and thicken into a glossy, velvety gravy. I slid the chicken thighs back into this bubbling bath, turned the heat down to a gentle simmer, popped the lid on, and let it run for thirty minutes to get that chicken fall-apart tender.
While the chicken simmered, it was time for the dumpling experiment. In my first bowl—labeled 'The Good Batch'—I whisked together two cups of flour, a tablespoon of baking powder, a pinch of baking soda, and a teaspoon of kosher salt. I cold-grated half a stick of unsalted butter directly into the flour, tossing it gently to coat the shreds. I poured in three-quarters of a cup of cold buttermilk. Using a rubber spatula, I folded the mixture exactly eight times. It was still shaggy, with visible dry patches of flour, but I stopped. I forced myself to walk away.
Then came bowl number two: 'The Over-Worked Batch.' I used the exact same ingredients, but once the buttermilk hit the flour, I went to town. I stirred, beaten, and whipped that dough with a heavy wooden spoon for two full minutes. I could actually feel the resistance changing in my hand. The dough went from soft and shaggy to shiny, stretchy, and incredibly elastic. It looked like bread dough ready for a knead, rather than a delicate biscuit batter. It felt heavy and tight, and I knew right then those glutens were screaming.
At the thirty-minute mark, I lifted the lid of the Dutch oven. The steam hit my face, carrying the scent of rich chicken broth and thyme. I pulled the chicken thighs out onto a cutting board. Using two forks, I shredded the meat, discarding the bones and skin, and slid the tender chicken back into the gravy. I stirred in half a cup of heavy cream and a cup of frozen peas for a pop of color and sweetness. The stew was thick, bubbling, and ready.
I used a small cookie scoop to drop the dumplings into the simmering stew. On the left side of the pot went the delicate, shaggy scoops of 'The Good Batch.' On the right side went the smooth, shiny, round balls of 'The Over-Worked Batch.' They looked different immediately; the good ones expanded instantly, their craggy surfaces soaking up the broth, while the overworked ones sat like tight, smooth marbles in the liquid.
I clamped the lid back down. This is the hardest part of making chicken and dumplings: you cannot lift the lid. Not even a peek. The dumplings need to steam, and lifting the lid lets all that trapped heat escape, which can cause them to collapse into heavy lead weights. I set the timer for fifteen minutes and cleaned up the flour-dusted counters, my heart beating with weird anticipation over a pot of dough.
When the timer finally buzzed, I stood over the stove with potholders in hand like a kid on Christmas morning. I lifted the lid, and a massive cloud of savory steam billowed up. I squinted through the fog to see the results. On the left, 'The Good Batch' had puffed up into massive, fluffy clouds that completely covered the surface of the gravy, looking like a snowy landscape. On the right, 'The Over-Worked Batch' had barely expanded at all. They looked like gray, shiny little golf balls floating in a sea of yellow fat.
A montage of hands grating butter, folding flour with buttermilk, vigorously beating dough in a second bowl, shredding tender chicken with forks, and scooping two very different doughs into a bubbling Dutch oven.
I ladled out two distinct bowls for Tony and me to taste-test. I started with a dumpling from the overworked batch. Cutting into it with a spoon felt like trying to slice through a eraser. When I put it in my mouth, it was chewy, dense, and had a springy texture that required actual jaw effort to break down. It hadn't absorbed any of the delicious chicken gravy; the broth just slid right off its slick exterior. Tony took one bite, raised an eyebrow, and said, 'This tastes like a bouncy ball I bought from a vending machine in 1998.'
Then, we dived into the good batch. The spoon slid through the dumpling like warm butter. It was incredibly light, airy, and cake-like inside, with thousands of tiny pockets that had soaked up the savory chicken broth. It melted on the tongue, rich with butter and tangy buttermilk, perfectly balancing the deeply savory, velvety chicken gravy underneath. It was pure, unadulterated comfort in a bowl. It was everything a dumpling is supposed to be.
The lesson was loud and clear: when it comes to dumplings, laziness is actually your best friend in the kitchen. You want to stir just until the wet and dry ingredients shake hands, and not a second longer. Any dry pockets of flour will hydrate and cook perfectly in the steam anyway. I am so glad I did this test, because now I know exactly how to get those perfect, pillowy clouds every single time. Tony and I finished the entire pot of the good ones, leaving the little rubber golf balls behind, feeling warm, full, and ready for a rainy-day nap.
Close-up of Tara and Tony sitting at the kitchen table, laughing as Tony bounces an overworked dumpling on a cutting board, then transitioning to a warm, cozy shot of them enjoying bowls of the perfect, fluffy version.
Shot List
| Type | Description | Audio | Duration |
|---|---|---|---|
| Close-up | A wooden spoon tears open a steaming, fluffy dumpling inside a rich, golden chicken gravy. | TARA [VO]: We have all eaten a dumpling that felt like a wet tennis ball. Today, we change that. | 5s |
| Wide | Tara stands in her sunlit Orlando kitchen, wearing a cozy knit sweater, looking directly at the camera with her Dutch oven on the stove behind her. | TARA: Hey guys, welcome back to the kitchen. It is a rare, rainy afternoon here in Florida, and I am making the ultimate chicken and dumplings from scratch. | 12s |
| Close-up | Close-up of four bone-in, skin-on chicken thighs sizzling violently in a hot Dutch oven, releasing golden fat. | TARA [VO]: It starts with rendering down bone-in, skin-on chicken thighs. That fat is liquid gold, and it's the base of our gravy. | 8s |
| Overhead | Onions, carrots, and celery are dumped into the shimmering chicken fat and stirred with a wooden spoon, scraping up caramelized browned bits. | TARA [VO]: In goes our mirepoix. We want to sweat these down and scrape up all those delicious, caramelized bits from the bottom of the pot. | 10s |
| Detail | Tara pours flour over the vegetables, stirring it into a thick paste, followed by a slow stream of chicken broth whispering into steam. | TARA [VO]: A little flour cooks in the fat to build our roux, and then we slowly whisk in chicken stock to create a velvety broth. | 10s |
| B-roll | A block of cold butter is grated on a box grater, the shreds falling into a bowl of flour like snowflakes. | TARA [VO]: While the chicken simmers, we make the dough. The secret to fluffiness is cold, grated butter distributed evenly through the flour. | 7s |
| Medium | Tara stands over two identical glass bowls, holding a measuring cup of buttermilk. | TARA: We are running an experiment today. Bowl one gets the gentle treatment. Bowl two is getting absolutely beaten to see when gluten turns to rubber. | 12s |
| Close-up | A spatula folding buttermilk into flour in 'Bowl One' just a few times, leaving dry spots. | TARA [VO]: For the perfect batch, I folded this exactly eight times. It looks messy, loose, and shaggy. That is exactly what you want. | 8s |
| Close-up | A wooden spoon aggressively whipping the dough in 'Bowl Two', turning it smooth, tight, and elastic. | TARA [VO]: For the over-worked batch, I stirred for two straight minutes. You can see it turning shiny and rubbery. Gluten has entered the chat. | 9s |
| Overhead | Shredded chicken, heavy cream, and bright green peas are stirred back into the thick, bubbling gravy. | TARA [VO]: Chicken goes back in, shredded and tender, along with a splash of cream and some sweet peas. | 8s |
| Close-up | A cookie scoop drops shaggy dough on the left side of the pot, and smooth round balls on the right side. | TARA [VO]: Good dumplings on the left, rubber marbles on the right. Now, we lid it and let the steam do its magic. | 10s |
| Medium | Tara lifts the heavy red lid of the Dutch oven, releasing a massive cloud of steam that clears to reveal the puffy dumplings. | TARA: Look at that! The good side puffed up into a beautiful cloud cushion, while the worked side stayed like tight little golf balls. | 11s |
| Detail | A spoon slices effortlessly through a fluffy dumpling, revealing its light, honeycomb, cake-like interior soaking in gravy. | TARA [VO]: Just look at that texture inside. It's like a savory cake that has soaked up all that rich, thyme-scented broth. | 8s |
| Medium | Tara and Tony sit at the table. Tony giggles and drops an over-worked dumpling onto a wooden cutting board; it literally bounces. | TONY: It's a culinary bouncy ball! TARA: See? Laziness in the kitchen pays off. Don't over-mix your dough! | 12s |
| Close-up | A final gorgeous shot of a warm bowl of chicken and dumplings, steam rising slowly in the soft afternoon light. | TARA [VO]: Happy cooking, guys. Grab the recipe below, keep your mixing to a minimum, and I'll see you next week. | 10s |
- Capture a slow-motion shot of the butter being grated; the yellow shreds falling into the white flour look beautiful and emphasize the cold ingredient technique.
- Get a close-up of the steam escaping the Dutch oven the exact second the lid is lifted after the 15-minute cook time to capture the drama of the reveal.
- Film a tight macro shot of the texture contrast when cutting both dumplings with a spoon side-by-side on a wooden board to visually prove the gluten difference.
- Show the rainy weather outside the kitchen window at least once to ground the cozy, warm atmosphere of the cooking session.
- 0:00 — Warm, acoustic indie-folk guitar intro, cozy and inviting.
- 1:15 — Upbeat, light-hearted acoustic plucking as the chicken starts sizzling and vegetables are chopped.
- 3:45 — Slightly playful, curious classical-style pizzicato strings during the two-bowl dumpling experiment.
- 6:20 — Calm, low-fi bedroom pop beat while the pot is simmering and Tara cleans up the kitchen.
- 8:10 — Tense but funny orchestral swell as the lid is lifted and the dumplings are revealed.
- 9:15 — Warm, satisfying acoustic guitar resolves as Tara and Tony taste the perfect dumpling.
- Keep the pacing conversational and relaxed, letting the natural sounds of cooking (sizzling chicken, bubbling broth, scraping spoon) breathe in the mix.
- Use a fun, hand-drawn text overlay on the screen to label 'The Good Batch' and 'The Over-Worked Batch' during the mixing and scooping phases.
- Do a split-screen comparison at 8:45 showing the cross-section of both dumplings side-by-side with text labels pointing out 'Air Pockets' vs. 'Dense Gluten Structure'.
- Color grade with warm, cozy tones—emphasize the golden yellows of the chicken broth and the soft, inviting light of a rainy afternoon.
| Call | Provider | Model | Input Tokens | Output Tokens | Compute / Credits |
|---|---|---|---|---|---|
| Script | abacus.ai | gemini-3.5-flash | 1,237 | 4,997 | — |
| Image 1 — The Golden Sizzle | abacus.ai | nano_banana2 | — | — | 6,787.45 |
| Image 2 — Tara's Two Bowls | abacus.ai | nano_banana2 | — | — | 6,787.5 |
| Image 3 — The Cloud Dumpling | abacus.ai | nano_banana2 | — | — | 6,787.25 |
I Let These Short Ribs Braise For 3 Hours (And They Paid Me Back In Gold)
I took one of the toughest, most intimidating cuts of beef at the store and trusted a low, slow three-hour braise to turn it into melt-in-your-mouth perfection.
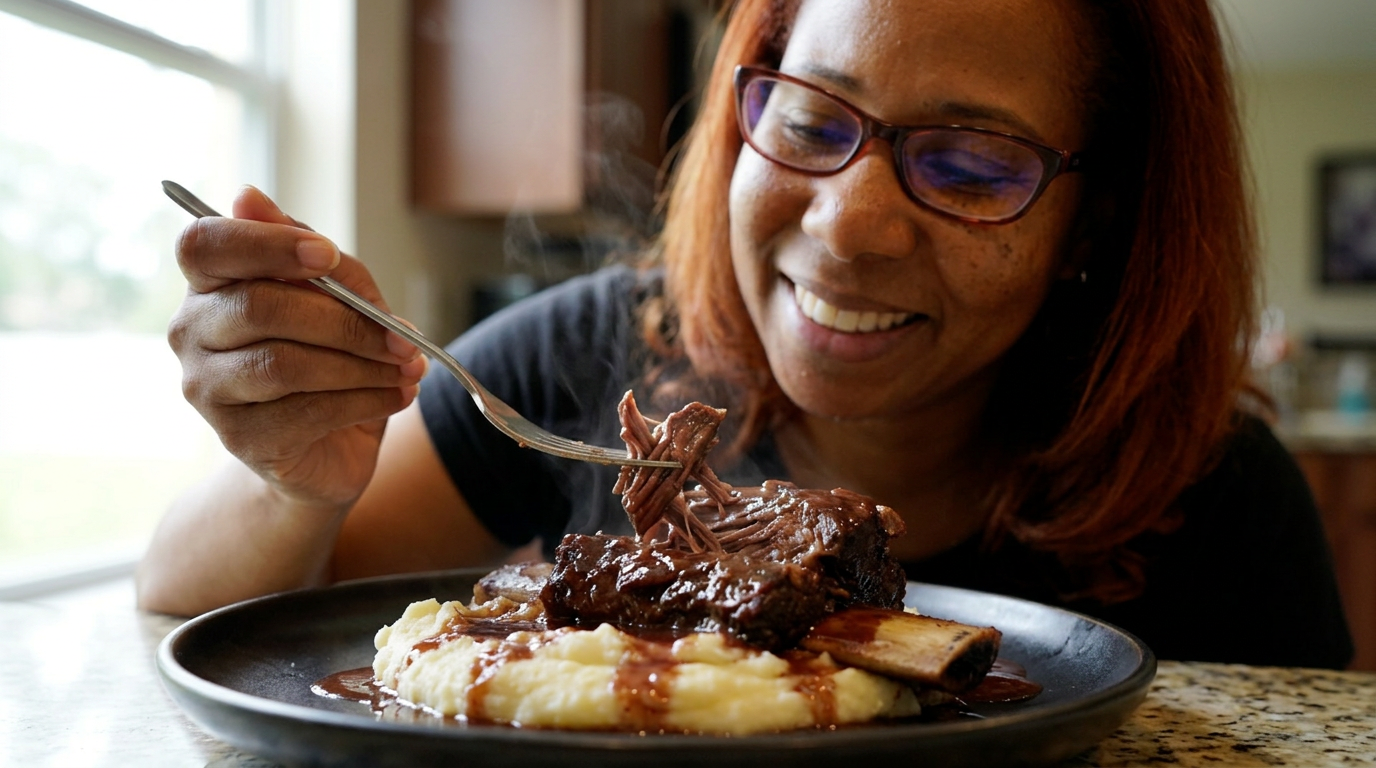
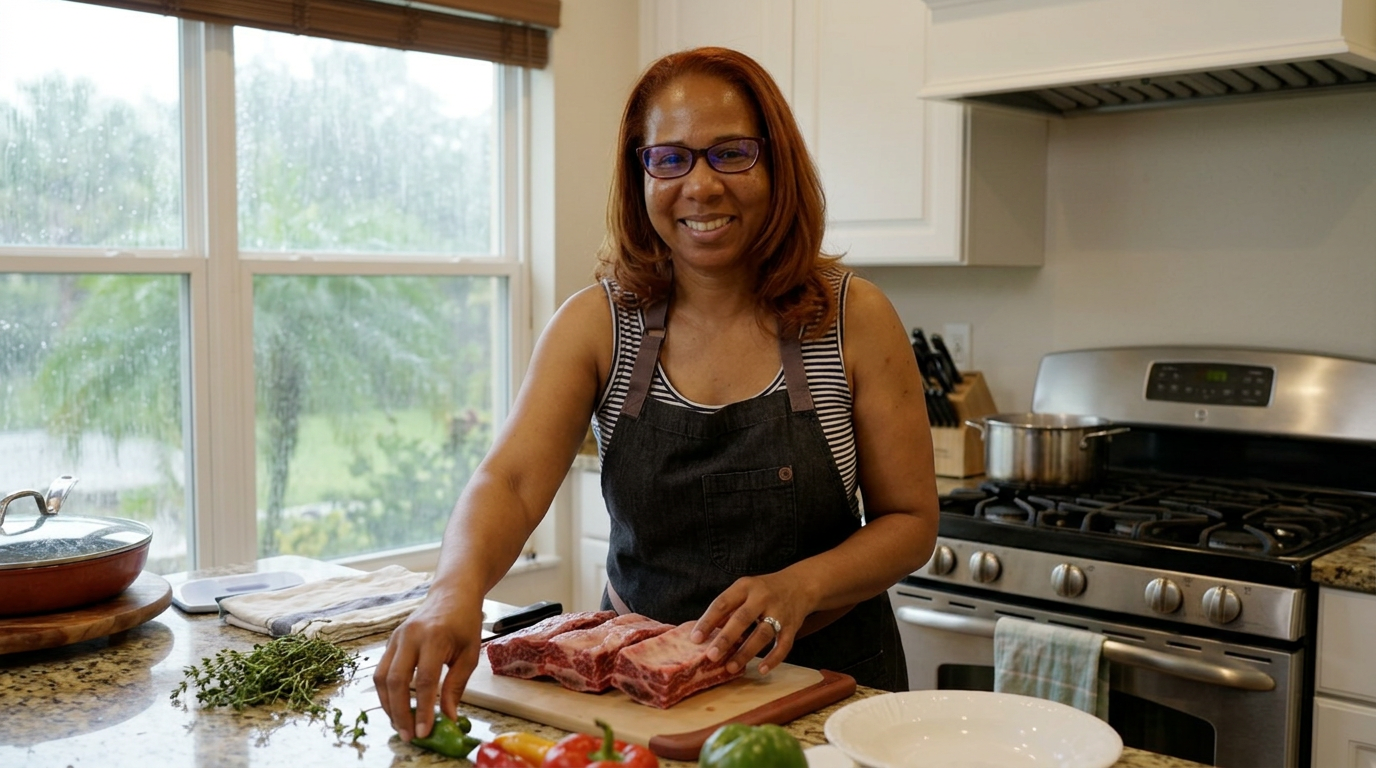
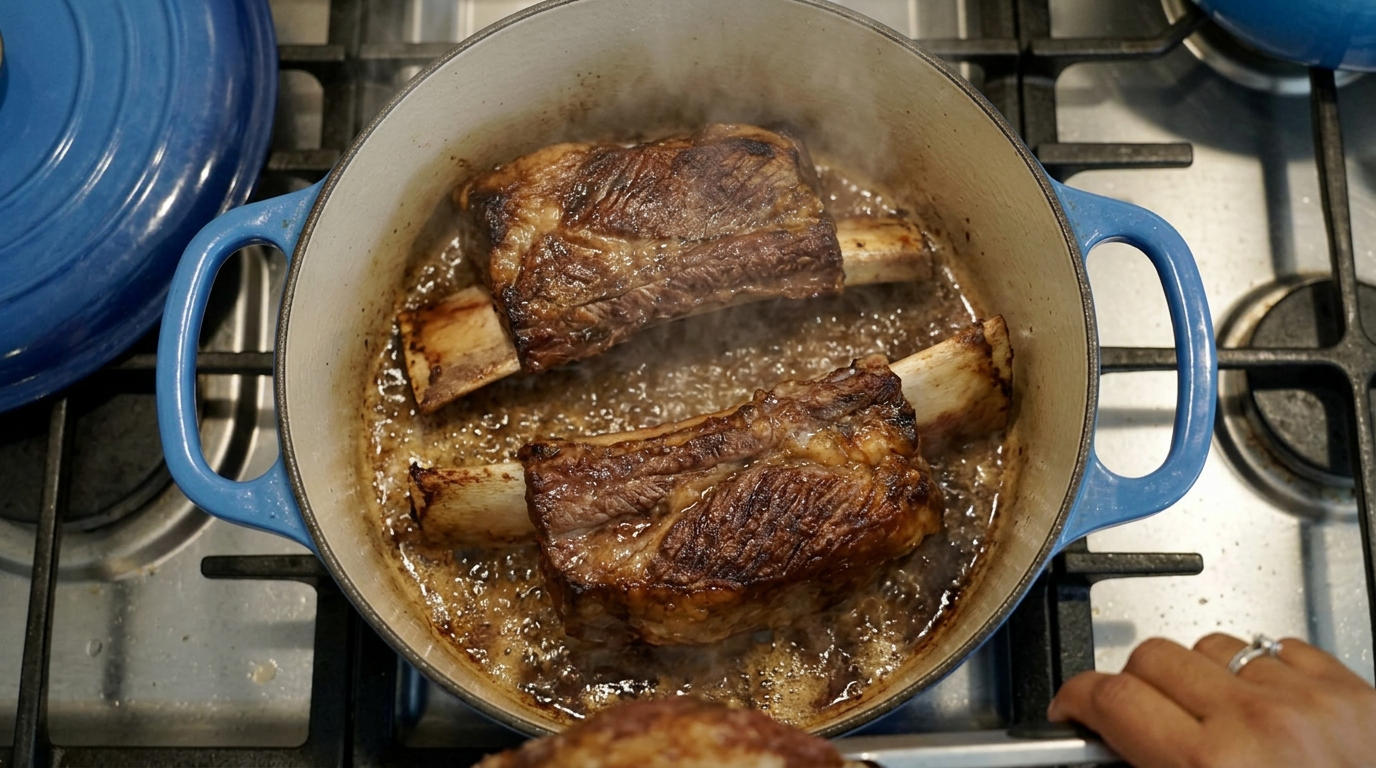
If you have three hours, a heavy pot, and a little bit of patience, you can turn a tough, marbled block of beef into the most tender, luxurious meal of your entire life.
Extreme close-up of a fork gently pressing into a deeply caramelized beef short rib, sliding the meat effortlessly away from the bone as rich, glossy red wine gravy pools around it.
It was one of those typical Orlando afternoons where the humidity hangs so thick you can practically wear it, and a sudden, gray thunderstorm was just starting to rattle our screen porch. Tony and I had both had a grueling, chaotic week, and honestly, the thought of throwing together a quick, frantic weeknight stir-fry just felt exhausting. I wanted something that felt like a slow, deliberate hug. I wanted our house to smell like warm garlic, rosemary, and rich, simmering beef for hours while we just sat on the couch and let the rain do its thing.
So, I made a run to the Publix down the street, bypasssing the quick-cooking steaks, and headed straight for the heavy hitters: bone-in beef short ribs. I managed to score four gorgeous, thick-cut English-style ribs. They were heavily marbled with beautiful white webs of fat, which is exactly what you want. If you try to rush these, they will reward you with something resembling a leather boot. But if you give them time, that tough connective tissue melts down into pure, silky collagen, creating a sauce so rich it coats the back of your spoon like liquid gold.
My plan was simple but required absolute discipline. I was going to sear these babies until they developed a deep, dark crust, build a aromatic flavor base with onions, carrots, celery, and fresh rosemary from my backyard garden, drown them in a full bottle of dry Cabernet Sauvignon, and let them tuck into a 325-degree oven for three uninterrupted hours. The stakes? If I pulled them too early, we'd be chewing on rubber for dinner. If my braising liquid ran dry, they'd burn. It was a game of trust, heat, and time.
Before we even touch the stove, I need to talk about prep. I pulled the ribs out of the fridge about thirty minutes early to take the chill off. This is crucial because if you drop ice-cold meat into a hot pan, the temperature plummets, the meat steams instead of sears, and you lose that beautiful brown crust. I patted them completely dry with paper towels—moisture is the enemy of a good sear—and seasoned them aggressively with kosher salt and freshly cracked black pepper on all six sides. Now, let's get that Dutch oven hot.
I put my heavy, enameled cast-iron Dutch oven over medium-high heat and swirled in just a tablespoon of olive oil. You don't need much oil because these ribs are going to render out an absolute lake of their own fat. As soon as the oil started shimmering, I dropped the ribs in. *Sizzle*. That sound is music to my ears. I let them sit undisturbed for a full four minutes per side. I know the temptation to wiggle them around is strong, but you have to resist. Let them build that dark, mahogany crust. That crust is where all the deep, savory umami flavors live.
As I flipped them, using my long metal tongs, a tiny splash of hot fat jumped out and caught me right on the wrist. A quick battle scar of the kitchen! But looking down at that perfect, caramelized surface on the meat made it totally worth it. Once all sides were deeply browned, I lifted the ribs out onto a plate, leaving behind a beautiful, dark layer of browned bits stuck to the bottom of the pot. In the culinary world, we call that 'fond,' and it is absolute flavor gold.
The pot was looking a little smoky, so I turned the heat down to medium and tossed in my mirepoix: one large chopped yellow onion, two medium carrots, and two ribs of celery. Immediately, they started sizzling and picking up those rich beefy bits from the bottom. I added four smashed cloves of garlic and a tablespoon of tomato paste. You want to cook that tomato paste for about two minutes until it turns from a bright red to a dark brick color. This removes the raw, metallic taste and sweetens it up.
Now for the fun part: deglazing. I poured in two cups of a decent, dry Cabernet Sauvignon. Rule of thumb: if you wouldn't drink it from a glass, don't dump it in your food. As the wine hit the hot surface, it bubbled up furiously, releasing an incredible cloud of steam that smelled like a cozy French bistro. I used my wooden spoon to scrape up every single bit of that stuck-on fond from the bottom of the pot. This is where your gravy gets its soul.
I let the wine simmer and reduce by about half, which concentrates the flavor and burns off the harsh alcohol edge. Then, I poured in two cups of high-quality beef stock, tossed in a few sprigs of fresh rosemary and thyme from the backyard, and nestled the short ribs back into their liquid bath, bone-side down. They should be submerged about three-quarters of the way, not completely drowning. You want the tops exposed so they can keep browning in the oven.
I popped the heavy lid on, slid the pot into the preheated oven at 325 degrees, and checked the time. It was exactly 4:00 PM. Now, we play the waiting game. By 5:00 PM, the kitchen started smelling incredible. By 6:00 PM, the aroma of red wine, garlic, and slow-roasting beef had drifted all the way down the hallway to Tony's home office. He actually stuck his head into the kitchen, sniffed the air like a cartoon hound dog, and asked, 'Is it ready yet?' I had to gently pat his shoulder and tell him we still had an hour to go.
At 7:00 PM, the timer finally buzzed. I pulled the heavy pot out of the oven, my oven mitts steaming slightly, and lifted the lid. A massive cloud of rich, aromatic steam filled the room. The liquid had reduced into a gorgeous, dark, glossy gravy. The meat had pulled back significantly from the bones, exposing them by about an inch. That is the ultimate visual cue that the collagen has melted and the meat is tender.
To test it, I took a fork and gently pressed it into the center of one of the ribs. It slipped in with absolutely zero resistance, like sliding a warm knife through butter. I carefully lifted the ribs out of the pot and placed them on a warm platter. Looking at the liquid left behind, there was a noticeable layer of clear fat floating on top. To make the sauce perfect, I skimmed off most of that excess fat with a wide spoon, then turned the stovetop burner back on to let the remaining liquid reduce for five minutes into a velvety, spoon-coating gravy.
A montage of hands prepping vegetables, the dramatic sizzle of the meat hitting the hot Dutch oven, steam rising as wine is poured, and close-ups of the bubbling red wine liquid thickening over the stove.
To serve this, I made a quick, comforting bed of creamy, buttery garlic mashed potatoes. I spooned a generous mound onto a wide, shallow bowl, placed one massive, glistening short rib right on top, and then ladled that glossy, deep-red wine reduction over everything. To cut through all that rich, savory intensity, I finished the plate with a bright scatter of freshly chopped Italian flat-leaf parsley and a little lemon zest.
Tony and I sat down at the table, the rain still drumming softly against the window. He took his first bite, closed his eyes, and just shook his head. 'Tara, this is ridiculous,' he muttered. I took a bite myself. The beef was so incredibly tender it practically dissolved on my tongue, bursting with deep, wine-infused richness, balanced perfectly by the creamy potatoes and the bright pop of parsley. It was absolute heaven in a bowl.
This dish taught me, once again, that you can't rush the good things in life. If you try to make this in thirty minutes, it's a disaster. But if you give it three hours, it pays you back with interest. Next time, I think I'll make a double batch, because as good as this is tonight, I already know the leftovers are going to make the most incredible ragu over pappardelle pasta tomorrow. But for tonight, we're cleaning our bowls with a piece of crusty bread and enjoying the storm.
Tara and Tony sitting at a cozy dining table with warm lighting, laughing as they eat. A final panning shot of the clean bowl with only a bare bone left behind.
Shot List
| Type | Description | Audio | Duration |
|---|---|---|---|
| Close-up | A close-up of Tara's hands using paper towels to dry the thick, beautifully marbled bone-in beef short ribs on a wooden cutting board. | TARA (V.O.): The secret to a legendary sear starts with bone-dry meat. If there's moisture, it steams instead of browns. | 5s |
| Detail | Kosher salt and coarse black pepper raining down on all sides of the short ribs. | TARA (V.O.): Don't be shy with the salt and pepper here. These are thick cuts; they can handle it. | 4s |
| Close-up | Short ribs hitting the hot olive oil in a blue enameled Dutch oven, producing a loud, satisfying sizzle with tiny oil pops. | TARA (V.O.): Hear that? That's the sound of flavor building. We're going for four minutes a side. | 6s |
| Medium | Tara looking directly at the camera in her kitchen, holding metal tongs, smiling as she reacts to a tiny splash of oil on her wrist. | TARA: Ouch! Okay, a tiny battle scar, but look at that crust. That mahogany color is exactly what we want. | 8s |
| Overhead | Seared ribs resting on a plate, showing off their deep brown, caramelized edges. | TARA (V.O.): Beautiful. Now we let them rest while we build our flavor base in the leftover drippings. | 5s |
| Close-up | Diced carrots, onions, and celery being dumped into the Dutch oven and stirred with a wooden spoon, scraping up the dark fond. | TARA (V.O.): The classic mirepoix. It's going to soak up all those rich beefy juices from the bottom of the pot. | 7s |
| Detail | A stream of dark red wine pouring from a bottle into the pot, bubbling up instantly and creating a thick cloud of steam. | TARA (V.O.): A whole bottle of good Cabernet. If you wouldn't drink it from a glass, don't put it in your food. | 6s |
| Timelapse | The red wine liquid slowly reducing and darkening in the pot over the stove burner. | TARA (V.O.): We're letting this simmer down until it thickens and concentrates into pure, rich essence. | 8s |
| Medium | Tara tucking fresh rosemary and thyme sprigs around the short ribs as they sit nestled in the bubbling liquid. | TARA: Herbs from the backyard garden. Now, we put the lid on, and they go into the oven for three whole hours. | 7s |
| B-roll | A shot of the rain pouring down outside the window of Tara's Orlando home, transitioning to Tony sniffing the kitchen air expectantly. | TARA (V.O.): While the rain poured outside, our house slowly filled with the most intoxicating warm, garlicky aroma. | 6s |
| Close-up | The Dutch oven lid being lifted, releasing a massive plume of steam to reveal bubbling, dark, fork-tender ribs. | TARA: Oh my goodness. Look at how the meat has pulled back from the bone. That is perfection. | 8s |
| Overhead | A spoon skimming the clear yellow fat off the top of the rich red wine gravy. | TARA (V.O.): Just skimming off the excess fat so we're left with nothing but smooth, velvety sauce. | 5s |
| B-roll | Tara plating a mound of creamy mashed potatoes, placing a glistening short rib on top, and ladling rich gravy over it. | TARA (V.O.): A bed of garlic mashed potatoes, a massive rib, and plenty of that glorious reduction gravy. | 10s |
| Close-up | Tony taking a bite, chewing, and giving a dramatic nod of pure satisfaction with his eyes closed. | TONY: Tara, this is hands down the best thing you've ever made. Cozy level one hundred. | 7s |
| Medium | Tara sitting at the table, taking a bite of the tender beef, smiling warmly at the camera with her warm dining room in the background. | TARA: It really is. Sometimes, giving a tough cut three hours is the best investment you can make. See you next time, guys! | 9s |
- Capture the rain splashing on the patio outside to establish the cozy, stormy-day contrast with the warm kitchen.
- Get a slow-motion shot of the red wine being poured into the pot to capture the dramatic steam rise and bubbling reaction.
- Show the physical transition of the meat before and after cooking: a side-by-side focus on the raw marbled fat vs. the shrunken, tender cooked meat pulling away from the bone.
- Capture the messy reality of skimming the fat: show the greasy spoon and the small bowl of discarded oil to keep it authentic and helpful for home cooks.
- 0:00 — Cozy, acoustic guitar intro—warm, inviting, and slow-paced.
- 1:15 — Upbeat, light acoustic pick with a gentle drum beat as prep and chopping vegetables begins.
- 2:45 — Slightly dramatic but playful jazzy strings as the wine is poured and the sizzle happens.
- 5:30 — Quiet, ambient lo-fi track playing softly in the background to represent the passage of time during the 3-hour bake.
- 7:15 — Warm, swelling indie-folk melody as the hot pot is pulled from the oven and the lid is lifted.
- 8:45 — Rich, soulful acoustic guitar and cello as the final plate is assembled and tasted.
- Keep the pacing slow and meditative during the braising montages to mimic the slow-cooked nature of the dish.
- Use clean, warm-toned color grading to highlight the rich reds of the wine sauce and the golden hues of the mashed potatoes.
- Insert a subtle, satisfying 'hiss/sizzle' sound design enhancement when the meat touches the hot pan to make the audio incredibly appetizing.
- Add a simple, elegant lower-third graphic listing the exact measurements of the mirepoix and wine when they are introduced on screen.
| Call | Provider | Model | Input Tokens | Output Tokens | Compute / Credits |
|---|---|---|---|---|---|
| Script | abacus.ai | gemini-3.5-flash | 1,236 | 4,877 | — |
| Image 1 — The Ultimate Fork-Tender Pull | abacus.ai | nano_banana2 | — | — | 6,787.3 |
| Image 2 — Rainy Day Comfort in Orlando | abacus.ai | nano_banana2 | — | — | 6,787.15 |
| Image 3 — The Sizzling Sear | abacus.ai | nano_banana2 | — | — | 6,787.05 |